

Year-round water spinach, also known as Ong Choy, is a delicious and nutritious leafy green that many gardeners only dream of harvesting consistently. But what if I told you that dream could become a reality? Forget seasonal limitations and embrace the joy of fresh, homegrown water spinach whenever you crave it! This isn’t just about growing a vegetable; it’s about unlocking a sustainable food source right in your backyard, or even on your balcony.
Water spinach has a rich history, deeply rooted in Southeast Asian cuisine and culture. For generations, it has been a staple ingredient, prized for its versatility and health benefits. Imagine bringing that same culinary tradition to your own table, knowing exactly where your food comes from and how it was grown.
In today’s world, where access to fresh, affordable produce can be a challenge, mastering the art of year-round water spinach cultivation is more relevant than ever. This DIY guide will equip you with simple yet effective tricks and hacks to extend your growing season and enjoy a continuous supply of this vibrant vegetable. Whether you’re a seasoned gardener or just starting out, these tips will empower you to create a thriving water spinach patch, regardless of the weather outside. Let’s dive in and discover the secrets to a bountiful harvest, all year long!
Year-Round Water Spinach: Your DIY Guide for Indoor Cultivation
Hello, dear garden friends! Who doesn’t love fresh, crisp water spinach? But what if I told you that you can grow it all year round, right in the comfort of your own home? Yes, you heard that right! With this DIY guide, I’ll show you how to set up your own indoor water spinach garden and enjoy the harvest all year long. Don’t worry, it’s easier than you think!
What you need: The Shopping List
Before we start, let’s make sure we have everything we need. Here is a list of the materials and tools you will need for your indoor water spinach project:
- Water spinach seeds: You can find them in most garden centers or online. Make sure you buy high-quality seeds.
- Container: A large bucket, a plastic tub, or even an old laundry basket (with holes for drainage) will work well. The size depends on how much water spinach you want to grow.
- Seed starting mix or coconut coir: This serves as the growing medium for your seeds.
- Water: Stale tap water or rainwater is best.
- Fertilizer: A liquid, water-soluble fertilizer is ideal.
- Grow light (optional): If you don’t have enough natural light, a grow light is a great investment.
- Spray bottle: For moistening the seeds and young plants.
- Scissors or knife: For harvesting the water spinach.
- pH meter (optional): To monitor the pH of the water.
- Air pump and airstone (optional): For better oxygen supply to the water.
Step-by-Step Guide: Your Indoor Water Spinach Garden
Now that we have everything, we can start the actual cultivation. Follow these steps to create your own indoor water spinach garden:
1. Prepare the seeds:
- Soak the water spinach seeds for 24 hours in lukewarm water. This helps to speed up germination.
- After soaking, you can place the seeds on a damp paper towel and put them in a plastic bag. Seal the bag and place it in a warm place.
- Check the seeds daily and keep the paper towel moist. After a few days, the seeds should germinate.
2. Prepare the container:
- Clean your container thoroughly with soap and water.
- If you are using a container without holes, drill some holes in the bottom to ensure good drainage.
- Fill the container with seed starting mix or coconut coir. Leave about 5-7 cm of space to the rim.
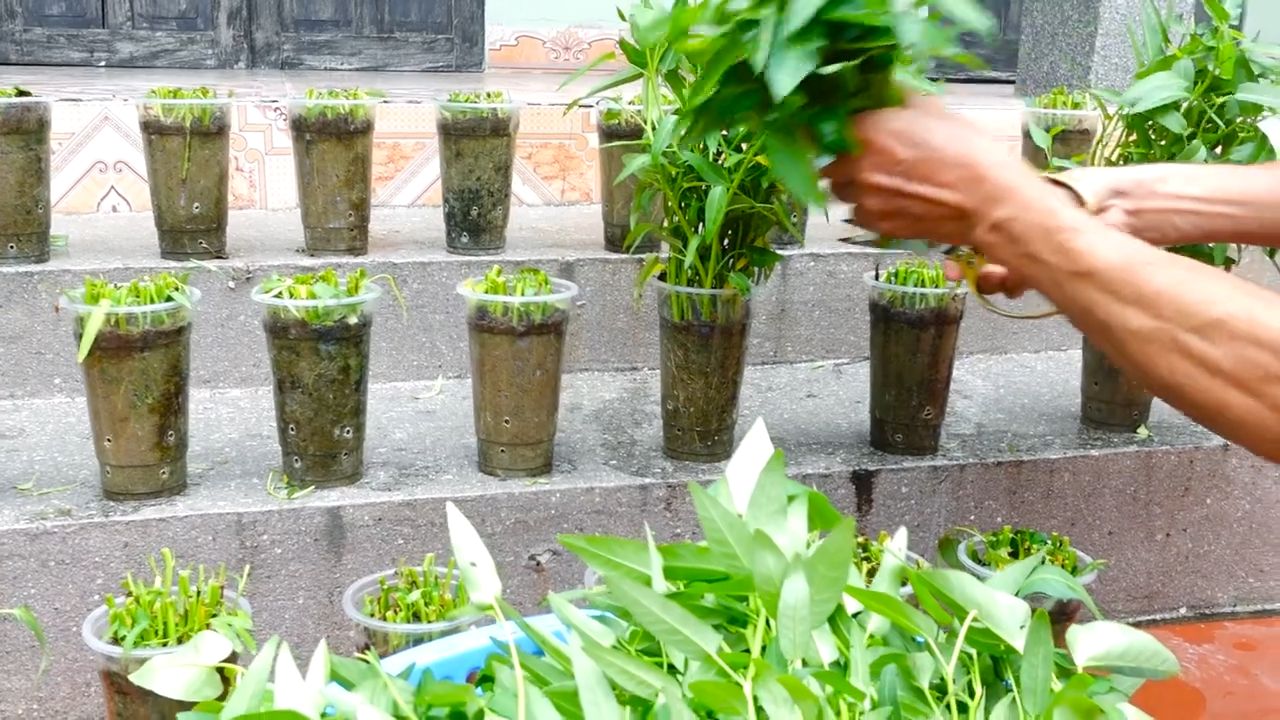
3. Sow the seeds:
- Distribute the germinated seeds evenly on the surface of the soil.
- Cover the seeds lightly with a thin layer of soil (approx. 0.5 cm).
- Gently spray the soil with water to moisten it.
4. Provide the right environment:
- Place the container in a warm and bright place. Water spinach needs at least 6 hours of sunlight per day.
- If you don’t have enough natural light, use a grow light.
- Keep the soil moist, but not soggy. Spray the soil regularly with water.
5. Watering and Fertilizing:
- Water spinach loves water! Make sure the soil is always moist. You can also place the container in a larger tub of water so that the soil can soak up the water from below.
- Fertilize the water spinach every two weeks with a liquid, water-soluble fertilizer. Follow the instructions on the fertilizer packaging.
6. Optional: Improve oxygen supply:
- If you have an air pump and an airstone, you can put them in the container to enrich the water with oxygen. This promotes the growth of the water spinach.
Caring for Your Water Spinach: Tips and Tricks
Caring for your indoor water spinach is relatively simple, but there are a few things you should keep in mind to ensure your plants stay healthy and productive:
- Light: Water spinach needs a lot of light. If your plants don’t get enough light, they will become long and thin. In this case, you should use a grow light.
- Water: As mentioned, water spinach loves water. Make sure the soil is always moist.
- Temperature: Water spinach prefers warm temperatures between 20 and 30 degrees Celsius.
- Humidity: Water spinach likes high humidity. You can increase the humidity by regularly spraying the plants with water or using a humidifier.
- Pests: Water spinach is relatively resistant to pests, but it can happen that aphids or spider mites appear. If you discover pests, you can combat them with an insecticide based on neem oil.
- pH value: The ideal pH for water spinach is between 6.0 and 7.0. You can check the pH of the water with a pH meter and adjust it if necessary.
Harvest Time: Your Homegrown Water Spinach
After about 4-6 weeks, you can harvest your first water spinach! Here are a few tips for harvesting:
- Cut the stems with scissors or a knife. Leave about 5-7 cm of the stems so that the plants can continue to grow.
- Harvest the water spinach regularly to promote the growth of new shoots.
- You can use the harvested water spinach immediately or store it in the refrigerator. It will keep for about 3-5 days.
Common Problems and Solutions
Problems can also occur when growing water spinach. Here are some common problems and how you can solve them:
- Yellow leaves: Yellow leaves can be a sign of a nutrient deficiency. Fertilize your plants with a liquid, water-soluble fertilizer.
- Slow growth: Slow growth can be caused by too little light, water, or nutrients. Make sure your plants get enough light, water, and nutrients.
- Pests: Combat pests with an insecticide based on neem oil.
- Rot: Rot can be caused by too much water or poor ventilation. Make sure the soil is not soggy and that the plants get enough air.
Recipes and Uses for Water Spinach
Water spinach is a versatile vegetable that can be used in many different dishes. Here are a few ideas:
- Stir-fried water spinach: a simple and quick dish that is perfect as a side or a main course with rice.
- Water spinach soup: a delicious and nutritious soup that is perfect for cold days.
- Water spinach salad: a refreshing salad that is perfect for summer.
- Water spinach curry: an aromatic curry that goes perfectly with rice or naan bread.
- Water spinach smoothie: a healthy and refreshing smoothie that is perfect for starting the day.
I hope this guide has helped you to grow your own indoor water spinach.
Conclusion
So, there you have it! Cultivating your own year-round water spinach supply is not just a fun gardening project; it’s a gateway to fresher, more flavorful meals and a deeper connection with the food you eat. We’ve walked you through the simple steps to create a thriving aquatic environment, ensuring a continuous harvest of this nutritious and delicious leafy green, regardless of the season.
Why is this DIY trick a must-try? Because it empowers you to bypass the limitations of seasonal availability and the often-questionable quality of store-bought produce. Imagine the satisfaction of snipping fresh, vibrant water spinach from your own backyard or indoor setup, knowing exactly where it came from and how it was grown. The difference in taste and texture compared to commercially available options is truly remarkable. You’ll experience a crispness and a subtle, earthy sweetness that will elevate your stir-fries, soups, and salads to a whole new level.
Beyond the superior flavor and freshness, growing your own water spinach is also incredibly rewarding from a sustainability perspective. You’ll be reducing your carbon footprint by minimizing transportation and packaging waste. Plus, you’ll have complete control over the growing process, allowing you to avoid harmful pesticides and herbicides, ensuring a truly organic and healthy harvest.
But the benefits don’t stop there. This DIY project is also surprisingly versatile. Feel free to experiment with different growing mediums, such as hydroponics or aquaponics, to further optimize your yield and efficiency. You can also explore different varieties of water spinach, each with its own unique flavor profile and texture. Consider adding companion plants to your growing environment, such as herbs or flowers, to attract beneficial insects and create a more balanced ecosystem.
Don’t be afraid to get creative and personalize your water spinach growing setup to suit your specific needs and preferences.
We encourage you to take the plunge and embark on this exciting gardening adventure. The initial setup may require a bit of effort, but the long-term rewards are well worth it. Imagine the joy of sharing your homegrown water spinach with friends and family, knowing that you’ve provided them with a healthy and delicious meal.
And most importantly, we want to hear about your experiences! Share your tips, tricks, and challenges in the comments section below. Let’s build a community of water spinach enthusiasts and learn from each other’s successes and failures. Together, we can unlock the full potential of this amazing plant and enjoy a year-round supply of fresh, homegrown goodness. So, grab your seeds, prepare your growing medium, and get ready to experience the magic of DIY year-round water spinach! We are confident that you will find this project to be both enjoyable and incredibly rewarding. Happy growing!
Frequently Asked Questions (FAQ)
What exactly is water spinach, and why should I grow it?
Water spinach (Ipomoea aquatica), also known as ong choy or kangkong, is a semi-aquatic leafy green vegetable popular in Asian cuisine. It’s known for its mild, slightly sweet flavor and crisp texture, making it a delicious addition to stir-fries, soups, salads, and other dishes. Growing your own water spinach allows you to enjoy a fresher, more flavorful product than you can typically find in stores, and it gives you control over the growing process, ensuring it’s free from harmful chemicals. Plus, it’s a fun and rewarding gardening project!
Is it really possible to grow water spinach year-round?
Yes, with the right setup and care, you can absolutely grow water spinach year-round, even in colder climates. The key is to provide a controlled environment that mimics the plant’s preferred growing conditions: warm temperatures (ideally between 70-85°F), plenty of sunlight (or artificial grow lights), and consistent moisture. Indoor setups, such as hydroponic systems or containers with grow lights, are ideal for year-round cultivation.
What kind of setup do I need to grow water spinach indoors?
You have several options for growing water spinach indoors. A simple setup could involve a large container filled with water and a nutrient solution, placed under grow lights. Hydroponic systems, such as deep water culture (DWC) or nutrient film technique (NFT), are also popular choices for maximizing yield and efficiency. You’ll need a container or reservoir to hold the water and nutrient solution, an air pump and air stone to oxygenate the water, and grow lights to provide sufficient light for photosynthesis.
What kind of nutrients does water spinach need?
Water spinach is a relatively heavy feeder, meaning it requires a good supply of nutrients to thrive. A balanced hydroponic nutrient solution specifically formulated for leafy greens is ideal. Look for a solution that contains essential macronutrients like nitrogen, phosphorus, and potassium, as well as micronutrients like iron, manganese, and zinc. Follow the manufacturer’s instructions for dilution and application.
How often should I change the water and nutrient solution?
The frequency of water and nutrient solution changes depends on the size of your container, the number of plants, and the growing conditions. As a general rule, you should change the water and nutrient solution every 1-2 weeks to prevent nutrient depletion and the buildup of harmful bacteria or algae. Monitor the pH and EC (electrical conductivity) of the solution regularly to ensure it’s within the optimal range for water spinach growth.
How much light does water spinach need?
Water spinach requires plenty of light to thrive. If you’re growing it indoors, you’ll need to supplement natural light with artificial grow lights. LED grow lights are a popular choice because they’re energy-efficient and provide a full spectrum of light that’s beneficial for plant growth. Aim for at least 12-16 hours of light per day.
How long does it take to harvest water spinach?
Water spinach is a fast-growing plant, and you can typically start harvesting it within 4-6 weeks of planting. You can harvest the leaves and stems as needed, cutting them back to about 4-6 inches above the water line. The plant will continue to produce new growth, allowing for multiple harvests over several months.
Are there any pests or diseases that affect water spinach?
Water spinach is generally resistant to pests and diseases, but it can occasionally be affected by aphids, spider mites, or fungal infections. Regularly inspect your plants for any signs of infestation or disease, and take appropriate action if necessary. Organic pest control methods, such as neem oil or insecticidal soap, can be effective for controlling aphids and spider mites. Ensure good air circulation to prevent fungal infections.
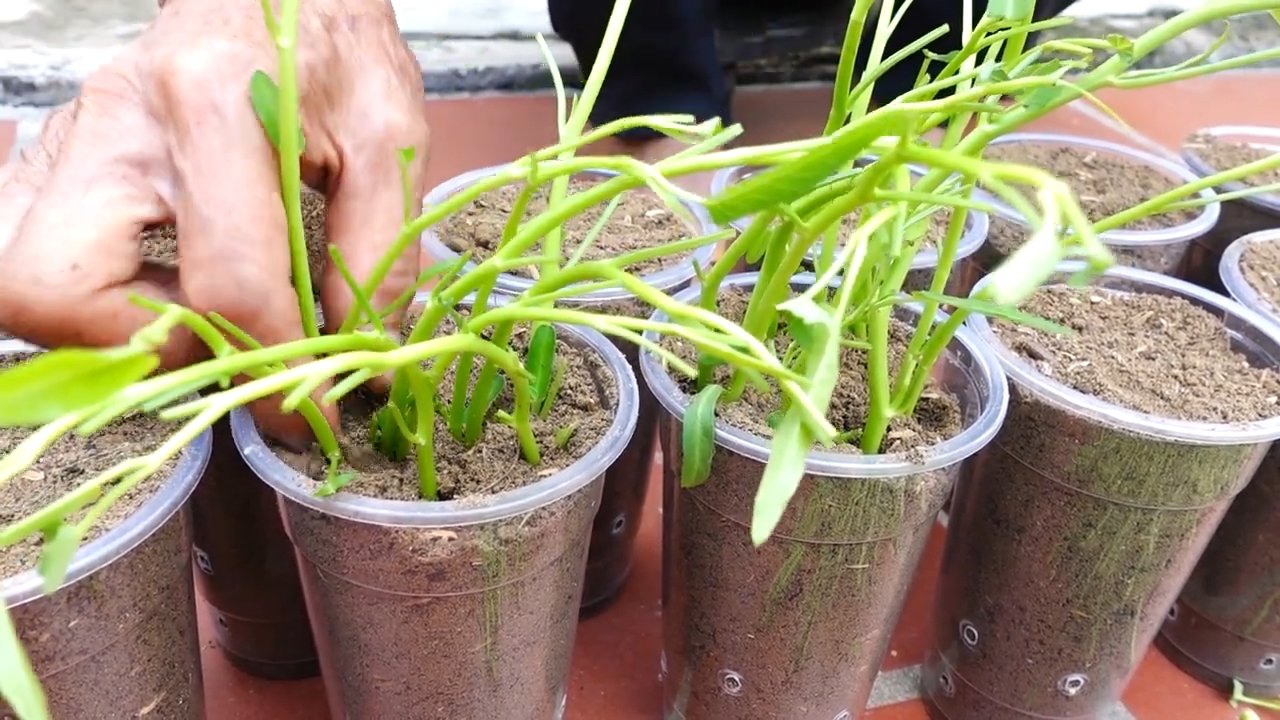
Can I grow water spinach from cuttings?
Yes, water spinach can be easily propagated from cuttings. Simply take a cutting from a mature plant, about 4-6 inches long, and remove the lower leaves. Place the cutting in water or a moist growing medium, and it will typically root within a week or two. Once the roots have developed, you can transplant the cutting into your hydroponic system or container.
Is water spinach safe to eat?
Yes, water spinach is generally safe to eat when grown in clean water and free from contaminants. However, it’s important to note that water spinach can accumulate nitrates from the water, especially if the water is high in nitrates. To minimize nitrate accumulation, avoid using fertilizers that are high in nitrogen, and ensure that the water is well-oxygenated. Thoroughly wash the water spinach before eating it. If you are concerned about nitrate levels, consult with a healthcare professional.
What are some delicious ways to prepare water spinach?
Water spinach is a versatile vegetable that can be used in a variety of dishes. It’s commonly stir-fried with garlic, chili peppers, and soy sauce. It can also be added to soups, stews, and curries. Water spinach is also delicious when blanched and served as a salad with a flavorful dressing. Experiment with different recipes and find your favorite way to enjoy this nutritious and delicious leafy green.

Leave a Comment