

Yardlong Bean Growing Tips: Ever dreamt of harvesting beans so long they practically touch the ground? I know I have! There’s something incredibly satisfying about growing your own food, and when that food is as unique and impressive as yardlong beans, the satisfaction is amplified tenfold. These aren’t your average green beans; they’re a conversation starter, a culinary adventure, and a testament to the magic of home gardening.
While the exact origins are debated, yardlong beans, also known as asparagus beans or Chinese long beans, have been cultivated in Southeast Asia for centuries. They’re a staple in many Asian cuisines, adding a delightful crunch and subtle flavor to stir-fries, salads, and curries. But you don’t have to travel to Asia to enjoy these delicious legumes! With the right yardlong bean growing tips, you can cultivate your own bountiful harvest right in your backyard.
Why bother with yardlong beans? Well, besides their impressive length and delicious taste, they’re relatively easy to grow, especially once you understand their specific needs. This DIY guide will walk you through everything you need to know, from selecting the right seeds and preparing your soil to providing proper support and harvesting your impressive crop. Forget expensive grocery store produce – imagine the joy of serving up a dish featuring beans you nurtured from seed to table. Let’s get started and unlock the secrets to successful yardlong bean growing!

Garden Bean Paradise: Your DIY Guide for Growing Asparagus Beans
Hello dear garden friends! I am so excited to take you into the fascinating world of growing asparagus beans today. These long, slender beauties are not only a real eye-catcher in the garden, but also incredibly delicious and versatile in the kitchen. Don’t worry, even if you’re not a pro gardener yet, with my step-by-step guide, you’re guaranteed to succeed!
What you need for growing asparagus beans:
- Asparagus bean seeds (it’s best to choose a variety that you like!)
- A sunny location with well-drained soil
- Compost or organic fertilizer
- A trellis (e.g., a frame, a fence, or bamboo poles)
- Watering can or garden hose
- Patience and love for gardening!
The Preparation: The Foundation for a Bountiful Harvest
Before we start with the actual cultivation, good preparation is essential. Because only if the soil is right and the trellis is ready can your asparagus beans develop optimally.
1. Choosing the Right Location:
Asparagus beans love the sun! So look for a place in your garden that gets at least six hours of direct sunlight per day. Also, make sure that the soil is well-drained so that no waterlogging occurs.
2. Soil Preparation:
Loosen the soil thoroughly and remove weeds and stones. Then mix in plenty of compost or organic fertilizer to enrich the soil with nutrients. Asparagus beans are not particularly demanding, but a good start is always an advantage.
3. Installing the Trellis:
Asparagus beans are climbing plants and definitely need a trellis to hold on to. You can use a frame, a fence, or just a few bamboo poles. It is important that the trellis is stable and provides enough support for the growing plants. I personally find trellises made of wood very beautiful, as they integrate well into the garden and give the asparagus beans a natural frame.
The Sowing: The Start of the Asparagus Bean Adventure
Now for the exciting part: the sowing! Here I will show you how to get your asparagus bean seeds into the ground correctly.
1. The Right Time:
Asparagus beans are sensitive to frost, so you should wait to sow until there is no more danger of frost. This is usually the case from mid-May. If you want to be on the safe side, you can also start the seeds indoors and then plant the young plants outdoors after the last frost.
2. The Sowing Method:
You can either sow the asparagus beans directly into the bed or start them in pots. For direct sowing, you make small furrows in the ground with a stick or a hoe, about 3-5 cm deep. Place the seeds in the furrows at a distance of about 10-15 cm and cover them with soil. Then water the soil gently.
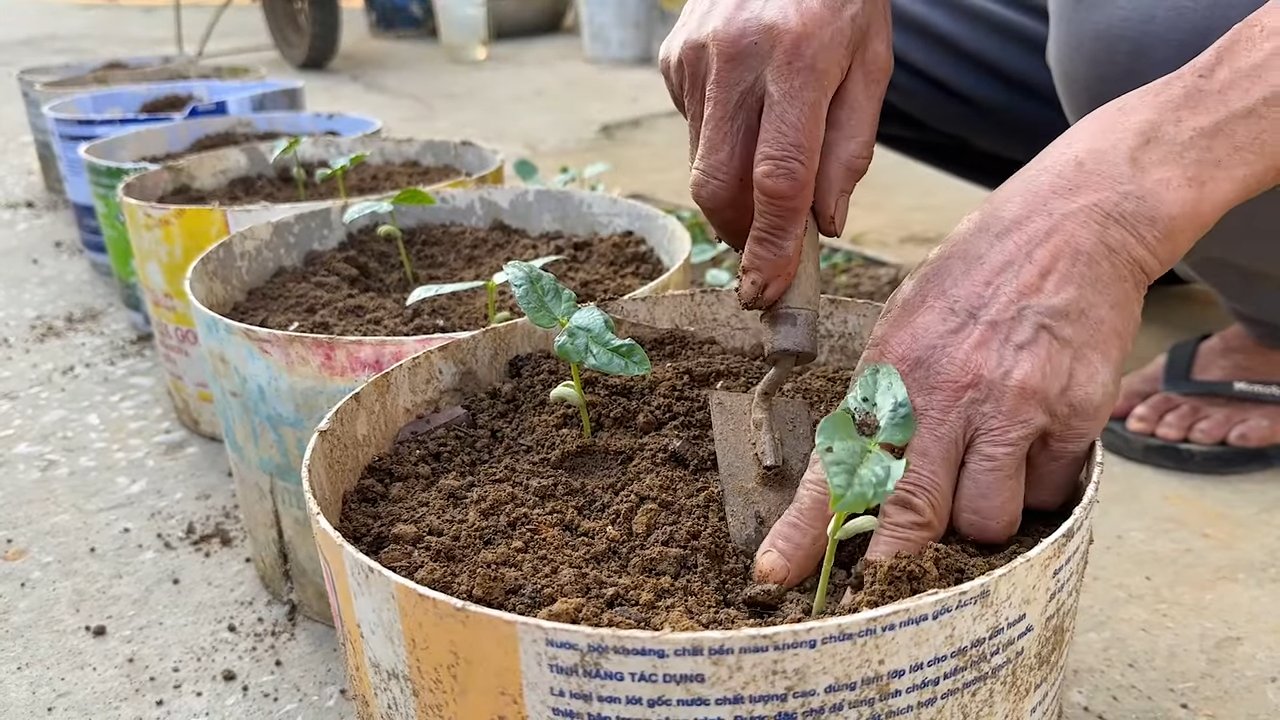
If you want to start the asparagus beans indoors, fill small pots with seed starting mix and place 2-3 seeds in each pot. Cover the seeds with soil and water them. Place the pots in a bright and warm place. After about a week, the first seedlings should be visible.
3. Watering In:
After sowing, it is important to keep the soil moist. Water the seeds or seedlings regularly, but avoid waterlogging.
The Care: So Your Asparagus Beans Thrive
After sowing, the real work begins: caring for your asparagus beans. Here are a few tips on how to keep your plants healthy and strong.
1. Watering:
Asparagus beans need regular water, especially during the flowering and fruiting period. It is best to water the plants in the morning or evening so that the water does not evaporate so quickly. Avoid watering the leaves, as this can promote fungal diseases.
2. Fertilizing:
Asparagus beans are not particularly demanding, but additional fertilization can improve the harvest. You can fertilize the plants every few weeks with an organic fertilizer or compost tea.
3. Weeding:
Keep the soil around the asparagus beans free of weeds so that the plants get enough nutrients and water.
4. Tying Up:
As soon as the asparagus beans are a little bigger, you have to attach them to the trellis. Carefully guide the shoots along the trellis and tie them with soft binding material.
5. Pests and Diseases:
Asparagus beans are relatively robust, but they too can be affected by pests and diseases. Watch for signs such as aphids, snails, or fungal infestation. If necessary, you can use biological pesticides or fungicides.
The Harvest: The Reward for Your Efforts
Finally, the time has come: the harvest! Here I will show you when and how to harvest your asparagus beans correctly.
1. The Right Time:
Asparagus beans are ready to harvest when they are about 20-30 cm long and can be easily bent. The pods should still be tender and crisp.
2. The Harvesting Method:
Cut the asparagus beans with a sharp knife or scissors. Be careful not to damage the plant.
3. Storage:
Asparagus beans do not keep for long. It is best to process them immediately after harvesting. In the refrigerator, they will keep for about 2-3 days. You can also freeze them to make them last longer.
Extra Tips for a Bountiful Harvest:
- Regular harvesting promotes the formation of new pods. The more often you harvest, the more asparagus beans will grow back.
- Ensure good ventilation of the plants. Good ventilation prevents fungal diseases.
- Do not water the plants from above. Watering from above can promote fungal diseases.
- Regularly remove withered leaves and shoots. Removing withered leaves and shoots promotes the health of the plants.
- Be patient! Asparagus beans need time to grow and ripen. Don’t be discouraged if it doesn’t work out right away.
Asparagus Beans in the Kitchen: Versatile and Delicious
Asparagus beans are not only an eye-catcher in the garden, but also a real all-rounder in the kitchen. You can boil, steam, fry, or grill them. They go wonderfully with meat, fish, vegetables, or simply as a side dish with potatoes or rice.
Here are a few of my favorite recipes with asparagus beans:
- Asparagus bean salad with tomatoes and feta: A refreshing salad for the summer.
- Asparagus bean stir-fry with garlic and chili: A quick and easy dish for everyday life.
- Asparagus bean gratin with cheese: A hearty dish for cold days.
- Fried asparagus beans with almonds and butter: An elegant side dish for special occasions.
I hope this guide has helped you to grow your own asparagus beans. Happy gardening and enjoy your meal!
Conclusion
So, there you have it! Mastering the art of growing yardlong beans doesn’t require a green thumb blessed by the gardening gods. It’s about understanding their needs, providing the right support, and employing a few clever DIY tricks to maximize your yield. This isn’t just about growing beans; it’s about cultivating a thriving garden and enjoying the satisfaction of harvesting your own delicious, organically grown produce.
Why is this DIY approach a must-try? Because it empowers you to take control of your garden’s success. Forget relying solely on commercial fertilizers or expensive pest control methods. By understanding the specific needs of your yardlong beans and implementing these simple, cost-effective techniques, you’ll witness a significant improvement in plant health, bean production, and overall garden vitality. You’ll be amazed at how much more productive your plants become when you provide them with the optimal environment they crave.
Consider these variations to further personalize your yardlong bean growing experience:
* Companion Planting Power: Experiment with companion planting. Marigolds can deter nematodes, while basil can repel bean beetles. Observe how different combinations affect your yardlong bean growth.
* DIY Trellis Designs: Get creative with your trellis system. Use bamboo poles, repurposed metal fencing, or even sturdy branches to create unique and visually appealing supports for your climbing beans.
* Soil Amendment Exploration: Test different soil amendments to find the perfect blend for your yardlong beans. Compost, aged manure, and even coffee grounds can enrich the soil and provide essential nutrients.
* Seed Saving for Future Harvests: Once you’ve grown a successful crop, save seeds from your best-performing plants to ensure a continuous supply of high-quality seeds for future seasons. This is a great way to adapt your yardlong bean variety to your specific climate and growing conditions.
Growing yardlong beans can be a rewarding experience, and with these DIY tricks, you’re well-equipped to achieve a bountiful harvest. Don’t be afraid to experiment, adapt, and learn from your experiences. Every garden is unique, and what works for one gardener may need tweaking for another. The key is to be observant, patient, and persistent.
We wholeheartedly encourage you to try these DIY yardlong bean growing tips in your own garden. We are confident that you’ll see a noticeable difference in the health and productivity of your plants. And most importantly, we want to hear about your experiences! Share your successes, challenges, and any variations you’ve discovered in the comments below. Let’s create a community of yardlong bean enthusiasts who are passionate about growing their own food and sharing their knowledge with others. Your insights could be invaluable to fellow gardeners who are just starting out on their yardlong bean growing journey. So, get out there, get your hands dirty, and start growing some amazing yardlong beans! We can’t wait to hear your stories.
FAQ
What are the most common problems when growing yardlong beans, and how can these DIY tips help?
The most common problems include poor germination, pest infestations (like aphids and bean beetles), diseases (like fungal infections), and inadequate support for the vines. These DIY tips address these issues directly. For example, improving soil drainage with compost prevents fungal diseases. Companion planting with marigolds deters nematodes, a common soil pest. Building a sturdy trellis ensures the vines have adequate support, preventing overcrowding and promoting better air circulation, which also reduces the risk of disease. Furthermore, using homemade fertilizer solutions provides the necessary nutrients for healthy growth, making the plants more resistant to pests and diseases.
How often should I water my yardlong beans, and does this DIY approach change that?
Yardlong beans need consistent moisture, especially during flowering and pod development. Generally, watering deeply 2-3 times per week is sufficient, depending on your climate and soil type. The DIY approach, particularly the emphasis on soil amendments like compost, can actually reduce the frequency of watering. Compost helps retain moisture in the soil, so you may find that you need to water less often. Always check the soil moisture before watering; it should be moist but not waterlogged. Mulching around the plants also helps retain moisture and suppress weeds, further reducing the need for frequent watering.
What kind of fertilizer is best for yardlong beans, and can I make my own using these DIY methods?
Yardlong beans benefit from a fertilizer that is relatively low in nitrogen but higher in phosphorus and potassium. Too much nitrogen can promote excessive foliage growth at the expense of bean production. You can absolutely make your own fertilizer using DIY methods! Compost tea is an excellent option, providing a balanced source of nutrients. You can also use diluted fish emulsion or seaweed extract. Another option is to bury banana peels near the plants; they are rich in potassium. Avoid using synthetic fertilizers, as they can harm beneficial soil microbes and disrupt the natural balance of the soil.
How do I protect my yardlong beans from pests and diseases without using harmful chemicals?
The DIY approach emphasizes natural pest and disease control methods. Companion planting is a great way to deter pests. Marigolds, as mentioned earlier, repel nematodes. Basil repels bean beetles. You can also use insecticidal soap or neem oil to control aphids and other pests. For fungal diseases, ensure good air circulation by spacing plants properly and pruning excess foliage. Avoid overhead watering, as this can create a humid environment that promotes fungal growth. A homemade baking soda spray (1 teaspoon baking soda per quart of water) can also help prevent fungal diseases. Regularly inspect your plants for signs of pests or diseases and take action promptly to prevent them from spreading.
How long does it take for yardlong beans to mature, and how can these DIY tips speed up the process?
Yardlong beans typically take 60-80 days to mature from planting. While you can’t drastically shorten this timeframe, these DIY tips can help optimize growing conditions and potentially speed up the process slightly. Ensuring proper soil drainage and fertility with compost and homemade fertilizers provides the plants with the nutrients they need to grow quickly and efficiently. Providing adequate support with a sturdy trellis allows the vines to climb freely and access sunlight, which is essential for photosynthesis and growth. Protecting the plants from pests and diseases also prevents them from being stressed, allowing them to focus their energy on growth and bean production. Starting seeds indoors a few weeks before the last frost can also give you a head start on the growing season.
Can I grow yardlong beans in containers, and how would these DIY tips apply?
Yes, you can grow yardlong beans in containers! Choose a large container (at least 12 inches in diameter) with good drainage. The DIY tips are still applicable. Use a high-quality potting mix amended with compost for optimal soil fertility and drainage. Build a small trellis or use stakes to provide support for the vines. Water regularly, as containers tend to dry out more quickly than garden beds. Fertilize with compost tea or diluted fish emulsion every few weeks. Protect the plants from pests and diseases using the natural methods described earlier. Container gardening allows you to control the growing environment more easily, making it a great option for those with limited space or poor soil conditions.
What are some common mistakes to avoid when growing yardlong beans?
Some common mistakes include planting too early in the season, neglecting to provide adequate support, overwatering or underwatering, using too much nitrogen fertilizer, and failing to protect the plants from pests and diseases. Avoid these mistakes by following the DIY tips outlined in this article. Plant after the last frost, build a sturdy trellis, water consistently but not excessively, use a balanced fertilizer or homemade fertilizer solution, and regularly inspect your plants for signs of pests or diseases. By avoiding these common pitfalls, you’ll be well on your way to a successful yardlong bean harvest.

Leave a Comment