

Watermelon growing early start can feel like a daunting task, especially if you’re eager to sink your teeth into that juicy, summer sweetness a little sooner! But fear not, fellow gardening enthusiasts, because I’m here to share some simple yet effective DIY tricks to get your watermelon plants thriving well before the traditional growing season even begins.
For centuries, watermelons have been a symbol of summer abundance and a refreshing treat enjoyed across cultures. From ancient Egypt, where they were depicted in hieroglyphics, to the American South, where they’re a staple of picnics and barbecues, watermelons hold a special place in our hearts (and stomachs!). But let’s face it, waiting for the perfect watermelon can feel like an eternity.
That’s where these DIY hacks come in! Many of us struggle with short growing seasons or unpredictable weather, making it challenging to achieve that perfect, vine-ripened watermelon. By implementing these simple strategies for a watermelon growing early start, you can extend your growing season, protect your precious seedlings from late frosts, and ultimately, enjoy a bountiful harvest of delicious watermelons weeks ahead of schedule. I’m excited to share these tips and tricks with you, so let’s dive in and get those watermelons growing!
Watermelon Head Start: How to Get a Jump on Your Own Sweet Summer Messengers!
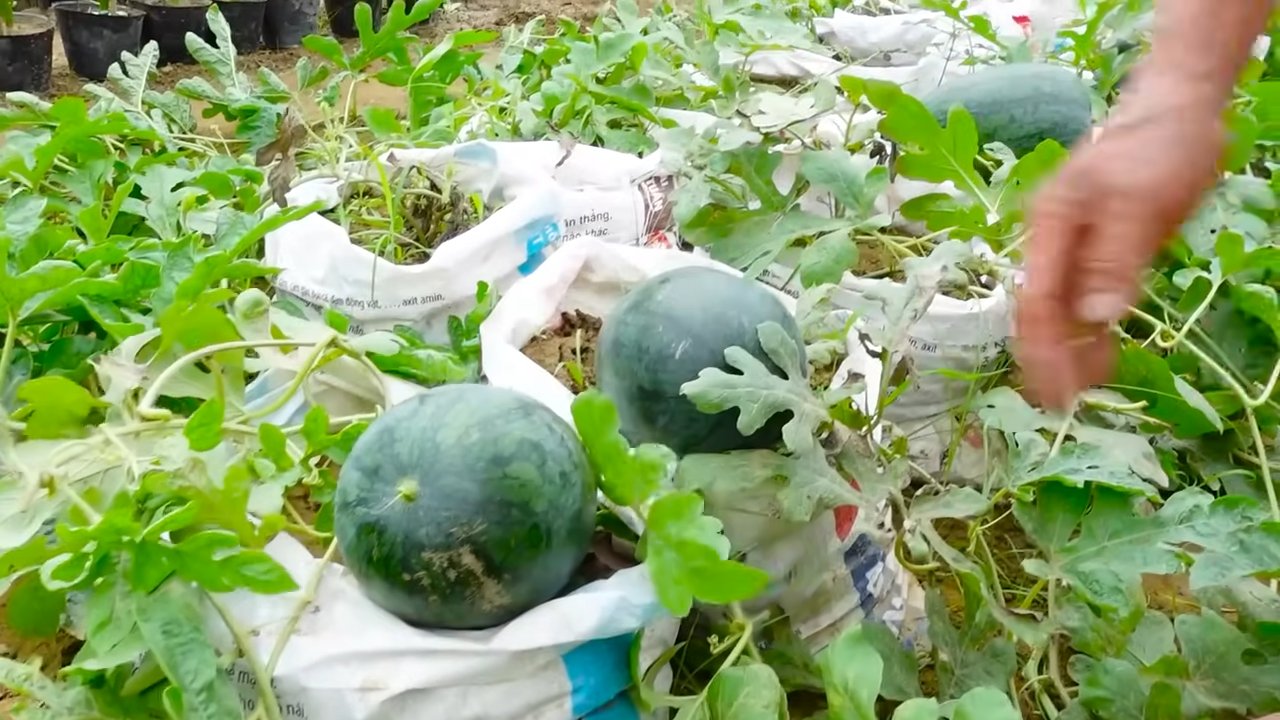
I love watermelons! And nothing is more satisfying than enjoying a juicy, homegrown watermelon. But in our latitudes, watermelons often have a short season. That’s why today I’m showing you how to give your watermelons a proper head start so you can enjoy your own harvest earlier in the year.
Why Start Watermelons Indoors?
Watermelons need a lot of warmth and a long growing season. By starting them indoors or in a greenhouse, you give them a head start before the temperatures outside are warm enough. This allows them to develop strong roots and grow faster once they are planted outdoors.
What You Need:
- Watermelon seeds (choose your favorite variety!)
- Seed starting mix (special soil for seedlings is ideal)
- Small pots or seedling trays (approx. 8-10 cm in diameter)
- Mini-greenhouse or clear plastic wrap (optional, but helpful)
- Spray bottle with water
- Heat mat (optional, but recommended)
- Grow light (optional, but very useful with little sunlight)
- Labels and pen (for labeling the varieties)
Step-by-Step Guide: Starting Watermelons Indoors
1. Preparing the Pots and Soil
- Prepare pots: Fill your pots or seedling trays with seed starting mix. Make sure the soil is loose and well-draining. Press the soil down lightly, but not too firmly.
- Moisten soil: Thoroughly moisten the soil with a spray bottle. It should be damp, but not wet.
2. Sowing the Watermelon Seeds
- Sow seeds: Place 2-3 seeds in each pot. This increases the probability that at least one seed will germinate.
- Seed depth: Press the seeds about 1-2 cm deep into the soil.
- Cover seeds: Cover the seeds with a thin layer of soil.
- Moisten: Gently moisten the soil again with the spray bottle.
- Label: Label the pots with the names of the watermelon varieties you have sown. This helps you keep track.
3. Germination: Warmth, Light, and Moisture
- Warmth: Watermelon seeds germinate best at a temperature of 25-30°C. A heat mat under the pots can help achieve this temperature. If you don’t have a heat mat, place the pots in a warm spot, e.g., on a windowsill above a heater.
- Moisture: Cover the pots with a mini-greenhouse or clear plastic wrap to keep the humidity high. Briefly air out the greenhouse or plastic wrap daily to prevent mold.
- Light: Place the pots in a bright location. If you don’t have enough sunlight, use a grow light. The light should be on for about 12-16 hours per day.
- Patience: Germination usually takes 5-10 days. Keep the soil moist, but not wet.
4. Caring for the Seedlings
- Thinning: Once the seedlings are about 5 cm tall and have their first true leaves, you should thin them. This means you keep only the strongest seedling in each pot. Cut the weaker seedlings with scissors just above the soil to avoid damaging the roots of the remaining seedling.
- Watering: Water the seedlings regularly, but not too much. The soil should always be slightly moist. Avoid waterlogging, as this can lead to root rot.
- Fertilizing: Start fertilizing about 2 weeks after thinning. Use a mild liquid fertilizer for vegetable plants. Halve the recommended dosage to avoid over-fertilizing the seedlings.
- Light: Continue to provide sufficient light. If you are using a grow light, adjust its height as the seedlings grow.
- Rotating: Rotate the pots regularly so that the seedlings grow evenly and don’t bend towards the light.
5. Hardening Off the Plants
Before you plant the watermelon plants outdoors, you must harden them off. This means you slowly accustom them to outdoor conditions.
- Start slowly: Initially, place the plants in a sheltered outdoor spot, such as a patio or balcony, for 1-2 hours a day.
- Increase the time: Extend the time outdoors by 1-2 hours each day.
- Protect from sun and wind: Protect the plants from direct sunlight and strong wind.
- Bring them in at night: Bring the plants back inside at night until the nighttime temperatures no longer drop below 10°C.
- Duration: Hardening off should take about 1-2 weeks.
6. Planting Outdoors
- The right time: Only plant the watermelons outdoors when there is no more danger of frost and the soil temperature is at least 18°C. This is usually the case from mid-May to early June.
- The right location: Choose a sunny location with well-draining soil. Watermelons need a lot of space, so plan for enough distance between plants (at least 1 meter).
- Soil preparation: Prepare the soil by loosening it and enriching it with compost or other organic material.
- Planting holes: Dig planting holes that are slightly larger than the pots of the watermelon plants.
- Insert plants: Carefully remove the plants from the pots and place them in the planting holes. Be careful not to damage the root balls.
- Fill with soil: Fill the planting holes with soil and press it down lightly.
- Watering: Water the plants thoroughly.
- Mulching: Mulch the soil around the plants with straw or other organic material. This helps to retain moisture in the soil and suppress weeds.
Additional Tips for a Successful Watermelon Harvest:
Harvest: Watermelons are ripe when they sound hollow when tapped and the tendril connecting the fruit to the plant turns brown.
Variety selection: Choose watermelon varieties that are suitable for your climate. There are many different varieties that differ in size, taste, and time to maturity.
Pollination: Watermelons depend on pollination by bees and other insects. If you have few insects in your garden, you can hand-pollinate the flowers.
Watering: Watermelons need a lot of water, especially during fruit formation. Water them regularly, but avoid waterlogging.
Fertilizing: Fertilize the watermelons regularly during the growing season with a fertilizer for vegetable plants.
Protection from pests and diseases: Watch out for pests and diseases and combat them if necessary.

Conclusion
So, there you have it! Taking the initiative to give your watermelon plants an early start indoors is more than just a gardening hack; it’s a game-changer for anyone dreaming of vine-ripened, juicy watermelon slices gracing their summer tables. By carefully nurturing your seedlings indoors, you’re not only extending your growing season but also providing them with a significant head start against potential threats like late frosts, pests, and diseases that can plague young, vulnerable plants.
Think of it as giving your watermelon babies a VIP pass to a healthy and productive life. They’ll be stronger, more resilient, and ready to explode with growth once they’re transplanted into their outdoor home. This early advantage translates directly into earlier harvests, larger fruits, and an overall more rewarding gardening experience.
But the benefits don’t stop there. Starting your watermelon seeds indoors allows you to control the growing environment, ensuring optimal temperature, moisture, and light conditions. This level of control is particularly crucial in regions with shorter growing seasons or unpredictable weather patterns. You’re essentially creating a mini-watermelon paradise, setting the stage for success from the very beginning.
Don’t be afraid to experiment with different watermelon varieties to find your perfect match. Consider trying heirloom varieties for unique flavors and colors, or opt for bush varieties if you’re short on space. You can also explore different starting mediums, such as peat pellets or coco coir, to see which works best for your growing conditions.
And remember, the key to successful indoor seed starting is patience and attention to detail. Monitor your seedlings closely, provide them with adequate light and water, and don’t be afraid to adjust your approach as needed. Gardening is a learning process, and every season brings new opportunities to refine your skills.
We wholeheartedly encourage you to embrace this DIY trick and experience the joy of growing your own watermelons from seed. It’s a rewarding and fulfilling endeavor that will connect you with nature and provide you with delicious, homegrown produce.
Once you’ve tried this method, we’d love to hear about your experience! Share your tips, tricks, and photos in the comments below. Let’s create a community of watermelon enthusiasts and learn from each other’s successes (and even the occasional setbacks!). Together, we can unlock the secrets to growing the most amazing watermelons imaginable. So go ahead, give your watermelon plants the early start they deserve, and get ready to savor the sweet taste of summer! This method of **watermelon growing early start** is a must try for any gardener.
Frequently Asked Questions (FAQ)
Q: What is the best time to start watermelon seeds indoors?
A: The ideal time to start watermelon seeds indoors is typically 3-4 weeks before the last expected frost in your area. This allows the seedlings to develop a strong root system and be ready for transplanting once the weather warms up. Check your local weather forecasts and historical data to determine the average last frost date for your region. Starting too early can result in leggy, weak seedlings that struggle to adapt to outdoor conditions. Starting too late may shorten your growing season and reduce your chances of a bountiful harvest.
Q: What type of container should I use for starting watermelon seeds?
A: Opt for individual pots or cells that are at least 3-4 inches in diameter. This will provide ample space for the watermelon seedlings to develop their roots without becoming root-bound. Biodegradable pots, such as peat pots or coco coir pots, are a great option as they can be directly planted into the ground, minimizing transplant shock. Avoid using small seed starting trays with shallow cells, as watermelon seedlings require more space than typical flower or vegetable seedlings. Ensure that your chosen containers have drainage holes to prevent waterlogging, which can lead to root rot.
Q: What kind of soil should I use for starting watermelon seeds?
A: Use a high-quality seed starting mix that is lightweight, well-draining, and sterile. Avoid using garden soil, as it can be too heavy and may contain pathogens or pests that can harm your seedlings. Seed starting mixes are specifically formulated to provide the optimal environment for germination and early growth. You can also create your own seed starting mix by combining equal parts peat moss, perlite, and vermiculite. Ensure that the mix is thoroughly moistened before sowing the seeds.
Q: How deep should I plant watermelon seeds?
A: Plant watermelon seeds about 1 inch deep in the seed starting mix. Gently cover the seeds with soil and lightly water the surface. Avoid planting the seeds too deep, as this can hinder germination. You can also use a heat mat to warm the soil and speed up the germination process. Maintain a consistent moisture level in the soil, but avoid overwatering, which can lead to damping-off disease.
Q: How much light do watermelon seedlings need?
A: Watermelon seedlings require at least 6-8 hours of direct sunlight per day. If you don’t have a sunny window, you can use grow lights to provide supplemental lighting. Position the grow lights a few inches above the seedlings and adjust the height as they grow. Rotate the seedlings regularly to ensure that they receive even light exposure on all sides. Insufficient light can result in leggy, weak seedlings that are more susceptible to pests and diseases.
Q: How often should I water watermelon seedlings?
A: Water watermelon seedlings when the top inch of soil feels dry to the touch. Avoid overwatering, as this can lead to root rot. Water deeply and thoroughly, allowing the excess water to drain out of the drainage holes. Use a watering can with a gentle spout to avoid disturbing the seedlings. You can also use a spray bottle to mist the seedlings, which helps to maintain humidity levels.
Q: When should I transplant watermelon seedlings outdoors?
A: Transplant watermelon seedlings outdoors when the weather has warmed up and the danger of frost has passed. The soil temperature should be at least 60°F (15°C). Harden off the seedlings by gradually exposing them to outdoor conditions for a week before transplanting. Start by placing them in a sheltered location for a few hours each day, gradually increasing the amount of time they spend outdoors. Choose a sunny location with well-drained soil for transplanting.
Q: What are some common problems when starting watermelon seeds indoors?
A: Some common problems include damping-off disease, leggy seedlings, and pest infestations. Damping-off disease is a fungal infection that can cause seedlings to rot and die. To prevent damping-off, use a sterile seed starting mix, avoid overwatering, and provide good air circulation. Leggy seedlings are caused by insufficient light. Provide adequate light or use grow lights to prevent this problem. Pest infestations can be controlled with insecticidal soap or neem oil.
Q: Can I start watermelon seeds directly in the ground?
A: Yes, you can start watermelon seeds directly in the ground, but this is only recommended in areas with long growing seasons and warm soil temperatures. Direct sowing can be less reliable than starting seeds indoors, as the seeds are more vulnerable to pests, diseases, and unfavorable weather conditions. If you choose to direct sow, wait until the soil has warmed up to at least 70°F (21°C) and plant the seeds about 1 inch deep.
Q: What are some good companion plants for watermelons?
A: Good companion plants for watermelons include marigolds, nasturtiums, and basil, which can help to deter pests. Other beneficial companions include beans and peas, which can fix nitrogen in the soil, and radishes, which can help to break up compacted soil. Avoid planting watermelons near potatoes or tomatoes, as they can compete for nutrients.
Leave a Comment