

Vertical Watermelon Growing Guide: Unlock a Bountiful Harvest in Limited Space!
Have you ever dreamed of biting into a juicy, homegrown watermelon, but thought your small garden or balcony couldn’t possibly accommodate such a sprawling vine? I’m here to tell you that dream can absolutely become a reality! This DIY guide will reveal the secrets to vertical watermelon growing, a technique that’s revolutionizing how gardeners with limited space cultivate this summertime favorite.
While watermelons have been enjoyed for millennia – evidence suggests they were cultivated in Africa as far back as 2000 BC! – traditional methods require a lot of ground. But, with the rise of urban gardening and a desire for fresh, local produce, innovative solutions like vertical watermelon growing are gaining immense popularity. Imagine the satisfaction of harvesting your own sweet, refreshing watermelons, knowing you nurtured them from tiny seedlings to plump, delicious fruits, all within a compact vertical space.
This isn’t just about saving space; it’s about maximizing your yield, improving air circulation to prevent diseases, and adding a unique, eye-catching element to your garden. I’ll walk you through every step, from choosing the right varieties and building a sturdy support system to providing the necessary nutrients and pollination assistance. Get ready to transform your small space into a watermelon wonderland!
DIY Vertical Watermelon Growing: A Sweet Success Story!
Hey there, fellow gardening enthusiasts! I’m so excited to share my experience with growing watermelons vertically. Trust me, it’s a game-changer, especially if you’re short on space or just want to try something a little different. I was skeptical at first, but the results were amazing – juicy, delicious watermelons without taking over my entire garden! So, let’s dive into how you can do it too.
Why Grow Watermelons Vertically?
Before we get started, you might be wondering why you’d even *want* to grow watermelons vertically. Here’s the lowdown:
* Space Saving: Watermelons are notorious for their sprawling vines. Growing them vertically frees up a ton of ground space.
* Better Air Circulation: Vertical growth promotes better airflow around the plant, reducing the risk of fungal diseases.
* Easier Pest Control: It’s much easier to spot and deal with pests when your watermelon plant is growing upwards.
* Sunlight Exposure: Vertical growing allows for more even sunlight distribution, leading to better fruit ripening.
* Aesthetic Appeal: Let’s be honest, a watermelon vine climbing a trellis looks pretty darn cool!
Choosing the Right Watermelon Variety
Not all watermelons are created equal when it comes to vertical growing. You’ll want to choose a smaller variety that won’t put too much strain on your support structure. Here are a few of my favorites:
* Sugar Baby: This is a classic choice for a reason. It produces small, sweet watermelons that are perfect for one or two people.
* Bush Sugar Baby: Even more compact than the regular Sugar Baby, this variety is specifically bred for smaller spaces.
* Golden Midget: This variety produces small, yellow-fleshed watermelons that are incredibly sweet and flavorful.
* Tiger Baby: A beautiful striped watermelon with a manageable size.
What You’ll Need
Okay, let’s gather our supplies. Here’s what you’ll need to get started:
* Watermelon Seeds or Seedlings: Choose your favorite small variety!
* Large Container: A 15-20 gallon container is ideal. Make sure it has drainage holes!
* High-Quality Potting Mix: Watermelons are heavy feeders, so use a nutrient-rich mix.
* Trellis or Support Structure: A sturdy trellis, cattle panel, or even a strong tomato cage will work.
* Soft Plant Ties or Twine: For gently securing the vines to the support structure.
* Old Pantyhose or Mesh Bags: To support the developing watermelons (more on this later!).
* Water-Soluble Fertilizer: A balanced fertilizer for the early stages and a bloom-boosting fertilizer once flowering begins.
* Gardening Gloves: To keep your hands clean.
* Watering Can or Hose: For regular watering.
Step-by-Step Guide: Planting and Training Your Watermelon
Alright, let’s get our hands dirty! Here’s how I plant and train my watermelons for vertical success:
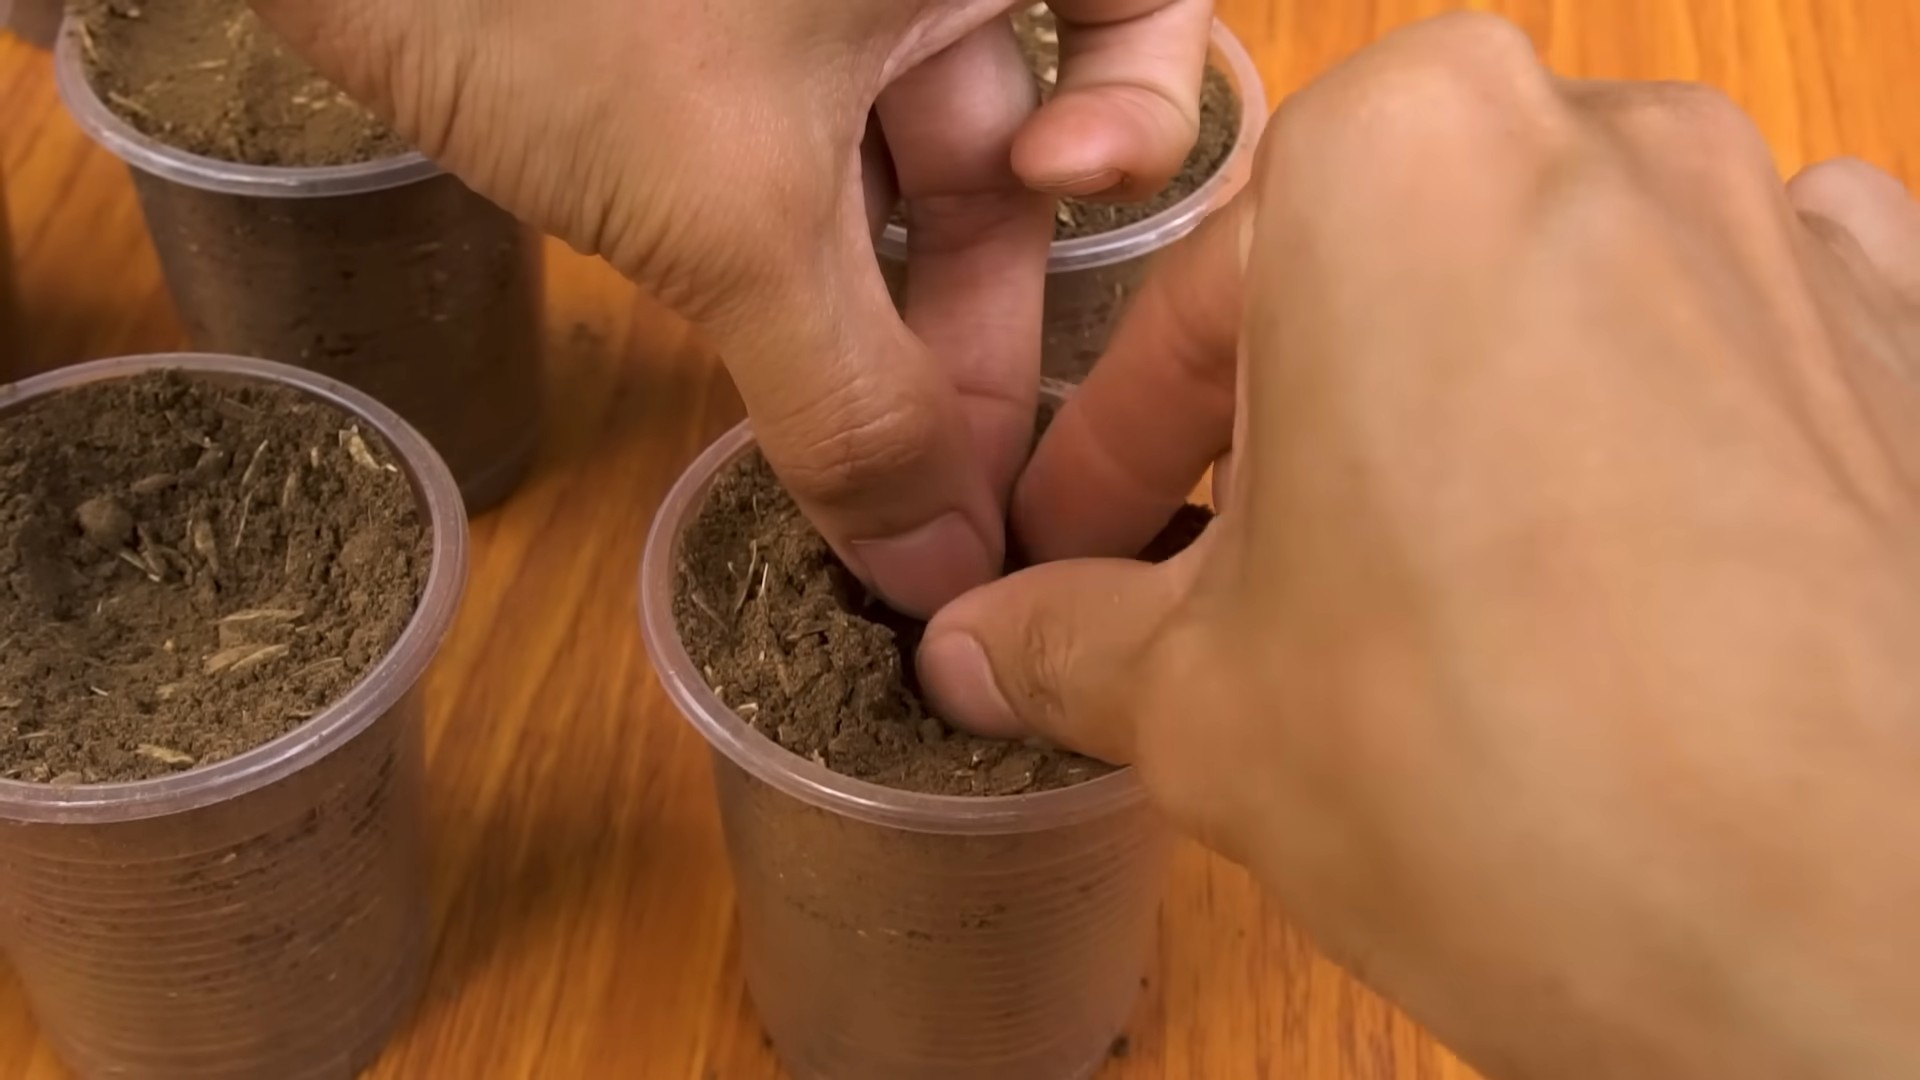
1. Prepare the Container: Fill your container with the high-quality potting mix, leaving a few inches of space at the top.
2. Plant the Seeds or Seedlings: If you’re starting from seeds, sow them directly into the container, following the instructions on the seed packet. If you’re using seedlings, gently remove them from their pots and plant them in the center of the container.
3. Water Thoroughly: Give the newly planted seeds or seedlings a good watering.
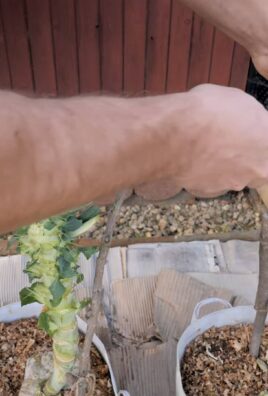
4. Install the Trellis: Position the trellis or support structure behind the container, making sure it’s securely anchored.
5. Training the Vines: As the watermelon vines grow, gently guide them towards the trellis and secure them with soft plant ties or twine. Be careful not to tie them too tightly, as this can damage the vines. I usually tie them every 6-8 inches.
6. Pinch Off Side Shoots: To encourage the main vine to grow upwards, pinch off any side shoots that develop. This will also help to improve air circulation.
7. Fertilize Regularly: Watermelons are heavy feeders, so fertilize them regularly with a water-soluble fertilizer. Start with a balanced fertilizer and switch to a bloom-boosting fertilizer once flowering begins. Follow the instructions on the fertilizer package for application rates.
Hey there, fellow gardening enthusiasts! I’m so excited to share my experience with growing watermelons vertically. Trust me, it’s a game-changer, especially if you’re short on space or just want to try something a little different. I was skeptical at first, but the results were amazing – juicy, delicious watermelons without taking over my entire garden! So, let’s dive into how you can do it too.
Why Grow Watermelons Vertically?
Before we get started, you might be wondering why you’d even *want* to grow watermelons vertically. Here’s the lowdown:
* Space Saving: Watermelons are notorious for their sprawling vines. Growing them vertically frees up a ton of ground space.
* Better Air Circulation: Vertical growth promotes better airflow around the plant, reducing the risk of fungal diseases.
* Easier Pest Control: It’s much easier to spot and deal with pests when your watermelon plant is growing upwards.
* Sunlight Exposure: Vertical growing allows for more even sunlight distribution, leading to better fruit ripening.
* Aesthetic Appeal: Let’s be honest, a watermelon vine climbing a trellis looks pretty darn cool!
Choosing the Right Watermelon Variety
Not all watermelons are created equal when it comes to vertical growing. You’ll want to choose a smaller variety that won’t put too much strain on your support structure. Here are a few of my favorites:
* Sugar Baby: This is a classic choice for a reason. It produces small, sweet watermelons that are perfect for one or two people.
* Bush Sugar Baby: Even more compact than the regular Sugar Baby, this variety is specifically bred for smaller spaces.
* Golden Midget: This variety produces small, yellow-fleshed watermelons that are incredibly sweet and flavorful.
* Tiger Baby: A beautiful striped watermelon with a manageable size.
What You’ll Need
Okay, let’s gather our supplies. Here’s what you’ll need to get started:
* Watermelon Seeds or Seedlings: Choose your favorite small variety!
* Large Container: A 15-20 gallon container is ideal. Make sure it has drainage holes!
* High-Quality Potting Mix: Watermelons are heavy feeders, so use a nutrient-rich mix.
* Trellis or Support Structure: A sturdy trellis, cattle panel, or even a strong tomato cage will work.
* Soft Plant Ties or Twine: For gently securing the vines to the support structure.
* Old Pantyhose or Mesh Bags: To support the developing watermelons (more on this later!).
* Water-Soluble Fertilizer: A balanced fertilizer for the early stages and a bloom-boosting fertilizer once flowering begins.
* Gardening Gloves: To keep your hands clean.
* Watering Can or Hose: For regular watering.
Step-by-Step Guide: Planting and Training Your Watermelon
Alright, let’s get our hands dirty! Here’s how I plant and train my watermelons for vertical success:
1. Prepare the Container: Fill your container with the high-quality potting mix, leaving a few inches of space at the top.
2. Plant the Seeds or Seedlings: If you’re starting from seeds, sow them directly into the container, following the instructions on the seed packet. If you’re using seedlings, gently remove them from their pots and plant them in the center of the container.
3. Water Thoroughly: Give the newly planted seeds or seedlings a good watering.
4. Install the Trellis: Position the trellis or support structure behind the container, making sure it’s securely anchored.
5. Training the Vines: As the watermelon vines grow, gently guide them towards the trellis and secure them with soft plant ties or twine. Be careful not to tie them too tightly, as this can damage the vines. I usually tie them every 6-8 inches.
6. Pinch Off Side Shoots: To encourage the main vine to grow upwards, pinch off any side shoots that develop. This will also help to improve air circulation.
7. Fertilize Regularly: Watermelons are heavy feeders, so fertilize them regularly with a water-soluble fertilizer. Start with a balanced fertilizer and switch to a bloom-boosting fertilizer once flowering begins. Follow the instructions on the fertilizer package for application rates.
Supporting the Growing Watermelons
This is a crucial step for vertical watermelon growing! As the watermelons develop, they’ll need extra support to prevent them from breaking off the vine. Here’s how I do it:
1. Choose Your Support Method: I like to use old pantyhose or mesh bags. You can also use slings made from fabric or netting.
2. Create the Sling: Cut a section of pantyhose or mesh bag that’s large enough to comfortably hold the watermelon.
3. Position the Sling: Gently slip the watermelon into the sling and tie the ends of the sling to the trellis or support structure. Make sure the sling is snug but not too tight. You want to support the weight of the watermelon without constricting it.
4. Adjust as Needed: As the watermelon grows, you may need to adjust the sling to provide more support.
Watering and Sunlight
Watermelons need plenty of water and sunlight to thrive. Here’s what you need to know:
* Watering: Water deeply and regularly, especially during hot, dry weather. Check the soil moisture regularly and water when the top inch or two feels dry. Avoid overwatering, as this can lead to root rot.
* Sunlight: Watermelons need at least 6-8 hours of direct sunlight per day. Choose a sunny location for your container.
Dealing with Pests and Diseases
Even with the best care, your watermelon plant may still encounter pests or diseases. Here are a few common problems and how to deal with them:
* Aphids: These tiny insects can suck the sap from your watermelon plant. Spray them off with a strong stream of water or use insecticidal soap.
* Squash Bugs: These pests can damage the leaves and stems of your watermelon plant. Handpick them off or use insecticidal soap.
* Powdery Mildew: This fungal disease can cause a white, powdery coating on the leaves of your watermelon plant. Improve air circulation and spray with a fungicide if necessary.
* Cucumber Beetles: These beetles can spread diseases and damage the leaves and fruit. Use row covers to protect your plants or handpick the beetles off.
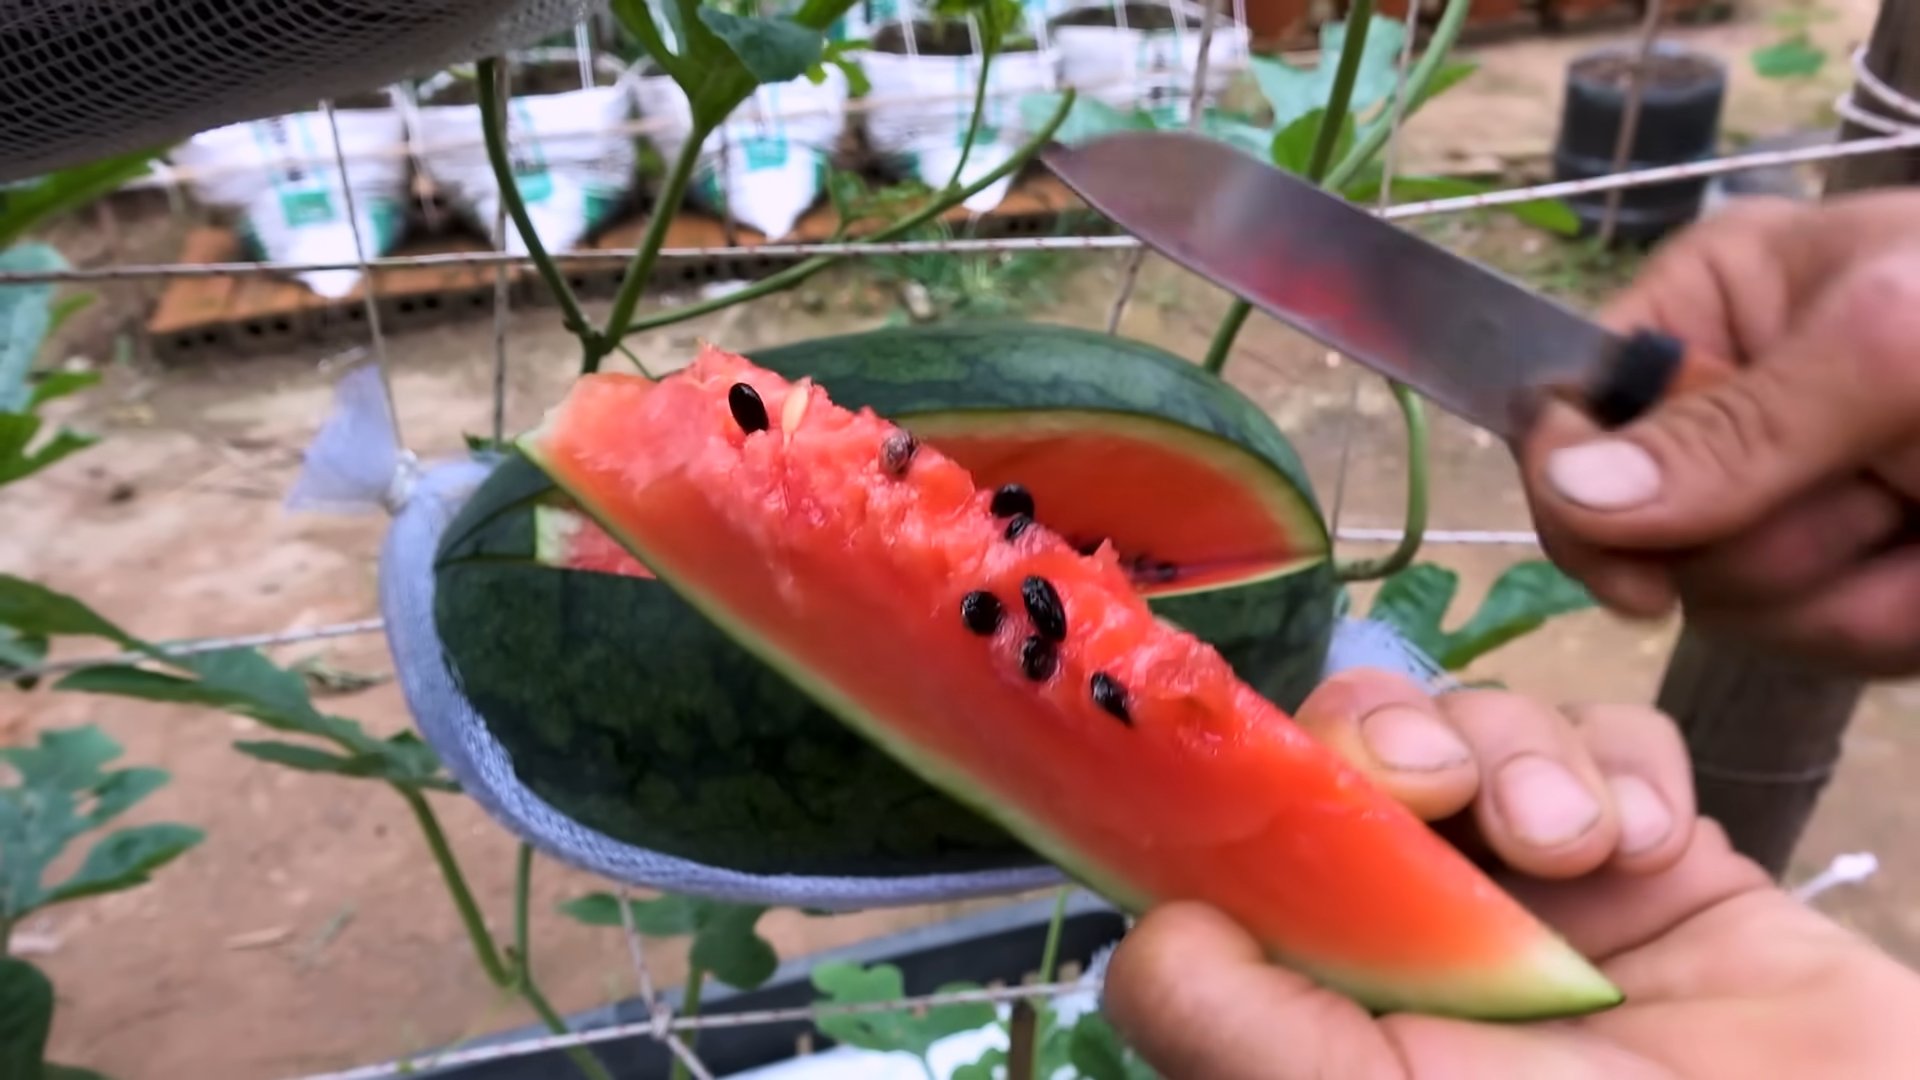
Harvesting Your Watermelons
The moment we’ve all been waiting for! Here’s how to tell when your watermelons are ripe:
* The Tendril Test: The tendril closest to the watermelon should be brown and dry.
* The Ground Spot: The spot where the watermelon rests on the ground (or in the sling) should be yellow or cream-colored.
* The Thump Test: Give the watermelon a gentle thump. A ripe watermelon will sound hollow.
* Days to Maturity: Check the seed packet for the days to maturity and start checking for ripeness around that time.
Once you’re confident that your watermelon is ripe, carefully cut it from the vine with a sharp knife or pruning shears.
Troubleshooting Tips
* Watermelon Not Setting Fruit: This can be due to a lack of pollination. You can hand-pollinate the flowers by transferring pollen from the male flowers to the female flowers with a small brush.
* Yellowing Leaves: This can be a sign of nutrient deficiency. Fertilize your watermelon plant with a balanced fertilizer.
* Fruit Rot: This can be caused by overwatering or poor air circulation. Make sure your container has good drainage and improve air circulation around the plant.
Enjoying Your Homegrown Watermelons!
Congratulations! You’ve successfully grown watermelons vertically! Now it’s time to enjoy the fruits (literally!) of your labor. Slice them up and enjoy them fresh, or use them in your favorite watermelon recipes. I love adding mine to salads, smoothies, and even grilling them!
Growing watermelons vertically is a rewarding experience that anyone can do. With a little bit of planning and effort, you can enjoy fresh, delicious watermelons from your own backyard, even if you have limited space. Happy gardening!
Conclusion
So, there you have it! Embracing the vertical watermelon growing method isn’t just a gardening trend; it’s a game-changer for maximizing space, improving fruit quality, and adding a touch of whimsical charm to your garden. We’ve explored the ins and outs of this innovative technique, from selecting the right varieties to constructing sturdy support systems. But why is this DIY trick a must-try?
First and foremost, it’s about efficiency. If you’re dealing with limited garden space, whether it’s a small backyard, a balcony, or even a patio, growing watermelons vertically allows you to cultivate these typically sprawling fruits in a fraction of the area. Imagine enjoying the sweet, juicy taste of homegrown watermelon even if you live in an apartment!
Beyond space-saving, vertical growing significantly improves air circulation around the plants. This reduces the risk of fungal diseases like powdery mildew, which can devastate watermelon crops. Better airflow also means more sunlight reaches all parts of the plant, leading to more even ripening and sweeter, more flavorful fruits. Plus, keeping the watermelons off the ground minimizes contact with soil-borne pests and diseases, further protecting your harvest.
But the benefits don’t stop there. Vertical growing makes harvesting easier and more manageable. No more bending and straining to lift heavy watermelons from the ground. You can easily inspect the fruits for ripeness and gently detach them when they’re ready. And let’s be honest, a watermelon hanging gracefully from a trellis is a sight to behold! It’s a conversation starter, a source of pride, and a testament to your gardening ingenuity.
Now, let’s talk about variations. While we’ve focused on using trellises and sturdy supports, feel free to get creative with your setup. You could repurpose old ladders, construct A-frame structures, or even use hanging baskets for smaller watermelon varieties. Experiment with different types of netting or fabric slings to provide extra support for the developing fruits. Consider companion planting at the base of your vertical watermelon plants. Marigolds, for example, can help deter pests, while basil can improve the flavor of your watermelons.
For those in cooler climates, consider starting your watermelon seeds indoors several weeks before the last expected frost. This will give your plants a head start and ensure a longer growing season. You can also use row covers or cloches to protect your young plants from cold snaps.
Remember to choose watermelon varieties that are well-suited for vertical growing. Smaller, more compact varieties like Sugar Baby, Bush Sugar Baby, or Golden Midget are excellent choices. These varieties produce smaller fruits that are easier to support and manage. However, with proper support, you can even attempt to grow larger varieties vertically. Just be sure to provide adequate support for the developing fruits.
Ultimately, the success of your vertical watermelon growing endeavor depends on your dedication, attention to detail, and willingness to experiment. Don’t be afraid to try new things, adapt your techniques, and learn from your mistakes. Gardening is a journey, not a destination.
So, what are you waiting for? Grab your seeds, build your trellis, and embark on the exciting adventure of vertical watermelon growing! We’re confident that you’ll be amazed by the results. And most importantly, we want to hear about your experience. Share your photos, tips, and stories with us in the comments below. Let’s create a community of vertical watermelon enthusiasts and inspire others to try this rewarding DIY trick. Happy growing!
Frequently Asked Questions (FAQ)
What are the best watermelon varieties for vertical growing?
The best watermelon varieties for vertical growing are typically smaller, more compact types that produce fruits weighing between 5 and 10 pounds. These are easier to support and manage on a trellis or other vertical structure. Some excellent choices include:
* **Sugar Baby:** A classic, early-maturing variety with small, round, dark green fruits.
* **Bush Sugar Baby:** A compact bush-type watermelon that’s perfect for small gardens and containers.
* **Golden Midget:** A unique variety with yellow skin and sweet, pink flesh. It matures quickly and is well-suited for cooler climates.
* **Tiger Baby:** A small, striped watermelon with a sweet, crisp flavor.
* **Blacktail Mountain:** Another early-maturing variety that’s known for its cold tolerance.
While these smaller varieties are generally recommended, you can also attempt to grow larger watermelon varieties vertically, such as Crimson Sweet or Jubilee. However, you’ll need to provide extra sturdy support for the developing fruits to prevent them from breaking off the vine.
How do I support the watermelons as they grow vertically?
Supporting the watermelons is crucial for successful vertical growing. As the fruits develop, they can become quite heavy and may break off the vine if not properly supported. Here are a few effective methods:
* **Netting:** Use nylon netting, old pantyhose, or fabric slings to cradle the watermelons. Secure the netting to the trellis or support structure, ensuring that the fruit is fully supported from underneath.
* **Hammocks:** Create small hammocks out of burlap, canvas, or other sturdy fabric. Suspend the hammocks from the trellis, providing a comfortable and secure resting place for the watermelons.
* **Shelves:** Build small shelves or platforms out of wood or metal and attach them to the trellis. These shelves can provide a solid base for the watermelons to rest on.
* **Individual Slings:** For larger watermelons, consider using individual slings made from strong rope or webbing. Tie the slings around the fruit and secure them to the trellis, distributing the weight evenly.
Regardless of the method you choose, make sure the support is strong enough to hold the weight of the mature watermelon. Check the supports regularly and adjust them as needed as the fruits grow.
How much sunlight do vertical watermelons need?
Watermelons are sun-loving plants and require at least 6-8 hours of direct sunlight per day to thrive. When growing watermelons vertically, ensure that the trellis or support structure is placed in a location that receives ample sunlight throughout the day. If you’re growing watermelons in a partially shaded area, you may need to supplement with artificial lighting to ensure adequate growth and fruit production.
How often should I water vertical watermelons?
Watermelons need consistent moisture, especially during hot weather and fruit development. Water deeply and regularly, aiming to keep the soil consistently moist but not waterlogged. The frequency of watering will depend on the weather conditions, soil type, and the size of the plants. As a general rule, water deeply every 2-3 days, or more often during hot, dry spells. Check the soil moisture regularly by sticking your finger into the soil about an inch deep. If the soil feels dry, it’s time to water.
What kind of fertilizer should I use for vertical watermelons?
Watermelons are heavy feeders and benefit from regular fertilization. Use a balanced fertilizer with a ratio of 10-10-10 or 14-14-14. Apply the fertilizer according to the package directions, typically every 2-3 weeks during the growing season. You can also supplement with organic fertilizers such as compost tea or fish emulsion. Avoid over-fertilizing, as this can lead to excessive foliage growth and reduced fruit production.
How do I prevent pests and diseases on vertical watermelons?
Vertical growing can help reduce the risk of pests and diseases by improving air circulation and minimizing contact with the soil. However, watermelons are still susceptible to certain pests and diseases. Here are a few tips for prevention:
* **Choose disease-resistant varieties:** Select watermelon varieties that are known to be resistant to common diseases such as powdery mildew and fusarium wilt.
* **Practice good sanitation:** Remove any dead or diseased leaves and debris from around the plants.
* **Improve air circulation:** Ensure that the plants are well-spaced and that the trellis or support structure allows for good air circulation.
* **Use organic pest control methods:** If you notice pests such as aphids or squash bugs, try using organic pest control methods such as insecticidal soap or neem oil.
* **Monitor plants regularly:** Inspect your watermelon plants regularly for signs of pests or diseases. Early detection is key to preventing serious problems.
How do I know when a watermelon is ripe?
Determining when a watermelon is ripe can be tricky, but here are a few telltale signs:
* **The tendril closest to the fruit turns brown and dries up:** This is a reliable indicator that the watermelon is nearing ripeness.
* **The underside of the watermelon (where it rests on the ground or support) turns from white to yellow:** This is known as the “ground spot.”
* **The watermelon sounds hollow when you thump it:** A ripe watermelon will produce a deep, resonant sound when thumped.
* **The skin of the watermelon becomes dull and loses its shine:** A ripe watermelon will have a slightly dull appearance.
It may take some practice to learn how to accurately determine when a watermelon is ripe, but with experience, you’ll become a pro.
Can I grow watermelons vertically in containers?
Yes, you can grow watermelons vertically in containers, but you’ll need to choose a large container (at least 20 gallons) and use a well
Leave a Comment