

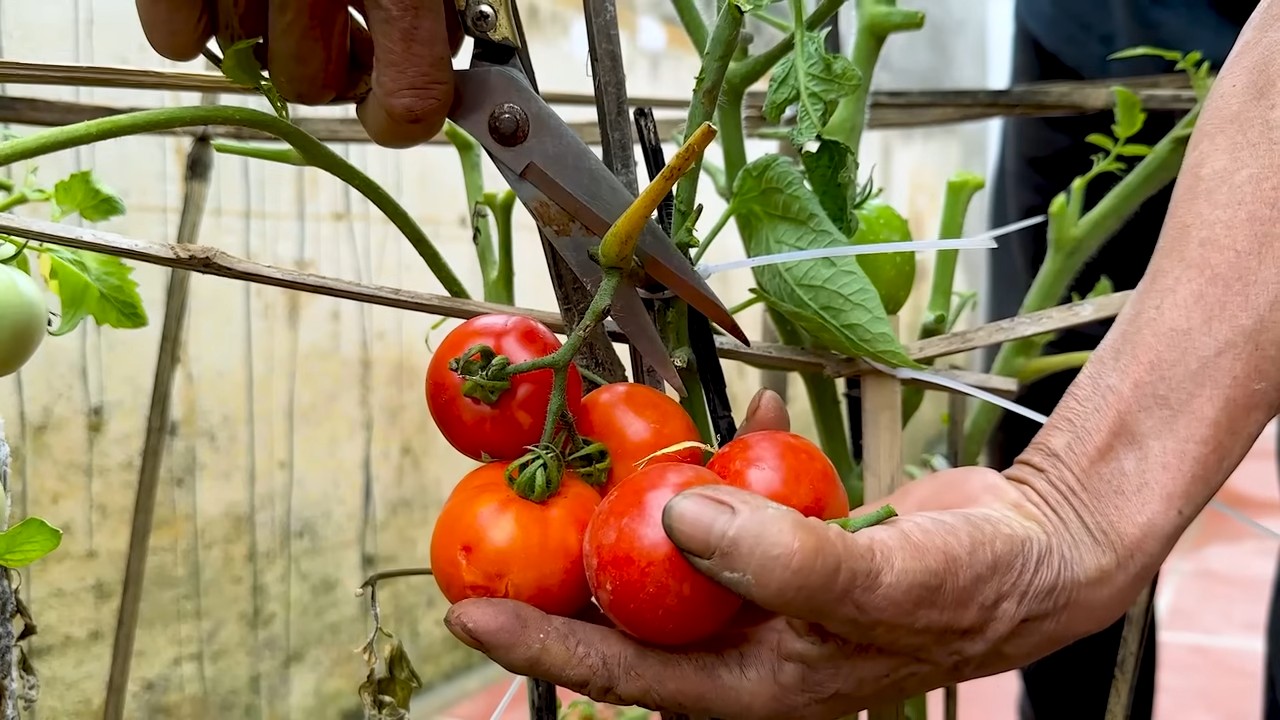
Tomato plant plastic can hack: Ever dreamt of harvesting juicy, sun-ripened tomatoes straight from your own backyard? I know I have! But the path to homegrown goodness can sometimes feel like a battle against pests, unpredictable weather, and the general challenges of nurturing delicate seedlings. That’s where a little DIY ingenuity comes in, and trust me, this one’s a game-changer.
For centuries, gardeners have sought clever ways to protect their precious plants. From ancient Roman greenhouses to the ingenious raised beds of medieval monasteries, the desire to cultivate thriving gardens has always driven innovation. Today, we’re carrying on that tradition with a simple yet effective trick that utilizes something you probably already have in your recycling bin: a plastic can!
Why is this tomato plant plastic can hack so essential? Well, think about it: young tomato plants are vulnerable. They’re susceptible to cutworms that can decimate them overnight, and they need consistent warmth and protection from harsh winds. This DIY method provides a mini-greenhouse effect, shielding your seedlings from the elements and creating a cozy environment for them to flourish. Plus, it acts as a barrier against those pesky critters. I’m excited to share this easy and affordable solution that will help you grow healthier, more productive tomato plants, and ultimately, enjoy a bountiful harvest!
Tomato Plant Turbo: The Plastic Canister Hack for Bountiful Harvests
Hello, dear garden friends! I am so excited to show you a brilliant DIY hack today that will make your tomato plants explode with growth! And the best part? All you need is an old plastic canister and a few simple tools. This trick not only ensures better watering but also provides optimal nutrient supply directly to the roots. Let’s get started!
What’s the Benefit of the Plastic Canister Hack?
Before we get into the details, here are the advantages of this hack in a nutshell:
- Targeted Watering: The water goes directly to the roots without getting the leaves wet. This reduces the risk of fungal diseases.
- Efficient Nutrient Supply: Liquid fertilizer can be added directly into the canister, so the nutrients are optimally absorbed by the plant.
- Heat Storage: The dark canister stores heat and slowly releases it into the soil, which promotes growth.
- Pest Protection: The canister can help keep ground-level pests away.
- Water Conservation: Less evaporation means less water consumption.
- Sustainability: We are recycling an old plastic canister and giving it a new life!
Materials and Tools
What you’ll need for this hack:
- An empty plastic canister (5-10 liters, ideally dark)
- A knife or scissors
- A drill or a nail
- A watering can
- Soil or compost
- Your tomato plants
- Optional: Liquid fertilizer
Step-by-Step Guide: The Plastic Canister Hack
Here’s how to build your own tomato plant turbo:
- Prepare the Canister: First, you need to thoroughly clean the plastic canister. Make sure there are no residues of chemicals or other liquids. Rinse it several times with clean water.
- Drill Holes: Now comes the most important part: we drill holes in the canister. These holes ensure that the water seeps slowly into the soil.
- Bottom Holes: Drill or poke several small holes (about 5-10) in the bottom of the canister with a nail. The holes should not be too large, so the water doesn’t drain too quickly.
- Side Holes (optional): If you wish, you can also drill a few small holes in the lower side walls of the canister. This ensures even better water distribution. But be careful: not too many holes, or the canister will lose water too fast.
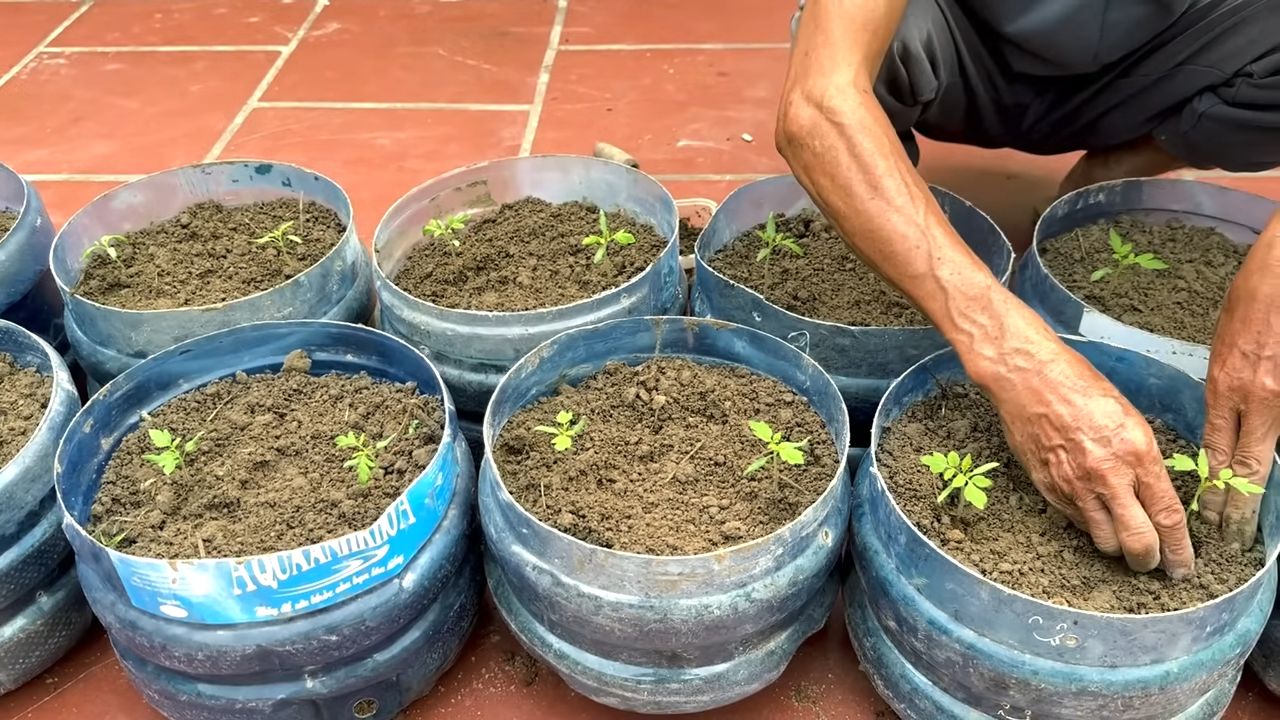
- Prepare the Soil: Find a sunny spot for your tomato plants. Loosen the soil well and remove weeds. If the soil is very sandy, you can mix in some compost or humus to improve its water-holding capacity.
- Dig the Planting Hole: Dig a planting hole large enough for your tomato plant. The hole should be deep enough for the plant’s root ball to fit comfortably.
- Insert the Canister: Place the prepared plastic canister in the middle of the planting hole. Make sure the canister is stable and cannot tip over.
- Plant the Tomato: Carefully remove your tomato plant from its pot and place it next to the canister in the planting hole. Ensure the plant is not too deep or too high. The top of the root ball should be about level with the soil surface.
- Fill the Planting Hole: Fill the planting hole with soil or compost and press the soil down lightly. Make sure the canister is firmly anchored in the ground.
- Water In: Water the tomato plant and the canister thoroughly. The water in the canister will slowly seep into the soil and provide moisture to the roots.
- Mulch (optional): To reduce evaporation and suppress weed growth, you can cover the soil around the tomato plant with mulch. Suitable materials include straw, wood chips, or grass clippings.
Watering and Fertilizing with the Canister
Now for the clever part: we use the canister to optimally water and fertilize the tomato plant.
- Watering: Fill the canister with water regularly. The frequency depends on the weather and the soil. On hot days, you may need to water daily. Make sure the canister is always well-filled.
- Fertilizing: Regularly add liquid fertilizer to the canister. The dosage depends on the manufacturer’s instructions. The fertilizer is then transported directly to the roots along with the water. I personally like to use organic liquid fertilizer as it is more environmentally friendly.
More Tips and Tricks
Here are a few additional tips that will help you get the most out of your tomato plant turbo:
- Canister Color: Dark canisters store more heat than light ones. If you live in a cooler region, a dark canister is advantageous. In very hot regions, however, a light-colored canister may be better to avoid overheating the soil.
- Canister Size: The size of the canister depends on the size of your tomato plant. For smaller plants, a 5-liter canister is sufficient. For larger plants, you should use a 10-liter canister.
- Canister Cover: To prevent insects or dirt from getting into the canister, you can cover it with a lid or a piece of cloth.
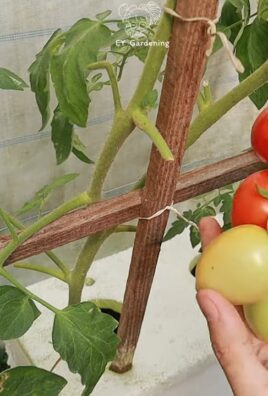
- Canister Position: Make sure the canister is not directly touching the stem of the tomato plant. This could damage the plant.
- Regular Checks: Regularly check if the holes in the canister are clogged. If so, you can clear them with a wire or a needle.
- Variety Selection: Some tomato varieties are better suited for this type of irrigation than others. Find out which varieties grow well in your region and are less susceptible to fungal diseases.
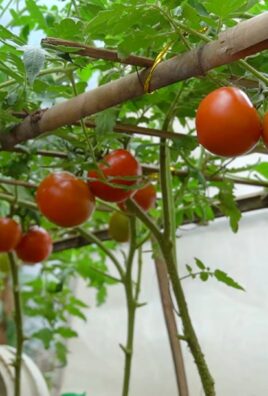
- Support: Tomato plants usually need support to keep from breaking. Use a tomato stake or a trellis to stabilize the plant.
- Pruning Suckers: Regularly remove the side shoots (suckers) from the tomato plant. This promotes the growth of the main stems and ensures better ventilation for the plant.
- Observation: Observe your tomato plants closely. Look for signs of diseases or pests. The sooner you identify problems, the better you can combat them.
Common Problems and Solutions
Problems can also arise with the plastic canister hack. Here are some common issues and how you can solve them:
Pests: Regularly check your tomato plants for pests like aphids or whiteflies. Combat the pests with appropriate methods.
Canister empties too quickly: If the canister empties too fast, the holes are likely too large. Try to make the holes smaller with tape or silicone.
Canister doesn’t empty: If the canister isn’t emptying, the holes are probably clogged. Clean the holes with a wire or a needle.
Tomato plant has yellow leaves: Yellow leaves can be a sign of a nutrient deficiency. Add more liquid fertilizer to the canister.
Tomato plant has brown spots: Brown spots can be a sign of a fungal disease. Remove the affected leaves and treat the plant with a fungicide.
Conclusion
So, there you have it! The humble plastic can, often destined for the recycling bin, transforms into a powerful ally in your tomato-growing endeavors. This simple yet ingenious DIY tomato plant plastic can hack isn’t just about saving money; it’s about fostering healthier, more robust tomato plants that yield a bountiful harvest. Think of it as giving your precious seedlings a head start, protecting them from the elements, and encouraging deep root growth that will sustain them throughout the growing season.
Why is this a must-try? Because it addresses several critical needs of young tomato plants simultaneously. It provides a mini-greenhouse effect, warming the soil and air around the plant, which is especially beneficial in cooler climates or during early spring planting. It shields the delicate stems from harsh winds and potential damage from pests like cutworms. Most importantly, it encourages deep root development by directing water and nutrients directly to the root zone, leading to stronger, more drought-resistant plants.
But the beauty of this DIY trick lies in its adaptability. Feel free to experiment with different types of plastic cans. Larger cans can accommodate larger plants or provide even greater protection. You can also modify the can by adding drainage holes at the bottom to prevent waterlogging in particularly rainy areas. Consider painting the cans a light color to reflect sunlight and prevent overheating in hotter climates. For an extra boost, you can even add a slow-release fertilizer to the soil within the can to provide a continuous supply of nutrients.
Don’t be afraid to get creative! Some gardeners have even used clear plastic bottles with the bottoms cut off to create mini-greenhouses that allow for even more sunlight penetration. The possibilities are endless, and the only limit is your imagination.
We wholeheartedly encourage you to give this DIY tomato plant plastic can hack a try. It’s a cost-effective, environmentally friendly, and incredibly rewarding way to nurture your tomato plants and maximize your harvest. You’ll be amazed at the difference it makes!
And most importantly, we want to hear about your experiences! Share your photos, tips, and variations in the comments below. Let’s build a community of tomato-growing enthusiasts who are passionate about sustainable gardening practices. Together, we can unlock the secrets to growing the juiciest, most flavorful tomatoes imaginable. Happy gardening!
Frequently Asked Questions (FAQ)
What type of plastic can is best to use for this hack?
Ideally, you want to use a sturdy, opaque plastic can that is large enough to accommodate the initial growth of your tomato plant. Cans that previously held coffee, powdered drink mixes, or even large yogurt containers work well. Avoid using cans that are too thin or flimsy, as they may not provide adequate protection or support. Make sure the can is clean and free of any residue before using it. Opaque cans are generally preferred as they help prevent algae growth in the soil.
How do I prepare the plastic can before planting?
The most important step is to remove the bottom of the can. You can do this carefully with a sharp utility knife or a pair of heavy-duty scissors. Be cautious to avoid cutting yourself. Once the bottom is removed, smooth out any sharp edges to prevent injury to yourself or your plants. You may also want to drill a few small drainage holes in the sides of the can near the bottom, especially if you live in an area with frequent rainfall. This will help prevent waterlogging and root rot.
When is the best time to use this hack?
This hack is most effective when transplanting young tomato seedlings into the garden. It provides protection during the critical early stages of growth when the plants are most vulnerable to pests, diseases, and harsh weather conditions. You can use it from the time you transplant your seedlings until they are large enough to withstand the elements on their own, typically a few weeks to a month.
How does this hack protect against cutworms?
Cutworms are notorious for severing young plant stems at the soil line, often overnight. The plastic can acts as a physical barrier, preventing cutworms from reaching the stem. By surrounding the base of the plant with the can, you create a protective shield that the cutworms cannot penetrate. This is a simple yet highly effective way to prevent cutworm damage and ensure the survival of your seedlings.
Will the plastic can restrict root growth?
No, the plastic can will not restrict root growth. Because the bottom of the can is removed, the roots are free to grow down into the surrounding soil. In fact, the can encourages deeper root growth by directing water and nutrients directly to the root zone. This leads to stronger, more drought-resistant plants that are better able to withstand environmental stresses.
Can I reuse the plastic cans for multiple seasons?
Yes, you can definitely reuse the plastic cans for multiple seasons. After the growing season is over, simply remove the cans from the garden, clean them thoroughly with soap and water, and store them in a dry place until the following spring. With proper care, the cans can last for several years, making this a truly sustainable gardening practice.
What if I don’t have plastic cans? Are there any alternatives?
If you don’t have plastic cans readily available, you can use other materials to create a similar protective barrier. Cardboard tubes, such as those from paper towels or toilet paper, can be cut to size and used in the same way. You can also use plastic bottles with the bottoms cut off. Just make sure that whatever material you use is sturdy enough to provide adequate protection and that it doesn’t contain any harmful chemicals that could leach into the soil.
How do I water my tomato plants when using this hack?
Water your tomato plants as you normally would, but focus on watering inside the plastic can. This will ensure that the water is directed directly to the root zone, maximizing its effectiveness. Avoid overwatering, as this can lead to root rot. Check the soil moisture regularly and water only when the top inch or two of soil feels dry to the touch.
Can I use this hack for other types of plants besides tomatoes?
Yes, this hack can be used for other types of plants that are susceptible to cutworm damage or that benefit from early protection from the elements. Peppers, eggplants, and other vegetable seedlings can all benefit from this simple yet effective technique. Just adjust the size of the can to suit the size of the plant.
What if the plastic can gets too hot in the sun?
If you live in a hot climate or experience particularly intense sunlight, the plastic can may get too hot and potentially damage the plant. To prevent this, consider painting the cans a light color to reflect sunlight. You can also provide shade for the plants during the hottest part of the day by using shade cloth or other materials. Monitoring the temperature inside the can and adjusting your approach as needed is key.

Leave a Comment