

Tomato harvest tips are essential for any home gardener dreaming of juicy, sun-ripened tomatoes bursting with flavor. Imagine biting into a perfectly ripe tomato, the taste a world away from the bland, store-bought variety. That’s the magic of homegrown tomatoes, and with the right tomato harvest tips, you can unlock that deliciousness every single time!
For centuries, tomatoes have been a symbol of abundance and vitality, finding their way into countless cuisines worldwide. From the sun-drenched fields of Italy to the vibrant gardens of Mexico, the tomato’s journey is a testament to its enduring appeal. But knowing when and how to harvest your precious tomatoes can be the difference between a culinary triumph and a disappointing mush.
Let’s face it, gardening can be tricky! We’ve all been there, eagerly anticipating our first tomato harvest, only to pick them too early (sour!) or too late (squishy!). That’s why I’m so excited to share these simple yet effective DIY tricks and hacks. These aren’t just random tips; they’re tried-and-true methods that will help you maximize your yield and ensure you’re enjoying the most flavorful tomatoes possible. So, grab your gardening gloves, and let’s dive in!
DIY Tomato Cage Upgrade for a Bountiful Harvest
Okay, tomato lovers, let’s talk about getting the most out of your tomato plants. We all dream of overflowing baskets of juicy, ripe tomatoes, but sometimes our plants need a little extra support to reach their full potential. Those flimsy store-bought tomato cages? They’re often just not up to the task, especially when you’re growing vigorous indeterminate varieties. So, I’m going to walk you through a simple, yet incredibly effective, DIY tomato cage upgrade that will keep your plants happy, healthy, and producing like crazy!
Why Upgrade Your Tomato Cages?
Before we dive into the how-to, let’s quickly cover why this upgrade is so important.
* Support for Heavy Fruit: As your tomato plants mature and start producing fruit, the weight can become significant. Standard cages often buckle or topple over, damaging the plant and potentially losing precious tomatoes.
* Improved Air Circulation: A sturdier cage allows for better airflow around the plant, reducing the risk of fungal diseases like blight, which can devastate your tomato crop.
* Easier Harvesting: A robust cage makes it easier to reach and harvest your tomatoes without damaging the plant. No more awkward reaching and bending!
* Long-Term Investment: These upgraded cages are built to last for years, saving you money in the long run compared to constantly replacing flimsy store-bought ones.
* Vertical Growth Management: Upgraded cages help to train your tomato plants to grow vertically, maximizing space in your garden and making them easier to manage.
Materials You’ll Need
Here’s what you’ll need to build your super-strong tomato cages. Don’t worry, it’s not a huge list, and you can probably find most of these items at your local hardware store.
* Existing Tomato Cages: We’re upgrading, not replacing! Use the cages you already have. Even if they’re a little bent or rusty, they’ll work just fine as a base.
* Reinforcing Steel Bars (Rebar): I recommend using 3/8-inch or 1/2-inch rebar. The length will depend on the height you want your cages to be, but 4-6 feet is a good starting point. You’ll need 3-4 pieces of rebar per cage.
* Heavy-Duty Zip Ties or Wire: These will be used to secure the rebar to the existing cages. Choose zip ties that are UV-resistant for longer life. Galvanized wire is also a great option.
* Gloves: Protect your hands from the rough edges of the rebar and cages.
* Safety Glasses: Always a good idea when working with metal.
* Bolt Cutters or a Metal Cutting Saw (Optional): If you need to cut the rebar to a specific length.
* Hammer or Mallet: To help drive the rebar into the ground.
* Measuring Tape: To ensure even spacing of the rebar.
Step-by-Step Instructions: Building Your Upgraded Tomato Cages
Alright, let’s get our hands dirty! Here’s how to transform those flimsy cages into tomato-supporting powerhouses.
1. Prepare Your Tomato Cages
* Inspect the Cages: Take a look at your existing tomato cages. Straighten out any bent sections as best you can. Don’t worry about minor imperfections; they won’t affect the overall strength of the upgrade.
* Clean the Cages (Optional): If your cages are particularly dirty or rusty, you can give them a quick scrub with a wire brush and some soapy water. This will help the zip ties or wire adhere better.
2. Position the Rebar
* Placement is Key: Decide where you want to position the rebar around the outside of the tomato cage. I usually place one piece of rebar on each side of the cage, evenly spaced. For larger cages or heavier tomato varieties, you might want to add a fourth piece.
* Consider the Plant: Think about where your tomato plant will be located within the cage. Position the rebar so that it provides the best support for the main stems and branches.
* Mark the Spots: Use a marker or piece of tape to mark the spots on the cage where you’ll be attaching the rebar. This will help ensure consistent spacing.
3. Attach the Rebar to the Cage
* Secure with Zip Ties or Wire: This is where the magic happens! Using your heavy-duty zip ties or wire, securely attach the rebar to the tomato cage at each of your marked spots.
* Wrap Tightly: Make sure the zip ties or wire are wrapped tightly around both the rebar and the cage. You want a snug fit that won’t allow the rebar to shift or move.
* Multiple Attachment Points: For each piece of rebar, use multiple zip ties or wire wraps along its length. I usually use at least 3-4 attachment points per piece of rebar, spaced evenly.
* Trim Excess: If you’re using zip ties, trim off any excess length after tightening. This will prevent them from snagging on clothing or plants. If you’re using wire, twist the ends together securely and tuck them in to avoid sharp edges.
4. Install the Upgraded Cages in Your Garden
* Choose the Right Location: Select a sunny spot in your garden with well-drained soil. Tomatoes need at least 6-8 hours of sunlight per day to thrive.
* Prepare the Soil: Before planting, amend the soil with compost or other organic matter to improve drainage and fertility.
* Position the Cages: Carefully place the upgraded tomato cages over your tomato plants.
* Drive the Rebar into the Ground: This is crucial for stability! Use a hammer or mallet to drive the rebar into the ground. Aim to drive the rebar at least 12-18 inches deep for maximum support.
* Check for Stability: Once the rebar is in the ground, give the cages a gentle shake to make sure they’re stable and secure. If they wobble, drive the rebar in a little further.
5. Ongoing Maintenance
* Monitor the Plants: As your tomato plants grow, keep an eye on them to make sure they’re properly supported by the cages.
* Add Additional Support (If Needed): If you notice any branches sagging or bending under the weight of the fruit, you can add additional support by tying them to the cage with twine or soft plant ties.
* Inspect the Cages Regularly: Check the zip ties or wire periodically to make sure they’re still secure. Replace any that are broken or damaged.
* Clean and Store: At the end of the growing season, clean the cages and store them in a dry place to protect them from the elements.
Tips for Success
Here are a few extra tips to help you get the most out of your upgraded tomato cages:
* Choose the Right Tomato Variety: Consider the growth habit of your tomato variety when choosing the size and strength of your cages. Indeterminate varieties, which continue to grow and produce fruit throughout the season, will require taller and sturdier cages than determinate varieties, which grow to a fixed size.
* Prune Your Tomato Plants: Pruning can help improve air circulation and reduce the weight on the plant, making it easier for the cages to support. Remove suckers (the small shoots that grow between the main stem and the branches) regularly.
* Water and Fertilize Regularly: Healthy tomato plants are better able to withstand the weight of the fruit. Water deeply and regularly, and fertilize with a balanced tomato fertilizer according to the package directions.
* Protect from Pests and Diseases: Keep an eye out for common tomato pests and diseases, and take steps to control them promptly. Healthy plants are more productive and less likely to be damaged by pests or diseases.
* Consider Using Tomato Clips: Tomato clips are small plastic clips that can be used to attach the tomato stems to the cage. This can provide extra support and prevent the stems from breaking.
Troubleshooting
* Cages Still Wobbling? If your cages are still wobbling even after driving the rebar into the ground, try using longer pieces of rebar or driving them in deeper. You can also add additional support by staking the cages to the ground with wooden stakes.
* Zip Ties Breaking? If your zip ties are breaking, make sure you’re using heavy-duty, UV-resistant zip ties. You can also try using wire instead, which is generally more durable.
* Rebar Bending? If the rebar is bending under the weight of the plants, you may need to use thicker rebar or add more pieces of rebar to each cage.
Alternative Materials
While rebar is my go-to choice for reinforcing tomato cages, here are a few alternative materials you could consider:
* Wooden Stakes: Sturdy wooden stakes
Conclusion
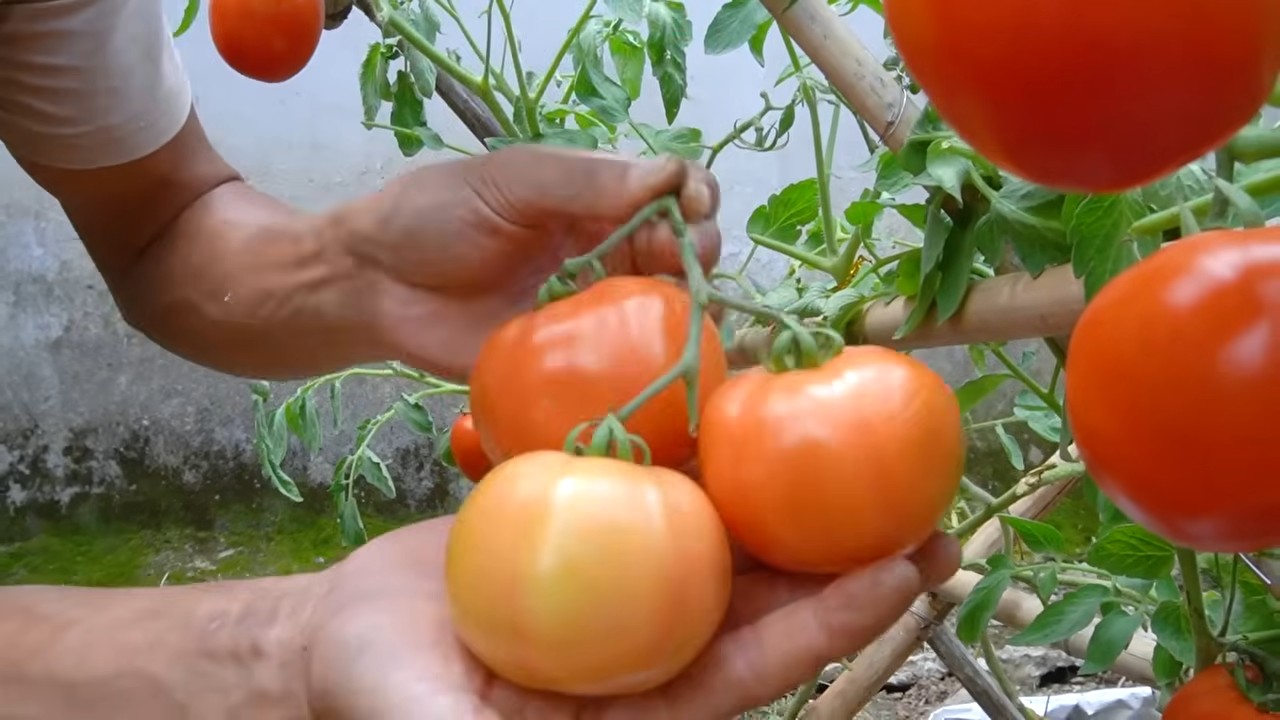
So, there you have it! Mastering these simple yet effective tomato harvest tips can truly transform your gardening experience and ensure you reap the rewards of your hard work. No more prematurely picked, bland tomatoes or fruit left to rot on the vine. By paying attention to the subtle signs of ripeness – the color, the feel, and the gentle tug – you’ll be enjoying the most flavorful, juicy tomatoes imaginable.
But why is this DIY approach a must-try? Because it empowers you to take control of your harvest and enjoy tomatoes at their absolute peak. Store-bought tomatoes, even those labeled “vine-ripened,” often lack the intense flavor and sweetness of a homegrown, perfectly harvested tomato. This is because they are often picked before they are fully ripe to withstand transportation and storage. By using these tomato harvest tips, you bypass that compromise and unlock the full potential of your tomato plants.
Beyond the basic principles, there’s plenty of room for experimentation and personalization. For example, if you’re dealing with a late-season frost threat, you can pick slightly under-ripe tomatoes and bring them indoors to ripen in a paper bag with an apple or banana. The ethylene gas released by these fruits will accelerate the ripening process. Another variation is to consider the specific variety of tomato you’re growing. Heirloom tomatoes, for instance, often have unique color variations and may require a slightly different approach to determining ripeness. Some varieties may develop subtle stripes or a blush of color that indicates they’re ready to pick.
Don’t be afraid to experiment with different harvesting times and techniques to find what works best for you and your garden. Keep a journal to track your observations and note which methods yield the best results. Over time, you’ll develop a keen sense of when your tomatoes are perfectly ripe and ready to be enjoyed.
Ready to elevate your tomato game? We wholeheartedly encourage you to put these tomato harvest tips into practice. The difference in flavor and quality will be undeniable. Imagine sinking your teeth into a sun-warmed, perfectly ripe tomato, bursting with sweetness and tanginess. It’s an experience that store-bought tomatoes simply can’t replicate.
And most importantly, we want to hear about your experiences! Share your successes, your challenges, and any variations you discover in the comments below. Let’s create a community of tomato enthusiasts who are passionate about harvesting the best possible fruit. Your insights could help other gardeners learn and improve their own harvests. So, grab your gardening gloves, head out to your tomato patch, and get ready to experience the joy of perfectly harvested tomatoes! Happy gardening!
Frequently Asked Questions (FAQ)
Q: How do I know when a tomato is ripe?
A: Determining ripeness is key to enjoying the best flavor. Look for a deep, even color that is characteristic of the variety. For red tomatoes, this means a vibrant, uniform red. For yellow or orange varieties, look for a rich, consistent color throughout the fruit. The tomato should also feel slightly soft to the touch but not mushy. A gentle tug should release the tomato easily from the vine. If you have to force it, it’s likely not quite ripe.
Q: What if my tomatoes are green at the end of the season?
A: Don’t despair! Green tomatoes can still be salvaged. If a frost is imminent, harvest all your remaining green tomatoes. You can ripen them indoors by placing them in a paper bag with an apple or banana. The ethylene gas released by these fruits will help to ripen the tomatoes. Alternatively, you can use green tomatoes in various recipes, such as fried green tomatoes or green tomato chutney.
Q: Can I ripen tomatoes on a windowsill?
A: Yes, you can ripen tomatoes on a windowsill, but it’s not the most efficient method. While sunlight can help with ripening, it can also cause the tomatoes to develop uneven coloring or become sunburned. A better option is to ripen them in a paper bag or cardboard box in a cool, dark place. This will help to ensure even ripening and prevent spoilage.
Q: What’s the best time of day to harvest tomatoes?
A: The best time to harvest tomatoes is in the morning, after the dew has dried but before the sun gets too hot. This will help to prevent the tomatoes from becoming stressed and will preserve their flavor. Avoid harvesting tomatoes in the heat of the day, as they may be more susceptible to bruising and damage.
Q: How should I store my harvested tomatoes?
A: Store your harvested tomatoes at room temperature, away from direct sunlight. Refrigerating tomatoes can diminish their flavor and alter their texture. If you have a large harvest, you can preserve tomatoes by canning, freezing, or drying them. Each method has its own advantages and disadvantages, so choose the one that best suits your needs and preferences.
Q: My tomatoes are cracking. What does this mean?
A: Tomato cracking is often caused by inconsistent watering. When tomatoes experience periods of drought followed by heavy watering, they can absorb water too quickly, causing the skin to crack. To prevent cracking, water your tomato plants regularly and consistently, especially during dry spells. Mulching around the plants can also help to retain moisture in the soil.
Q: Some of my tomatoes have blossom end rot. What causes this?
A: Blossom end rot is a condition caused by a calcium deficiency in the developing fruit. It’s often triggered by inconsistent watering, which can interfere with the plant’s ability to absorb calcium from the soil. To prevent blossom end rot, ensure your tomato plants receive consistent watering and amend the soil with calcium-rich materials, such as bone meal or crushed eggshells.
Q: How often should I water my tomato plants?
A: The frequency of watering depends on several factors, including the weather, the type of soil, and the size of the plants. As a general rule, water your tomato plants deeply and regularly, aiming to keep the soil consistently moist but not waterlogged. Check the soil moisture level regularly by sticking your finger into the soil a few inches deep. If the soil feels dry, it’s time to water.
Q: What are some common tomato pests and diseases?
A: Tomato plants are susceptible to various pests and diseases, including aphids, whiteflies, tomato hornworms, blight, and fusarium wilt. To prevent pest and disease problems, choose disease-resistant varieties, practice good sanitation in your garden, and monitor your plants regularly for signs of infestation or infection. If you detect a problem, take action promptly to prevent it from spreading.
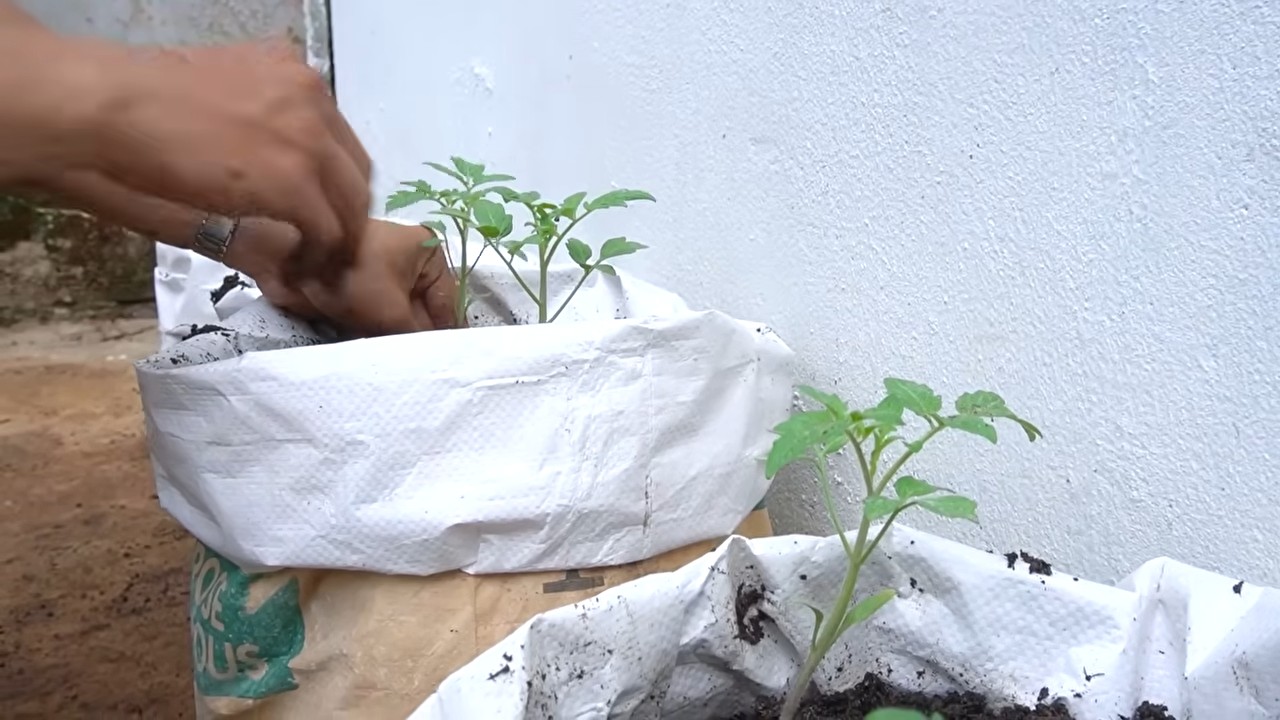
Q: Can I grow tomatoes in containers?
A: Yes, you can successfully grow tomatoes in containers, but it’s important to choose the right size container and provide adequate support for the plants. Select a container that is at least 18 inches in diameter and depth. Use a high-quality potting mix and provide regular watering and fertilization. Choose determinate or bush varieties of tomatoes, as they tend to be more compact and better suited for container growing.

Leave a Comment