

Sweet Potato Nonstop Harvest: Imagine sinking your hands into the soil and pulling out a bounty of sweet potatoes, not just once, but continuously throughout the growing season! Sounds like a gardener’s dream, right? Well, it’s more attainable than you might think. For centuries, cultures around the globe, particularly in South America where sweet potatoes originated, have understood the incredible resilience and productivity of this vibrant root vegetable. They’ve developed ingenious methods to maximize their yields, and now, I’m excited to share some of those secrets with you.
In today’s world, where sustainability and fresh, homegrown food are more important than ever, learning how to achieve a sweet potato nonstop harvest is a game-changer. Forget relying solely on a single harvest at the end of the season. This DIY guide will equip you with simple yet effective tricks and hacks to extend your sweet potato production, ensuring a steady supply of these nutritious and delicious tubers for your table. Whether you’re a seasoned gardener or just starting out, these tips will help you unlock the full potential of your sweet potato patch and enjoy a truly rewarding gardening experience. Let’s get digging!

Grow Sweet Potatoes Like a Pro: The Nonstop Harvest Method!
Hey there, fellow gardening enthusiasts! I’m so excited to share a game-changing technique I’ve discovered for growing sweet potatoes – the nonstop harvest method! Forget waiting for the end of the season to dig up your entire crop. This method allows you to harvest sweet potatoes gradually, enjoying fresh spuds throughout the growing season. It’s perfect for smaller gardens or anyone who wants a continuous supply of these delicious and nutritious root vegetables.
What You’ll Need
Before we dive in, let’s gather our supplies. This is a pretty straightforward project, and you probably have many of these items already:
* Sweet Potato Slips: These are sprouted sweet potatoes, and they’re what you’ll plant. You can buy them online or at your local nursery. You can even grow your own from a sweet potato you bought at the grocery store!
* Large Container or Raised Bed: We’re talking big! Think at least 20 gallons per plant. Sweet potatoes need room to spread out. A half wine barrel, a large plastic tub, or a well-constructed raised bed will work perfectly.
* Well-Draining Soil: Sweet potatoes thrive in loose, well-draining soil. A mix of compost, potting soil, and perlite or vermiculite is ideal. Avoid heavy clay soils, as they can lead to rot.
* Watering Can or Hose: Essential for keeping your sweet potatoes hydrated.
* Gardening Gloves: To protect your hands, of course!
* Trowel or Small Shovel: For planting and harvesting.
* Mulch (Optional): Helps retain moisture and suppress weeds. Straw, wood chips, or shredded leaves work great.
* Fertilizer (Optional): A balanced fertilizer can boost growth, but it’s not strictly necessary if your soil is already rich in nutrients.
Preparing Your Container or Raised Bed
The key to a successful nonstop harvest is creating the right environment for your sweet potatoes to thrive. Here’s how to get your container or raised bed ready:
* Choose the Right Location: Sweet potatoes need at least 6-8 hours of direct sunlight per day. Pick a spot that gets plenty of sunshine.
* Ensure Proper Drainage: Make sure your container has drainage holes. If you’re using a raised bed, ensure the soil underneath drains well.
* Fill with Soil: Fill your container or raised bed with your well-draining soil mix. Leave a few inches of space at the top.
* Water Thoroughly: Water the soil until it’s evenly moist but not soggy.
Planting Your Sweet Potato Slips
Now for the fun part – planting! Here’s how to get your sweet potato slips off to a great start:
1. Prepare the Slips: Gently separate the slips if they’re tangled together. If the roots are very long, you can trim them slightly.
2. Dig a Hole: Use your trowel or small shovel to dig a hole deep enough to bury the roots of the slip, leaving the leaves above the soil.
3. Plant the Slip: Place the slip in the hole and gently backfill with soil. Press the soil down lightly to secure the slip.
4. Space the Slips: If you’re planting multiple slips in the same container or raised bed, space them at least 12-18 inches apart.
5. Water Well: Water the newly planted slips thoroughly.
6. Mulch (Optional): Apply a layer of mulch around the base of the plants to help retain moisture and suppress weeds.
The Nonstop Harvest Technique: The Magic Begins!
This is where the magic happens! Instead of waiting for the entire plant to mature, we’ll be carefully harvesting individual sweet potatoes as they reach a usable size.
1. Wait for Growth: Give your sweet potato plants a few weeks to establish themselves and start growing vigorously. You’ll know they’re ready when you see plenty of healthy foliage.
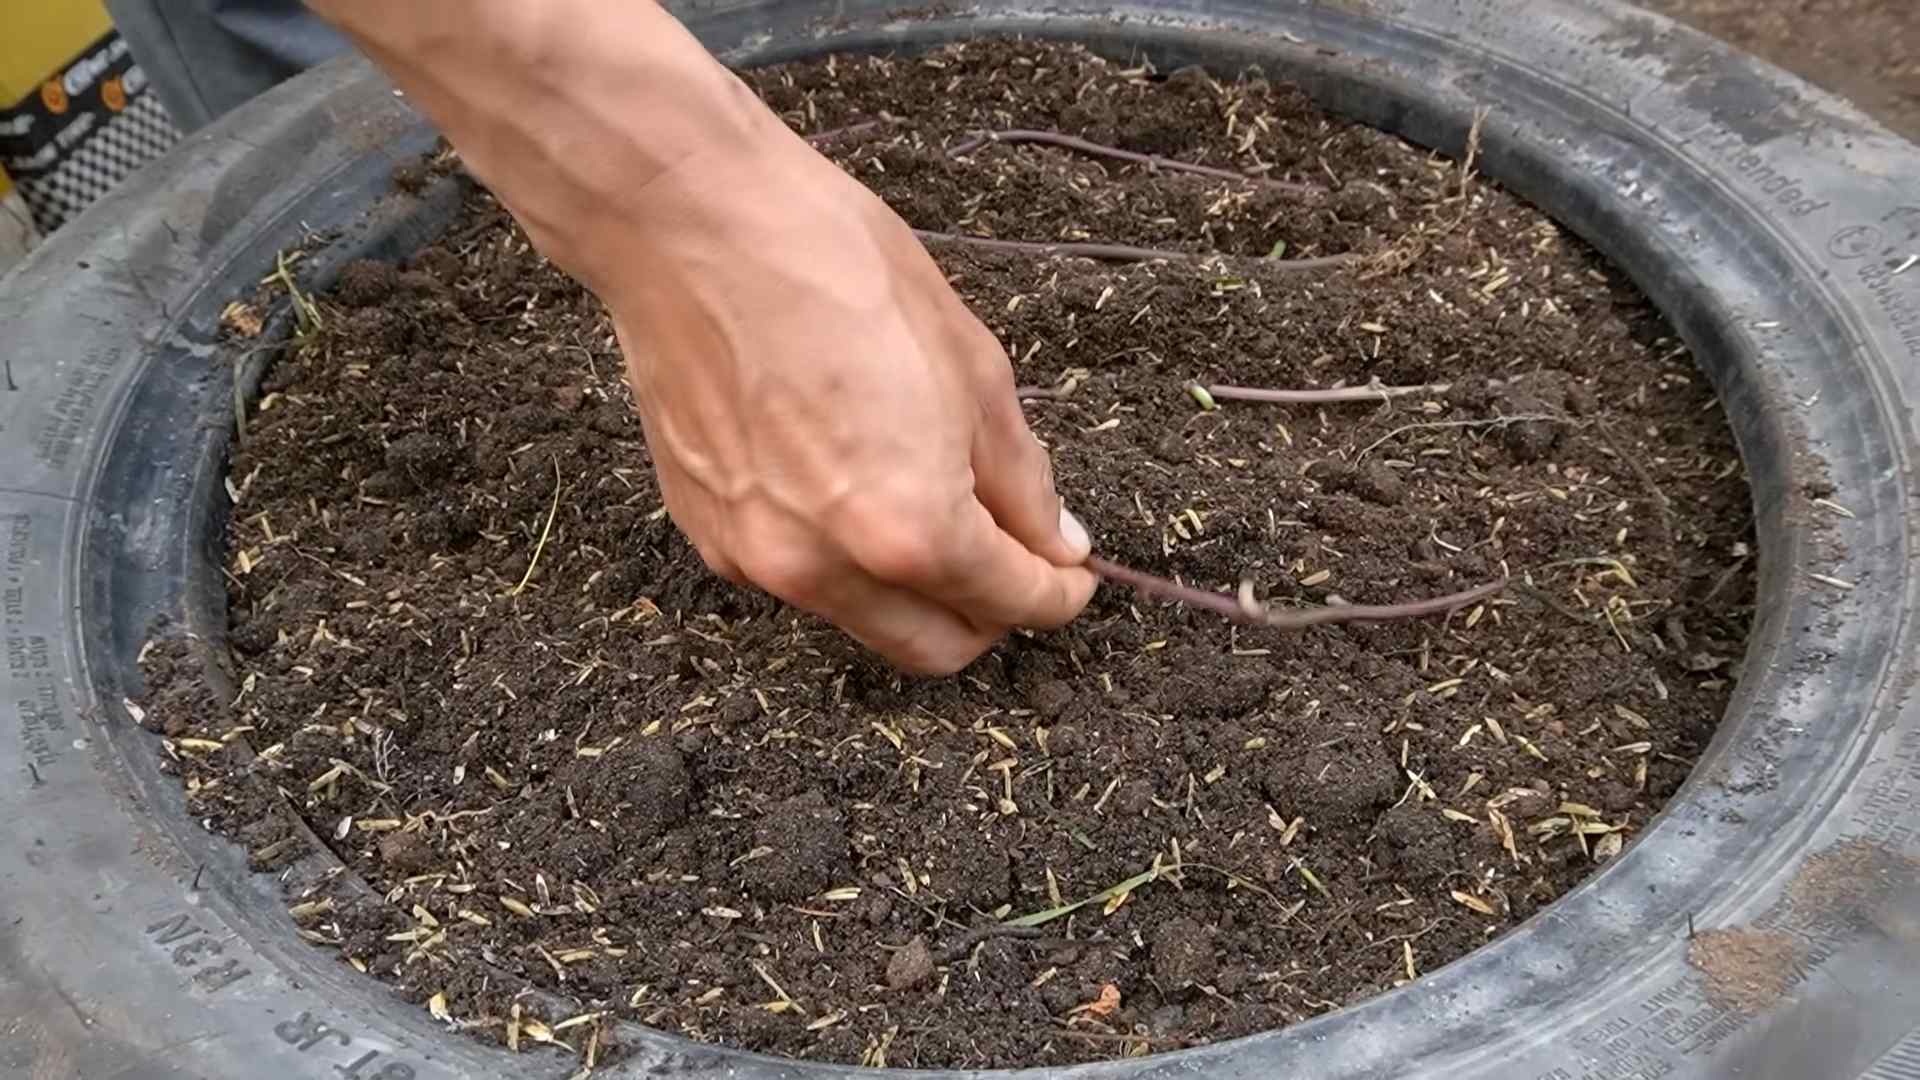
2. Gently Explore: After about 60-75 days, carefully feel around in the soil near the base of the plant. You should be able to feel the developing sweet potatoes.
3. Selective Harvesting: Choose the largest sweet potatoes that you can easily reach without disturbing the rest of the plant.
4. Careful Extraction: Gently dig around the chosen sweet potato with your hands or a small trowel. Be careful not to damage the other roots or sweet potatoes.
5. Harvest and Enjoy: Carefully lift the sweet potato out of the soil. Brush off any excess dirt and enjoy your fresh harvest!
6. Refill the Hole: After harvesting, gently refill the hole with soil and press it down lightly. This will help prevent the remaining sweet potatoes from drying out.
7. Repeat: Continue to check for and harvest sweet potatoes every few weeks throughout the growing season.
Tips for Success
To ensure a bountiful and continuous harvest, keep these tips in mind:
* Water Regularly: Sweet potatoes need consistent moisture, especially during hot weather. Water deeply whenever the soil feels dry to the touch.
* Fertilize (Optional): If your plants are looking pale or growing slowly, you can apply a balanced fertilizer according to the package directions. Avoid over-fertilizing, as this can lead to excessive foliage growth at the expense of sweet potato development.
* Control Pests and Diseases: Keep an eye out for common sweet potato pests like aphids and sweet potato weevils. Treat any infestations promptly with organic pest control methods. Also, ensure good air circulation to prevent fungal diseases.
* Cure Your Harvest: After harvesting, cure your sweet potatoes for about a week in a warm, humid place (around 85°F and 90% humidity). This will help them develop their sweetness and improve their storage life. You can use a greenhouse, a sunny porch, or even a cardboard box with a humidifier.
* Store Properly: Store cured sweet potatoes in a cool, dry, and dark place (around 55-60°F). They should last for several months.
Troubleshooting
Even with the best care, you might encounter a few challenges along the way. Here are some common problems and how to address them:
* Yellowing Leaves: This could indicate a nutrient deficiency, overwatering, or underwatering. Check the soil moisture and consider fertilizing with a balanced fertilizer.
* Slow Growth: This could be due to insufficient sunlight, poor soil, or cool temperatures. Ensure your plants are getting enough sunlight and consider amending the soil with compost.
* Rotting Sweet Potatoes: This is usually caused by overwatering or poor drainage. Ensure your soil is well-draining and avoid overwatering.
* Pest Infestations: Treat any pest infestations promptly with organic pest control methods.
Why This Method Works So Well
The beauty of the nonstop harvest method lies in its simplicity and efficiency. Here’s why it’s so effective:
* Continuous Supply: You don’t have to wait until the end of the season to enjoy fresh sweet potatoes. You can harvest them gradually, providing a continuous supply throughout the growing season.
* Space-Saving: This method is perfect for smaller gardens or containers, as you don’t need to dedicate a large area to a single harvest.
* Reduced Waste: By harvesting only the sweet potatoes you need, you minimize the risk of spoilage and waste.
* Extended Harvest Season: You can extend your harvest season by starting your sweet potato slips indoors early and protecting them from frost.
Experiment and Adapt
Gardening is all about experimentation! Don’t be afraid to try different varieties of sweet potatoes, adjust your watering and fertilizing schedule, and adapt the nonstop harvest method to suit your specific growing conditions.
I’ve found that this method works incredibly well for me, and I’m confident that it will work for you too. So, grab your sweet potato slips, prepare your container or raised bed, and get ready to enjoy a continuous harvest of delicious and nutritious sweet potatoes! Happy gardening!
Conclusion
So, there you have it! The secret to a near-endless supply of sweet potatoes, right from your own backyard (or even balcony!). This DIY trick for a sweet potato nonstop harvest isn’t just about saving money; it’s about connecting with the food you eat, reducing waste, and experiencing the sheer joy of watching life spring forth from something you nurtured. Forget those expensive grocery store sweet potatoes that may have traveled thousands of miles – imagine the satisfaction of harvesting your own, knowing exactly where they came from and how they were grown.
This method, focusing on propagating slips from existing sweet potatoes, offers a sustainable and rewarding gardening experience. It’s a fantastic project for families, a great way to teach children about plant life cycles, and a fulfilling hobby for anyone interested in self-sufficiency. The beauty of this technique lies in its simplicity and adaptability. You don’t need acres of land or specialized equipment. A sunny windowsill, a jar of water, and a single sweet potato are all you need to embark on this horticultural adventure.
But the fun doesn’t stop there! Feel free to experiment with different varieties of sweet potatoes. Try growing Beauregard, known for its vibrant orange flesh, or perhaps a Japanese sweet potato with its creamy white interior. You can even try growing ornamental sweet potato vines alongside your edible varieties for a beautiful and productive display. Consider using different potting mixes to see which yields the best results in your specific climate and growing conditions. You can also experiment with different methods of hardening off your slips before transplanting them outdoors. Some gardeners prefer to gradually expose them to sunlight over a week, while others opt for a shorter, more intense hardening-off period.
Don’t be afraid to get creative with your sweet potato growing setup. If you live in an apartment, consider using vertical gardening techniques to maximize your space. You can also try growing sweet potatoes in containers on your patio or balcony. Just make sure to choose a container that is large enough to accommodate the plant’s root system.
The possibilities are truly endless! The key is to embrace the learning process, observe your plants closely, and adapt your approach as needed. Remember, gardening is a journey, not a destination. There will be successes and failures along the way, but each experience will teach you something valuable.
We wholeheartedly encourage you to give this DIY trick a try. It’s a simple, effective, and incredibly rewarding way to enjoy a continuous supply of delicious and nutritious sweet potatoes. Once you’ve harvested your first batch, we’d love to hear about your experience! Share your photos, tips, and stories in the comments section below. Let’s build a community of sweet potato enthusiasts and learn from each other’s successes and challenges. Happy growing!
Frequently Asked Questions (FAQ)
What kind of sweet potato should I use to grow slips?
You can use any sweet potato you find at the grocery store, but organic sweet potatoes are generally recommended. Non-organic sweet potatoes may have been treated with chemicals to prevent sprouting, which can hinder slip production. However, even non-organic sweet potatoes can often be coaxed into producing slips. If you have access to sweet potatoes from a local farmer or garden, those are also excellent choices. Experiment with different varieties to see which ones thrive best in your area.
How long does it take for sweet potato slips to grow?
The time it takes for slips to grow can vary depending on several factors, including the variety of sweet potato, the temperature, and the amount of light. Generally, you can expect to see slips emerging within 2-4 weeks. Keep the sweet potato in a warm, sunny location to encourage faster growth. Ensure the water is changed regularly to prevent mold and bacteria buildup.
How do I know when the sweet potato slips are ready to be transplanted?
The slips are ready to be transplanted when they are about 6-8 inches long and have developed a good root system. The roots should be at least an inch or two long. Gently remove the slips from the sweet potato, being careful not to damage the roots. You can either plant them directly into the garden or pot them up in small containers to give them a head start.
What kind of soil is best for growing sweet potatoes?
Sweet potatoes prefer well-drained, sandy loam soil. They don’t do well in heavy clay soil, which can become waterlogged and prevent the roots from developing properly. If you have clay soil, amend it with plenty of organic matter, such as compost or well-rotted manure, to improve drainage. The ideal soil pH for sweet potatoes is between 5.5 and 6.5.
How much sun do sweet potatoes need?
Sweet potatoes need at least 6-8 hours of direct sunlight per day to thrive. Choose a sunny location in your garden or on your patio or balcony. If you are growing sweet potatoes indoors, supplement with grow lights if necessary. Insufficient sunlight can result in leggy growth and reduced yields.
How often should I water sweet potatoes?
Water sweet potatoes regularly, especially during dry periods. Keep the soil consistently moist, but avoid overwatering, which can lead to root rot. Water deeply and less frequently, rather than shallowly and more often. Mulching around the plants can help to retain moisture in the soil.
What are some common pests and diseases that affect sweet potatoes?
Some common pests that affect sweet potatoes include sweet potato weevils, flea beetles, and aphids. Diseases that can affect sweet potatoes include stem rot, black rot, and scurf. Practice good garden hygiene to prevent pest and disease problems. Remove any infected plants promptly and dispose of them properly. Consider using organic pest control methods, such as neem oil or insecticidal soap, to control pests.
Can I grow sweet potatoes in containers?
Yes, you can grow sweet potatoes in containers, but you will need a large container to accommodate the plant’s root system. Choose a container that is at least 20 gallons in size. Make sure the container has drainage holes to prevent waterlogging. Use a well-draining potting mix and water regularly.
How do I harvest sweet potatoes?
Sweet potatoes are typically ready to harvest about 90-120 days after planting. The leaves will start to turn yellow and the vines will begin to die back. To harvest, carefully dig around the plants with a garden fork, being careful not to damage the sweet potatoes. Gently lift the sweet potatoes from the soil and brush off any excess dirt.
How do I cure sweet potatoes after harvesting?
Curing sweet potatoes is essential for improving their flavor and storage life. To cure sweet potatoes, place them in a warm, humid location (80-85°F and 85-90% humidity) for about 7-10 days. This allows the skins to harden and the starches to convert to sugars. After curing, store the sweet potatoes in a cool, dry, and well-ventilated location.
Can I save slips from my harvest to grow more sweet potatoes next year?
Absolutely! This is the beauty of the sweet potato nonstop harvest method. You can save slips from your harvest to start the process all over again next year. Simply select healthy, disease-free sweet potatoes and store them in a cool, dry place until it’s time to start growing slips again. This creates a sustainable cycle of sweet potato production in your garden.
Leave a Comment