

Stainless steel oil trick – sounds intriguing, right? I bet you’re picturing gleaming, fingerprint-free appliances already! For generations, keeping our homes sparkling has been a point of pride, and while modern cleaners offer convenience, sometimes the simplest solutions are the most effective. Think about it: our grandmothers likely didn’t have a cabinet full of specialized sprays, yet their kitchens often radiated a timeless shine. They relied on ingenuity and readily available resources, a tradition we’re happily reviving!
Let’s face it, stainless steel appliances are gorgeous, but they’re also magnets for smudges, fingerprints, and water spots. It’s a daily battle to keep them looking their best. That’s where this amazing stainless steel oil trick comes in. It’s a game-changer for anyone tired of endless wiping and expensive cleaners that promise the world but often fall short. This DIY hack is not only incredibly easy and affordable, but it also leaves your stainless steel surfaces with a protective layer that repels future smudges. I’m excited to share this simple yet effective method that will save you time, money, and frustration, leaving your kitchen looking effortlessly polished!
Transform Your Stainless Steel: The Ultimate Oil Polishing Guide
Hey there, fellow DIY enthusiasts! Are you tired of looking at your stainless steel appliances covered in fingerprints, smudges, and water spots? I know I was! It felt like no matter how much I cleaned, they never truly shined. That’s when I stumbled upon the magic of oil polishing, and let me tell you, it’s a game-changer. This simple hack will leave your stainless steel looking brand new, and the best part? It’s incredibly easy and affordable. Let’s dive in!
What You’ll Need
Before we get started, gather these essential supplies. Trust me, having everything ready will make the process smooth and enjoyable.
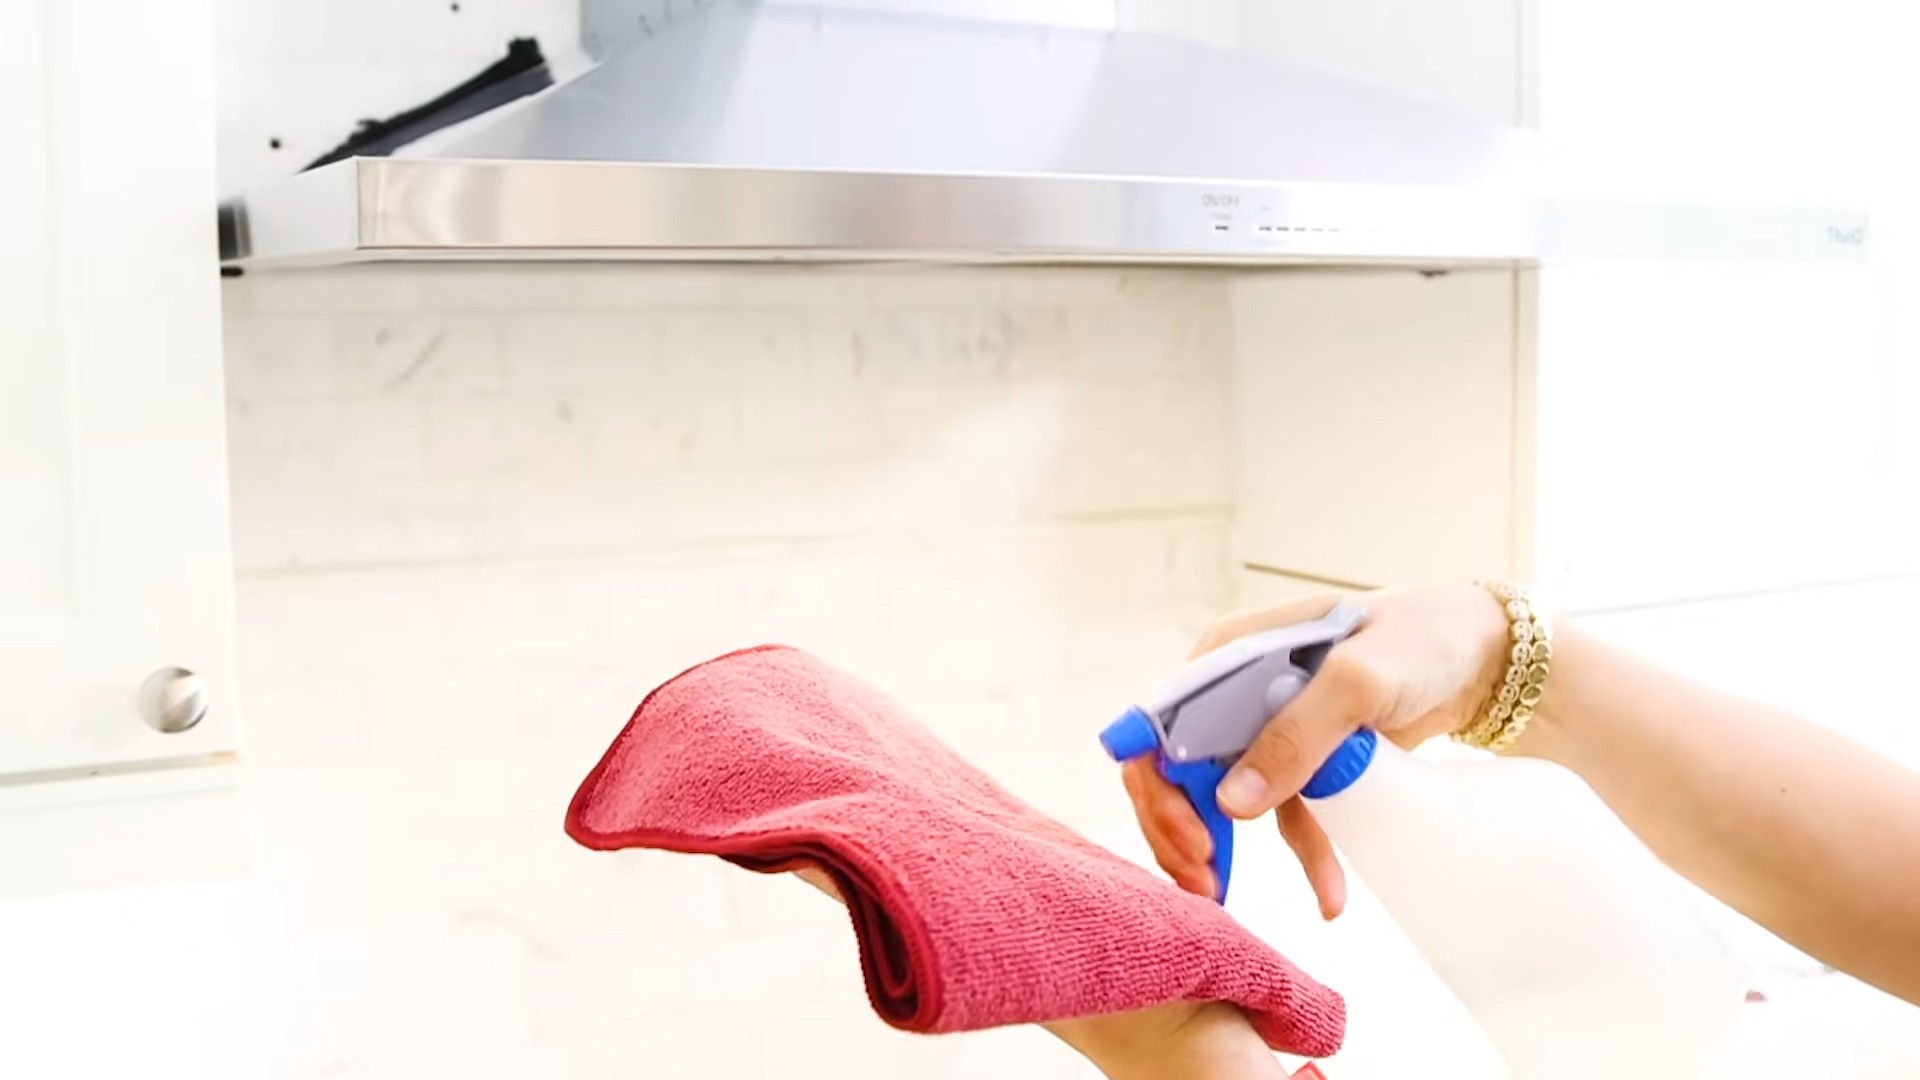
* Microfiber Cloths: You’ll need at least two – one for applying the oil and one for buffing. Microfiber is key because it won’t leave lint or scratches.
* Your Choice of Oil: Mineral oil is the classic choice, and it’s what I usually use. It’s food-safe, readily available, and does a fantastic job. However, you can also use baby oil, olive oil (use sparingly!), or even coconut oil (melted, of course). Just be mindful of the potential for residue with olive and coconut oil.
* Spray Bottle (Optional): If you’re using a larger area, a spray bottle can help distribute the oil more evenly.
* Dish Soap and Water: For pre-cleaning.
* Soft Sponge or Cloth: For pre-cleaning.
Prepping Your Stainless Steel: The Foundation for a Flawless Finish
Before we even think about oil, we need to make sure the surface is clean. This is crucial because any dirt or grime will just get smeared around, defeating the purpose of our polishing efforts.
1. Wash with Soap and Water: Fill your sink with warm, soapy water. Using a soft sponge or cloth, thoroughly wash the stainless steel surface. Pay special attention to areas with stubborn stains or grease.
2. Rinse Thoroughly: Rinse away all traces of soap with clean water. Any soap residue will interfere with the oil’s ability to create a protective barrier.
3. Dry Completely: This is super important! Use a clean, dry microfiber cloth to completely dry the stainless steel. Water spots will ruin the final result, so take your time and make sure it’s bone dry.
Applying the Oil: The Heart of the Transformation
Now for the fun part! This is where the magic happens. Remember, a little oil goes a long way, so start with a small amount and add more as needed.
1. Apply a Small Amount of Oil: Pour a *very* small amount of your chosen oil onto a clean microfiber cloth. I’m talking just a few drops – about the size of a dime. If you’re using a spray bottle, lightly mist the surface.
2. Wipe in the Direction of the Grain: This is key to achieving a uniform and professional-looking finish. Look closely at your stainless steel – you’ll notice faint lines running in one direction. Wipe the oil along these lines, using long, even strokes.
3. Work in Sections: If you’re working on a large appliance like a refrigerator, divide it into smaller sections. This will help you ensure even coverage and prevent the oil from drying out before you have a chance to buff it.
4. Don’t Overdo It: Resist the urge to apply too much oil. A thin, even coat is all you need. Too much oil will leave a greasy residue that’s difficult to remove.
Buffing to Perfection: Unveiling the Shine
Buffing is what really brings out the shine and removes any excess oil. This step is just as important as applying the oil, so don’t skip it!
1. Grab a Clean Microfiber Cloth: Use a fresh, clean microfiber cloth for buffing.
2. Buff in the Direction of the Grain: Just like with the oil application, buff in the direction of the grain. Use firm, even pressure to remove any excess oil and create a smooth, polished surface.
3. Keep Buffing: Continue buffing until the surface is no longer oily to the touch and has a beautiful, even shine. This may take a few minutes, but it’s worth the effort.
4. Inspect and Repeat (If Necessary): Step back and admire your work! If you notice any streaks or areas that need more attention, apply a tiny bit more oil and buff again.
Troubleshooting: Common Issues and How to Fix Them
Even with the best instructions, sometimes things don’t go exactly as planned. Here are a few common issues you might encounter and how to fix them:
* Streaks: Streaks are usually caused by using too much oil or not buffing thoroughly enough. Try buffing the area again with a clean microfiber cloth. If that doesn’t work, lightly dampen the cloth with water and buff again.
* Greasy Residue: If you’ve applied too much oil, you might be left with a greasy residue. Use a clean microfiber cloth to wipe away as much of the excess oil as possible. If the residue persists, try washing the area with a mild dish soap and water, then drying and re-applying a very small amount of oil.
* Uneven Shine: An uneven shine can be caused by uneven application of the oil or inconsistent buffing. Make sure you’re applying the oil in a thin, even coat and buffing with consistent pressure.
* Dull Spots: Dull spots might indicate that the area wasn’t properly cleaned beforehand. Try cleaning the area again with soap and water, drying thoroughly, and then re-applying the oil and buffing.
Maintaining Your Shine: Keeping Your Stainless Steel Looking Its Best
Now that you’ve achieved that beautiful shine, you’ll want to keep it that way! Here are a few tips for maintaining your stainless steel:
* Regular Cleaning: Wipe down your stainless steel appliances regularly with a damp microfiber cloth to remove fingerprints and smudges.
* Avoid Abrasive Cleaners: Abrasive cleaners can scratch the surface of your stainless steel, so avoid using them.
* Re-Apply Oil as Needed: Depending on how often you use your appliances, you may need to re-apply the oil every few weeks or months. You’ll know it’s time when the shine starts to fade or you notice more fingerprints and smudges.
* Use Stainless Steel Cleaners Sparingly: While stainless steel cleaners can be effective, they can also be harsh on the surface. Use them sparingly and always follow the manufacturer’s instructions. I find the oil trick works better and is less harsh.
Choosing the Right Oil: A Deeper Dive
I mentioned different oil options earlier, but let’s explore them in a bit more detail:
* Mineral Oil: This is my go-to choice. It’s food-safe, odorless, and creates a beautiful, long-lasting shine. It’s also relatively inexpensive and readily available at most drugstores and supermarkets.
* Baby Oil: Baby oil is essentially mineral oil with added fragrance. It works just as well as mineral oil, but some people prefer the added scent.
* Olive Oil: Olive oil can be used, but use it sparingly! It can leave a sticky residue if you use too much. Also, be aware that olive oil can attract dust and dirt. If you choose to use olive oil, make sure to use a high-quality extra virgin olive oil and apply it very sparingly.
* Coconut Oil: Similar to olive oil, coconut oil can be used, but with caution. Melt it completely before applying, and use a very small amount. Coconut oil can also leave a residue, so buff thoroughly.
* Commercial Stainless Steel Polishes: While I prefer the oil method, there are also commercial stainless steel polishes available. If you choose to use one of these, be sure to read the instructions carefully and test it on an inconspicuous area first.
Safety First: A Few Important Reminders
While this DIY project is relatively safe, it’s always a good idea to keep a few safety precautions in mind:
* Keep Oil Away from Heat Sources: Oil is flammable, so keep it away from heat sources like stoves and ovens.
* Use in a Well-Ventilated Area: While the oils we’re using are generally safe, it’s always a good idea to work in a well-ventilated area.
* Keep Out of Reach of Children and Pets: Store your oil and cleaning supplies out of reach of children and pets.
* Dispose of Oily Rags Properly: Oily rags can be a fire hazard, so dispose of them properly. The best way to do this is to lay them flat to dry completely before discarding them in a trash can.
Beyond Appliances: Where Else Can You Use This Trick?
This oil polishing trick isn’t just for appliances! You can use it on a variety of stainless steel surfaces, including:

Conclusion
So, there you have it! This simple yet incredibly effective stainless steel oil trick is a game-changer for anyone who wants to keep their stainless steel appliances looking pristine and fingerprint-free. It’s more than just a cleaning hack; it’s a way to elevate the overall appearance of your kitchen, making it feel cleaner, brighter, and more inviting.
Why is this a must-try? Because it’s easy, affordable, and uses readily available materials. Forget about expensive stainless steel cleaners filled with harsh chemicals. All you need is a little bit of oil – olive oil, mineral oil, even baby oil will do in a pinch – and a microfiber cloth. The process is quick, the results are immediate, and the protective layer of oil helps to repel future smudges and fingerprints.
Beyond the basic application, there are a few variations you can experiment with to find what works best for your specific needs and preferences. For example, some people prefer to use a very small amount of lemon essential oil mixed with their chosen oil for a subtle, fresh scent. Others find that using a slightly damp microfiber cloth for the initial cleaning step helps to remove stubborn grime before applying the oil. You can also adjust the amount of oil you use based on the size and type of your stainless steel appliance. For larger surfaces like refrigerators, you might need a bit more oil, while smaller appliances like toasters might only require a few drops.
Don’t be afraid to experiment! The beauty of this DIY trick is its adaptability. The key is to start with a small amount of oil and gradually add more as needed, always buffing thoroughly to avoid any greasy residue. Remember to always wipe in the direction of the grain of the stainless steel to achieve the best results and prevent streaking.
We wholeheartedly encourage you to try this stainless steel oil trick on your own appliances. We are confident that you’ll be amazed by the difference it makes. It’s a simple, cost-effective way to maintain the beauty and longevity of your stainless steel, keeping it looking its best for years to come.
But don’t just take our word for it! We want to hear about your experiences. Did you find that a particular type of oil worked better than others? Did you discover any helpful tips or tricks of your own? Share your thoughts and photos in the comments below. Let’s create a community of stainless steel enthusiasts who are dedicated to keeping their kitchens sparkling clean and beautiful! Your feedback will not only help other readers but also inspire us to continue sharing valuable DIY solutions. So go ahead, give it a try, and let us know what you think!
Frequently Asked Questions (FAQ)
What kind of oil is best for cleaning stainless steel?
While several types of oil can be used, mineral oil is often considered the gold standard for cleaning and protecting stainless steel. It’s odorless, colorless, and food-safe, making it a great choice for kitchen appliances. Olive oil is another popular option, readily available in most households, but be sure to use it sparingly and buff thoroughly to avoid any sticky residue. Baby oil can also work in a pinch, but it may leave a slightly stronger scent. Ultimately, the best oil is the one you have on hand and that you find provides the desired results without leaving a greasy film. Experiment to see what works best for you!
How often should I apply oil to my stainless steel appliances?
The frequency of application depends on how often you use your appliances and how much they are exposed to fingerprints and smudges. Generally, applying oil once a week is sufficient to maintain a clean and protected surface. However, if you notice that your appliances are starting to look dull or are accumulating fingerprints more quickly, you may need to apply oil more frequently. Conversely, if your appliances are not heavily used, you may be able to get away with applying oil every two weeks or even once a month. Observe your appliances and adjust the frequency accordingly.
Will this trick work on all types of stainless steel?
This trick is generally effective on most types of stainless steel, but it’s always a good idea to test it in an inconspicuous area first, especially if you have a unique or specialized finish. Some stainless steel appliances may have a protective coating that could react differently to oil. By testing a small area first, you can ensure that the oil doesn’t damage or discolor the surface. If you’re unsure about the type of stainless steel you have, consult the manufacturer’s instructions or contact customer support for guidance.
Can I use this trick on my stainless steel sink?
Yes, you can use this trick on your stainless steel sink! In fact, it can be particularly beneficial for sinks, as they are often exposed to water spots and food residue. After cleaning your sink thoroughly, apply a small amount of oil and buff it in well. This will help to repel water and prevent water spots from forming. However, be extra careful not to leave any excess oil in the sink, as it could make the surface slippery.
What if I accidentally use too much oil?
If you accidentally use too much oil, don’t panic! Simply grab a clean, dry microfiber cloth and buff the surface thoroughly until all the excess oil is removed. You may need to repeat this process several times to achieve the desired result. If the surface still feels greasy, you can try using a mild dish soap diluted in water to remove the excess oil, followed by a thorough rinsing and drying.
Does this trick attract dust?
While oil can potentially attract dust, the key is to use a very small amount and buff it in thoroughly. When applied correctly, the oil should create a thin, protective layer that repels fingerprints and smudges without leaving a sticky residue that attracts dust. If you find that your appliances are accumulating dust more quickly after applying oil, try using less oil or buffing the surface more vigorously.
Is this trick safe for food preparation surfaces?
If you are using mineral oil, it is generally considered food-safe. However, it’s always a good idea to wipe down any food preparation surfaces with a clean, damp cloth before preparing food. If you are using olive oil, be sure to use it sparingly and buff thoroughly to avoid any sticky residue that could contaminate your food. Avoid using baby oil on food preparation surfaces, as it is not food-safe.
Can I use this trick on other metal surfaces?
While this trick is primarily designed for stainless steel, it may also work on other metal surfaces, such as chrome or brushed nickel. However, it’s always a good idea to test it in an inconspicuous area first to ensure that it doesn’t damage or discolor the surface. Avoid using this trick on surfaces that are painted or coated with a protective finish, as it could potentially damage the coating.
What are the benefits of using oil instead of commercial stainless steel cleaners?
There are several benefits to using oil instead of commercial stainless steel cleaners. First, oil is often more affordable and readily available than commercial cleaners. Second, oil is a natural and non-toxic alternative to harsh chemicals found in many commercial cleaners. Third, oil can provide a longer-lasting protective layer that repels fingerprints and smudges more effectively than some commercial cleaners. Finally, using oil is a simple and easy way to maintain the beauty of your stainless steel appliances without the need for specialized equipment or training.
How do I clean my stainless steel before applying the oil?
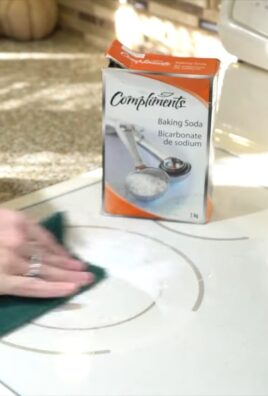
Before applying the oil, it’s important to clean your stainless steel appliances thoroughly to remove any dirt, grime, or fingerprints. You can use a mild dish soap diluted in warm water to clean the surface. Apply the soapy water with a soft cloth or sponge, and then rinse thoroughly with clean water. Dry the surface completely with a clean, dry microfiber cloth before applying the oil. For stubborn stains or grime, you can try using a paste of baking soda and water to gently scrub the surface.

Leave a Comment