

Spicy chili growing tips are what you need to transform your garden into a fiery fiesta! Have you ever dreamed of harvesting your own vibrant, tongue-tingling chilies, ready to spice up your favorite dishes? Forget those bland, store-bought peppers – imagine the satisfaction of nurturing your own chili plants from tiny seedlings to bountiful producers.
The history of chili peppers is as rich and vibrant as their flavor. Originating in South America, chilies have been cultivated for thousands of years, playing a vital role in culinary traditions and even medicinal practices across various cultures. From the ancient Aztecs to modern-day foodies, the allure of the chili pepper has endured.
But let’s be honest, growing chilies can sometimes feel like a fiery challenge! That’s where these DIY tricks and hacks come in. I’m here to share my tried-and-true secrets to help you cultivate a thriving chili garden, even if you’re a beginner. We’ll cover everything from choosing the right varieties and preparing your soil to mastering watering techniques and pest control. With these spicy chili growing tips, you’ll be well on your way to a bumper crop of flavorful peppers that will add a kick to every meal. So, grab your gardening gloves, and let’s get started!

Growing Fiery Hot Peppers: My Foolproof DIY Guide
Hey fellow chiliheads! I’m so excited to share my tried-and-true method for growing the most scorching hot peppers right in your own backyard (or balcony!). Forget those bland, store-bought peppers – we’re talking serious heat, flavor, and bragging rights. This guide is packed with everything I’ve learned over the years, from seed starting to harvesting, so you can cultivate your own chili pepper paradise. Let’s get started!
Choosing Your Chili Pepper Varieties
Before we dive into the nitty-gritty, let’s talk peppers! The world of chili peppers is vast and exciting, ranging from mild jalapenos to face-melting Carolina Reapers. Here’s a quick rundown to help you choose the right varieties for you:
* Mild Heat (Scoville Heat Units – SHU: 0-5,000): Jalapenos, Poblano, Anaheim. These are great for adding a touch of warmth to your dishes without overwhelming your taste buds.
* Medium Heat (SHU: 5,000-50,000): Serrano, Cayenne, Tabasco. These peppers pack a decent punch and are perfect for spicing up salsas, sauces, and stir-fries.
* Hot Heat (SHU: 50,000-100,000): Thai Chili, Bird’s Eye Chili. These little guys are small but mighty! Use them sparingly if you’re not a seasoned chili eater.
* Very Hot Heat (SHU: 100,000-500,000): Habanero, Scotch Bonnet. Now we’re getting serious! These peppers have a fruity flavor with intense heat. Handle with care!
* Extreme Heat (SHU: 500,000+): Ghost Pepper (Bhut Jolokia), Carolina Reaper, Trinidad Scorpion. These are the kings (and queens) of heat! Only for the truly adventurous.
My personal favorites? I love growing jalapenos for everyday use, habaneros for a fruity kick, and a few ghost peppers just to impress my friends (and scare myself a little!).
Starting Your Chili Pepper Seeds
Starting your seeds indoors is crucial, especially if you live in a region with a shorter growing season. This gives your peppers a head start and ensures you’ll have a bountiful harvest.
What you’ll need:
* Chili pepper seeds (obviously!)
* Seed starting trays or small pots
* Seed starting mix (a light, well-draining soil)
* A heat mat (optional, but highly recommended)
* A grow light (also optional, but helps prevent leggy seedlings)
* A spray bottle
Step-by-step instructions:
1. Prepare your seed starting trays: Fill your trays or pots with seed starting mix, leaving about half an inch of space at the top. Gently pat down the soil.
2. Sow your seeds: Place 2-3 seeds in each cell or pot, about ¼ inch deep. Cover the seeds with a thin layer of soil.
3. Water gently: Use a spray bottle to moisten the soil. Avoid overwatering, as this can lead to damping off (a fungal disease that kills seedlings).
4. Provide warmth: Place your seed starting trays on a heat mat. Chili pepper seeds germinate best at temperatures between 80-90°F (27-32°C).
5. Provide light: If you’re using a grow light, position it a few inches above the trays. If not, place the trays in a sunny windowsill.
6. Maintain moisture: Keep the soil consistently moist, but not soggy. Check the soil daily and water as needed.
7. Be patient: Chili pepper seeds can take anywhere from 1-3 weeks to germinate, depending on the variety and temperature.
8. Thin your seedlings: Once your seedlings have developed their first true leaves (the second set of leaves), thin them out, leaving only the strongest seedling in each cell or pot.
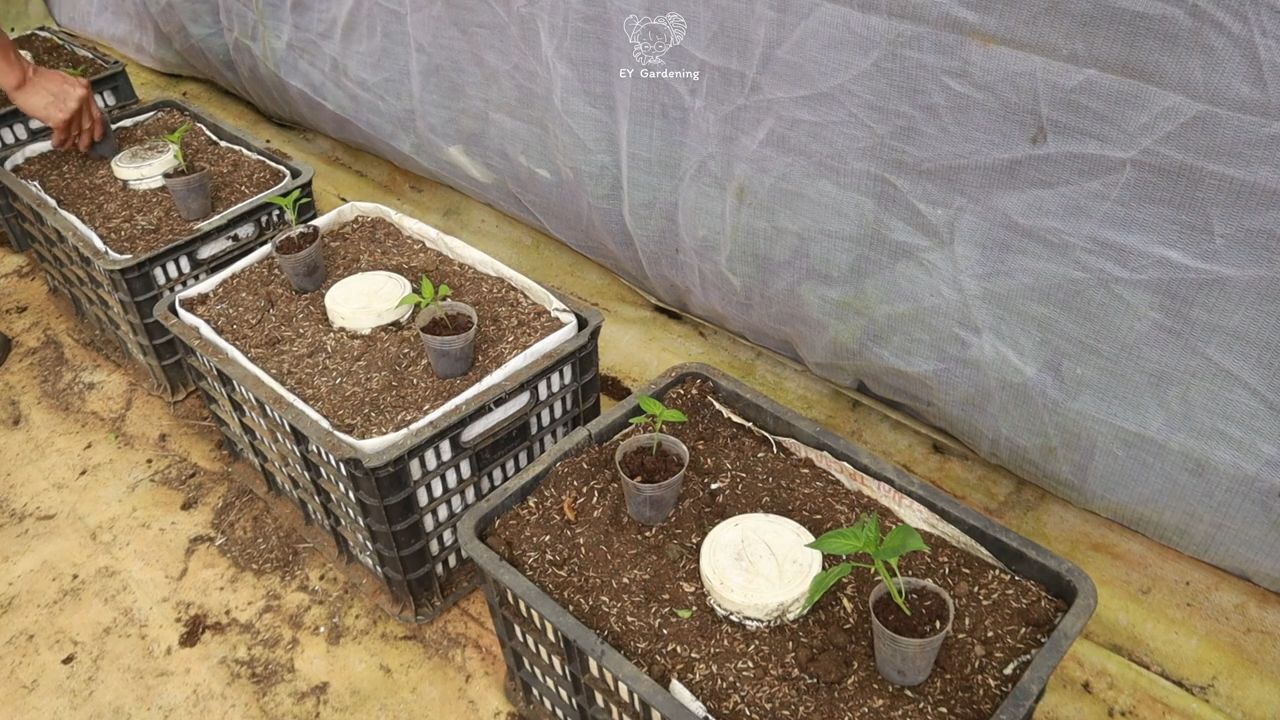
Transplanting Your Chili Pepper Seedlings
Once your seedlings are a few inches tall and the weather has warmed up, it’s time to transplant them outdoors.
What you’ll need:
* Your chili pepper seedlings
* Gardening gloves
* A trowel
* Well-draining soil (amend with compost for added nutrients)
* Fertilizer (specifically formulated for peppers or tomatoes)
* Mulch (optional, but helps retain moisture and suppress weeds)
Step-by-step instructions:
1. Harden off your seedlings: Before transplanting, you need to acclimate your seedlings to outdoor conditions. This process is called “hardening off.” Start by placing your seedlings outdoors in a sheltered location for a few hours each day, gradually increasing the amount of time they spend outside over the course of a week.
2. Choose a sunny location: Chili peppers need at least 6-8 hours of sunlight per day. Choose a location in your garden that receives plenty of sun.
3. Prepare the soil: Dig a hole that is slightly larger than the root ball of your seedling. Amend the soil with compost to improve drainage and fertility.
4. Transplant your seedlings: Gently remove the seedling from its pot, being careful not to damage the roots. Place the seedling in the hole and backfill with soil.
5. Water thoroughly: Water the newly transplanted seedlings thoroughly.
6. Fertilize: Apply a fertilizer specifically formulated for peppers or tomatoes according to the package directions.
7. Mulch (optional): Apply a layer of mulch around the base of the plants to help retain moisture and suppress weeds.
Caring for Your Chili Pepper Plants
Now that your chili pepper plants are in the ground, it’s time to provide them with the care they need to thrive.
Watering:
* Water your chili pepper plants regularly, especially during hot, dry weather.
* Water deeply, allowing the soil to dry out slightly between waterings.
* Avoid overwatering, as this can lead to root rot.
* Water in the morning to allow the foliage to dry before nightfall, which can help prevent fungal diseases.
Fertilizing:
* Fertilize your chili pepper plants every 2-3 weeks with a fertilizer specifically formulated for peppers or tomatoes.
* Look for a fertilizer that is high in phosphorus and potassium, which are essential for fruit production.
* Avoid over-fertilizing, as this can lead to excessive foliage growth and reduced fruit production.
Pruning:
* Pruning is not essential for chili pepper plants, but it can help improve air circulation and sunlight penetration, which can lead to increased fruit production.
* Remove any dead or diseased leaves or branches.
* You can also pinch off the tips of the branches to encourage bushier growth.
Pest and Disease Control:
* Chili pepper plants are susceptible to a variety of pests and diseases, including aphids, spider mites, whiteflies, and fungal diseases.
* Inspect your plants regularly for signs of pests or diseases.
* If you find any pests, you can try spraying them with insecticidal soap or neem oil.
* For fungal diseases, you can try spraying with a fungicide.
* Prevention is key! Good air circulation, proper watering, and healthy soil can help prevent many pest and disease problems.
Supporting Your Plants:
* As your chili pepper plants grow, they may need support to prevent them from falling over.
* You can use stakes, cages, or trellises to support your plants.
* Tie the plants to the support structure with soft twine or plant ties.
Harvesting Your Chili Peppers
The moment we’ve all been waiting for! Harvesting your own homegrown chili peppers is incredibly rewarding.
When to harvest:
* The timing of your harvest will depend on the variety of chili pepper you are growing.
* Generally, chili peppers are ready to harvest when they have reached their mature color and size.
* The peppers should be firm to the touch.
How to harvest:
* Use pruning shears or scissors to cut the peppers from the plant.
* Leave a small stem attached to the pepper.
* Handle the peppers with care, especially if they are hot varieties. Wear gloves if necessary.
Storing your chili peppers:
* Fresh chili peppers can be stored in the refrigerator for up to a week.
* You can also dry, freeze, or pickle your chili peppers for longer storage.
* To dry chili peppers, string them together and hang them in a well-ventilated area.
* To freeze chili peppers, wash and dry them, then place them in a freezer bag.
* To pickle chili peppers, follow a recipe for pickled peppers.
Troubleshooting Common Problems
Even with the best care, you might encounter
Conclusion
So, there you have it! Mastering these spicy chili growing tips isn’t just about cultivating plants; it’s about unlocking a world of flavor and heat right in your own backyard. From selecting the perfect seeds to providing the ideal growing conditions, each step contributes to a bountiful harvest of fiery peppers. We’ve explored the importance of sunlight, soil composition, watering techniques, and even pest control, equipping you with the knowledge to overcome common challenges and nurture your chili plants to their full potential.
But why is this DIY approach a must-try? Because it empowers you to control every aspect of your chili pepper production. You know exactly what goes into your plants, ensuring they are free from harmful chemicals and grown with love. Plus, there’s an undeniable satisfaction in harvesting peppers you’ve nurtured from tiny seeds. The vibrant colors, the intense aromas, and the explosive flavors are a testament to your hard work and dedication.
Don’t be afraid to experiment with variations! Try different chili varieties to discover your personal favorites. Jalapeños, habaneros, Scotch bonnets, ghost peppers – the possibilities are endless. You can also explore different growing methods, such as container gardening or hydroponics, to adapt to your space and preferences. Consider companion planting with herbs like basil or oregano, which can deter pests and enhance the flavor of your chilies. Another fun variation is to ferment your chilies into hot sauce, creating a unique and personalized condiment that will impress your friends and family. You can also dry your chilies for long-term storage, allowing you to enjoy their fiery goodness throughout the year.
Growing your own spicy chilies is a rewarding experience that connects you to nature and provides you with a sustainable source of fresh, flavorful ingredients. It’s a journey of discovery, learning, and ultimately, deliciousness.
We encourage you to embrace these spicy chili growing tips and embark on your own chili-growing adventure. Start small, be patient, and don’t be afraid to make mistakes. Every challenge is an opportunity to learn and improve. And most importantly, have fun!
Once you’ve harvested your first batch of chilies, we’d love to hear about your experience. Share your successes, your challenges, and your favorite recipes in the comments below. Let’s create a community of chili enthusiasts who support and inspire each other. Together, we can cultivate a world of flavor, one chili pepper at a time. So, grab your seeds, get your hands dirty, and prepare to unleash the fiery potential of your garden!
Frequently Asked Questions (FAQ)
What is the best time of year to start growing chili peppers?
The best time to start growing chili peppers depends on your climate. In general, chili peppers need warm temperatures to thrive. If you live in a region with a short growing season, it’s best to start your seeds indoors 6-8 weeks before the last expected frost. This will give your plants a head start and ensure they have enough time to mature and produce fruit. If you live in a warmer climate with a longer growing season, you can start your seeds directly in the ground after the last frost. However, starting indoors is still recommended for better control over the growing environment and to protect the seedlings from pests and diseases.
What kind of soil is best for growing chili peppers?
Chili peppers prefer well-draining soil that is rich in organic matter. A slightly acidic to neutral pH (around 6.0-7.0) is ideal. You can improve the soil by adding compost, aged manure, or other organic amendments. Avoid heavy clay soils, as they can retain too much water and lead to root rot. If you have clay soil, amend it with plenty of organic matter and consider growing your chili peppers in raised beds or containers. A good soil mix for chili peppers would be a combination of potting soil, compost, and perlite or vermiculite for drainage.
How much sunlight do chili peppers need?
Chili peppers need at least 6-8 hours of direct sunlight per day to thrive. The more sunlight they receive, the more peppers they will produce. If you are growing your chili peppers indoors, you will need to supplement with grow lights. Place your plants in the sunniest spot in your garden or on your balcony. If you live in a very hot climate, you may need to provide some afternoon shade to prevent the peppers from scorching.
How often should I water my chili peppers?
Water your chili peppers regularly, especially during hot, dry weather. The soil should be kept consistently moist, but not waterlogged. Overwatering can lead to root rot, while underwatering can stress the plants and reduce pepper production. A good rule of thumb is to water deeply when the top inch of soil feels dry to the touch. Use a watering can or a hose with a gentle spray nozzle to avoid damaging the plants. Mulching around the base of the plants can help retain moisture and suppress weeds.
What are some common pests and diseases that affect chili peppers?
Chili peppers can be susceptible to a variety of pests and diseases, including aphids, spider mites, whiteflies, blossom-end rot, and fungal diseases. Regularly inspect your plants for signs of pests or diseases. If you find any, take action immediately. You can use organic pest control methods, such as insecticidal soap or neem oil, to control aphids, spider mites, and whiteflies. Blossom-end rot is caused by a calcium deficiency and can be prevented by adding calcium to the soil or using a calcium-rich fertilizer. Fungal diseases can be prevented by providing good air circulation and avoiding overwatering.
How do I harvest chili peppers?
Harvest your chili peppers when they have reached their mature color and size. The color will vary depending on the variety of chili pepper. Use a sharp knife or scissors to cut the peppers from the plant, leaving a small stem attached. Be careful not to damage the plant when harvesting. Wear gloves when handling hot chili peppers, as the capsaicin (the compound that makes them spicy) can irritate your skin.
How do I store chili peppers?
There are several ways to store chili peppers. You can dry them, freeze them, pickle them, or make them into hot sauce. To dry chili peppers, string them together and hang them in a well-ventilated area until they are completely dry. You can also dry them in a dehydrator. To freeze chili peppers, wash them, dry them, and place them in a freezer bag. To pickle chili peppers, follow a canning recipe. To make hot sauce, blend the chili peppers with vinegar, salt, and other spices.
How can I make my chili peppers spicier?
The spiciness of chili peppers is determined by the amount of capsaicin they contain. Several factors can influence the capsaicin content, including genetics, growing conditions, and stress. To make your chili peppers spicier, you can try the following:
* Choose a spicier variety of chili pepper.
* Provide your plants with plenty of sunlight and warmth.
* Water your plants less frequently, as this can stress them and increase capsaicin production.
* Add Epsom salts to the soil, as this can also increase capsaicin production.
* Allow the peppers to ripen fully on the plant before harvesting.
What are some creative ways to use my homegrown chili peppers?
Beyond the obvious uses in chili and salsa, your homegrown chili peppers can add a kick to a wide variety of dishes. Infuse oils and vinegars for a spicy drizzle, create a flavorful dry rub for meats, or add a pinch to your favorite chocolate dessert for a surprising twist. You can also ferment them into a vibrant hot sauce, or simply dry and grind them into chili powder for everyday use. Don’t be afraid to experiment and discover new ways to incorporate the heat and flavor of your homegrown chilies into your cooking!
Leave a Comment