

Soil Free Garlic Growing: Sounds like something out of a sci-fi movie, right? But trust me, it’s a real, and surprisingly simple, way to cultivate this pungent powerhouse right in your own home! Forget wrestling with garden beds and battling soil-borne pests. I’m about to show you how to grow garlic without any soil at all!
Garlic has been revered for centuries, not just for its culinary prowess, but also for its medicinal properties. From ancient Egyptian tombs to traditional Chinese medicine, garlic has held a place of honor. Now, you can tap into that rich history and bring the magic of garlic into your home, even if you don’t have a green thumb or a backyard.
Why should you try this soil free garlic growing method? Well, for starters, it’s incredibly space-saving, perfect for apartment dwellers or anyone with limited outdoor space. Plus, it’s a fantastic way to recycle those garlic cloves that are starting to sprout in your pantry. But the biggest reason? It’s just plain fun! There’s something incredibly satisfying about watching those little roots emerge and the green shoots reach for the light. So, ditch the dirt and let’s get growing!
Growing Garlic Indoors Without Soil: A Fun DIY Experiment!
Hey there, fellow plant enthusiasts! Ever thought about growing garlic indoors, but without getting your hands dirty? Well, you’re in for a treat! I’m going to walk you through a super cool DIY project that lets you grow garlic using just water and a few household items. It’s a fantastic way to get fresh garlic greens for your cooking, and it’s surprisingly easy. Let’s dive in!
What You’ll Need
Before we get started, let’s gather our supplies. This is a pretty low-cost project, which is always a win in my book!
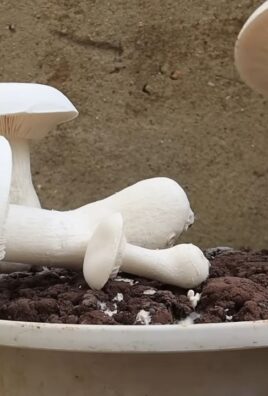
* Garlic Cloves: Choose organic ones if possible. They tend to sprout better and you avoid any potential chemical treatments. Look for firm, plump cloves that haven’t started to sprout yet (although a little sprouting is okay!).
* Shallow Dish or Container: A small ceramic dish, a plastic container, or even a recycled yogurt container will work perfectly. Just make sure it’s wide enough to hold your garlic cloves.
* Water: Tap water is fine, but filtered water is even better.
* Toothpicks (Optional): These are helpful for suspending the garlic cloves if you don’t want them sitting directly in the water.
* Small Stones or Gravel (Optional): These can help stabilize the garlic cloves in the water and add a decorative touch.
* Spray Bottle (Optional): For misting the garlic greens as they grow.
* Sunny Spot: A windowsill or area with bright, indirect sunlight is ideal.
Preparing Your Garlic Cloves
Okay, let’s get our garlic ready for its soil-free adventure!
1. Separate the Cloves: Gently separate the cloves from the garlic bulb. Be careful not to damage the cloves. We want them to be intact and healthy.
2. Leave the Paper On: Don’t peel the papery skin off the cloves. This helps protect them and prevents them from rotting.
3. Inspect for Damage: Check each clove for any signs of mold, rot, or damage. Discard any cloves that look unhealthy. We want to start with the best possible cloves for the best results.
Setting Up Your Water Garden
Now for the fun part – creating our little water garden for the garlic!
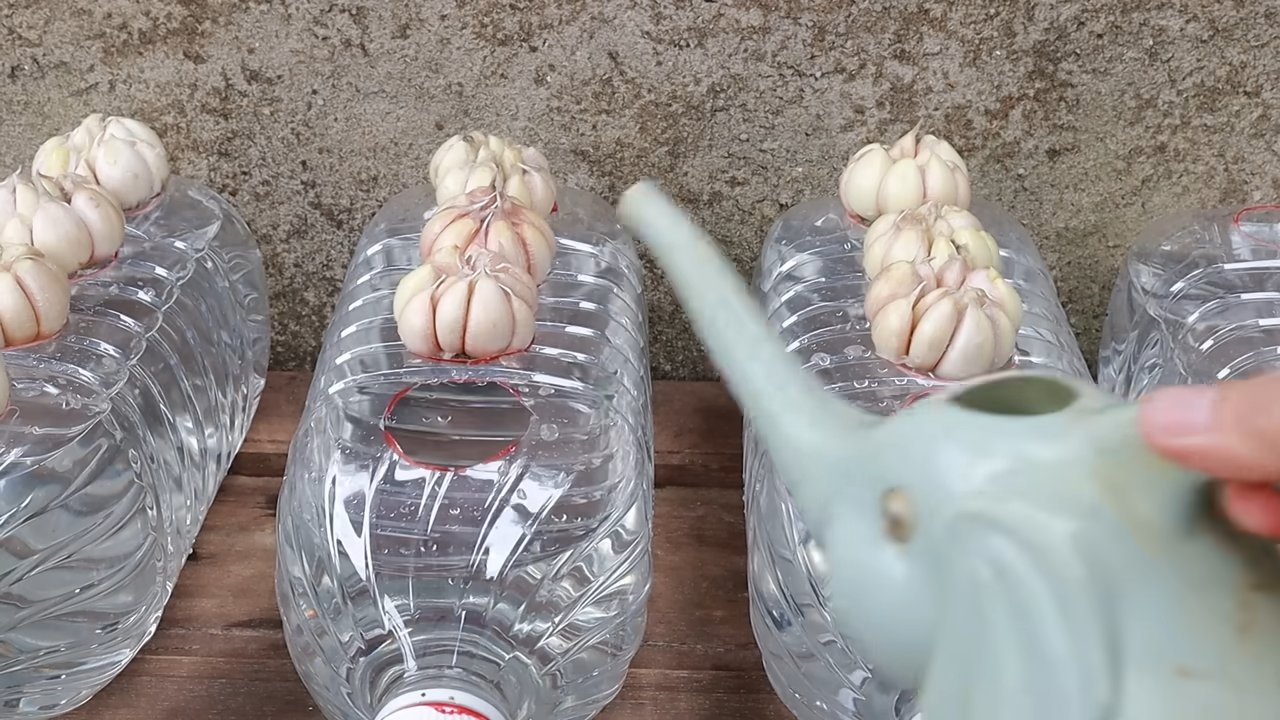
1. Choose Your Method: You have a couple of options here. You can either let the garlic cloves sit directly in the water, or you can suspend them using toothpicks. I’ll explain both methods.
* Method 1: Direct Contact with Water: This is the simplest method. Just place the garlic cloves in your dish, pointy side up.
* Method 2: Toothpick Suspension: This method prevents the cloves from sitting directly in the water, which can help prevent rot. Insert three or four toothpicks around the middle of each clove, spacing them evenly. The toothpicks will rest on the rim of the dish, suspending the clove above the water.
2. Add Water: Pour water into the dish until it just touches the bottom of the garlic cloves (or the bottom of the cloves if you’re using the toothpick method). You don’t want to submerge the entire clove, as this can lead to rot.
3. Add Stones (Optional): If you’re using stones or gravel, place them around the garlic cloves to help stabilize them and add a decorative touch.
4. Find a Sunny Spot: Place your dish in a sunny spot, such as a windowsill. Garlic needs plenty of light to grow.
Caring for Your Soil-Free Garlic
Now that our garlic is set up, let’s talk about how to care for it. It’s pretty low-maintenance, which is great!
1. Change the Water Regularly: This is crucial! Change the water every 1-2 days to prevent bacteria and mold from growing. Stale water can lead to rot and hinder growth.
2. Monitor Water Level: Keep an eye on the water level and add more water as needed to keep the bottom of the cloves moist.
3. Mist the Greens (Optional): If you want to give your garlic greens a little extra boost, you can mist them with water every few days. This helps keep them hydrated and looking their best.
4. Rotate the Dish: To ensure even growth, rotate the dish every few days so that all sides of the garlic receive equal sunlight.
5. Be Patient: It takes time for the garlic to sprout and grow. You should start to see sprouts within a week or two.
Harvesting Your Garlic Greens
The best part! Once your garlic greens have grown to a decent size (usually a few inches tall), you can start harvesting them.
1. Snip the Greens: Use scissors to snip off the greens near the base of the clove. Don’t cut off all the greens at once, as this can weaken the plant.
2. Use in Cooking: The garlic greens have a mild garlic flavor and can be used in a variety of dishes, such as salads, soups, stir-fries, and omelets.
3. Allow Regrowth: After harvesting, the garlic greens will continue to grow. Just keep caring for your garlic as described above, and you’ll have a continuous supply of fresh greens.
Troubleshooting
Sometimes things don’t go exactly as planned. Here are a few common issues you might encounter and how to fix them.
* Rotting Cloves: If your garlic cloves start to rot, it’s usually due to too much moisture or stagnant water. Make sure you’re changing the water regularly and that the cloves aren’t sitting completely submerged. You can also try using the toothpick suspension method to keep the cloves out of direct contact with the water.
* Slow Growth: If your garlic isn’t growing as quickly as you’d like, it could be due to lack of sunlight. Try moving your dish to a sunnier location. You can also try adding a diluted liquid fertilizer to the water every few weeks to give the garlic a boost.
* Mold Growth: Mold can sometimes grow on the garlic cloves or in the water. If you see mold, remove the affected cloves and clean the dish thoroughly. Make sure you’re changing the water regularly and that the cloves aren’t sitting in stagnant water.
Advanced Tips and Tricks
Want to take your soil-free garlic growing to the next level? Here are a few advanced tips and tricks to try.
* Experiment with Different Varieties of Garlic: Different varieties of garlic will produce different flavors and textures of greens. Try growing several different varieties to see which ones you like best.
* Use a Grow Light: If you don’t have a sunny spot, you can use a grow light to provide your garlic with the light it needs.
* Add Nutrients: While garlic can grow in just water, adding a diluted liquid fertilizer every few weeks can help boost growth and produce healthier greens.
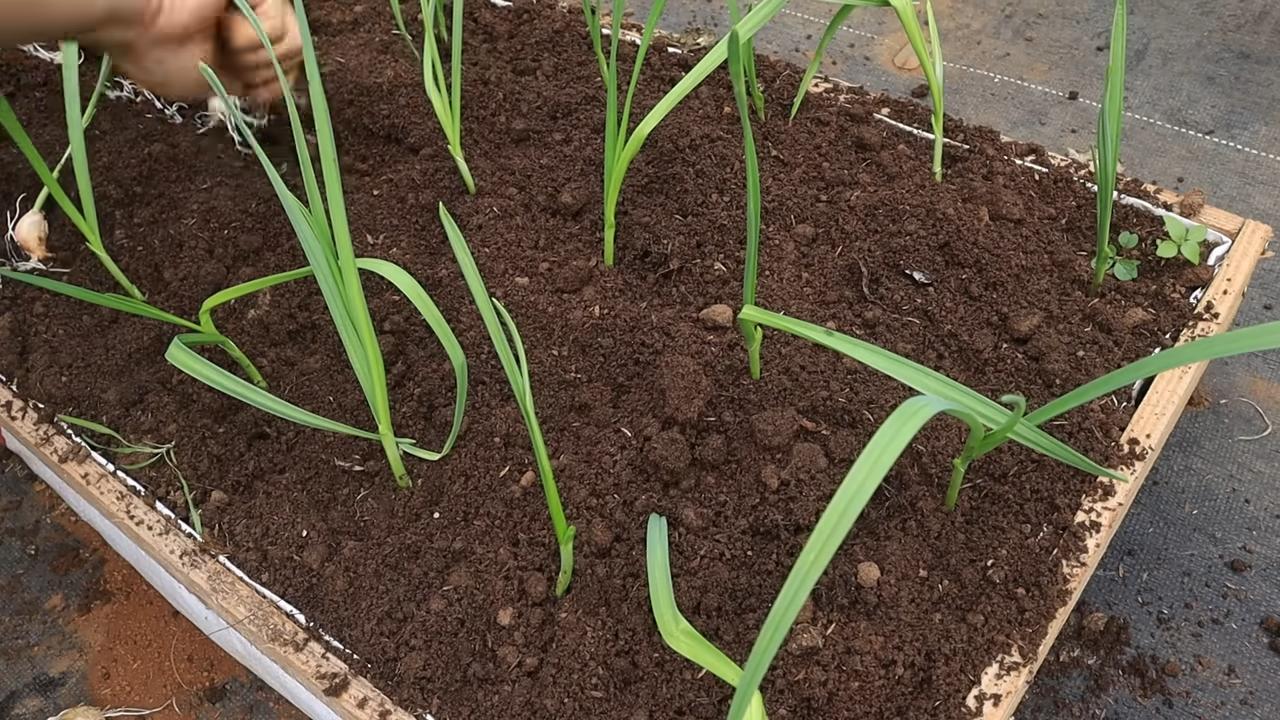
* Plant in Soil After Sprouting: Once your garlic cloves have sprouted and grown some roots, you can transplant them into soil if you want to grow full garlic bulbs.
* Successive Planting: To have a continuous supply of garlic greens, start new cloves every few weeks. This way, you’ll always have some garlic growing and ready to harvest.
Why This Works: The Science Behind It
You might be wondering how garlic can grow without soil. Well, garlic cloves contain all the nutrients they need to start growing. The water provides the moisture necessary for the cloves to sprout and develop roots. The sunlight provides the energy for photosynthesis, which allows the plant to produce its own food. It’s a pretty amazing process!
Benefits of Growing Garlic Without Soil
There are several benefits to growing garlic without soil:
* It’s Easy: This method is incredibly easy and requires minimal effort.
* It’s Clean: You don’t have to worry about getting your hands dirty or dealing with soil.
* It’s Space-Saving: You can grow garlic in a small space, such as a windowsill.
* It’s Sustainable: You can reuse the same dish and water over and over again.
* It’s Educational: It’s a great way to learn about plant growth and experiment with different growing methods.
* Fresh Garlic Greens: You get a continuous supply of fresh, flavorful garlic greens for your cooking.
Final Thoughts
Growing garlic indoors without soil is a fun and rewarding project that anyone can do. It’s a great way to get fresh garlic greens, learn about plant growth, and add a little greenery to your home. So, give it a try and see what you can grow! I hope you found this guide helpful. Happy growing!
Conclusion
So, there you have it! Growing garlic without soil might seem unconventional, but the benefits are undeniable. From the sheer convenience of monitoring growth to the reduced risk of soilborne diseases and pests, this method offers a clean, efficient, and surprisingly rewarding way to cultivate your own flavorful garlic. Forget the back-breaking labor of tilling, weeding, and worrying about soil composition. This method simplifies the entire process, making fresh, homegrown garlic accessible to everyone, regardless of their gardening experience or available space.
This isn’t just about growing garlic; it’s about embracing a more sustainable and accessible approach to food production. Imagine the satisfaction of snipping fresh garlic greens for your salads or pasta dishes, knowing they were grown right in your kitchen, free from harmful chemicals and pesticides. The vibrant green shoots add a burst of freshness and flavor that store-bought garlic simply can’t match.
But the real magic lies in the adaptability of this method. Experiment with different varieties of garlic to discover your favorites. Try using different types of containers, from repurposed glass jars to decorative vases, to add a touch of personality to your indoor garden. Consider adding a diluted liquid fertilizer solution to the water every few weeks to boost growth and nutrient uptake. You can even try growing multiple cloves in a single container for a more abundant harvest.
Don’t be afraid to get creative and personalize your soil-free garlic growing experience. The possibilities are endless!
We’ve shown you how to unlock the secrets of soil free garlic growing, now it’s your turn to put it into practice. Gather your supplies, follow the simple steps outlined in this guide, and prepare to be amazed by the results. We are confident that you’ll find this method to be both enjoyable and incredibly rewarding.
We encourage you to embark on this exciting gardening adventure and share your experiences with us. Post photos of your growing garlic on social media using #SoilFreeGarlic and tag us so we can see your progress. Let us know what varieties you’re growing, what challenges you encounter, and what successes you achieve. Your feedback will not only inspire others to try this method but also help us refine and improve our guide for future growers.
So, what are you waiting for? Ditch the soil, embrace the simplicity, and start growing your own delicious garlic today! You’ll be amazed at how easy and rewarding it can be.
Frequently Asked Questions (FAQ)
What type of garlic is best for growing without soil?
While you can technically grow any type of garlic without soil, some varieties tend to perform better than others. Softneck garlic varieties, like Artichoke and Silverskin, are generally more adaptable to indoor growing conditions and tend to produce more robust greens. Hardneck varieties, like Rocambole and Porcelain, can also be grown, but they may require slightly more attention and may not produce as many greens. Experiment with different varieties to see which ones thrive best in your specific environment. Elephant garlic, while technically a type of leek, can also be grown using this method and produces impressively large cloves.
How often should I change the water?
It’s crucial to change the water regularly to prevent the growth of bacteria and algae, which can hinder garlic growth and potentially lead to rot. We recommend changing the water every 2-3 days, or more frequently if you notice any cloudiness or discoloration. When changing the water, be sure to rinse the container thoroughly to remove any accumulated debris. Using filtered water can also help to minimize the buildup of minerals and impurities.
Can I use tap water?
While tap water can be used, it’s often best to let it sit out for 24 hours before using it to allow chlorine and other chemicals to dissipate. Alternatively, you can use filtered water or rainwater, which are generally free of harmful additives. Avoid using softened water, as it contains high levels of sodium, which can be detrimental to plant growth.
How much light does the garlic need?
Garlic needs plenty of light to thrive, especially when grown indoors. Aim for at least 6-8 hours of direct sunlight per day. If you don’t have a sunny windowsill, you can supplement with artificial grow lights. Position the grow lights about 6-12 inches above the garlic cloves and keep them on for 12-16 hours per day. Proper lighting is essential for healthy growth and the development of flavorful greens.
What if the garlic starts to rot?
Rot is a common problem when growing garlic in water, but it can be prevented with proper care. The most common cause of rot is overwatering or poor water quality. Make sure to change the water regularly and avoid letting the garlic cloves sit in stagnant water. If you notice any signs of rot, such as soft spots or discoloration, remove the affected cloves immediately to prevent the spread of the problem. You can also try adding a small amount of hydrogen peroxide to the water to help kill bacteria and fungi.
Can I eat the garlic cloves after growing the greens?
Yes, you can absolutely eat the garlic cloves after growing the greens! While the cloves may not be as large or potent as those grown in soil, they will still have a mild garlic flavor. You can use them in any recipe that calls for garlic, such as sauces, soups, or stir-fries. Alternatively, you can replant the cloves in soil to grow a full-sized garlic bulb.
How long does it take to grow garlic greens?
You should start to see sprouts within a few days of placing the garlic cloves in water. The greens will typically reach a harvestable size within 2-3 weeks. You can harvest the greens as needed, snipping them off with scissors. The garlic will continue to produce new greens for several weeks, providing you with a continuous supply of fresh flavor.
Can I use fertilizer?
Yes, you can use a diluted liquid fertilizer to boost growth and nutrient uptake. Choose a balanced fertilizer that is specifically formulated for vegetables or herbs. Dilute the fertilizer according to the package instructions and add it to the water every 2-3 weeks. Be careful not to over-fertilize, as this can lead to nutrient burn and damage the garlic.
What are the benefits of growing garlic without soil?
Growing garlic without soil offers several advantages, including:
* **Convenience:** No need for soil, tilling, or weeding.
* **Cleanliness:** Reduced risk of soilborne diseases and pests.
* **Space-saving:** Can be grown in small spaces, such as apartments or balconies.
* **Easy monitoring:** You can easily observe the growth of the roots and greens.
* **Sustainability:** Reduces the need for pesticides and herbicides.
Is soil free garlic growing truly sustainable?
Yes, when done correctly, soil free garlic growing can be a very sustainable practice. By eliminating the need for soil, you reduce the reliance on traditional agricultural practices that can contribute to soil erosion and degradation. Furthermore, growing your own garlic reduces your carbon footprint by minimizing transportation and packaging. Using repurposed containers and rainwater further enhances the sustainability of this method.
Leave a Comment