

Self Watering Mustard Greens: Imagine biting into crisp, peppery mustard greens you’ve grown yourself, bursting with flavor and packed with nutrients. Sounds amazing, right? But what if you’re short on time, space, or simply forget to water your plants regularly? Don’t worry, I’ve got you covered! This DIY guide will unlock the secrets to effortlessly growing your own thriving mustard greens, even if you have a notorious black thumb.
Mustard greens have a rich history, cultivated for centuries across Asia and Europe, not just for their culinary uses but also for their medicinal properties. From traditional Chinese medicine to Southern soul food, these leafy greens have nourished generations. But in today’s busy world, finding the time to nurture a garden can feel like a luxury. That’s where the magic of self-watering comes in!
This DIY trick is a game-changer because it eliminates the biggest hurdle for many aspiring gardeners: consistent watering. We all know the disappointment of seeing our precious plants wilt and wither because we simply forgot to give them a drink. With a simple self-watering system, you can ensure your self watering mustard greens receive the perfect amount of moisture, promoting healthy growth and abundant harvests. Plus, it’s a fantastic way to recycle materials and reduce your environmental impact. So, let’s dive in and discover how easy it is to create your own self-watering oasis for delicious, homegrown mustard greens!
DIY Self-Watering Mustard Greens Planter: Never Forget to Water Again!
Hey there, fellow gardening enthusiasts! Are you like me, sometimes a little forgetful when it comes to watering your plants? Or maybe you’re planning a vacation and worried about your precious greens wilting while you’re gone? Well, fret no more! I’m going to show you how to build a super easy and effective self-watering planter specifically designed for mustard greens (but honestly, it works great for other leafy greens too!). This project is perfect for beginners and will keep your mustard greens happy and hydrated, even when you’re not around.
What You’ll Need: The Supply List
Before we dive in, let’s gather all the necessary materials. Don’t worry, most of these are readily available at your local hardware store or even around your house!
* Two Plastic Containers: One larger container (think a storage tote or a large bucket) and one smaller container that can fit inside the larger one with some space around it. The smaller container will hold the soil and plants, and the larger one will act as the water reservoir. Make sure both are food-grade plastic if you’re concerned about chemicals leaching into your soil.
* Drill with Various Drill Bits: You’ll need a drill to create drainage holes and a hole for the wicking system. A variety of drill bit sizes will come in handy.
* Wicking Material: This is crucial for drawing water from the reservoir up to the soil. I recommend using strips of old t-shirt material (cotton works best), felt, or even nylon rope. Make sure it’s a material that won’t decompose quickly in water.
* Potting Mix: Choose a good quality potting mix that’s well-draining. Mustard greens like soil that retains moisture but doesn’t become waterlogged.
* Mustard Green Seeds or Seedlings: Of course, you’ll need something to plant! You can start from seeds or purchase seedlings from a nursery.
* Gravel or Small Rocks: This will create a drainage layer at the bottom of the smaller container.
* Measuring Tape or Ruler: For accurate measurements when drilling holes.
* Scissors or Utility Knife: For cutting the wicking material.
* Water: For filling the reservoir.
* Optional: Landscape Fabric: To prevent soil from falling into the water reservoir.
Step-by-Step Instructions: Building Your Self-Watering Planter
Alright, let’s get our hands dirty! Follow these steps carefully, and you’ll have your self-watering mustard greens planter ready in no time.
1. Prepare the Smaller Container (Planting Container):
* First, grab your smaller container. This is where your mustard greens will actually grow.
* Using your drill, create drainage holes at the bottom of the container. I recommend drilling about 6-8 holes, each about 1/4 inch in diameter. This will prevent the soil from becoming waterlogged.
* Now, drill a hole on the bottom of the smaller container, large enough to thread your wicking material through. The size of this hole will depend on the thickness of your wicking material. Make sure it’s snug, but not too tight.
* Line the bottom of the container with a layer of gravel or small rocks. This will further improve drainage and prevent the wicking material from sitting directly in the soil. A layer of about 1-2 inches is perfect.
* (Optional) Place a piece of landscape fabric over the gravel layer. This will help prevent soil from washing down into the reservoir and clogging the wicking system.
2. Prepare the Wicking System:
* Cut your wicking material into strips that are long enough to reach from the bottom of the smaller container, through the hole you drilled, and down into the larger container (the reservoir). You’ll want at least 6-8 inches of wicking material extending into the reservoir.
* Thread the wicking material through the hole in the bottom of the smaller container, leaving a generous amount hanging down.
* Spread the top ends of the wicking material evenly across the bottom of the smaller container, on top of the gravel (or landscape fabric). This will ensure that the water is distributed evenly throughout the soil.
3. Prepare the Larger Container (Water Reservoir):
* This container will hold the water that your mustard greens will use.
* Drill a small hole near the top of the container, about an inch or two below the rim. This will act as an overflow hole, preventing the reservoir from overfilling during heavy rain.
* That’s it for this container! Simple, right?
4. Assemble the Planter:
* Carefully place the smaller container (with the wicking material in place) inside the larger container. Make sure the wicking material is hanging down into the larger container.
* Adjust the length of the wicking material so that it reaches the bottom of the larger container. You want it to be able to draw water effectively.
5. Add the Potting Mix:
* Now, fill the smaller container with your potting mix. Leave about an inch or two of space at the top.
* Gently pat down the soil to remove any air pockets.
6. Plant Your Mustard Greens:
* If you’re starting from seeds, sow them according to the package instructions.
* If you’re using seedlings, carefully remove them from their containers and plant them in the potting mix.
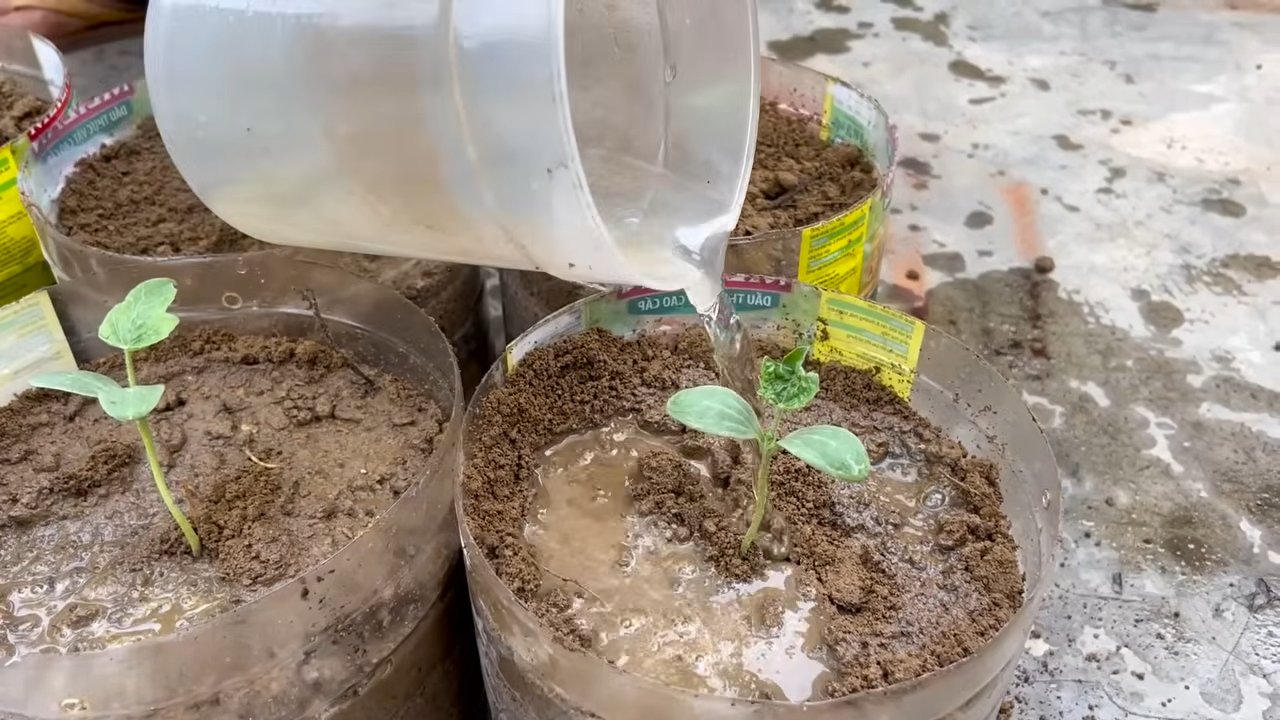
* Water the soil gently after planting. This will help settle the soil and encourage the roots to establish.
7. Fill the Water Reservoir:
* Pour water into the larger container (the reservoir) until it reaches the overflow hole.
* Keep an eye on the water level and refill as needed. The frequency of refilling will depend on the weather, the size of your plants, and the type of potting mix you’re using.
Troubleshooting and Tips for Success
Even with the best instructions, sometimes things don’t go exactly as planned. Here are a few common issues you might encounter and how to fix them:
* Soil is Too Wet: If the soil is constantly soggy, it could be a sign that the wicking system is too efficient or that the drainage holes are clogged. Try using less wicking material or making the drainage holes larger. You can also try using a potting mix that drains more quickly.
* Soil is Too Dry: If the soil is consistently dry, it could be a sign that the wicking system isn’t working properly or that the reservoir is empty. Make sure the wicking material is making good contact with the water in the reservoir and that the reservoir is always full. You can also try using more wicking material.
* Algae Growth in the Reservoir: Algae can sometimes grow in the water reservoir, especially if it’s exposed to sunlight. This isn’t usually harmful to your plants, but it can be unsightly. To prevent algae growth, try using an opaque container for the reservoir or adding a small amount of hydrogen peroxide to the water.
* Choosing the Right Location: Mustard greens thrive in partial shade, especially during the hottest part of the day. Avoid placing your self-watering planter in direct sunlight all day long, as this can cause the soil to dry out too quickly.
* Fertilizing Your Mustard Greens: While the self-watering system provides consistent moisture, you’ll still need to fertilize your mustard greens to provide them with the nutrients they need to grow. Use a balanced liquid fertilizer diluted to half strength every few weeks.
* Pest Control: Keep an eye out for common garden pests like aphids and slugs. Treat any infestations promptly with organic pest control methods.
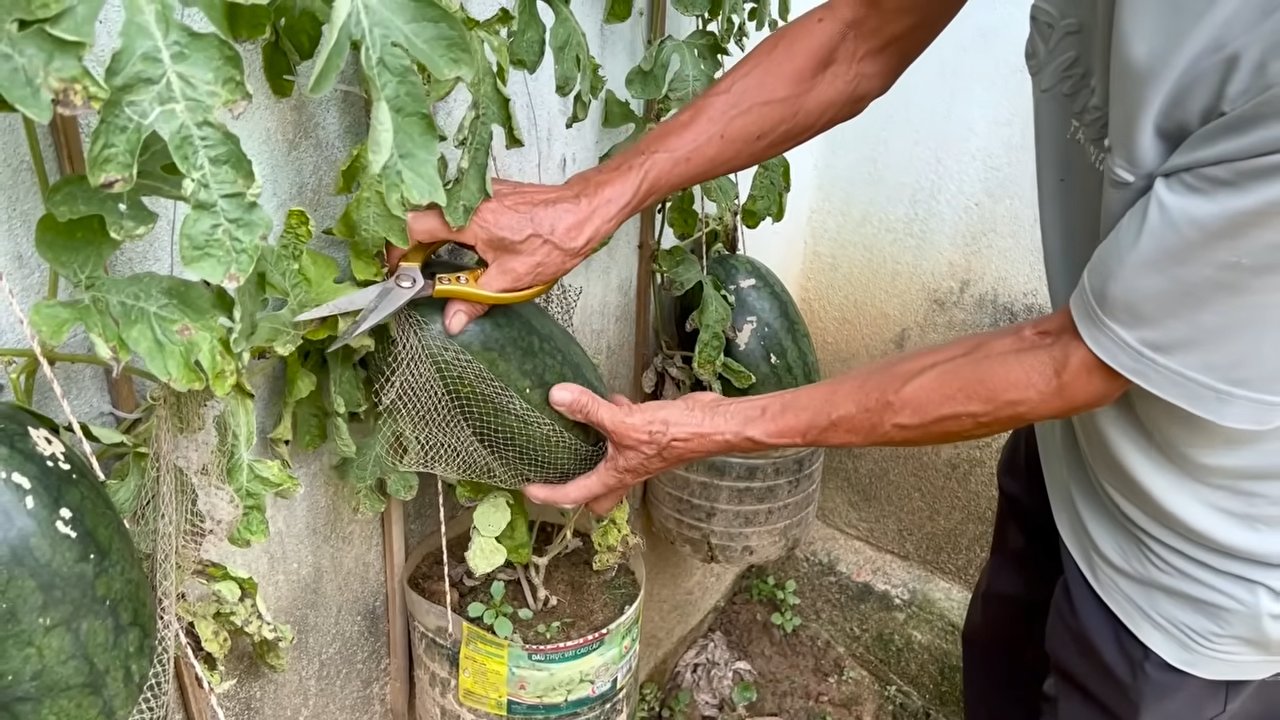
* Harvesting Your Mustard Greens: You can start harvesting your mustard greens when the leaves are about 4-6 inches long. Simply snip off the outer leaves, leaving the inner leaves to continue growing. This will allow you to harvest your mustard greens continuously for several weeks.
Choosing the Right Containers: A Deeper Dive
Let’s talk a little more about those containers. The size and type of containers you choose can significantly impact the success of your self-watering planter.
* Size Matters: The size of the smaller container will determine how many mustard greens you can grow. A container that’s about 12 inches in diameter and 8 inches deep is a good starting point. The larger container should be large enough to hold the smaller container with at least a few inches of space around it. This space will serve as the water reservoir.
* Material Considerations: As I mentioned earlier, it’s important to use food-grade plastic containers if you’re concerned about chemicals leaching into your soil. You can also use terracotta pots for the smaller container, but keep in mind that terracotta is porous and will dry out more quickly than plastic.
* Repurposing Containers: Don’t be afraid to get creative and repurpose old containers! Old storage totes,
Conclusion
So, there you have it! Creating your own self-watering system for mustard greens isn’t just a fun project; it’s a game-changer for anyone who wants fresh, vibrant greens without the constant worry of underwatering or overwatering. This DIY trick offers a simple, cost-effective, and sustainable way to cultivate your own little patch of deliciousness, regardless of your gardening experience.
Why is this a must-try? Because it liberates you from the daily watering grind. Imagine coming home after a long day, knowing your mustard greens are thriving, perfectly hydrated, and ready to be harvested. No more wilted leaves or parched soil! This system provides consistent moisture, promoting healthy growth and maximizing your yield. Plus, it’s incredibly satisfying to build something with your own hands that directly contributes to your well-being and access to fresh produce.
But the beauty of this DIY project lies in its adaptability. Feel free to experiment with different container sizes and materials. Recycled plastic bottles work wonderfully, but you could also use buckets, tubs, or even repurposed containers from your kitchen. Consider adding a layer of mulch on top of the soil to further retain moisture and suppress weeds. For variations, you could incorporate a small solar-powered pump to circulate the water in the reservoir, ensuring even distribution and preventing stagnation. You can also add a liquid fertilizer to the water reservoir to provide your mustard greens with extra nutrients. Just be sure to dilute it properly to avoid burning the roots.
Furthermore, think about the location of your self-watering system. While mustard greens thrive in partial shade, they still need adequate sunlight. Experiment with different spots in your garden or on your balcony to find the sweet spot that encourages optimal growth. You can even use grow lights if you’re growing indoors.
This self-watering system isn’t just limited to mustard greens, either. It can be adapted for other leafy greens like spinach, kale, and lettuce, as well as herbs like basil, mint, and parsley. The possibilities are endless!
We strongly encourage you to give this DIY self-watering system for mustard greens a try. It’s a rewarding project that will not only provide you with fresh, delicious greens but also connect you with the process of growing your own food.
Once you’ve built your system and harvested your first batch of mustard greens, we’d love to hear about your experience! Share your photos, tips, and variations in the comments below. Let’s create a community of self-watering enthusiasts and inspire others to embrace the joy of homegrown goodness. What worked well for you? What challenges did you face? What innovative solutions did you come up with? Your insights can help others succeed and further refine this simple yet effective gardening technique. Let’s cultivate a greener, more sustainable future, one self-watering system at a time!
Frequently Asked Questions (FAQ)
What type of container is best for a self-watering mustard greens system?
The best type of container depends on your space and aesthetic preferences. Recycled plastic bottles are a great eco-friendly option, especially for smaller setups. Buckets, tubs, or even repurposed storage containers work well for larger gardens. The key is to ensure the container is food-grade if you’re using recycled materials and that it’s deep enough to accommodate the soil and the water reservoir. A dark-colored container can also help prevent algae growth in the reservoir. Consider the material as well. Plastic is lightweight and durable, while terracotta can help regulate soil temperature but may dry out faster.
How often do I need to refill the water reservoir?
The frequency of refilling the water reservoir depends on several factors, including the size of the reservoir, the weather conditions, and the size of your mustard greens. In hot, sunny weather, the water will evaporate more quickly, and the plants will transpire more, requiring more frequent refills. As a general rule, check the water level every few days and refill when it’s about halfway empty. You can also use a water level indicator to easily monitor the reservoir.
What type of soil should I use for my self-watering mustard greens?
A well-draining potting mix is essential for self-watering systems. Avoid using garden soil, as it can become compacted and impede drainage. A mix of peat moss, perlite, and vermiculite provides good aeration and water retention. You can also add compost to enrich the soil with nutrients. Make sure the soil is slightly acidic to neutral, with a pH between 6.0 and 7.0, which is ideal for mustard greens.
Can I use fertilizer in my self-watering system?
Yes, you can use fertilizer in your self-watering system, but it’s crucial to use it sparingly and choose the right type. A liquid fertilizer specifically formulated for leafy greens is a good option. Dilute the fertilizer according to the manufacturer’s instructions and add it to the water reservoir. Avoid over-fertilizing, as this can lead to nutrient burn and damage your plants. Organic fertilizers, such as compost tea or fish emulsion, are also excellent choices.
How much sunlight do mustard greens need in a self-watering system?
Mustard greens thrive in partial shade, especially in hot climates. They need at least 4-6 hours of sunlight per day. If you’re growing your mustard greens indoors, you may need to supplement with grow lights. Position the lights about 6-12 inches above the plants and provide 12-16 hours of light per day. Monitor your plants closely and adjust the lighting as needed.
What are some common problems I might encounter with a self-watering system, and how can I fix them?
Some common problems include algae growth in the reservoir, root rot, and pest infestations. To prevent algae growth, use a dark-colored container and avoid exposing the reservoir to direct sunlight. Root rot can occur if the soil is too wet, so ensure your potting mix is well-draining. If you notice signs of root rot, such as yellowing leaves or wilting, reduce watering and improve drainage. Pest infestations can be treated with organic pesticides or by introducing beneficial insects. Regularly inspect your plants for signs of pests and take action promptly.
Can I use this self-watering system for other plants besides mustard greens?
Absolutely! This self-watering system can be adapted for a variety of plants, including other leafy greens like spinach, kale, and lettuce, as well as herbs like basil, mint, and parsley. The key is to adjust the watering frequency and fertilizer levels to suit the specific needs of each plant. Research the specific requirements of the plants you want to grow and make adjustments accordingly.
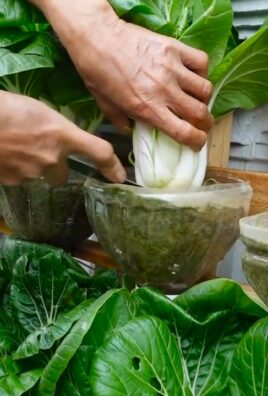
How do I harvest my mustard greens from a self-watering system?
You can harvest mustard greens at any stage of growth, depending on your preference. For baby greens, harvest when the leaves are about 3-4 inches long. For mature greens, wait until the leaves are 6-8 inches long. To harvest, simply cut the leaves near the base of the plant, leaving the central stem intact. This will allow the plant to continue producing new leaves. Harvest regularly to encourage continued growth and prevent the plants from bolting (going to seed).
How long will my mustard greens last in a self-watering system?
With proper care, your mustard greens can last for several weeks or even months in a self-watering system. The lifespan of the plants depends on factors such as the variety of mustard greens, the growing conditions, and the frequency of harvesting. Regularly remove any yellowing or damaged leaves to prevent disease and encourage continued growth.
Is a DIY self-watering system really better than traditional watering methods for mustard greens?
For many gardeners, the DIY self-watering system offers significant advantages over traditional watering methods, especially for mustard greens. The consistent moisture provided by the system promotes healthier growth and reduces the risk of underwatering or overwatering. It also saves time and effort, as you don’t need to water the plants as frequently. Additionally, the self-watering system can help conserve water, as it minimizes evaporation and runoff. However, traditional watering methods can still be effective if done correctly. Ultimately, the best method depends on your individual needs and preferences.
Leave a Comment