

Rooftop okra gardening might sound like a far-fetched dream, especially if you’re living in a bustling city! But trust me, it’s not only possible, it’s incredibly rewarding. Imagine stepping out onto your own private oasis, plucking fresh, vibrant okra straight from the vine, and knowing you grew it yourself. That’s the magic we’re unlocking today!
Okra, also known as “lady’s fingers,” has a rich history, tracing back to ancient Ethiopia. It then spread throughout North Africa, the Middle East, and eventually made its way to the Americas with the transatlantic slave trade. For generations, okra has been a staple in Southern cuisine and a symbol of resilience and resourcefulness. Now, we’re bringing that same spirit of resourcefulness to our rooftops!
Why should you try rooftop okra gardening? Well, beyond the sheer joy of growing your own food, it’s a fantastic way to maximize limited space, reduce your carbon footprint, and enjoy the freshest, most flavorful okra imaginable. Plus, let’s be honest, store-bought okra just doesn’t compare to the taste of homegrown. In this article, I’m going to share some simple, yet effective DIY tricks and hacks that will help you transform your rooftop into a thriving okra paradise, even if you’re a complete beginner. Get ready to get your hands dirty and experience the satisfaction of harvesting your own delicious okra!
Rooftop Okra Oasis: A DIY Guide to Growing Your Own!
Hey there, fellow gardening enthusiasts! Ever dreamt of harvesting fresh, vibrant okra right from your own rooftop? Well, dream no more! I’m here to guide you through creating your very own rooftop okra garden. It’s easier than you think, and the reward of homegrown okra is absolutely worth it. Let’s get started!
Choosing the Right Spot & Container
Before we even think about seeds, we need to consider the crucial elements: sunlight and space. Okra is a sun-loving plant, so a sunny rooftop is a must!
* Sunlight is Key: Okra needs at least 6-8 hours of direct sunlight per day. Observe your rooftop throughout the day to identify the sunniest spot.
* Container Size Matters: Okra plants can grow quite tall (3-6 feet!), so you’ll need a large container. I recommend a container that’s at least 18 inches in diameter and 12 inches deep. The bigger, the better, as it allows for better root development.
* Drainage is Essential: Make sure your container has drainage holes! Okra doesn’t like soggy roots. If your container doesn’t have enough holes, you can drill a few more.
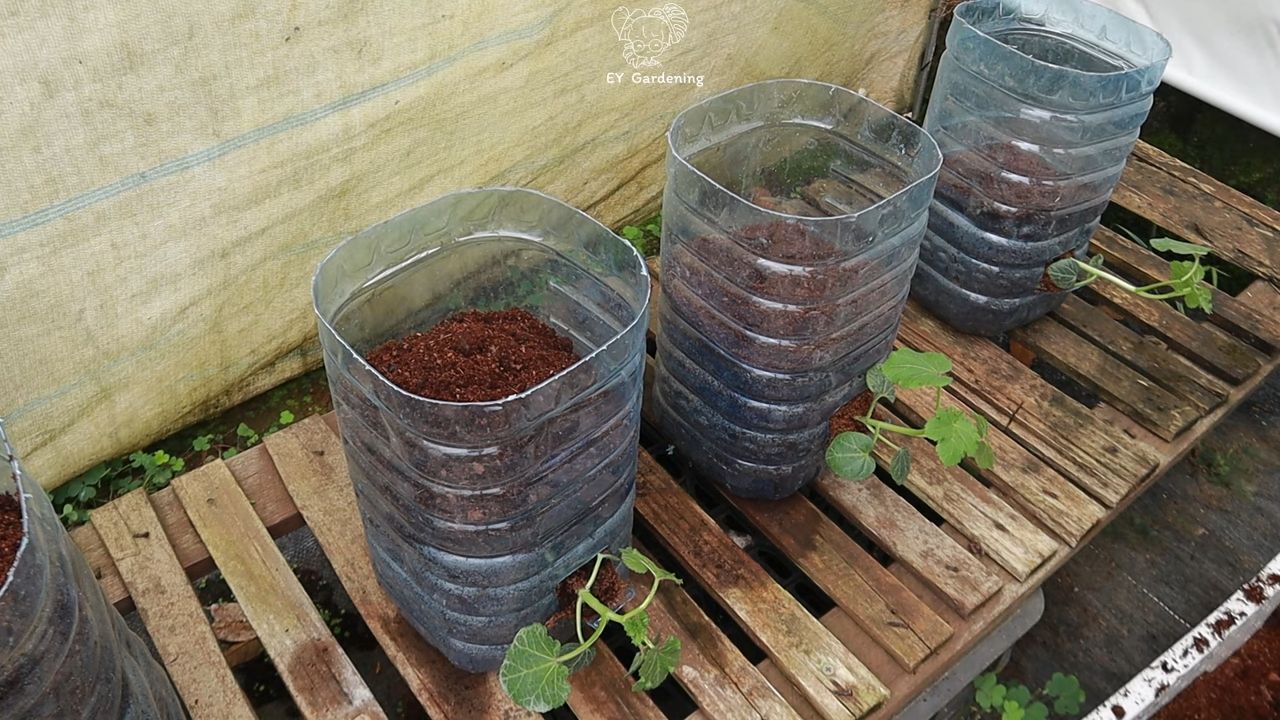
* Container Material: You can use plastic, terracotta, or even repurposed containers like large buckets or tubs. Just make sure they’re clean and food-safe if you’re using repurposed materials.
* Weight Considerations: Remember that soil and water add significant weight. Ensure your rooftop can handle the weight of the containers, especially when they’re fully grown and watered. Consult with a structural engineer if you have any concerns.
* Accessibility: Choose a spot that’s easily accessible for watering, weeding, and harvesting. You don’t want to be struggling to reach your okra plants!
Preparing the Soil
Okra thrives in well-draining, fertile soil. Here’s how to create the perfect mix:
* Start with a Good Base: I recommend using a high-quality potting mix as your base. Avoid using garden soil directly, as it can be too heavy and compact for container gardening.
* Amend with Compost: Compost is your best friend! It adds nutrients, improves drainage, and helps retain moisture. Mix in about 1/3 compost to your potting mix.
* Add Perlite or Vermiculite: These materials improve drainage and aeration. Add about 1/4 perlite or vermiculite to your soil mix.
* Consider Slow-Release Fertilizer: Adding a slow-release fertilizer to your soil mix will provide your okra plants with a steady supply of nutrients throughout the growing season. Follow the instructions on the fertilizer package.
* pH Level: Okra prefers a slightly acidic to neutral soil pH (around 6.0-7.0). You can test your soil pH with a soil testing kit and amend it if necessary.
Planting Your Okra Seeds
Now for the fun part – planting!
1. Soak the Seeds: Soak your okra seeds in warm water for 12-24 hours before planting. This helps soften the seed coat and improves germination rates.
2. Fill the Container: Fill your container with the prepared soil mix, leaving about an inch or two of space at the top.
3. Plant the Seeds: Sow the seeds about 1/2 inch deep and 2-3 inches apart. You can plant 2-3 seeds per spot and thin them out later, keeping the strongest seedling.
4. Water Gently: Water the soil gently after planting, making sure not to dislodge the seeds.
5. Keep it Warm: Okra needs warm temperatures to germinate. If the weather is still cool, you can cover the container with plastic wrap to create a mini-greenhouse effect.
6. Germination Time: Okra seeds typically germinate in 5-14 days, depending on the temperature.
Caring for Your Okra Plants
Once your okra seedlings emerge, it’s time to provide them with the care they need to thrive.
* Watering: Water your okra plants regularly, especially during hot weather. The soil should be consistently moist, but not waterlogged. Check the soil moisture by sticking your finger into the soil. If the top inch feels dry, it’s time to water.
* Fertilizing: Okra is a heavy feeder, so you’ll need to fertilize it regularly. Use a balanced fertilizer (e.g., 10-10-10) every 2-3 weeks. You can also use organic fertilizers like compost tea or fish emulsion.
* Mulching: Mulching helps retain moisture, suppress weeds, and regulate soil temperature. Use organic mulches like straw, wood chips, or shredded leaves.
Hey there, fellow gardening enthusiasts! Ever dreamt of harvesting fresh, vibrant okra right from your own rooftop? Well, dream no more! I’m here to guide you through creating your very own rooftop okra garden. It’s easier than you think, and the reward of homegrown okra is absolutely worth it. Let’s get started!
Choosing the Right Spot & Container
Before we even think about seeds, we need to consider the crucial elements: sunlight and space. Okra is a sun-loving plant, so a sunny rooftop is a must!
* Sunlight is Key: Okra needs at least 6-8 hours of direct sunlight per day. Observe your rooftop throughout the day to identify the sunniest spot.
* Container Size Matters: Okra plants can grow quite tall (3-6 feet!), so you’ll need a large container. I recommend a container that’s at least 18 inches in diameter and 12 inches deep. The bigger, the better, as it allows for better root development.
* Drainage is Essential: Make sure your container has drainage holes! Okra doesn’t like soggy roots. If your container doesn’t have enough holes, you can drill a few more.
* Container Material: You can use plastic, terracotta, or even repurposed containers like large buckets or tubs. Just make sure they’re clean and food-safe if you’re using repurposed materials.
* Weight Considerations: Remember that soil and water add significant weight. Ensure your rooftop can handle the weight of the containers, especially when they’re fully grown and watered. Consult with a structural engineer if you have any concerns.
* Accessibility: Choose a spot that’s easily accessible for watering, weeding, and harvesting. You don’t want to be struggling to reach your okra plants!
Preparing the Soil
Okra thrives in well-draining, fertile soil. Here’s how to create the perfect mix:
* Start with a Good Base: I recommend using a high-quality potting mix as your base. Avoid using garden soil directly, as it can be too heavy and compact for container gardening.
* Amend with Compost: Compost is your best friend! It adds nutrients, improves drainage, and helps retain moisture. Mix in about 1/3 compost to your potting mix.
* Add Perlite or Vermiculite: These materials improve drainage and aeration. Add about 1/4 perlite or vermiculite to your soil mix.
* Consider Slow-Release Fertilizer: Adding a slow-release fertilizer to your soil mix will provide your okra plants with a steady supply of nutrients throughout the growing season. Follow the instructions on the fertilizer package.
* pH Level: Okra prefers a slightly acidic to neutral soil pH (around 6.0-7.0). You can test your soil pH with a soil testing kit and amend it if necessary.
Planting Your Okra Seeds
Now for the fun part – planting!
1. Soak the Seeds: Soak your okra seeds in warm water for 12-24 hours before planting. This helps soften the seed coat and improves germination rates.
2. Fill the Container: Fill your container with the prepared soil mix, leaving about an inch or two of space at the top.
3. Plant the Seeds: Sow the seeds about 1/2 inch deep and 2-3 inches apart. You can plant 2-3 seeds per spot and thin them out later, keeping the strongest seedling.
4. Water Gently: Water the soil gently after planting, making sure not to dislodge the seeds.
5. Keep it Warm: Okra needs warm temperatures to germinate. If the weather is still cool, you can cover the container with plastic wrap to create a mini-greenhouse effect.
6. Germination Time: Okra seeds typically germinate in 5-14 days, depending on the temperature.
Caring for Your Okra Plants
Once your okra seedlings emerge, it’s time to provide them with the care they need to thrive.
* Watering: Water your okra plants regularly, especially during hot weather. The soil should be consistently moist, but not waterlogged. Check the soil moisture by sticking your finger into the soil. If the top inch feels dry, it’s time to water.
* Fertilizing: Okra is a heavy feeder, so you’ll need to fertilize it regularly. Use a balanced fertilizer (e.g., 10-10-10) every 2-3 weeks. You can also use organic fertilizers like compost tea or fish emulsion.
* Mulching: Mulching helps retain moisture, suppress weeds, and regulate soil temperature. Use organic mulches like straw, wood chips, or shredded leaves.
* Pruning: Pruning isn’t usually necessary for okra, but you can remove any yellowing or dead leaves to improve air circulation.
* Pest Control: Keep an eye out for pests like aphids, spider mites, and okra stink bugs. You can control these pests with insecticidal soap, neem oil, or by handpicking them off the plants.
* Support: As your okra plants grow taller, they may need support. You can use stakes or cages to prevent them from falling over.
Harvesting Your Okra
The moment we’ve all been waiting for – harvesting!
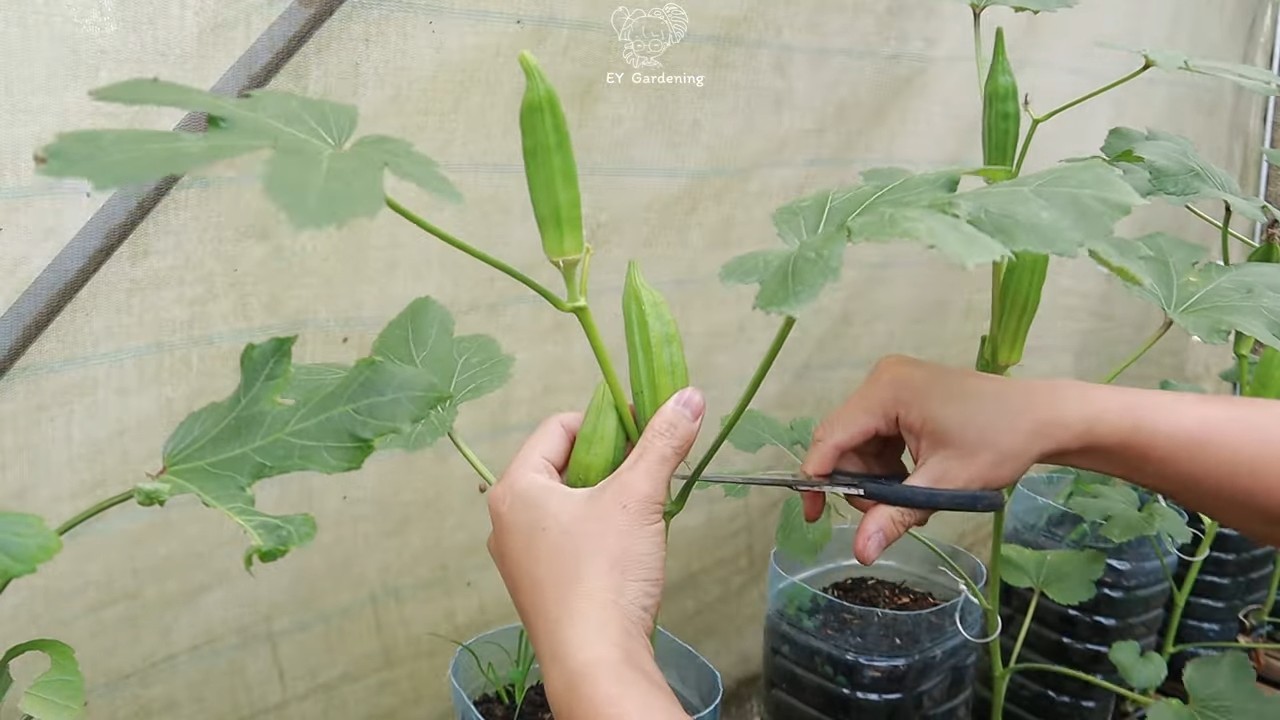
1. Timing is Key: Okra pods are best harvested when they’re young and tender, typically 3-4 inches long. Overripe pods become tough and fibrous.
2. Use a Sharp Knife or Pruners: Cut the pods from the plant with a sharp knife or pruners. Be careful not to damage the plant.
3. Wear Gloves: Okra plants have tiny spines that can irritate your skin, so it’s best to wear gloves when harvesting.
4. Harvest Regularly: Okra plants produce pods continuously throughout the growing season, so harvest them every 1-2 days to encourage more production.
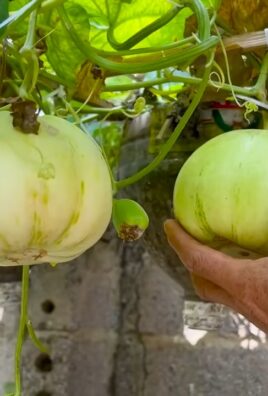
5. Enjoy Your Harvest: Enjoy your fresh, homegrown okra in your favorite recipes! Okra is delicious fried, grilled, stewed, or pickled.
Dealing with Common Problems
Even with the best care, you might encounter some problems along the way. Here are a few common issues and how to address them:
* Yellowing Leaves: This could be a sign of nutrient deficiency, overwatering, or underwatering. Check the soil moisture and fertilize if necessary.
* Stunted Growth: This could be caused by poor soil, lack of sunlight, or pest infestation. Amend the soil, move the plant to a sunnier location, and control pests.
* Lack of Pod Production: This could be due to lack of pollination, high temperatures, or nutrient deficiency. Hand-pollinate the flowers if necessary, provide shade during the hottest part of the day, and fertilize regularly.
* Root Rot: This is caused by overwatering and poor drainage. Make sure your container has drainage holes and avoid overwatering.
Extending the Growing Season
If you live in a cooler climate, you can extend the okra growing season by starting seeds indoors 6-8 weeks before the last frost. You can also use row covers or cold frames to protect your plants from frost.
Choosing Okra Varieties
There are many different okra varieties to choose from, each with its own unique characteristics. Here are a few popular varieties:
* Clemson Spineless: A classic variety with smooth, spineless pods.
* Burgundy: A beautiful variety with deep red pods.
* Emerald: A prolific variety with dark green pods.
* Dwarf Green Long Pod: A compact variety that’s perfect for container gardening.
Safety First!
Rooftop gardening can be incredibly rewarding, but it’s important to prioritize safety.
* Check Weight Limits: Before you start, make sure your rooftop can handle the weight of the containers, soil, and water. Consult with a structural engineer if you have any concerns.
* Secure Containers: Secure your containers to prevent them from blowing over in strong winds.
* Use Proper Footwear: Wear sturdy shoes with good traction to prevent slips and falls.
* Stay Hydrated: Drink plenty of water, especially during hot weather.
* Protect Yourself from the Sun: Wear sunscreen, a hat, and sunglasses to protect yourself from the sun’s harmful rays.
* Be Aware of Your Surroundings: Be aware of your surroundings and avoid any potential hazards.
Final Thoughts
Growing okra on your rooftop is a fantastic way to enjoy fresh, homegrown produce and add a touch of green to your urban environment. With a little planning and care, you can create a thriving rooftop okra garden that will provide you with a bountiful harvest for months to come. So, get out there, get your hands dirty, and start growing! Happy gardening!
Conclusion
So, there you have it! Rooftop okra gardening isn’t just a whimsical dream; it’s a tangible, rewarding reality waiting to unfold on your very own urban oasis. We’ve explored the ins and outs, from selecting the right varieties to nurturing those precious pods under the city sun. But why is this DIY endeavor a must-try?
Firstly, consider the unparalleled freshness. Imagine stepping onto your rooftop, basket in hand, and harvesting okra that’s bursting with flavor, untouched by long transportation routes and supermarket shelves. The taste difference alone is a game-changer. Beyond the culinary delight, rooftop okra gardening offers a unique connection to nature, a therapeutic escape from the concrete jungle. It’s a chance to witness the miracle of growth firsthand, to nurture a living thing, and to reap the rewards of your labor.
Furthermore, it’s an incredibly sustainable practice. By growing your own okra, you’re reducing your carbon footprint, minimizing packaging waste, and contributing to a greener urban environment. You’re also gaining control over the quality of your food, ensuring it’s free from harmful pesticides and chemicals.
But the benefits don’t stop there. Rooftop okra gardening can be a surprisingly social activity. Share your harvest with neighbors, swap gardening tips, and create a vibrant community around your shared passion for homegrown goodness. It’s a fantastic way to connect with others and build relationships.
Now, let’s talk about variations. Feel free to experiment with different okra varieties. Clemson Spineless is a classic choice, but why not try Burgundy okra for its beautiful red pods or Emerald okra for its prolific yields? You can also incorporate companion planting techniques to enhance your okra’s growth and attract beneficial insects. Consider planting basil, marigolds, or peppers alongside your okra to create a thriving ecosystem on your rooftop.
Another exciting variation is vertical gardening. If you’re limited on space, explore the possibilities of growing okra in vertical planters or hanging baskets. This not only maximizes your growing area but also adds a visually stunning element to your rooftop garden.
Don’t be afraid to get creative with your container choices. While traditional pots work perfectly well, you can also repurpose old buckets, tires, or even fabric grow bags. Just make sure your containers have adequate drainage to prevent waterlogging.
Finally, remember that rooftop okra gardening is a journey, not a destination. There will be challenges along the way, but don’t let them discourage you. Embrace the learning process, experiment with different techniques, and celebrate your successes.
We wholeheartedly encourage you to embark on this exciting adventure. Transform your rooftop into a flourishing okra paradise and experience the joy of growing your own food. And most importantly, we want to hear about your experiences! Share your photos, tips, and stories with us in the comments below. Let’s create a community of rooftop okra gardeners and inspire others to join the movement. Happy gardening!
Frequently Asked Questions (FAQ)
What kind of soil is best for rooftop okra gardening?
Okra thrives in well-draining, fertile soil. A good mix would be equal parts of potting soil, compost, and perlite or vermiculite. The compost provides essential nutrients, while the perlite or vermiculite improves drainage and aeration. Avoid using heavy clay soil, as it can become waterlogged and hinder okra growth. You can also amend your soil with a slow-release fertilizer specifically formulated for vegetables. Before planting, test your soil’s pH level. Okra prefers a slightly acidic to neutral pH of 6.0 to 7.0. If your soil is too alkaline, you can amend it with sulfur.
How often should I water my rooftop okra plants?
Watering frequency depends on several factors, including the weather, the size of your containers, and the type of soil you’re using. Generally, okra plants need consistent moisture, especially during hot and dry periods. Water deeply whenever the top inch of soil feels dry to the touch. Avoid overwatering, as this can lead to root rot. A good rule of thumb is to water thoroughly in the morning, allowing the foliage to dry before nightfall. This helps prevent fungal diseases. Consider using a soaker hose or drip irrigation system to deliver water directly to the roots, minimizing water waste and keeping the foliage dry.
How much sunlight does okra need on a rooftop?
Okra is a sun-loving plant and requires at least 6-8 hours of direct sunlight per day to thrive. Choose a location on your rooftop that receives ample sunlight throughout the day. If your rooftop is partially shaded, try to position your okra plants where they’ll receive the most sunlight during the hottest part of the day. Insufficient sunlight can result in leggy growth, reduced flowering, and smaller okra pods. If you’re growing okra in containers, you can move them around to maximize their exposure to sunlight.
What are some common pests and diseases that affect rooftop okra?
Common pests that can affect rooftop okra include aphids, spider mites, flea beetles, and okra stink bugs. Regularly inspect your plants for signs of infestation, such as yellowing leaves, webbing, or visible insects. You can control these pests with organic methods, such as insecticidal soap, neem oil, or handpicking. Diseases that can affect okra include powdery mildew, Fusarium wilt, and leaf spot. To prevent these diseases, ensure good air circulation around your plants, avoid overwatering, and remove any infected leaves promptly. Consider using disease-resistant okra varieties.
When is the best time to harvest okra from my rooftop garden?
Okra pods are typically ready to harvest about 50-60 days after planting. The ideal time to harvest is when the pods are young and tender, usually 2-4 inches long. Overripe okra pods become tough and fibrous. Check your plants daily during the harvest season and harvest the pods regularly to encourage continued production. Use a sharp knife or pruning shears to cut the pods from the plant, leaving a short stem attached. Wear gloves when harvesting okra, as the pods can be prickly and irritating to the skin.
Can I grow okra in containers on a windy rooftop?
Yes, you can grow okra in containers on a windy rooftop, but you’ll need to take some precautions to protect your plants from wind damage. Choose sturdy containers that won’t easily tip over in strong winds. You can also weigh down the containers with rocks or bricks. Consider using windbreaks, such as trellises, fences, or even strategically placed shrubs, to shield your okra plants from the wind. Stake your okra plants to provide additional support and prevent them from bending or breaking in the wind. Water your plants more frequently during windy conditions, as the wind can dry out the soil quickly.
How can I encourage more okra production on my rooftop?
To encourage more okra production, ensure your plants receive adequate sunlight, water, and nutrients. Fertilize your okra plants regularly with a balanced fertilizer or a fertilizer specifically formulated for vegetables. Prune your okra plants to remove any dead or yellowing leaves, as well as any suckers that are growing from the base of the plant. This will help improve air circulation and direct the plant’s energy towards pod production. Harvest the okra pods regularly to encourage continued flowering and fruiting.
Is rooftop okra gardening organic?
Rooftop okra gardening can absolutely be organic! By using organic soil amendments, pest control methods, and fertilizers, you can ensure that your okra is grown without the use of synthetic chemicals. Look for organic potting mixes, compost, and fertilizers at your local garden center. When dealing with pests and diseases, opt for organic solutions like insecticidal soap, neem oil, and beneficial insects. Growing organic okra on your rooftop is a great way to enjoy fresh, healthy produce while minimizing your environmental impact.


Leave a Comment