

Rooftop corn growing simple? Absolutely! Imagine stepping onto your rooftop and harvesting fresh, juicy corn, right in the heart of the city. Sounds like a dream, doesn’t it? Well, it’s a dream that can easily become a reality with a few simple tricks and a little DIY spirit. For centuries, humans have cultivated corn, or maize, as it’s also known, from its origins in Mesoamerica to becoming a staple crop worldwide. Now, we’re bringing it to new heights – literally!
But why bother with rooftop corn growing? In today’s world, where access to fresh, locally sourced produce can be a challenge, especially in urban environments, growing your own food is more important than ever. Plus, let’s be honest, there’s something incredibly satisfying about nurturing a plant from seed to harvest. This DIY guide will provide you with the essential knowledge and easy-to-follow steps to successfully grow corn on your rooftop, regardless of your gardening experience. I’m here to show you that even with limited space, you can enjoy the taste of homegrown corn and impress your friends and family with your urban farming skills. Let’s get started and transform your rooftop into a thriving cornfield!
DIY Rooftop Garden: How to Grow Your Own Corn on the Roof!
Hey everyone! Have you ever thought about growing your own vegetables but don’t have a garden? No problem! Today I’m going to show you how to create a small cornfield on your roof. Yes, you read that right, corn! It’s easier than you think and a lot of fun. Plus, it’s totally satisfying to harvest your own ears of corn at the end. Let’s get started!
What you need:
- Suitable containers: Large planters or grow bags (at least 45 cm deep and wide). Corn needs space for its roots!
- High-quality potting soil: A mixture of garden soil, compost, and a little sand for good drainage is best.
- Corn seeds: Choose a variety that is suitable for growing in containers. Dwarf corn or popcorn are good options.
- Fertilizer: A slow-release fertilizer or organic fertilizer such as horn shavings or compost tea.
- Watering can or hose: For regular watering.
- Support material: Bamboo stakes or similar to support the plants if necessary.
- Tools: Shovel, garden shears, maybe a small rake.
- Sunlight: A sunny location is crucial! Corn loves the sun.
- Patience: Corn takes time to grow.
Step-by-Step Guide:
1. Preparing the Containers
- Cleaning: First, you should thoroughly clean your planters or grow bags. Remove all old plant debris and rinse them with water. This will prevent the spread of diseases or pests.
- Drainage: Make sure your containers have drainage holes so that excess water can drain away. If not, it’s best to drill a few holes in the bottom. Good drainage is super important to prevent the roots from rotting. I always put a layer of pebbles or clay shards on the bottom of the container before I add the soil. This improves the drainage even more.
- Filling: Now you can fill the containers with your potting soil. Leave about 5-10 cm of space at the top so you don’t overflow everything when you water. The soil should be loose and airy. I always mix in some compost with the soil to provide the corn with enough nutrients.
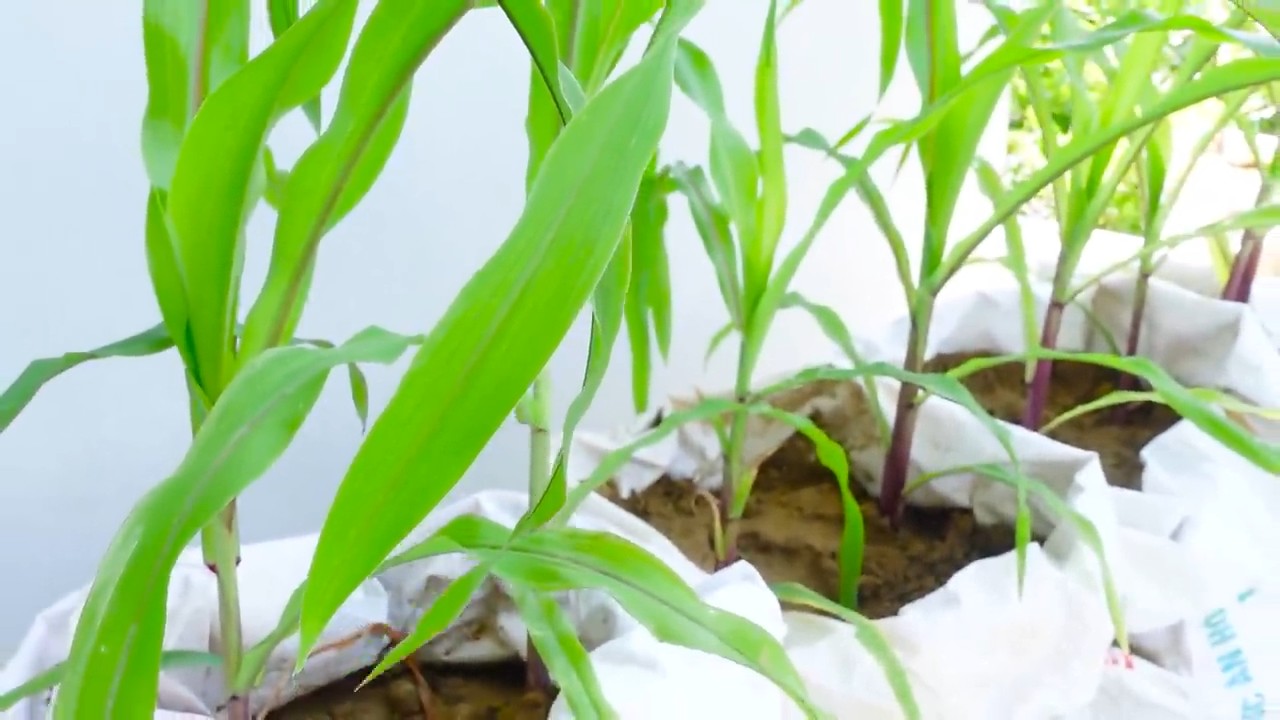
2. Sowing
- Choose your seeds: As I said, it’s best to choose a variety that is suitable for growing in containers. Dwarf corn or popcorn are good options. Read the description on the seed packet carefully to find out the optimal conditions for sowing.
- Sowing time: The best time to sow is in the spring, after the danger of frost has passed. In Germany, this is usually from mid-May. You can also start the seeds indoors to speed up the growing process.
- Sowing depth and spacing: Make small holes in the soil with your finger or a small stick. The holes should be about 2-3 cm deep. Place 2-3 seeds in each hole. This increases the likelihood that at least one seed will germinate. The distance between the holes should be about 15-20 cm.
- Covering and watering: Cover the seeds with soil and press them down lightly. Water the soil gently so that it is well moistened. Be careful not to wash the seeds away.
3. Care
- Watering: Corn needs a lot of water, especially during the growing season. Water regularly, preferably in the morning or evening, so that the water doesn’t evaporate as quickly. The soil should always be slightly moist, but not wet. Avoid waterlogging, as this can lead to root rot.
- Fertilizing: Fertilize your corn plants regularly to provide them with enough nutrients. A slow-release fertilizer that you mix into the soil when planting is a good option. Alternatively, you can also use organic fertilizer such as horn shavings or compost tea. Fertilize about every 2-3 weeks.
- Weed control: Regularly remove weeds that grow in your containers. Weeds compete with the corn for nutrients and water.
- Staking: As your corn plants get taller, they may need support. Bamboo stakes or similar are good for supporting the plants and preventing them from tipping over.
- Pollination: Corn is wind-pollinated. This means that the pollen from the male flowers (which are at the top of the plant) must reach the female flowers (which are on the ears). If you only have a few plants, pollination may not work optimally. You can assist pollination by gently shaking the male flowers or by transferring the pollen to the female flowers with a brush.
4. Harvesting
- Harvest time: The harvest time depends on the corn variety. As a rule, the ears of corn are ripe when the husks turn dry and brown and the corn kernels are plump and juicy. Gently press on a kernel. If it’s milky, the corn is ripe.
- Harvesting process: Carefully break the ears of corn off the plant. Turn them slightly to avoid damaging them.
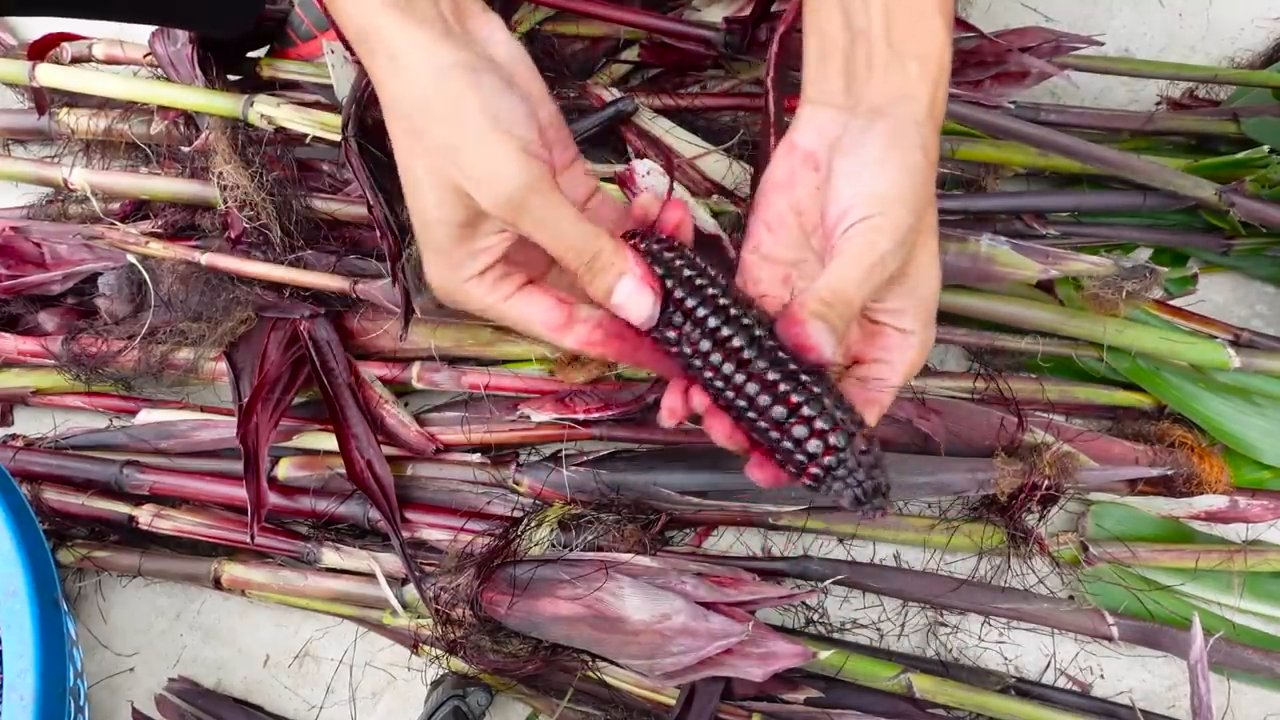
- Processing: You can eat the ears of corn immediately, grill them, cook them, or freeze them. Popcorn needs to be dried before it can be made into popcorn.
Additional Tips and Tricks:
- Sun protection: It can get very hot on the roof in the summer. Make sure your containers don’t get too hot. You can cover them with light-colored cloths or move them to a shadier spot.
- Wind protection: It can also be very windy on the roof. Place your containers in a sheltered spot or secure them so they don’t fall over.
- Pests: Watch out for pests like aphids or corn borers. If infested, you can use natural pesticides.
- Variety selection: Before sowing, find out about the different corn varieties and choose the one that best suits your conditions.
- Neighbors: Talk to your neighbors before you start growing. Maybe they’d like to join in!
Common Problems and Solutions:
- No germination: If the seeds don’t germinate, there can be various reasons. Maybe the seeds were too old, the soil was too dry or too cold. Make sure to use fresh seeds, keep the soil moist, and only sow the seeds when the temperatures are warm enough.
- Yellow leaves: Yellow leaves can be a sign of a nutrient deficiency. Fertilize your plants regularly to provide them with enough nutrients.
- Root rot: Root rot is caused by waterlogging. Make sure your containers have good drainage and don’t water too much.
- Pests: In case of pest infestation, you can use natural pesticides.
I hope this guide helps you to grow your own corn on the roof. It’s a great feeling to harvest your own ears of corn and know where they come from. Happy gardening! Let me know if you have any questions or want to share your experiences. I look forward to hearing from you
Conclusion
So, there you have it! Transforming your rooftop into a miniature cornfield is not only achievable but also incredibly rewarding. We’ve walked you through the simple steps to cultivate your own supply of fresh, delicious corn, right in the heart of your urban oasis. Forget those bland, mass-produced ears from the grocery store; imagine sinking your teeth into sweet, juicy kernels that you nurtured from seed to harvest. This DIY rooftop corn growing project is more than just a gardening endeavor; it’s a connection to nature, a sustainable practice, and a source of immense personal satisfaction.
Why is this a must-try? Because it’s empowering! You’re taking control of your food source, reducing your carbon footprint, and adding a touch of rustic charm to your urban landscape. Plus, the taste of homegrown corn is simply unparalleled. The sweetness is more intense, the texture is more tender, and the overall flavor is bursting with freshness. It’s a taste that will transport you back to simpler times, to family farms and summer picnics.
But the benefits don’t stop there. Rooftop gardening, in general, offers a plethora of advantages. It can help insulate your building, reducing energy costs. It can improve air quality by absorbing pollutants and releasing oxygen. And it can provide a habitat for beneficial insects and pollinators, contributing to a healthier ecosystem.
Variations and Suggestions:
Don’t be afraid to experiment! While we’ve focused on a basic approach, there are plenty of ways to customize your rooftop corn growing experience.
* Different Corn Varieties: Explore different varieties of corn to find your favorite flavor profile. Consider trying sweet corn, dent corn (for cornmeal), or even ornamental corn for a splash of color.
* Companion Planting: Incorporate companion plants like beans and squash to create a symbiotic relationship. Beans fix nitrogen in the soil, benefiting the corn, while squash provides ground cover, suppressing weeds and retaining moisture.
* Vertical Growing: If space is limited, consider using vertical growing techniques, such as trellises or stacked planters, to maximize your yield.
* Succession Planting: Plant corn in stages, a few weeks apart, to ensure a continuous harvest throughout the growing season.
* Container Size Matters: Ensure your containers are large enough to accommodate the mature corn plants. Larger containers will retain moisture better and provide more room for root growth.
* Fertilizing: Corn is a heavy feeder, so regular fertilization is essential. Use a balanced fertilizer or compost tea to provide the necessary nutrients.
* Pest Control: Keep an eye out for pests like corn earworms and aphids. Use organic pest control methods, such as neem oil or insecticidal soap, to protect your plants.
We wholeheartedly encourage you to embark on this exciting journey of rooftop corn growing. It’s a rewarding experience that will connect you with nature, provide you with delicious homegrown produce, and add a touch of green to your urban environment. So, grab your seeds, prepare your containers, and get ready to witness the magic of corn growing right before your eyes.
And most importantly, we want to hear about your experiences! Share your successes, your challenges, and your tips with us and the rest of the community. Let’s learn from each other and create a network of rooftop corn growers who are passionate about sustainable urban agriculture. Post pictures of your rooftop corn on social media using #RooftopCorn and tag us! We can’t wait to see what you create. Happy growing!
Frequently Asked Questions (FAQ)
What is the best type of corn to grow on a rooftop?
The best type of corn to grow on a rooftop depends on your personal preferences and the available space. Sweet corn varieties are generally the most popular choice for home gardeners due to their delicious flavor and versatility. Look for varieties that are specifically bred for container gardening or shorter growing seasons, as these will be better suited to the rooftop environment. Some excellent options include ‘Golden Bantam’, ‘Sugar Baby’, and ‘Honey Select’. Consider the size of the mature plant when choosing a variety, as some corn plants can grow quite tall and may require additional support. Also, remember that corn is wind pollinated, so you will need to plant multiple stalks close together to ensure good pollination and kernel development.
How much sunlight does rooftop corn need?
Corn requires at least 6-8 hours of direct sunlight per day to thrive. This is crucial for photosynthesis, which is the process by which plants convert sunlight into energy. If your rooftop doesn’t receive enough sunlight, your corn plants may become leggy, produce smaller ears, or fail to produce ears at all. Observe your rooftop throughout the day to determine the areas that receive the most sunlight and position your containers accordingly. If necessary, you can supplement natural sunlight with grow lights, especially during periods of cloudy weather.
What size containers are needed for rooftop corn growing?
Corn plants have extensive root systems, so they require large containers to accommodate their growth. A minimum container size of 15-20 gallons per plant is recommended. The larger the container, the more room the roots will have to spread, and the better the plant will be able to access water and nutrients. Choose containers that are made of durable materials, such as plastic or terracotta, and that have drainage holes to prevent waterlogging. You can also use grow bags, which are lightweight and breathable, allowing for good root aeration.
How often should I water my rooftop corn?
Corn plants need consistent moisture, especially during hot weather. Water deeply and regularly, ensuring that the soil is evenly moist but not waterlogged. Check the soil moisture level daily by sticking your finger into the soil. If the top inch of soil feels dry, it’s time to water. The frequency of watering will depend on factors such as the weather, the size of the container, and the type of soil. During hot, dry periods, you may need to water your corn plants daily or even twice a day. Consider using a soaker hose or drip irrigation system to deliver water directly to the roots, minimizing water loss through evaporation.
What kind of soil is best for rooftop corn?
Corn prefers well-draining, fertile soil that is rich in organic matter. A good potting mix for rooftop corn should consist of a blend of compost, peat moss, and perlite or vermiculite. Compost provides essential nutrients and improves soil structure, while peat moss helps retain moisture. Perlite or vermiculite improves drainage and aeration. Avoid using garden soil in containers, as it can become compacted and poorly drained. You can also amend your potting mix with slow-release fertilizer to provide a steady supply of nutrients throughout the growing season.
How do I pollinate my rooftop corn?
Corn is wind-pollinated, meaning that the pollen from the tassels (male flowers) must be transferred to the silks (female flowers) by the wind. On a rooftop, where wind conditions may be less reliable, you may need to assist with pollination. You can do this by gently shaking the corn stalks to release pollen or by using a small paintbrush to collect pollen from the tassels and transfer it to the silks. Repeat this process every day for several days to ensure that all of the silks are pollinated. You’ll know that pollination has been successful when the silks turn brown and dry.
How do I protect my rooftop corn from pests and diseases?
Rooftop corn can be susceptible to various pests and diseases, such as corn earworms, aphids, and fungal infections. To protect your plants, inspect them regularly for signs of infestation or disease. Remove any affected leaves or ears promptly. Use organic pest control methods, such as neem oil or insecticidal soap, to control pests. Ensure that your plants have good air circulation to prevent fungal diseases. You can also use companion planting to deter pests. For example, planting marigolds near your corn can help repel aphids.
When is rooftop corn ready to harvest?
Corn is typically ready to harvest about 60-90 days after planting, depending on the variety. The silks will turn brown and dry, and the ears will feel plump and full. To check for ripeness, peel back a portion of the husk and puncture a kernel with your fingernail. If the liquid that comes out is milky, the corn is ready to harvest. If the liquid is clear, the corn is not yet ripe. If the liquid is doughy, the corn is overripe. Harvest the corn by twisting the ear off the stalk. Enjoy your fresh, homegrown corn immediately or store it in the refrigerator for a few days.


Leave a Comment