

Regrow Mint Indoors: Unlock the secrets to a never-ending supply of fresh, fragrant mint, right in your own home! Have you ever bought a bunch of mint for a recipe, only to have most of it wilt away in the fridge? I know I have! It’s frustrating, wasteful, and totally unnecessary. That’s why I’m so excited to share this simple, yet incredibly effective, DIY trick that will transform your kitchen into a miniature mint garden.
Mint, with its vibrant green leaves and invigorating aroma, has been cherished for centuries. From ancient medicinal practices to culinary delights, mint has played a significant role in cultures around the globe. The Romans used it to freshen breath and flavor sauces, while in the Middle East, mint tea remains a symbol of hospitality and warmth. Now, you can bring that same sense of freshness and tradition into your own home, effortlessly.
But why bother with regrowing mint indoors? Well, for starters, it’s incredibly cost-effective. Think of all the money you’ll save by not having to constantly repurchase fresh mint from the grocery store! More importantly, having a readily available supply of fresh mint elevates your cooking, cocktails, and even your everyday beverages. Imagine adding a sprig of freshly grown mint to your morning tea or whipping up a batch of homemade mojitos with ingredients straight from your windowsill. Plus, regrowing mint indoors is a fantastic way to add a touch of greenery to your living space and enjoy the therapeutic benefits of tending to a small garden. Let’s dive in and discover how easy it is!
Regrowing Mint Indoors: A Simple DIY Guide
Hey there, fellow plant enthusiasts! Are you tired of buying fresh mint only to have it wilt away in your fridge after a few days? I know I was! That’s why I decided to try regrowing mint indoors, and let me tell you, it’s surprisingly easy and rewarding. Plus, you’ll have a constant supply of fresh mint for your mojitos, teas, and culinary creations. Let’s dive into this simple DIY project!
What You’ll Need
Before we get started, let’s gather all the necessary supplies. This will make the process smoother and more enjoyable.
* Fresh Mint Stems: Look for healthy-looking stems with plenty of leaves from your local grocery store or farmer’s market. Make sure they haven’t been treated with any anti-sprouting chemicals. Organic is always a good choice!
* A Glass or Jar: Any clean glass or jar will do. I prefer using a clear glass so I can monitor the root growth.
* Water: Tap water is fine, but filtered water is even better.
* Potting Soil: Choose a well-draining potting mix. I like to use a mix specifically formulated for herbs.
* A Pot with Drainage Holes: This is crucial for preventing root rot. The size of the pot will depend on how many mint stems you’re planting. A 4-6 inch pot is usually a good starting point.
* Scissors or Pruning Shears: For trimming the mint stems.
* Optional: Rooting Hormone: While not essential, rooting hormone can help speed up the rooting process.
* Optional: Spray Bottle: For misting the mint leaves.
Step-by-Step Instructions: Rooting Mint in Water
This is the first phase of our mint-growing adventure. We’ll start by rooting the mint stems in water.
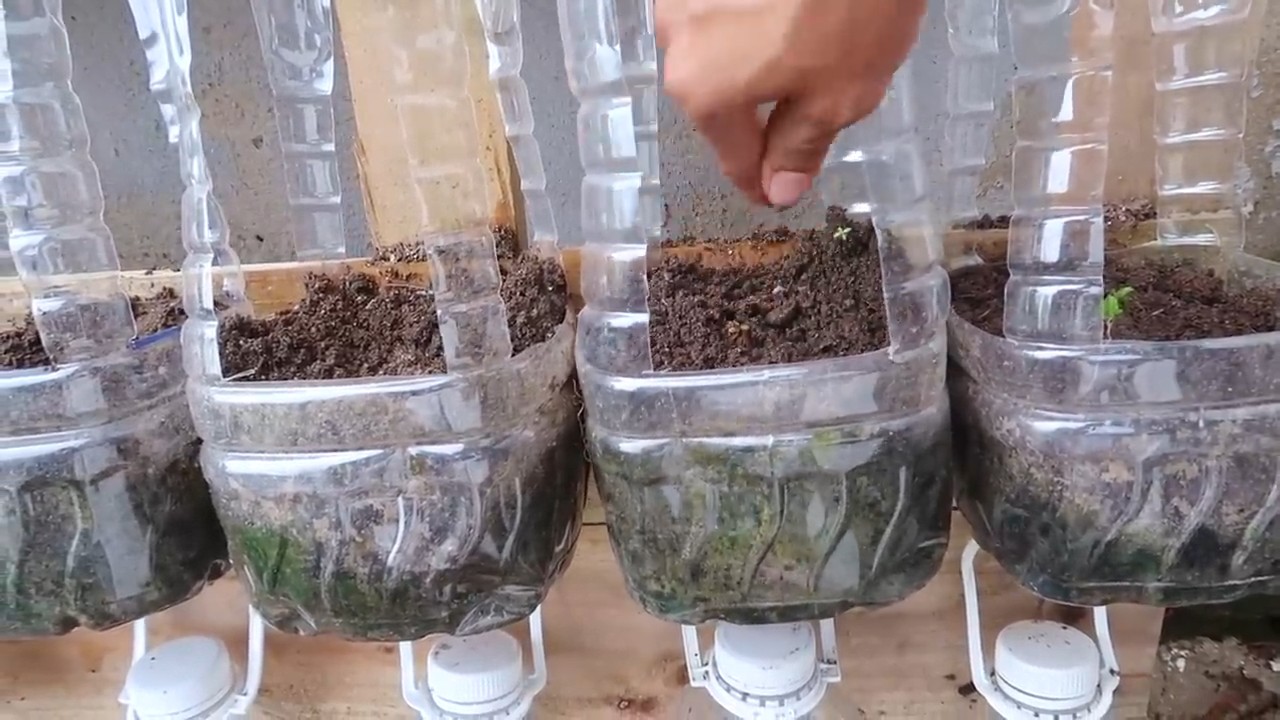
1. Prepare the Mint Stems: This is a crucial step. Take your fresh mint stems and carefully remove the leaves from the bottom inch or two of each stem. This is important because the submerged leaves will rot and contaminate the water. I usually just pinch them off with my fingers.
2. Place the Stems in Water: Fill your glass or jar with fresh water. Place the prepared mint stems into the water, making sure that the bare stem is submerged. Don’t overcrowd the glass; give the stems some space to breathe.
3. Find a Sunny Spot: Place the glass in a bright, indirect sunlight location. Avoid direct sunlight, as it can scorch the leaves. A windowsill that receives morning sun is ideal.
4. Change the Water Regularly: This is key to preventing bacteria growth and keeping your mint stems healthy. Change the water every one to two days. I usually do it every other day.
5. Observe Root Growth: Be patient! It usually takes about a week or two for roots to start appearing. You’ll see small, white roots emerging from the nodes (the points where the leaves were removed).
6. Optional: Use Rooting Hormone: If you’re using rooting hormone, dip the cut ends of the stems into the hormone powder before placing them in the water. This can help speed up the rooting process.
Step-by-Step Instructions: Planting the Rooted Mint
Once your mint stems have developed a good root system, it’s time to plant them in soil.
1. Prepare the Pot: Fill your pot with well-draining potting mix, leaving about an inch of space at the top.
2. Create Planting Holes: Use your finger or a small tool to create small holes in the soil, spaced about an inch or two apart. The number of holes will depend on how many mint stems you’re planting.
3. Carefully Remove the Rooted Stems: Gently remove the rooted mint stems from the water. Be careful not to damage the delicate roots.
4. Plant the Stems: Place each rooted stem into a planting hole, making sure the roots are covered with soil. Gently press the soil around the base of each stem to secure it.
5. Water Thoroughly: Water the newly planted mint thoroughly until the water drains out of the drainage holes. This will help settle the soil and hydrate the roots.
6. Find a Sunny Location: Place the pot in a sunny location that receives at least 4-6 hours of sunlight per day. Mint thrives in bright light.
Caring for Your Indoor Mint Plant
Now that your mint is planted, it’s important to provide it with the proper care to ensure it thrives.
* Watering: Water your mint plant regularly, keeping the soil consistently moist but not soggy. Check the soil moisture by sticking your finger into the soil. If the top inch feels dry, it’s time to water. Avoid overwatering, as this can lead to root rot.
* Fertilizing: Feed your mint plant with a balanced liquid fertilizer every two to four weeks during the growing season (spring and summer). Follow the instructions on the fertilizer label.
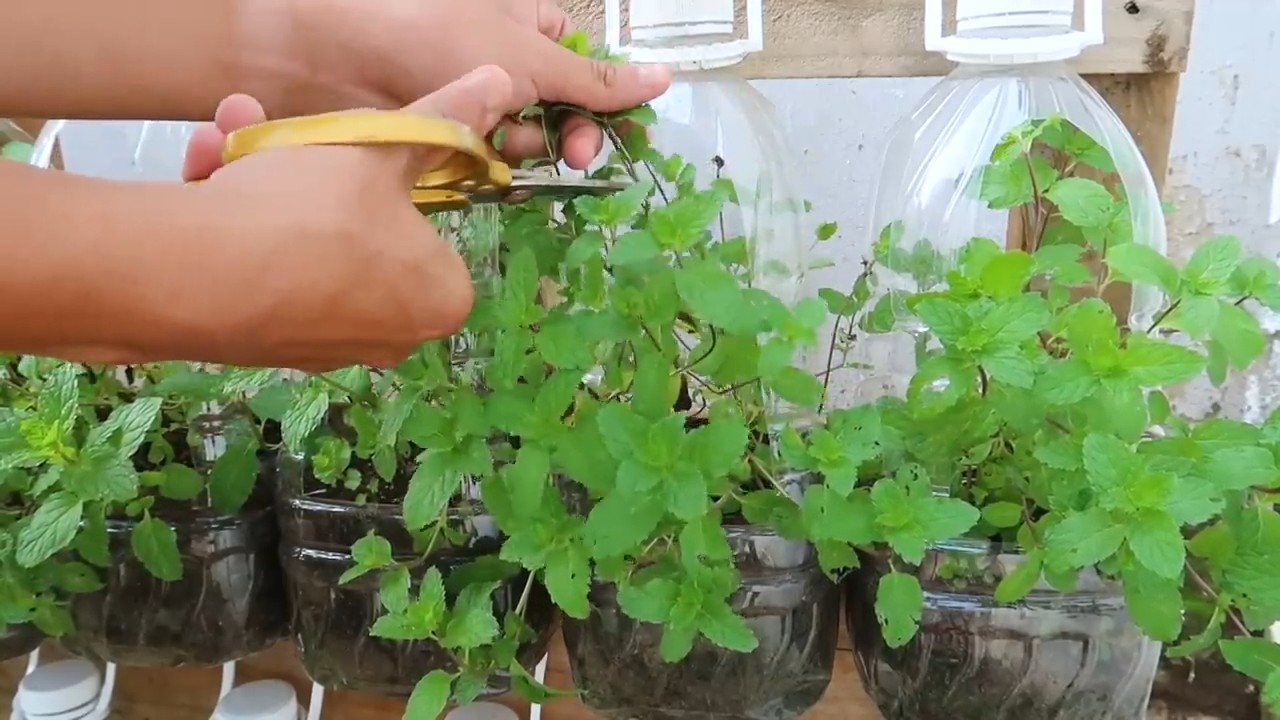
* Pruning: Pruning is essential for keeping your mint plant healthy and productive. Regularly pinch off the top leaves to encourage bushier growth. You can also prune back the stems to control the size of the plant. Don’t be afraid to harvest your mint regularly! The more you harvest, the more it will grow.
* Light: Mint needs plenty of light to thrive. If you don’t have a sunny windowsill, you can supplement with a grow light.
* Humidity: Mint prefers slightly humid conditions. You can increase the humidity around your plant by misting the leaves with water or placing the pot on a tray filled with pebbles and water. Make sure the bottom of the pot isn’t sitting directly in the water.
* Pest Control: Keep an eye out for pests such as aphids, spider mites, and whiteflies. If you notice any pests, treat them with an insecticidal soap or neem oil.
Troubleshooting
Even with the best care, you might encounter some problems along the way. Here are some common issues and how to address them:
* Yellowing Leaves: This can be caused by overwatering, underwatering, or lack of nutrients. Adjust your watering schedule and fertilize your plant if necessary.
* Leggy Growth: This is usually a sign of insufficient light. Move your plant to a brighter location or supplement with a grow light.
* Root Rot: This is caused by overwatering and poor drainage. Make sure your pot has drainage holes and avoid overwatering. If you suspect root rot, repot your plant in fresh soil.
* Pests: As mentioned earlier, keep an eye out for pests and treat them promptly.
Harvesting Your Mint
The best part of growing your own mint is being able to harvest it whenever you need it!
* When to Harvest: You can start harvesting your mint as soon as the plant has established itself and has plenty of leaves.
* How to Harvest: Use scissors or pruning shears to cut off the stems just above a leaf node. This will encourage new growth.
* Storing Your Mint: Freshly harvested mint can be stored in the refrigerator for several days. Wrap the stems in a damp paper towel and place them in a plastic bag. You can also dry your mint for longer-term storage.
Enjoy Your Fresh Mint!
Now that you know how to regrow mint indoors, you can enjoy a constant supply of fresh mint for all your culinary and beverage needs. I love adding it to my teas, mojitos, and salads. It’s also great for flavoring water or making homemade mint sauce. The possibilities are endless!
Growing mint indoors is a fun and rewarding project that anyone can do. With a little bit of care and attention, you can have a thriving mint plant that provides you with fresh herbs for years to come. Happy growing!
Conclusion
So, there you have it! Regrowing mint indoors isn’t just a fun project; it’s a practical and sustainable way to ensure you always have fresh, vibrant mint on hand. Forget those sad, wilted bunches from the grocery store – imagine stepping into your kitchen and snipping off exactly what you need, bursting with flavor and aroma. This DIY trick is a game-changer for home cooks, cocktail enthusiasts, and anyone who appreciates the simple pleasure of fresh herbs.
Why is this a must-try? Because it’s incredibly easy, cost-effective, and rewarding. You’re not just saving money on store-bought mint; you’re also reducing waste and connecting with the natural world, even in the heart of your home. Plus, the process itself is surprisingly therapeutic. Watching those tiny roots emerge and the plant flourish is a little victory that brightens any day.
But don’t stop there! Experiment with different varieties of mint. Peppermint, spearmint, chocolate mint – each offers a unique flavor profile that can elevate your culinary creations. Try planting your regrown mint in different types of containers, from simple terracotta pots to repurposed jars. Consider adding companion plants like basil or rosemary to create a mini indoor herb garden. You can even propagate your regrown mint further, creating an endless supply for yourself and to share with friends and family.
This method of regrowing mint indoors is also a fantastic way to introduce children to the wonders of gardening and the importance of sustainability. It’s a hands-on learning experience that teaches them about plant life cycles and the joy of growing their own food.
We’re confident that once you try this simple technique, you’ll be hooked. The satisfaction of transforming a few sprigs of mint into a thriving plant is truly unparalleled. So, gather your supplies, follow our easy steps, and get ready to enjoy the freshest, most flavorful mint you’ve ever tasted.
We encourage you to embark on this green adventure and share your experiences with us! Post photos of your regrown mint on social media using [Your Hashtag Here], or leave a comment below to let us know how it’s going. We’re eager to hear your tips, tricks, and success stories. Let’s build a community of indoor herb enthusiasts and spread the joy of fresh, homegrown mint!
Now, let’s address some frequently asked questions to ensure your mint-regrowing journey is a resounding success.
Frequently Asked Questions (FAQ)
What kind of mint works best for regrowing?
Generally, most common varieties of mint, such as spearmint, peppermint, and chocolate mint, are excellent candidates for regrowing indoors. Look for healthy stems with vibrant green leaves at your local grocery store or farmer’s market. Avoid stems that are wilted, discolored, or show signs of disease. The fresher the stems, the better your chances of successful rooting. Organic mint is always a good choice to avoid any potential pesticide residue.
How long does it take for mint to regrow roots?
You should start to see roots emerging from the stems within 7-14 days. The exact timeframe can vary depending on factors such as water temperature, light exposure, and the overall health of the mint stems. Be patient and ensure the water is changed regularly to prevent bacterial growth. Once the roots are about an inch long, they are ready to be planted in soil.
What type of soil is best for regrowing mint indoors?
Mint thrives in well-draining soil that is rich in organic matter. A good potting mix specifically formulated for herbs is ideal. You can also create your own mix by combining equal parts of potting soil, compost, and perlite or vermiculite. This will provide the necessary nutrients and drainage for healthy growth. Avoid using garden soil, as it can be too heavy and may contain pests or diseases.
How much sunlight does regrown mint need?
Mint needs at least 6 hours of sunlight per day to thrive. A sunny windowsill facing south or east is usually the best location. If you don’t have access to enough natural light, you can supplement with a grow light. Position the grow light about 6-12 inches above the plants and keep it on for 12-14 hours per day. Insufficient light can lead to leggy growth and reduced flavor.
How often should I water my regrown mint?
Water your mint regularly, keeping the soil consistently moist but not waterlogged. Check the soil moisture by sticking your finger about an inch deep. If the soil feels dry, it’s time to water. Avoid letting the soil dry out completely, as this can stress the plant. Overwatering can also be detrimental, leading to root rot. Ensure your pot has drainage holes to allow excess water to escape.
How do I prevent my regrown mint from becoming leggy?
Leggy growth, characterized by long, spindly stems with few leaves, is often caused by insufficient light. Ensure your mint receives adequate sunlight or supplement with a grow light. You can also pinch back the stems regularly to encourage bushier growth. Pinching involves removing the top set of leaves, which stimulates the plant to produce more side shoots.
Can I use fertilizer on my regrown mint?
Yes, you can fertilize your regrown mint to promote healthy growth. Use a balanced liquid fertilizer diluted to half strength. Fertilize every 2-4 weeks during the growing season (spring and summer). Avoid over-fertilizing, as this can lead to excessive foliage growth at the expense of flavor. Organic fertilizers, such as compost tea or fish emulsion, are also excellent options.
How do I harvest my regrown mint?
Harvest your mint by snipping off stems just above a leaf node. This will encourage the plant to produce new growth from that point. Avoid removing more than one-third of the plant at a time, as this can stress it. The best time to harvest mint is in the morning, after the dew has dried but before the sun gets too hot. This is when the essential oils are most concentrated, resulting in the best flavor.
How do I deal with pests on my regrown mint?
Inspect your mint regularly for pests such as aphids, spider mites, and whiteflies. If you find any pests, you can try washing them off with a strong stream of water. You can also use insecticidal soap or neem oil to control infestations. Be sure to follow the instructions on the product label carefully. Avoid using harsh chemicals, as they can harm the plant and make it unsafe for consumption.
My regrown mint is flowering. Should I do anything?
When mint flowers, it can sometimes affect the flavor of the leaves, making them slightly bitter. To prevent flowering, pinch off the flower buds as soon as you see them. This will also encourage the plant to focus its energy on producing more leaves. If your mint does flower, you can still use the leaves, but you may want to use them in cooked dishes where the flavor will be less noticeable. You can also allow the plant to flower to attract pollinators to your garden.
Can I move my regrown indoor mint plant outside?
Yes, you can move your regrown indoor mint plant outside, but it’s important to acclimate it gradually to the outdoor conditions. Start by placing the plant in a sheltered location for a few hours each day, gradually increasing the amount of time it spends outdoors. Avoid exposing it to direct sunlight or strong winds initially. Once the plant has acclimated, you can plant it in the ground or in a larger container. Be aware that mint can be invasive, so it’s best to plant it in a container to prevent it from spreading.
How do I propagate my regrown mint further?
Once your regrown mint is established, you can easily propagate it further through stem cuttings or root division. For stem cuttings, simply take a 4-6 inch cutting from a healthy stem, remove the lower leaves, and place it in water or directly into moist potting mix. For root division, carefully dig up the plant and divide the root ball into smaller sections, each with its own roots and stems. Replant the divisions in separate pots.

Leave a Comment