

Regrow Enoki Mushrooms at Home: Sounds like something out of a sci-fi movie, right? But trust me, it’s totally doable, and I’m here to show you how! Forget those pricey grocery store runs for exotic mushrooms; imagine harvesting your own fresh, delicious Enoki right from your kitchen counter.
Mushrooms, in general, have a rich history, deeply intertwined with various cultures for centuries. From ancient medicinal practices in Asia to culinary delicacies in Europe, they’ve always held a special place. Enoki mushrooms, with their delicate flavor and unique appearance, are particularly prized in East Asian cuisine. Traditionally, they were foraged from the stumps of hackberry trees, hence the name “Enoki” which translates to “hackberry mushroom” in Japanese.
Now, why would you want to learn to regrow Enoki mushrooms at home? Well, besides the sheer satisfaction of cultivating your own food, it’s a fantastic way to reduce food waste, save money, and enjoy the freshest possible ingredients. Plus, it’s a super fun and educational project for the whole family! In this article, I’ll walk you through a simple, step-by-step DIY method that even a complete beginner can master. Get ready to transform your kitchen into a mini mushroom farm!
Regrowing Enoki Mushrooms at Home: A Fun and Frugal Project!
Hey there, fellow mushroom enthusiasts! Ever wondered if you could regrow those delicate, long-stemmed Enoki mushrooms you love in your soups and stir-fries? Well, guess what? You absolutely can! It’s a surprisingly simple and rewarding DIY project, and I’m here to guide you through every step. Get ready to impress your friends (and yourself!) with your homegrown Enoki.
What You’ll Need: Your Enoki Regrowth Toolkit
Before we dive in, let’s gather our supplies. This is a low-cost project, so you probably have most of these items already.
* Enoki Mushrooms: Obviously! You’ll need a cluster of store-bought Enoki mushrooms. Choose ones that look fresh and firm, preferably with the roots still attached.
* A Clean Container: A plastic container with a lid works perfectly. Think a yogurt container, a deli container, or even a clean takeout box. Just make sure it’s deep enough to hold your substrate and mushrooms.
* Substrate: This is the growing medium for your mushrooms. I’ve had great success with a mix of:
* Cardboard: Plain, corrugated cardboard, shredded into small pieces. Avoid cardboard with heavy printing or glossy coatings.
* Coffee Grounds: Used coffee grounds are a fantastic nutrient source for mushrooms. Make sure they’ve cooled down!
* Sawdust (Optional): If you have access to untreated sawdust, it can add extra bulk and nutrients to your substrate.
* Hydrogen Peroxide (3%): This helps sterilize the substrate and prevent mold growth.
* Spray Bottle: For misting your mushrooms.
* Distilled or Filtered Water: Tap water can sometimes contain chlorine, which isn’t ideal for mushroom growth.
* Rubbing Alcohol: For sanitizing your work area and tools.
* Gloves (Optional): To keep things extra clean.
Preparing the Substrate: The Foundation for Growth
This is a crucial step, as a clean and nutritious substrate is essential for successful Enoki regrowth.
1. Sanitize Everything: Before you even touch the cardboard, wipe down your work surface, container, and spray bottle with rubbing alcohol. This minimizes the risk of contamination.
2. Shred the Cardboard: Tear or cut the cardboard into small pieces, about 1-2 inches in size. The smaller the pieces, the easier it will be for the mushrooms to colonize.
3. Mix the Substrate: In a bowl, combine the shredded cardboard, used coffee grounds, and sawdust (if using). A good ratio is roughly 2 parts cardboard, 1 part coffee grounds, and 1 part sawdust. Don’t worry about being exact; a little variation is fine.
4. Sterilize the Substrate: This is where the hydrogen peroxide comes in. In your container, add the substrate mixture. Then, pour in enough distilled or filtered water to thoroughly moisten the substrate. It should be damp, but not soaking wet. Now, add about 1-2 tablespoons of 3% hydrogen peroxide to the water-soaked substrate. This will help kill off any unwanted bacteria or mold spores. Mix everything well.
5. Drain Excess Water: If there’s excess water pooling at the bottom of the container, carefully drain it off. The substrate should be moist, not waterlogged.
Planting the Enoki: Giving Them a New Home
Now for the fun part! We’re going to give our Enoki mushrooms a new lease on life.
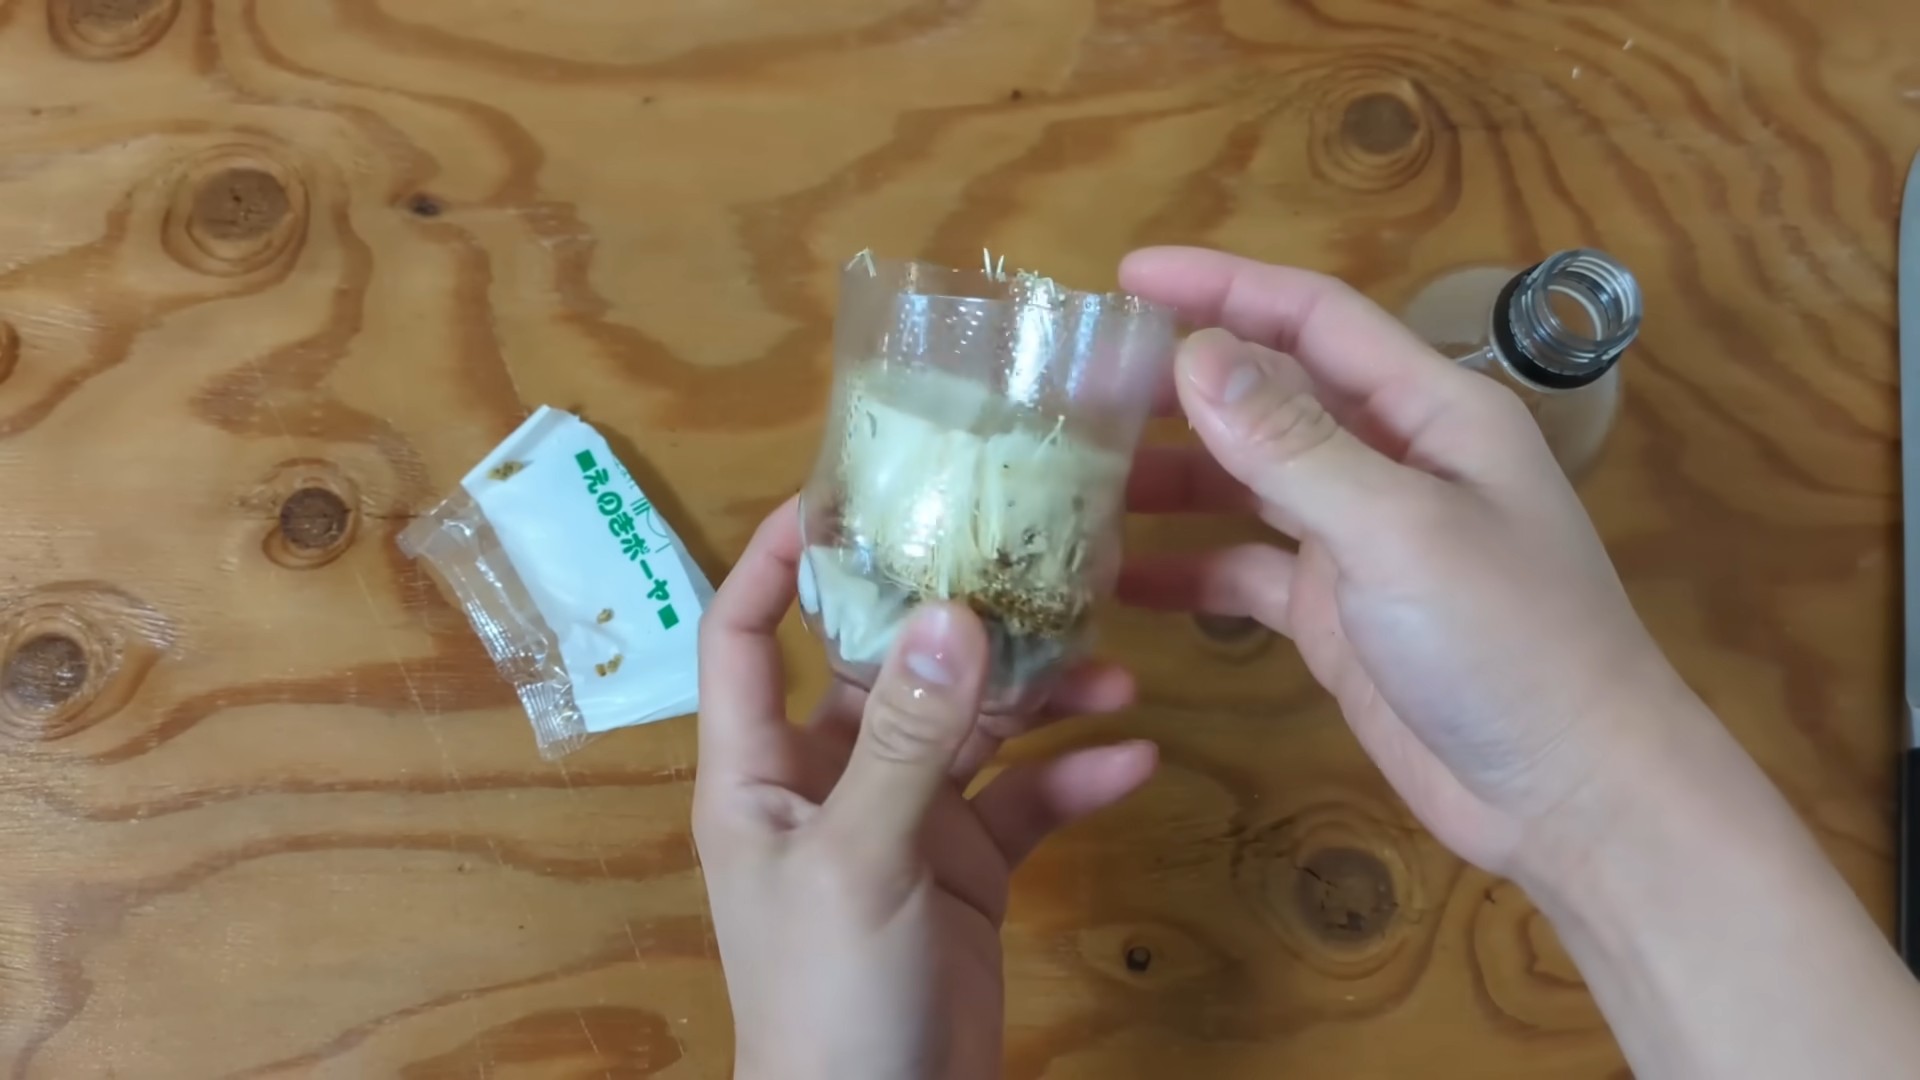
1. Prepare the Enoki: Gently separate the Enoki mushroom cluster from its original packaging. If the roots are still attached, that’s great! If not, don’t worry; they can still regrow.
2. Bury the Base: Create a small indentation in the center of your prepared substrate. Place the base of the Enoki mushroom cluster (where the stems are joined) into the indentation. Gently cover the base with the substrate, leaving the stems exposed.
3. Mist Lightly: Use your spray bottle to lightly mist the Enoki mushrooms and the surrounding substrate with distilled or filtered water.
4. Cover and Wait: Place the lid on the container, but don’t seal it completely. You want some air circulation to prevent the buildup of moisture and mold. Leave a small gap for ventilation.
Creating the Ideal Environment: Temperature, Light, and Humidity
Enoki mushrooms are a bit picky about their environment, but don’t let that intimidate you. Here’s how to create the perfect conditions for growth:
1. Temperature: Enoki mushrooms prefer cool temperatures, ideally between 55-65°F (13-18°C). A basement, garage, or cool cupboard is a good location. Avoid placing them in direct sunlight or near heat sources.
2. Light: Enoki mushrooms don’t need a lot of light. Indirect light is sufficient. Avoid direct sunlight, which can dry them out.
3. Humidity: Enoki mushrooms thrive in humid environments. Mist the mushrooms and the substrate with distilled or filtered water 1-2 times a day, or as needed to keep them moist. If you live in a dry climate, you might consider placing the container inside a larger plastic bag to create a mini-greenhouse effect. Just be sure to leave the bag slightly open for ventilation.
4. Patience is Key: Now comes the hardest part: waiting! It can take several weeks for the Enoki mushrooms to start regrowing. Be patient and continue to monitor the moisture levels and temperature.
Monitoring and Maintenance: Keeping Things Healthy
Regular monitoring is essential to ensure your Enoki mushrooms are thriving.
1. Check for Mold: Keep a close eye on the substrate for any signs of mold. If you see any green, black, or fuzzy growth, carefully remove the affected area with a clean spoon or knife. You can also spray the area with a diluted hydrogen peroxide solution (1 part hydrogen peroxide to 10 parts water).
2. Maintain Moisture: As mentioned earlier, keep the substrate and mushrooms consistently moist by misting them regularly.
3. Ventilation: Ensure there’s adequate ventilation to prevent the buildup of moisture and mold. If you’re using a plastic bag, leave it slightly open. If you’re using a container with a lid, leave a small gap.
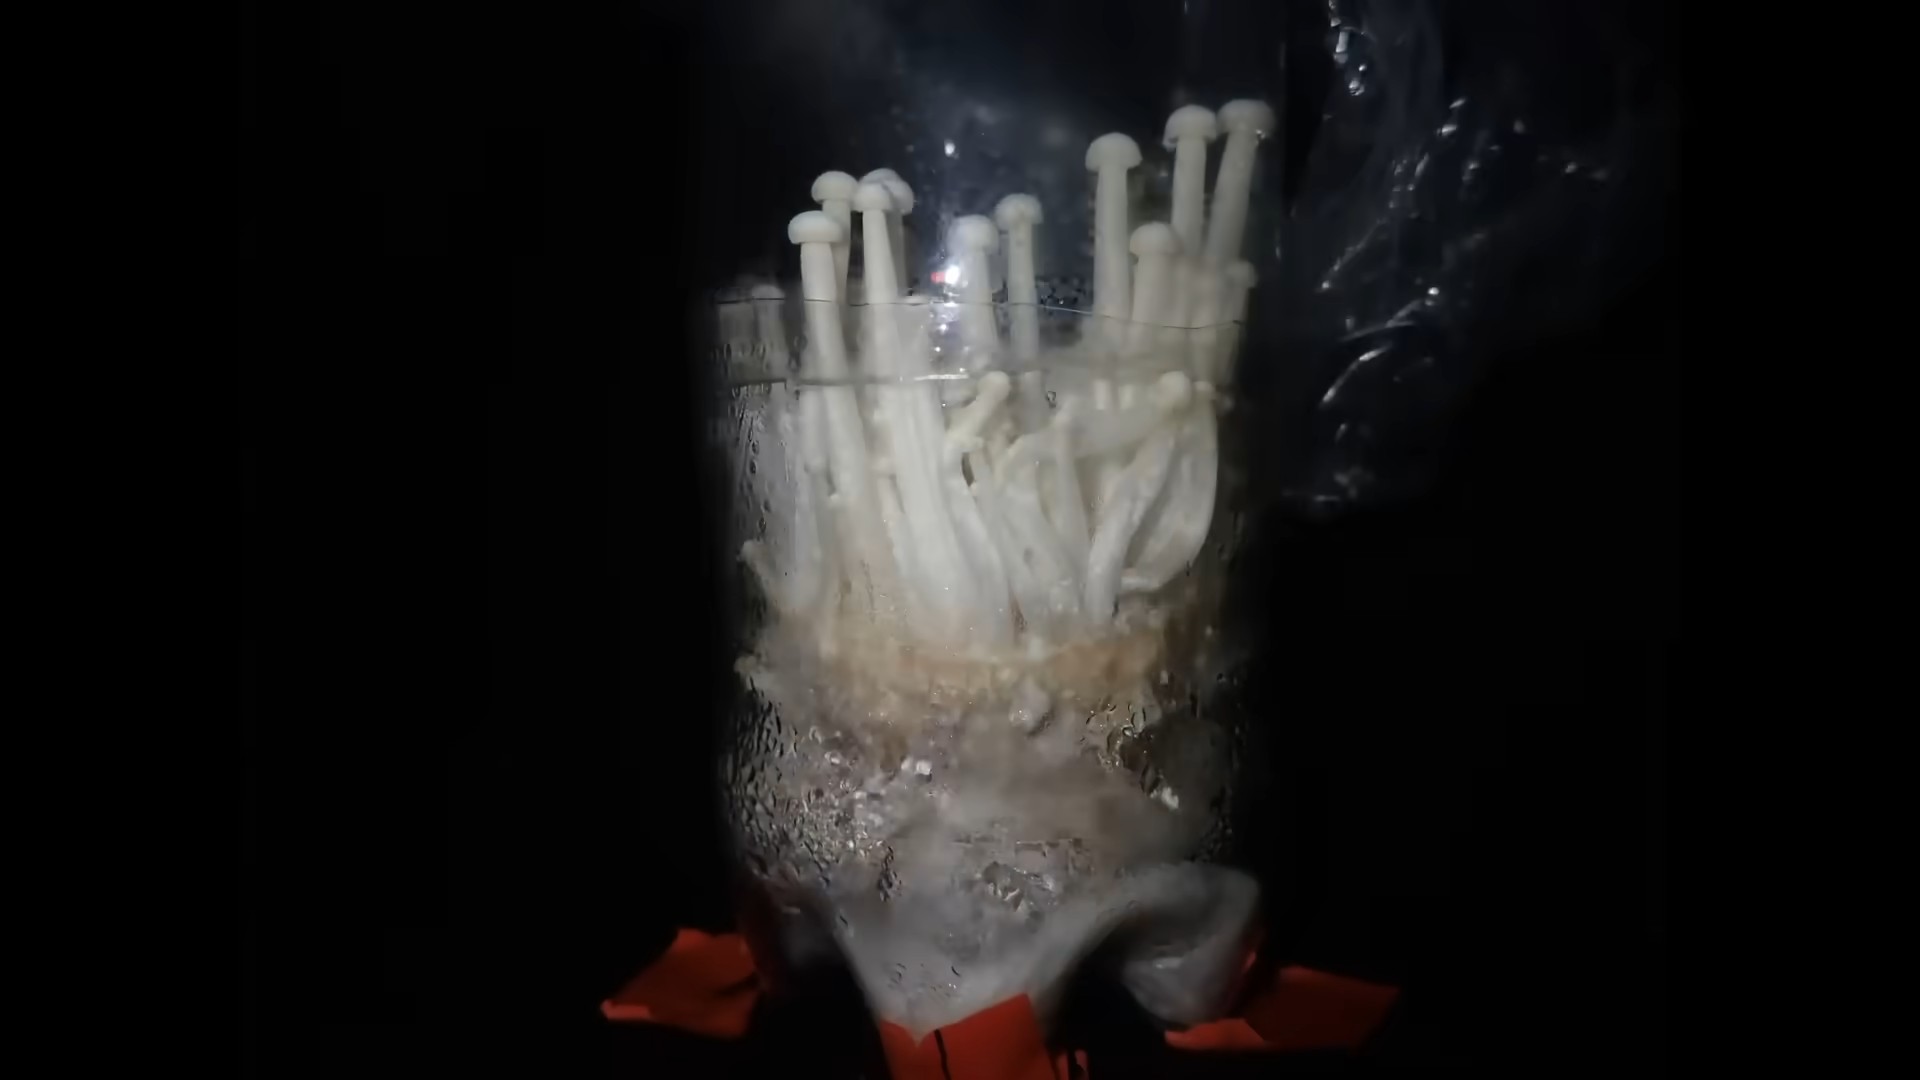
4. Observe Growth: Over time, you should start to see new Enoki mushroom stems emerging from the base of the original cluster. These new stems will be white and delicate.
Harvesting Your Enoki: The Fruits (or Fungi!) of Your Labor
After several weeks, your Enoki mushrooms should be ready to harvest!
1. Harvest Time: When the new Enoki mushroom stems have reached a desired length (usually a few inches), it’s time to harvest.
2. Gentle Harvest: Using a clean knife or scissors, carefully cut the Enoki mushroom stems at the base, near the substrate.
3. Enjoy Your Harvest: Your homegrown Enoki mushrooms are now ready to be enjoyed! Add them to soups, stir-fries, salads, or any other dish where you would typically use Enoki mushrooms.
4. Second Flush (Optional): After harvesting, you can try to get a second flush of mushrooms by continuing to mist the substrate and maintain the ideal growing conditions. However, the second flush may not be as abundant as the first.
Troubleshooting: Addressing Common Issues
Even with the best care, you might encounter some challenges along the way. Here are some common issues and how to address them:
* No Growth: If you’re not seeing any growth after several weeks, it could be due to several factors:
* Temperature: Make sure the temperature is within the ideal range (55-65°F).
* Moisture: Ensure the substrate and mushrooms are consistently moist.
* Contamination: Check for signs of mold.
* Substrate: The substrate might not be providing enough nutrients. Try adding more coffee grounds or sawdust.
* Mold Growth: Mold is a common problem in mushroom cultivation. To prevent mold, sanitize everything thoroughly, use hydrogen peroxide to sterilize the substrate, and ensure adequate ventilation. If you see mold, remove the affected area and spray with a diluted hydrogen peroxide solution.
* Mushrooms Drying Out: If the mushrooms are drying out, increase the humidity by misting them more frequently or placing the container inside a plastic bag.
* Stunted Growth: Stunted growth can be caused by a lack of nutrients, inadequate moisture, or poor ventilation. Make sure the substrate is nutritious, the mushrooms are consistently moist, and there’s adequate air circulation.
Tips and Tricks for Success: Elevating Your Enoki Game
Here are a few extra tips to help you achieve Enoki mushroom regrowth success:
* Experiment with Substrates:
Conclusion
So, there you have it! Regrowing Enoki mushrooms at home isn’t just a fun experiment; it’s a sustainable way to enjoy these delicate, flavorful fungi without constantly relying on store-bought options. We’ve walked you through the simple steps, highlighting the key elements for success, from selecting the right mushroom base to maintaining the ideal growing environment.
Why is this DIY trick a must-try? Because it empowers you to take control of your food source, reduces food waste, and connects you with the fascinating world of mycology. Imagine the satisfaction of harvesting your own Enoki mushrooms, knowing you nurtured them from a humble stem to a culinary delight. It’s a rewarding experience that’s both educational and delicious.
But the adventure doesn’t stop there! Feel free to experiment with variations. Try using different types of growing mediums, such as supplemented sawdust or even coffee grounds mixed with cardboard. Observe how these variations affect the growth rate, texture, and flavor of your Enoki mushrooms. You could also explore different lighting conditions to see if it impacts the color and shape of the fruiting bodies. Some growers even add a small amount of sugar to the water to provide extra nutrients, although this should be done cautiously to avoid contamination.
Don’t be afraid to get creative with your Enoki mushroom cultivation. The beauty of DIY is the freedom to adapt and personalize the process to suit your preferences and resources. Remember to document your experiments and share your findings with the community.
We wholeheartedly encourage you to embark on this exciting journey of regrowing Enoki mushrooms at home. It’s a simple, sustainable, and incredibly rewarding project that will add a touch of magic to your kitchen and a deeper appreciation for the wonders of nature.
Once you’ve given it a try, we’d love to hear about your experience! Share your photos, tips, and challenges in the comments below. Let’s create a community of Enoki enthusiasts, learning and growing together. Your insights could inspire others to take the plunge and discover the joy of homegrown mushrooms. So, grab your Enoki stems, gather your supplies, and get ready to witness the amazing power of regeneration. Happy growing!
Frequently Asked Questions (FAQs)
What exactly are Enoki mushrooms, and why should I bother regrowing them?
Enoki mushrooms (Flammulina velutipes) are long, thin, white mushrooms with small caps, often sold in clusters. They have a mild, slightly fruity flavor and a crisp texture, making them a popular addition to soups, salads, and stir-fries. Regrowing them at home offers several advantages: it’s a sustainable way to reduce food waste, it’s cheaper than buying them repeatedly, and it’s a fascinating educational experience. Plus, you get to enjoy fresh, homegrown Enoki mushrooms whenever you want!
How long does it take to regrow Enoki mushrooms?
The time it takes to regrow Enoki mushrooms can vary depending on environmental conditions and the health of the original mushroom base. Generally, you can expect to see initial growth within 1-2 weeks. It may take 3-4 weeks for the mushrooms to fully mature and be ready for harvest. Maintaining optimal humidity and temperature is crucial for faster growth.
What’s the best growing medium for regrowing Enoki mushrooms?
While the instructions often recommend using water, you can experiment with other growing mediums to potentially enhance growth. Sterilized sawdust, supplemented with nutrients like wheat bran, can provide a more robust substrate. You can also try a mixture of coffee grounds and shredded cardboard, which provides a sustainable and nutrient-rich environment. Remember to sterilize any alternative growing medium to prevent contamination.
How do I maintain the right humidity levels for Enoki mushroom growth?
Humidity is critical for successful Enoki mushroom cultivation. Aim for a humidity level of 80-90%. You can achieve this by placing a plastic bag or container over the growing setup, creating a mini-greenhouse effect. Mist the inside of the bag or container regularly to maintain moisture. Avoid direct spraying of the mushroom stems, as this can lead to rot. A humidity monitor can be helpful for accurate readings.
What temperature is ideal for regrowing Enoki mushrooms?
Enoki mushrooms prefer cooler temperatures, ideally between 55-65°F (13-18°C). Avoid placing the growing setup in direct sunlight or near heat sources. A cool, dark location, such as a basement or pantry, is often ideal. If the temperature is too high, the mushrooms may become leggy and less flavorful.
How much light do Enoki mushrooms need?
Enoki mushrooms don’t require a lot of light. In fact, they prefer low-light conditions. Indirect light is sufficient for their growth. Avoid direct sunlight, as it can dry out the mushrooms and inhibit their development.
How do I know when the Enoki mushrooms are ready to harvest?
The Enoki mushrooms are ready to harvest when they have reached your desired length and the caps are still small and tightly closed. Typically, they will be several inches long. Use a clean, sharp knife or scissors to cut the mushrooms at the base of the stem, just above the growing medium.
Can I regrow Enoki mushrooms more than once from the same base?
Yes, you can often get multiple flushes of Enoki mushrooms from the same base. After harvesting the first flush, remove any remaining mushroom debris and refresh the growing medium with fresh water or nutrients. Maintain the same environmental conditions, and you should see another flush of mushrooms within a few weeks. However, the subsequent flushes may be smaller than the first.
What are some common problems I might encounter, and how can I fix them?
One common problem is mold contamination. To prevent this, ensure that all materials are sterilized before use. If you see mold, carefully remove the affected area and replace the growing medium. Another issue is insufficient humidity, which can lead to dry, stunted growth. Increase humidity by misting regularly and covering the growing setup. Overwatering can also be a problem, leading to rot. Ensure proper drainage and avoid direct spraying of the mushroom stems.
Are there any safety precautions I should take when regrowing Enoki mushrooms?
Always wash your hands thoroughly before handling the mushrooms or the growing medium. Use sterilized equipment to prevent contamination. If you are unsure about the safety of the mushrooms, it’s best to err on the side of caution and discard them. Never consume mushrooms that have an unusual odor or appearance.
Can I eat the regrown Enoki mushrooms raw?
While commercially grown Enoki mushrooms are often eaten raw, it’s generally recommended to cook regrown Enoki mushrooms thoroughly. Cooking helps to break down the chitin in the mushroom cell walls, making them easier to digest and reducing the risk of any potential contamination.
What can I do with my homegrown Enoki mushrooms?
The possibilities are endless! Add them to soups, salads, stir-fries, and noodle dishes. They can also be sautéed with garlic and butter for a simple and delicious side dish. Their delicate flavor and crisp texture make them a versatile ingredient in a variety of cuisines.
How do I store harvested Enoki mushrooms?
Store harvested Enoki mushrooms in the refrigerator in a paper bag or a container lined with a paper towel. They will typically last for up to a week. Avoid storing them in plastic bags, as this can trap moisture and cause them to spoil more quickly.
Where can I find more information about growing mushrooms at home?
There are many excellent resources available online and in libraries. Look for books and articles on mushroom cultivation, and consider joining online forums or communities dedicated to mycology. Experimentation and learning from others are key to success in the world of mushroom growing.

Leave a Comment