

Mushroom Bucket Indoor Gardening: Unlock the secrets to cultivating your own delicious and nutritious mushrooms right in the comfort of your home! Have you ever dreamed of harvesting fresh, gourmet mushrooms without ever stepping foot outside? Well, dream no more! This DIY guide will walk you through the surprisingly simple process of creating your very own mushroom bucket garden, bringing the earthy flavors of the forest directly to your kitchen.
For centuries, mushroom cultivation has been revered in various cultures, from ancient Chinese medicinal practices to European culinary traditions. The ability to grow these fascinating fungi indoors offers a sustainable and rewarding way to connect with nature, regardless of your living space. Plus, imagine the satisfaction of serving a meal featuring mushrooms you nurtured from start to finish!
In today’s fast-paced world, access to fresh, high-quality produce can be a challenge. Store-bought mushrooms can be expensive and often lack the robust flavor of freshly harvested ones. That’s where Mushroom Bucket Indoor Gardening comes in. This DIY project is not only cost-effective but also incredibly space-efficient, making it perfect for apartment dwellers, urban gardeners, and anyone looking to add a touch of homegrown goodness to their diet. I’m excited to share these simple steps with you, so you can start enjoying the benefits of fresh, homegrown mushrooms in no time!

Transforming a Mushroom Bucket into an Indoor Garden Oasis
Hey there, fellow plant enthusiasts! Ever wondered what to do with those empty mushroom buckets after enjoying a delicious meal? Instead of tossing them, let’s give them a new life as charming indoor gardens! This DIY project is not only eco-friendly but also a fantastic way to bring a touch of nature into your home. I’ll walk you through each step, making it super easy and fun.
Materials You’ll Need
Before we dive in, gather these essentials:
* Empty mushroom bucket (thoroughly cleaned)
* Potting soil (choose a mix suitable for your desired plants)
* Drainage material (gravel, pebbles, or broken pottery shards)
* Small plants or seeds (herbs, succulents, flowers – the choice is yours!)
* Gloves (to keep your hands clean)
* Trowel or small shovel
* Watering can or spray bottle
* Optional: Decorative stones, moss, or small figurines for embellishment
* Optional: Drill and drill bit (if you want to add extra drainage holes)
Preparing the Mushroom Bucket
This is a crucial step to ensure your plants thrive.
1. Cleaning the Bucket: First things first, give that mushroom bucket a good scrub! Remove any leftover substrate or debris. I usually use warm, soapy water and a sponge. Rinse it thoroughly to get rid of any soap residue. You don’t want any lingering chemicals harming your plants.
2. Drainage Assessment: Most mushroom buckets have some drainage holes, but it’s always a good idea to check. If you’re unsure or want to be extra cautious, I recommend adding a few more.
3. Adding Drainage Holes (Optional): If you decide to add more drainage, grab your drill and a suitable drill bit. Carefully drill a few holes in the bottom of the bucket. I usually aim for about four to six holes, evenly spaced. Be gentle and avoid applying too much pressure to prevent cracking the plastic.
Creating the Foundation
A good foundation is key for healthy plant growth.
1. Drainage Layer: Now, let’s create a drainage layer at the bottom of the bucket. This prevents water from pooling and causing root rot. I like to use gravel or pebbles, but broken pottery shards work just as well. Spread a layer of about 1-2 inches thick.
2. Soil Barrier (Optional): To prevent the soil from washing away into the drainage layer, you can add a barrier. I often use a piece of landscape fabric or even an old coffee filter. Just cut it to fit the bottom of the bucket and place it on top of the drainage layer.
3. Adding Potting Soil: Time to add the potting soil! Choose a mix that’s appropriate for the plants you’ve selected. For succulents, I use a well-draining cactus mix. For herbs, a general-purpose potting soil works great. Fill the bucket with soil, leaving about an inch or two of space at the top.
Planting Your Garden
This is where the magic happens!
1. Planning Your Layout: Before you start planting, take a moment to plan your layout. Consider the size and growth habits of your plants. Taller plants should go in the back, and smaller ones in the front. I like to arrange the plants on the soil surface to get a visual idea before planting.
2. Planting the Plants: Gently remove your plants from their containers. Loosen the roots a bit to encourage them to spread out. Dig a small hole in the soil for each plant and carefully place it in the hole. Backfill with soil and gently pat it down.
3. Planting Seeds: If you’re using seeds, follow the instructions on the seed packet. Sprinkle the seeds evenly over the soil surface and cover them with a thin layer of soil. Gently water the soil to moisten it.
Adding the Finishing Touches
These details will make your garden truly special.
1. Watering: After planting, give your garden a good watering. Use a watering can or spray bottle to gently moisten the soil. Avoid overwatering, as this can lead to root rot.
2. Mulching (Optional): Adding a layer of mulch can help retain moisture and suppress weeds. I like to use shredded bark or coconut coir. Spread a thin layer of mulch around the base of your plants.
3. Decorative Elements (Optional): Now for the fun part! Add decorative stones, moss, or small figurines to personalize your garden. I often use small pebbles to create pathways or add a miniature gnome for a whimsical touch.
Caring for Your Indoor Garden
Proper care is essential for a thriving garden.
1. Light: Place your garden in a location that receives adequate sunlight. Most plants need at least six hours of sunlight per day. If you don’t have enough natural light, you can supplement with a grow light.
2. Watering: Water your plants regularly, but avoid overwatering. The frequency of watering will depend on the type of plants you have and the humidity levels in your home. I usually check the soil moisture by sticking my finger into the soil. If the top inch feels dry, it’s time to water.
3. Fertilizing: Feed your plants with a balanced fertilizer every few weeks during the growing season. Follow the instructions on the fertilizer label.
4. Pruning: Prune your plants regularly to encourage bushier growth and remove any dead or yellowing leaves.
5. Pest Control: Keep an eye out for pests, such as aphids or spider mites. If you spot any pests, treat them with an appropriate insecticide or organic pest control method. I prefer using neem oil for a natural solution.
Choosing the Right Plants
Selecting the right plants is crucial for success. Here are some of my favorite options:
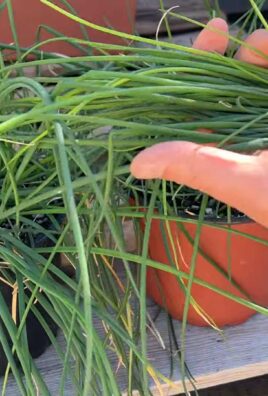
* Herbs: Basil, mint, parsley, and chives are all easy to grow indoors and add fresh flavor to your meals.
* Succulents: Echeverias, sedums, and haworthias are low-maintenance and come in a variety of shapes and colors.
* Flowers: African violets, begonias, and impatiens are beautiful flowering plants that thrive indoors.
* Leafy Greens: Spinach, lettuce, and kale can be grown in smaller containers and provide fresh greens for salads.
Troubleshooting Tips
Even with the best care, you might encounter some challenges. Here are a few common issues and how to address them:
* Yellowing Leaves: This could be a sign of overwatering, underwatering, or nutrient deficiency. Adjust your watering schedule and fertilize your plants if necessary.
* Leggy Growth: This usually indicates insufficient light. Move your garden to a brighter location or supplement with a grow light.
* Root Rot: This is caused by overwatering and poor drainage. Make sure your bucket has adequate drainage holes and avoid overwatering.
* Pest Infestations: Treat pests with an appropriate insecticide or organic pest control method.
Expanding Your Indoor Garden
Once you’ve mastered the mushroom bucket garden, you can explore other creative options:
* Vertical Gardens: Create a vertical garden by attaching multiple mushroom buckets to a wall or fence.
* Hanging Baskets: Transform your mushroom buckets into hanging baskets by adding macrame or rope hangers.
* Terrariums: Use a clear plastic mushroom bucket to create a miniature terrarium.
* Herb Gardens: Dedicate a mushroom bucket to growing a variety of herbs for your kitchen.
Why I Love This Project
I absolutely adore this DIY project because it’s a fantastic way to repurpose materials, connect with nature, and add a personal touch to my home decor. It’s also incredibly rewarding to watch your plants grow and thrive in their new environment. Plus, it’s a great conversation starter when guests come over!
Final Thoughts
So, there you have it! A comprehensive guide to transforming a humble mushroom bucket into a thriving indoor garden. I hope you found this tutorial helpful and inspiring. Remember, gardening is all about experimentation and learning. Don’t be afraid to try new things and have fun along the way. Happy gardening!
Conclusion
So, there you have it! Transforming a simple bucket into a thriving indoor mushroom garden is not just a fun project; it’s a sustainable and rewarding way to bring fresh, delicious mushrooms right to your kitchen. We’ve walked you through the process, highlighting the simplicity and accessibility of this DIY trick. Forget expensive kits and complicated setups – with a bucket, some substrate, and mushroom spawn, you’re well on your way to harvesting your own gourmet fungi.
But why is this DIY mushroom bucket gardening a must-try? Beyond the obvious benefit of fresh, organic mushrooms, it’s about reclaiming control over your food source. In a world increasingly disconnected from the origins of our meals, this project offers a tangible connection to the natural world. It’s a chance to learn about the fascinating life cycle of fungi, to experiment with different varieties, and to enjoy the satisfaction of nurturing something from start to finish.
Furthermore, the environmental benefits are undeniable. By repurposing a bucket, you’re reducing waste and contributing to a more sustainable lifestyle. Growing your own mushrooms also minimizes your carbon footprint compared to purchasing commercially grown varieties that often travel long distances.
Don’t be afraid to get creative with your mushroom bucket garden! Consider experimenting with different types of mushrooms. Oyster mushrooms are a great starting point due to their ease of cultivation and rapid growth. Shiitake mushrooms offer a more robust flavor, while Lion’s Mane mushrooms are prized for their unique texture and potential health benefits. Remember to research the specific needs of each variety to ensure optimal growth.
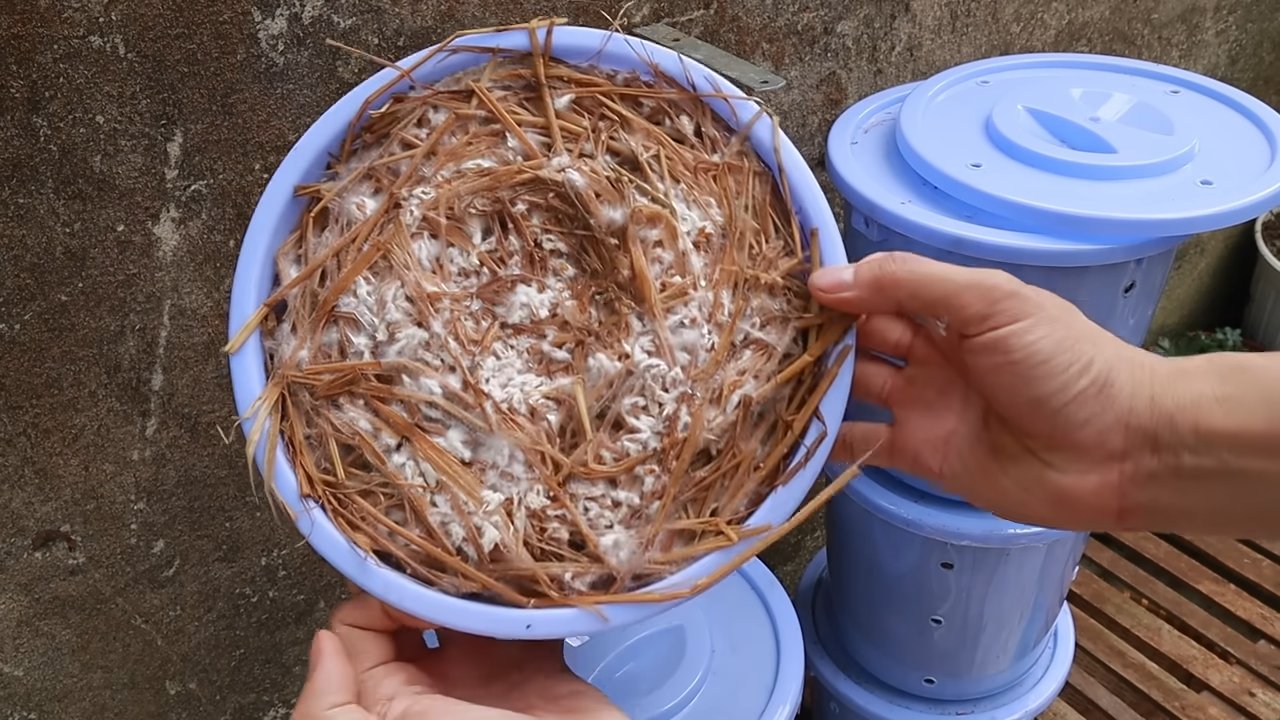
You can also explore different substrate options. While straw and coffee grounds are popular choices, you can also use wood chips, cardboard, or even cotton waste. The key is to ensure the substrate is properly pasteurized or sterilized to eliminate competing organisms.
Another variation to consider is the location of your mushroom bucket garden. While a dark, humid environment is ideal, you can adjust the conditions to suit your space. If you live in a dry climate, consider using a humidity tent or misting the mushrooms regularly. If you lack a dark space, you can cover the bucket with a breathable cloth or place it in a shaded area.
This DIY mushroom bucket gardening method is truly a game-changer for anyone looking to grow their own food sustainably and affordably. It’s a project that’s accessible to beginners, yet offers endless opportunities for experimentation and learning.
We wholeheartedly encourage you to give this DIY trick a try. It’s a rewarding experience that will not only provide you with delicious mushrooms but also connect you to the natural world in a meaningful way.
Once you’ve embarked on your mushroom-growing adventure, we’d love to hear about your experiences! Share your photos, tips, and challenges in the comments below. Let’s build a community of mushroom enthusiasts and learn from each other. What varieties did you try? What substrate worked best for you? What challenges did you encounter, and how did you overcome them? Your insights will be invaluable to others who are just starting out.
So, grab a bucket, gather your supplies, and get ready to embark on a fascinating journey into the world of mushroom cultivation. Happy growing!
Frequently Asked Questions (FAQ)
What kind of bucket should I use?
Almost any food-grade plastic bucket will work for mushroom cultivation. A 5-gallon bucket is a common and convenient size, but you can use larger or smaller buckets depending on your space and desired yield. Ensure the bucket is clean and free of any harmful chemicals. Avoid buckets that have previously contained toxic substances. Look for buckets labeled as “food-grade” or made from HDPE (high-density polyethylene) plastic, which is generally considered safe for food contact.
What is the best substrate for growing mushrooms in a bucket?
The best substrate depends on the type of mushroom you’re growing. Oyster mushrooms thrive on straw, coffee grounds, and cardboard. Shiitake mushrooms prefer hardwood sawdust or wood chips. Lion’s Mane mushrooms also do well on hardwood substrates. Regardless of the substrate you choose, it’s crucial to pasteurize or sterilize it to eliminate competing organisms. Pasteurization involves heating the substrate to a temperature that kills harmful bacteria and fungi without destroying beneficial microbes. Sterilization involves heating the substrate to a higher temperature to kill all living organisms.
How do I pasteurize or sterilize the substrate?
For pasteurization, you can soak the substrate in hot water (around 160-180°F) for 1-2 hours. For sterilization, you can use a pressure cooker or autoclave. Place the substrate in a heat-resistant container and heat it at 15 PSI for 90 minutes. Always allow the substrate to cool completely before inoculating it with mushroom spawn. Improperly cooled substrate can kill the spawn.
Where should I place my mushroom bucket garden?
Mushrooms generally prefer a dark, humid environment with good air circulation. A basement, garage, or closet are often ideal locations. Avoid placing the bucket in direct sunlight, as this can dry out the substrate and inhibit mushroom growth. The ideal temperature range for most mushroom varieties is between 60-75°F. If you live in a dry climate, you may need to increase the humidity by misting the mushrooms regularly or using a humidity tent.
How often should I water my mushroom bucket garden?
The frequency of watering depends on the humidity of your environment and the type of substrate you’re using. Generally, you should mist the mushrooms regularly to keep the substrate moist but not waterlogged. Avoid overwatering, as this can lead to mold growth. A good way to check the moisture level is to squeeze a handful of substrate. It should feel damp but not dripping wet.
How long does it take for mushrooms to grow in a bucket?
The time it takes for mushrooms to grow depends on the variety and the environmental conditions. Oyster mushrooms typically fruit within 1-2 weeks of inoculation, while shiitake mushrooms may take several months. Patience is key! Ensure the substrate is properly colonized by the mycelium (the vegetative part of the fungus) before expecting to see mushrooms.
How do I know when the mushrooms are ready to harvest?
Mushrooms are typically ready to harvest when the caps are fully formed and the edges are just beginning to curl upwards. Harvest the mushrooms by gently twisting them off the substrate. Avoid pulling them, as this can damage the mycelium.
Can I get multiple flushes of mushrooms from the same bucket?
Yes, you can typically get multiple flushes of mushrooms from the same bucket. After harvesting the first flush, allow the substrate to rest for a week or two. Then, rehydrate the substrate by soaking it in water for 12-24 hours. Drain the excess water and return the bucket to its growing location. You should see another flush of mushrooms within a few weeks.
What if I see mold growing in my mushroom bucket?
Mold can be a common problem in mushroom cultivation. If you see mold growing, try to identify the type of mold. Green mold (Trichoderma) is a common contaminant that can outcompete the mushroom mycelium. If you see green mold, remove the affected area and spray the surrounding area with a diluted hydrogen peroxide solution. Good ventilation and proper pasteurization/sterilization of the substrate can help prevent mold growth.
Is mushroom bucket gardening safe?
Yes, mushroom bucket gardening is generally safe, but it’s important to take precautions. Always use food-grade buckets and properly pasteurize or sterilize the substrate to prevent the growth of harmful bacteria and fungi. Avoid growing mushrooms in areas where children or pets have access, as some wild mushrooms can be poisonous. When in doubt, consult with a mycologist or expert before consuming any mushrooms you’ve grown.
Leave a Comment