

Melon growing tips harvest – are you dreaming of biting into a juicy, homegrown melon bursting with flavor? I know I am! There’s nothing quite like the satisfaction of nurturing a tiny seed into a thriving plant that yields delicious fruit. But let’s be honest, growing melons can sometimes feel like a gamble. You put in the effort, but the results aren’t always guaranteed.
For centuries, melons have been cherished across cultures, from ancient Egypt where they were buried with pharaohs, to the vibrant markets of Asia where they symbolize prosperity. These sweet treats have always held a special place in our hearts (and stomachs!). But in today’s busy world, who has time to become a melon-growing expert? That’s where these DIY tricks and hacks come in!
This article is your shortcut to a successful melon harvest. I’m going to share simple, effective techniques that will help you overcome common challenges, maximize your yield, and ensure you’re enjoying the sweetest, most flavorful melons possible. Whether you’re a seasoned gardener or just starting out, these melon growing tips harvest secrets will empower you to grow your own delicious melons with confidence. Get ready to impress your friends and family with your green thumb – let’s get growing!
Growing Melons Like a Pro: From Seed to Sweet Harvest
Okay, melon lovers, let’s dive into the juicy world of growing your own melons! I’m going to share everything I’ve learned over the years to help you cultivate delicious, homegrown melons that will make your taste buds sing. We’ll cover everything from choosing the right variety to harvesting that perfect, ripe fruit. Get ready to get your hands dirty!
Choosing the Right Melon Variety
Before we even think about planting, let’s talk about variety. Not all melons are created equal, and some are better suited for certain climates and growing conditions. Here’s a quick rundown:
* Watermelons: These are the kings of summer! Consider varieties like ‘Sugar Baby’ (early maturing and compact), ‘Crimson Sweet’ (classic flavor and good size), or ‘Black Diamond’ (large and impressive).
* Cantaloupes: These fragrant melons are a classic choice. ‘Hales Best Jumbo’ is a reliable and flavorful option. ‘Athena’ is another popular choice, known for its disease resistance.
* Honeydew Melons: These smooth-skinned melons offer a delicate sweetness. ‘Honeycrisp’ is a popular variety known for its crisp texture and sweet flavor.
* Specialty Melons: Don’t be afraid to experiment! Consider growing Galia melons (sweet and aromatic), Charentais melons (intensely flavored), or even Armenian cucumbers (which are technically melons!).
Tip: Check your local climate and growing season before choosing a variety. Shorter growing seasons require early-maturing varieties.
Preparing Your Melon Patch
Melons are sun-loving, heavy feeders, so proper soil preparation is crucial.
* Sunlight: Melons need at least 6-8 hours of direct sunlight per day. Choose a location that gets plenty of sunshine.
* Soil: Melons thrive in well-drained, fertile soil. Amend your soil with plenty of compost or well-rotted manure. This will improve drainage, add nutrients, and help retain moisture.
* Soil pH: Melons prefer a slightly acidic to neutral soil pH (6.0-7.0). You can test your soil pH with a home testing kit or send a sample to your local extension office.
* Space: Melons need plenty of space to sprawl. Watermelons, in particular, can take up a lot of room. Allow at least 3-4 feet between plants.
Planting Your Melons
You have two options for starting your melons: direct sowing or starting transplants indoors.
* Direct Sowing: This is the easiest method, but it requires warmer soil temperatures. Wait until the soil temperature reaches at least 70°F (21°C) before sowing seeds directly into the ground.
* Starting Transplants Indoors: This gives you a head start on the growing season, especially in cooler climates. Start seeds indoors 3-4 weeks before the last expected frost.
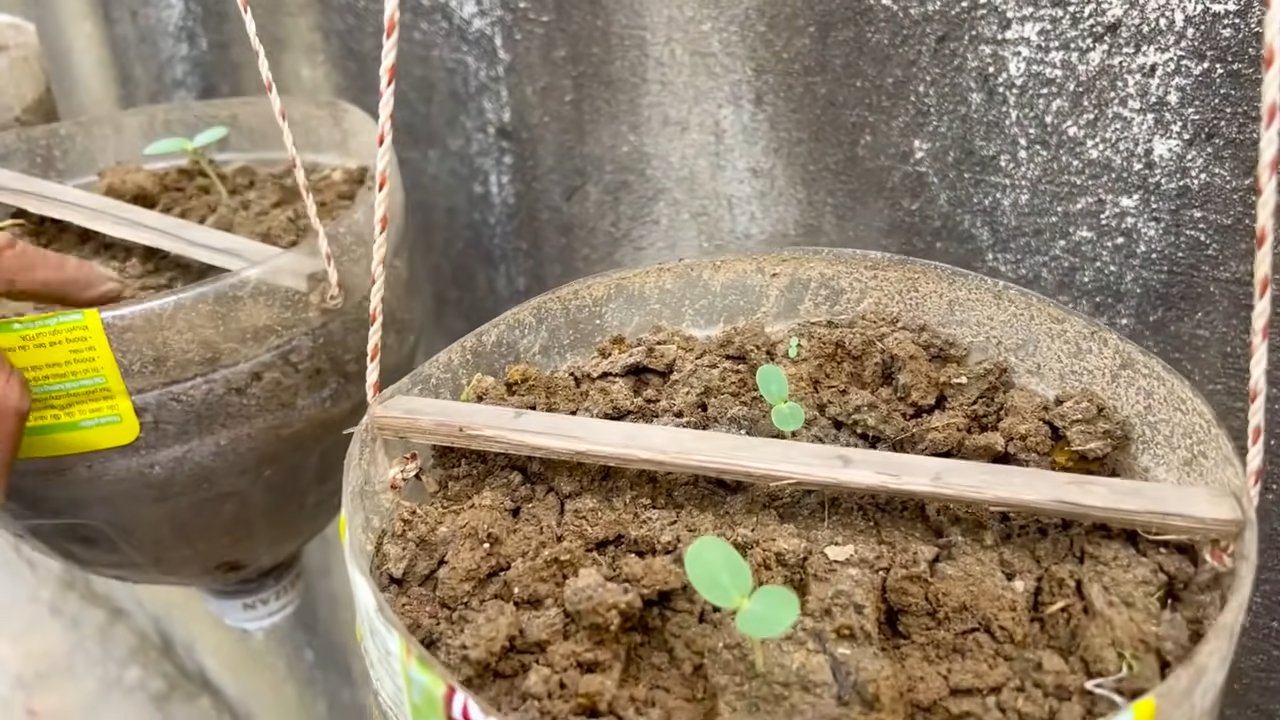
Starting Seeds Indoors (Step-by-Step)
1. Choose Your Containers: Use peat pots or biodegradable containers to minimize root disturbance when transplanting.
2. Fill with Seed Starting Mix: Use a high-quality seed starting mix that is light and well-draining.
3. Sow the Seeds: Plant 2-3 seeds per pot, about ½ inch deep.
4. Water Gently: Water the soil gently to moisten it, but avoid overwatering.
5. Provide Warmth: Place the pots in a warm location, such as on a heat mat or near a sunny window.
6. Provide Light: Once the seedlings emerge, provide them with plenty of light. Use grow lights if necessary.
7. Thin the Seedlings: Once the seedlings have developed a few true leaves, thin them to one plant per pot.
Transplanting Seedlings (Step-by-Step)
1. Harden Off the Seedlings: Before transplanting, gradually acclimate the seedlings to outdoor conditions by exposing them to increasing amounts of sunlight and wind over a period of 7-10 days.
2. Prepare the Planting Holes: Dig holes that are slightly larger than the root balls of the seedlings.
3. Transplant Carefully: Gently remove the seedlings from their containers and place them in the planting holes.
4. Backfill with Soil: Backfill the holes with soil and gently firm the soil around the plants.
5. Water Thoroughly: Water the transplants thoroughly after planting.
Direct Sowing Seeds (Step-by-Step)
1. Prepare the Soil: Rake the soil smooth and remove any rocks or debris.
2. Sow the Seeds: Plant the seeds about ½ inch deep, spacing them according to the variety’s recommendations.
3. Water Gently: Water the soil gently to moisten it, but avoid overwatering.
4. Thin the Seedlings: Once the seedlings emerge, thin them to the strongest plant per hill.
Caring for Your Melon Plants
Once your melon plants are established, it’s time to provide them with the care they need to thrive.
* Watering: Melons need consistent watering, especially during hot, dry weather. Water deeply and regularly, aiming for about 1-2 inches of water per week. Avoid overhead watering, which can promote fungal diseases. Drip irrigation is ideal.
* Fertilizing: Melons are heavy feeders and benefit from regular fertilization. Use a balanced fertilizer (e.g., 10-10-10) or a fertilizer specifically formulated for melons. Fertilize every 2-3 weeks.
* Weeding: Keep the area around your melon plants free of weeds. Weeds compete with melons for water and nutrients.
* Mulching: Apply a layer of mulch around your melon plants to help retain moisture, suppress weeds, and regulate soil temperature. Straw, wood chips, or black plastic mulch are all good options.
* Pest and Disease Control: Monitor your melon plants regularly for pests and diseases. Common pests include aphids, squash bugs, and cucumber beetles. Common diseases include powdery mildew and fusarium wilt. Use organic pest control methods whenever possible.
Tip: Elevate melons off the ground with straw or small pieces of wood to prevent rot and improve air circulation.
Pollination: A Crucial Step
Melons require pollination to produce fruit. If you’re not seeing any fruit developing, it could be due to poor pollination.
* Attract Pollinators: Plant flowers that attract bees and other pollinators near your melon patch.
* Hand Pollination: If you’re having trouble with pollination, you can hand-pollinate your melon flowers. Use a small paintbrush to transfer pollen from the male flowers to the female flowers. Female flowers have a small fruit behind the flower, while male flowers do not.
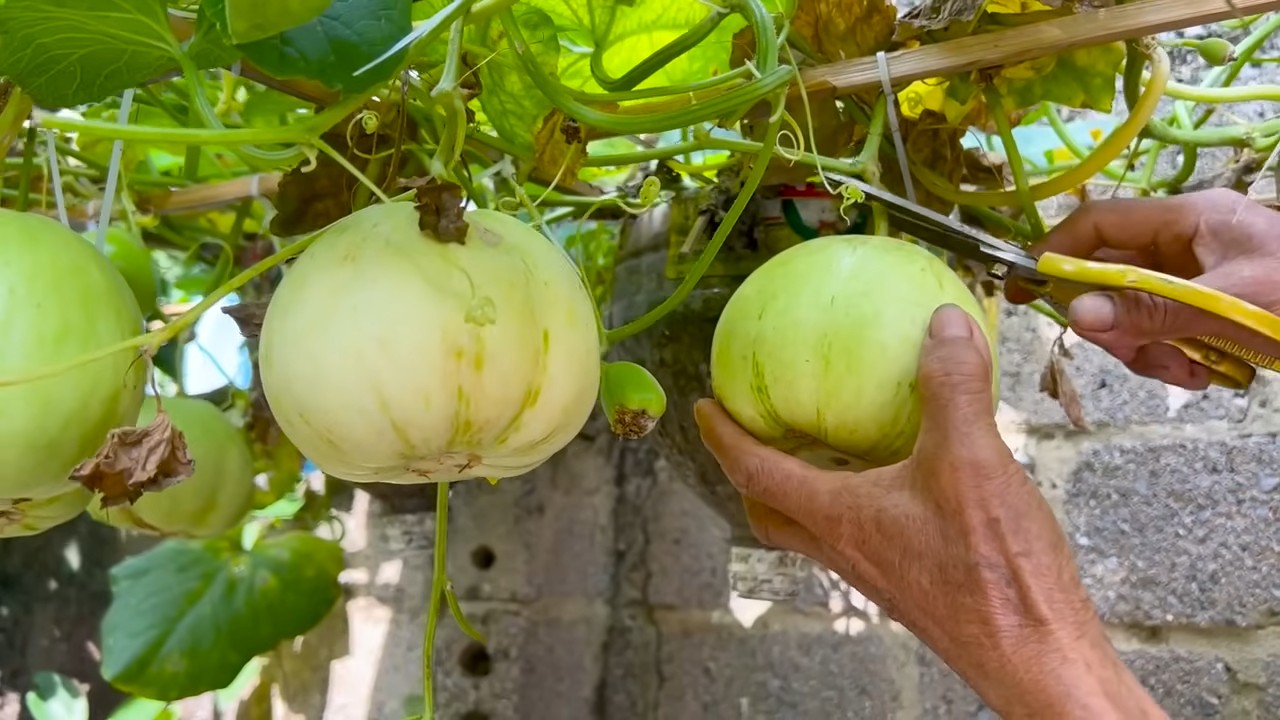
Harvesting Your Melons: The Sweet Reward
Knowing when to harvest your melons is key to enjoying their full flavor and sweetness. Each type of melon has its own indicators of ripeness.
Watermelon Harvesting Tips
* Thump Test: A ripe watermelon will sound hollow when thumped.
* Ground Spot: The underside of the watermelon, where it rests on the ground, should be a creamy yellow color.
* Tendril: The tendril closest to the watermelon should be brown and dry.
* Days to Maturity: Check the seed packet for the variety’s days to maturity and harvest accordingly.
Cantaloupe Harvesting Tips
* Aroma: A ripe cantaloupe will have a sweet, musky aroma.
* Stem Slip: The stem should easily slip from the melon with gentle pressure.
* Color: The skin should be a golden-tan color.
Honeydew Melon Harvesting Tips
* Color: The skin should be a creamy yellow color.
* Blossom End: The blossom end of the melon should be slightly soft to the touch.
* Aroma: A ripe honeydew melon will have a slightly sweet aroma.
Tip: Once harvested, store melons in a cool, dry place. Watermelons can be stored for up to two weeks, while cantaloupes and honeydew melons are best consumed within a few days.
Troubleshooting Common Melon Problems
Even with the best care, you may encounter some problems while growing melons. Here are a few common issues and how to address them:
* Powdery Mildew: This fungal disease causes a white, powdery coating on the leaves. Improve air circulation and apply a fungicide if necessary.
* Fusarium Wilt: This soilborne disease causes wilting and yellowing of the leaves. Choose disease-resistant varieties and practice crop rotation.
* Aphids: These small, sap-sucking insects can weaken melon plants. Spray with insecticidal soap or neem oil.
*
Conclusion
So, there you have it! Mastering the art of knowing when to harvest your melons is no longer a guessing game. By implementing these simple yet effective DIY tricks, you’ll be enjoying perfectly ripe, juicy, and flavorful melons straight from your garden. Forget the disappointment of prematurely picked, bland fruit or the mushy sadness of overripe ones. This method empowers you to take control of your melon harvest and unlock the full potential of your homegrown bounty.
Why is this a must-try? Because it’s about more than just picking a melon. It’s about maximizing flavor, minimizing waste, and experiencing the pure joy of gardening success. It’s about connecting with the natural rhythms of your garden and understanding the subtle cues that your plants are giving you. Plus, it’s incredibly satisfying to know you’ve nurtured your melons from seed to perfectly ripe fruit, all thanks to your own knowledge and skills.
But don’t stop there! Experiment with different melon varieties and adapt these techniques to suit their specific needs. For example, with cantaloupes, pay close attention to the stem slip – that’s a key indicator. For watermelons, the thump test is your best friend, but remember to combine it with visual cues like the ground spot color. Honeydew melons often develop a fragrant aroma when ripe, so use your sense of smell as another tool in your arsenal.
Consider these variations to enhance your melon-growing experience:
* Succession Planting: Plant your melon seeds in staggered intervals to extend your harvest season. This way, you’ll have a continuous supply of ripe melons throughout the summer.
* Companion Planting: Plant beneficial herbs and flowers near your melons to attract pollinators and deter pests. Marigolds, basil, and nasturtiums are excellent choices.
* Soil Enrichment: Amend your soil with compost and other organic matter to provide your melons with the nutrients they need to thrive.
* Vertical Growing: If you’re short on space, consider growing your melons vertically on a trellis. This can also improve air circulation and reduce the risk of disease.
Ultimately, the best way to learn is by doing. So, get out there, plant some melon seeds, and put these DIY tricks to the test. Don’t be afraid to experiment and find what works best for you and your garden. Remember to document your observations and learn from your successes and failures.
We’re confident that these tips will transform your melon harvest. Now, it’s your turn! We encourage you to try these DIY tricks and share your experiences with us. What varieties are you growing? What challenges have you faced? What successes have you celebrated? Share your photos, stories, and tips in the comments below. Let’s create a community of melon-growing enthusiasts and learn from each other. Happy harvesting!
Frequently Asked Questions (FAQ)
Q: How do I know if my watermelon is ripe using the “thump test”?
A: The “thump test” is a classic method, but it requires a bit of practice. A ripe watermelon should produce a deep, hollow sound when thumped. An unripe watermelon will sound higher-pitched and more solid. An overripe watermelon may sound dull or thuddy. The key is to compare the sound of different watermelons in your patch and learn to recognize the subtle differences. Don’t rely solely on the thump test; combine it with other indicators like the ground spot color and the tendril condition.
Q: What is the “ground spot” and how does it indicate ripeness?
A: The ground spot is the area of the melon that rests on the ground as it grows. As the melon ripens, the ground spot will change color from a pale white or greenish hue to a creamy yellow or even a deep orange. A yellow or orange ground spot is a good indication that the melon is ripe and ready to harvest.
Q: What does “stem slip” mean, and how does it apply to cantaloupes?
A: “Stem slip” refers to the ease with which the melon separates from the vine at the point where the stem attaches. For cantaloupes, a ripe melon will naturally slip from the vine with a gentle tug. If you have to force it, it’s likely not ripe yet. The area around the stem should also show signs of cracking or netting.
Q: My melon has a crack in it. Is it still safe to eat?
A: It depends on the severity of the crack. A small, superficial crack may not be a problem, but a large, deep crack can allow bacteria and insects to enter the melon, potentially spoiling it. If the crack is recent and the melon still smells fresh, you can try cutting away the damaged area and eating the rest. However, if the crack is old or the melon smells off, it’s best to discard it.
Q: How long can I store a harvested melon?
A: The storage life of a harvested melon depends on the variety and its ripeness at the time of harvest. Generally, whole watermelons can be stored at room temperature for up to two weeks. Cantaloupes and honeydews should be refrigerated after harvesting and can last for about a week. Once cut, all melons should be refrigerated and consumed within a few days.
Q: What are some common pests and diseases that affect melons, and how can I prevent them?
A: Common melon pests include aphids, squash bugs, cucumber beetles, and vine borers. Diseases include powdery mildew, fusarium wilt, and anthracnose. To prevent these problems, practice good garden hygiene, such as removing plant debris and weeds. Use row covers to protect young plants from pests. Choose disease-resistant varieties. Ensure proper watering and fertilization to keep your plants healthy and strong. Consider using organic pest control methods, such as insecticidal soap or neem oil.
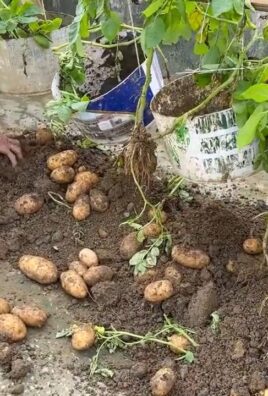
Q: Can I grow melons in containers?
A: Yes, you can grow melons in containers, but you’ll need to choose a large container (at least 20 gallons) and select a compact or bush variety. Provide adequate support for the vines, such as a trellis or stake. Water and fertilize regularly, as container-grown plants tend to dry out and deplete nutrients more quickly.
Q: My melon vines are producing flowers, but no fruit. What could be the problem?
A: There are several possible reasons why your melon vines are not producing fruit. One common reason is a lack of pollination. Melons require pollination to set fruit, so make sure there are plenty of bees and other pollinators in your garden. You can also try hand-pollinating the flowers yourself. Other possible causes include poor soil fertility, insufficient watering, or extreme temperatures.
Q: Is it better to harvest melons in the morning or evening?
A: It’s generally best to harvest melons in the morning, after the dew has dried but before the heat of the day sets in. This is when the melons are at their coolest and freshest. Avoid harvesting melons in the heat of the day, as they can be more susceptible to bruising and damage.
Q: How does knowing when to harvest melons impact the overall taste and quality?
A: Harvesting melons at the peak of ripeness is crucial for maximizing their flavor, texture, and nutritional value. Underripe melons will be bland, hard, and lacking in sweetness. Overripe melons will be mushy, watery, and may have an off-flavor. By using the DIY tricks described above, you can ensure that you’re harvesting your melons at the perfect time, resulting in a superior eating experience. Mastering the art of **melon growing tips harvest** is the key to unlocking the full potential of your homegrown melons.

Leave a Comment