

Larger cauliflower heads are the holy grail for many home gardeners, and I totally get it! There’s nothing quite as satisfying as harvesting a massive, creamy white cauliflower you’ve nurtured from a tiny seedling. But let’s be honest, sometimes our cauliflower heads end up looking more like golf balls than volleyballs. Don’t worry, you’re not alone, and I’m here to help!
Growing cauliflower has a rich history, dating back to ancient times in the Mediterranean. It was considered a delicacy and a symbol of abundance. While we no longer have to be royalty to enjoy this versatile vegetable, achieving that perfect, impressive head can still feel like a royal challenge.
Why is getting larger cauliflower heads so important? Well, beyond the bragging rights (which are totally valid!), a bigger head means more delicious florets for roasting, steaming, pickling, or adding to your favorite dishes. Plus, a healthy, robust cauliflower plant is more resistant to pests and diseases, making your gardening experience much more enjoyable. This DIY guide will equip you with simple yet effective tricks and hacks to maximize your cauliflower yield. I’ll share my secrets to ensure you’re harvesting the biggest, most beautiful cauliflower heads you’ve ever seen. Let’s get growing!
Grow Giant Caulifower: My Secrets to Massive Heads!
Hey fellow gardeners! Are you tired of those puny, golf-ball sized caulifower heads? I was too! After years of experimenting, I’ve finally cracked the code to growing caulifower heads so big, they practically need their own zip code. I’m going to share all my secrets with you, so get ready to impress your neighbors with your caulifower prowess!
Understanding Caulifower’s Needs
Before we dive into the nitty-gritty, let’s talk about what caulifower *really* wants. Think of it as a demanding diva 鈥?it needs specific conditions to truly thrive.
* Sunlight: Caulifower is a sun-lover. Aim for at least 6 hours of direct sunlight per day. More is always better!
* Soil: Rich, well-draining soil is crucial. Caulifower is a heavy feeder, so the soil needs to be packed with nutrients.
* Water: Consistent moisture is key. Caulifower hates drying out, especially when it’s forming its head.
* Temperature: Caulifower prefers cool weather. Hot temperatures can cause bolting (premature flowering) and bitter-tasting heads.
* Nutrients: As I mentioned, caulifower is a heavy feeder. It needs a steady supply of nitrogen, phosphorus, and potassium, as well as micronutrients.
Choosing the Right Variety
Not all caulifower varieties are created equal. Some are naturally smaller, while others are bred for larger heads. Here are a few of my favorite varieties for growing big caulifower:
* ‘Snowball Y Improved’: This is a classic variety known for its reliable performance and large, dense heads.
* ‘Amazing’: As the name suggests, this variety produces truly amazing heads that can weigh several pounds.
* ‘Cheddar’: This variety produces orange heads that are not only beautiful but also packed with nutrients.
* ‘Graffiti’: If you want to add some color to your garden, try ‘Graffiti’. It produces vibrant purple heads.
Getting Started: Planting Your Caulifower
Now, let’s get our hands dirty! Here’s how I plant my caulifower for maximum growth:
1. Start Seeds Indoors (Optional): I usually start my caulifower seeds indoors about 6-8 weeks before the last expected frost. This gives them a head start and allows me to control the growing environment.
* Fill seed trays with a good quality seed-starting mix.
* Sow the seeds about 1/4 inch deep.
* Keep the soil moist but not soggy.
* Provide plenty of light, either from a sunny window or a grow light.
* Once the seedlings have a few true leaves, transplant them into individual pots.
2. Prepare the Soil: This is arguably the most important step! Caulifower needs rich, well-draining soil to thrive.
* Choose a location that gets at least 6 hours of direct sunlight per day.
* Amend the soil with plenty of compost or well-rotted manure. I usually add about 2-3 inches of compost to the topsoil and work it in thoroughly.
* Add a slow-release fertilizer that’s high in phosphorus. Phosphorus is essential for root development, which is crucial for supporting a large caulifower head. Bone meal is a great organic option.
* Make sure the soil is well-draining. Caulifower hates sitting in soggy soil. If your soil is heavy clay, consider adding some sand or perlite to improve drainage.
3. Transplant Seedlings (or Direct Sow): Once the danger of frost has passed, it’s time to transplant your seedlings into the garden. If you’re direct sowing, sow the seeds about 1/2 inch deep.
* Space the plants about 18-24 inches apart. This gives them enough room to grow and prevents overcrowding.
* Water the plants thoroughly after transplanting.
* Mulch around the plants with straw or wood chips to help retain moisture and suppress weeds.
The Secret Sauce: Fertilizing for Giant Heads
Fertilizing is where the magic happens! Caulifower is a heavy feeder, so it needs a steady supply of nutrients to produce those massive heads. Here’s my fertilizing routine:
1. Initial Feeding: About 2-3 weeks after transplanting, I give my caulifower plants their first feeding.
* I use a balanced liquid fertilizer, such as a 20-20-20, diluted to half strength.
* I apply the fertilizer around the base of the plants, being careful not to get it on the leaves.
2. Regular Feeding: I continue to fertilize my caulifower plants every 2-3 weeks throughout the growing season.
* I alternate between the balanced liquid fertilizer and a fertilizer that’s higher in nitrogen. Nitrogen is essential for leafy growth, which is important for supporting a large head. Fish emulsion is a great organic option.
* I also supplement with Epsom salts. Epsom salts provide magnesium, which is essential for chlorophyll production and overall plant health. I dissolve about 1 tablespoon of Epsom salts in a gallon of water and spray it on the leaves every few weeks.
3. Boron Boost: Caulifower is particularly susceptible to boron deficiency, which can cause hollow stems and small heads.
* To prevent boron deficiency, I apply a boron supplement every few weeks. I use a product called Borax, which is readily available at most grocery stores.
* I dissolve about 1/4 teaspoon of Borax in a gallon of water and spray it on the leaves. Be careful not to overdo it with the Borax, as too much boron can be toxic to plants.
Watering Wisely
Consistent moisture is crucial for growing large caulifower heads. Here’s how I water my plants:
1. Water Deeply: I water my caulifower plants deeply whenever the top inch of soil feels dry to the touch.
2. Avoid Overhead Watering: Overhead watering can lead to fungal diseases, so I prefer to water at the base of the plants.
3. Mulch, Mulch, Mulch!: Mulching helps retain moisture in the soil, which is especially important during hot weather.
Blanching for White Heads
Blanching is the process of covering the caulifower head to prevent it from turning yellow or brown. While not strictly necessary, blanching produces a whiter, more appealing head. Here’s how I blanch my caulifower:
1. When to Blanch: I start blanching my caulifower when the head is about 2-3 inches in diameter.
2. How to Blanch: There are several ways to blanch caulifower.
* Tie the Leaves: The easiest method is to simply tie the leaves together over the head. This will block out the sunlight and keep the head white.
* Use a Blanching Clip: You can also purchase special blanching clips that are designed to hold the leaves together.
* Cover with a Container: For a more thorough blanching, you can cover the head with a container, such as a bucket or a flower pot. Just make sure to provide some ventilation to prevent the head from rotting.
3. Check Regularly: I check the caulifower head regularly to make sure it’s not rotting. If it is, remove the covering and allow the head to air out.
Pest and Disease Control
Caulifower is susceptible to a variety of pests and diseases. Here’s how I protect my plants:
1. Cabbage Worms: Cabbage worms are the most common pest of caulifower. They can quickly decimate a plant if left unchecked.
* I control cabbage worms by handpicking them off the plants. I also use a product called Bacillus thuringiensis (Bt), which is a natural insecticide that’s effective against cabbage worms.
2. Aphids: Aphids are small, sap-sucking insects that can weaken plants and spread diseases.
* I control aphids by spraying them with a strong stream of water. I also use insecticidal soap, which is a safe and effective way to kill aphids.
3. Clubroot: Clubroot is a fungal disease that causes the roots of caulifower plants to swell and distort.
* To prevent clubroot, I make sure to plant my caulifower in well-draining soil. I also rotate my crops to avoid planting caulifower in the same location year after year.
4. Black Rot: Black rot is a bacterial disease that causes dark lesions on the leaves of caulifower plants.
* To prevent black rot, I make sure to water my caulifower plants at the base, avoiding overhead watering. I also remove any infected leaves as soon as I see them
Conclusion
So, there you have it! Transforming your cauliflower growing game with this simple, yet incredibly effective DIY trick for achieving larger cauliflower heads is within your reach. We’ve walked you through the process, highlighting the science behind why it works, and hopefully, dispelled any doubts you might have had.
Why is this a must-try? Because it’s about maximizing your yield without resorting to harsh chemicals or complicated techniques. It’s about working *with* nature, understanding the plant’s needs, and providing that little extra boost that can make all the difference. Imagine the satisfaction of harvesting cauliflower heads that are significantly larger and more impressive than you ever thought possible! Think of the delicious meals you can create, the envious glances from your gardening neighbors, and the pride you’ll feel knowing you achieved this through your own ingenuity.
But the beauty of gardening lies in experimentation. Don’t be afraid to adapt this DIY trick to your specific environment and growing conditions. Perhaps you want to experiment with different types of organic fertilizers, or adjust the timing of the feeding based on your local climate. Maybe you want to try this technique on other brassicas, like broccoli or cabbage, to see if you can achieve similar results. The possibilities are endless!
Consider these variations:
* Compost Tea Boost: Instead of a standard fertilizer solution, try using a well-diluted compost tea. Compost tea is packed with beneficial microbes that can further enhance nutrient uptake and promote overall plant health.
* Foliar Feeding: In addition to soil application, consider foliar feeding with a diluted seaweed extract. This allows the plant to absorb nutrients directly through its leaves, providing a quick and targeted boost.
* Companion Planting: Plant companion plants like marigolds or nasturtiums around your cauliflower to deter pests and attract beneficial insects. This can help reduce stress on the plants and allow them to focus on growth.
* Mulching Matters: Ensure you have a good layer of organic mulch around your cauliflower plants. This helps retain moisture, suppress weeds, and regulate soil temperature, all of which contribute to healthier, more productive plants.
Ultimately, the goal is to find what works best for *your* garden. We encourage you to embrace the spirit of experimentation and share your findings with the gardening community.
We are confident that by implementing this DIY trick, you’ll see a noticeable improvement in the size and quality of your cauliflower heads. It’s a small investment of time and effort that yields a significant return. So, grab your supplies, head out to your garden, and get ready to witness the magic of larger cauliflower heads unfold before your very eyes!
Don’t just take our word for it 鈥?try it yourself! We’re eager to hear about your experiences. Share your photos, tips, and results in the comments section below. Let’s learn from each other and collectively elevate our cauliflower growing game. Happy gardening!
Frequently Asked Questions (FAQ)
What type of fertilizer is best for this DIY trick?
The best type of fertilizer for this DIY trick is a balanced, organic fertilizer that is rich in nitrogen, phosphorus, and potassium (NPK). Look for a fertilizer with an NPK ratio of around 10-10-10 or 12-12-12. Organic options like composted manure, bone meal, and blood meal are excellent choices as they provide a slow-release of nutrients and improve soil health. Avoid using synthetic fertilizers, as they can be harsh on the soil and potentially harm beneficial microbes. Remember to always dilute the fertilizer according to the manufacturer’s instructions to prevent burning the plant’s roots.
How often should I apply the fertilizer solution?
The frequency of fertilizer application depends on the type of fertilizer you are using and the growing conditions. As a general guideline, apply the fertilizer solution every 2-3 weeks, starting when the cauliflower head begins to form. Monitor your plants closely for any signs of nutrient deficiency or over-fertilization. Yellowing leaves can indicate a nitrogen deficiency, while excessive leaf growth with little head development can indicate over-fertilization. Adjust the frequency and concentration of the fertilizer solution accordingly.
Can I use this trick on other brassica vegetables?
Yes, this DIY trick can be adapted for use on other brassica vegetables, such as broccoli, cabbage, and kale. These vegetables have similar nutrient requirements and can benefit from the extra boost of fertilizer during head or leaf formation. However, it’s important to adjust the timing and concentration of the fertilizer solution based on the specific needs of each vegetable. For example, broccoli may require more frequent applications of fertilizer than cabbage. Always research the specific nutrient requirements of the vegetable you are growing before applying any fertilizer.
What if I don’t see any improvement in the size of my cauliflower heads?
If you don’t see any improvement in the size of your cauliflower heads after implementing this DIY trick, there could be several reasons why. First, ensure that you are providing your plants with adequate sunlight, water, and nutrients. Cauliflower requires at least 6 hours of direct sunlight per day and consistent watering to thrive. Second, check the soil pH. Cauliflower prefers a slightly acidic soil pH of around 6.0 to 6.5. If the soil pH is too high or too low, it can interfere with nutrient uptake. Third, consider the variety of cauliflower you are growing. Some varieties are naturally smaller than others. Finally, rule out any potential pest or disease problems that could be hindering growth.
Is it possible to over-fertilize my cauliflower plants?
Yes, it is definitely possible to over-fertilize your cauliflower plants. Over-fertilization can lead to several problems, including leaf burn, root damage, and reduced head formation. Signs of over-fertilization include yellowing or browning of leaf tips, stunted growth, and a build-up of salts on the soil surface. To prevent over-fertilization, always dilute the fertilizer solution according to the manufacturer’s instructions and avoid applying excessive amounts. It’s always better to err on the side of caution and apply a smaller amount of fertilizer more frequently than to over-fertilize.
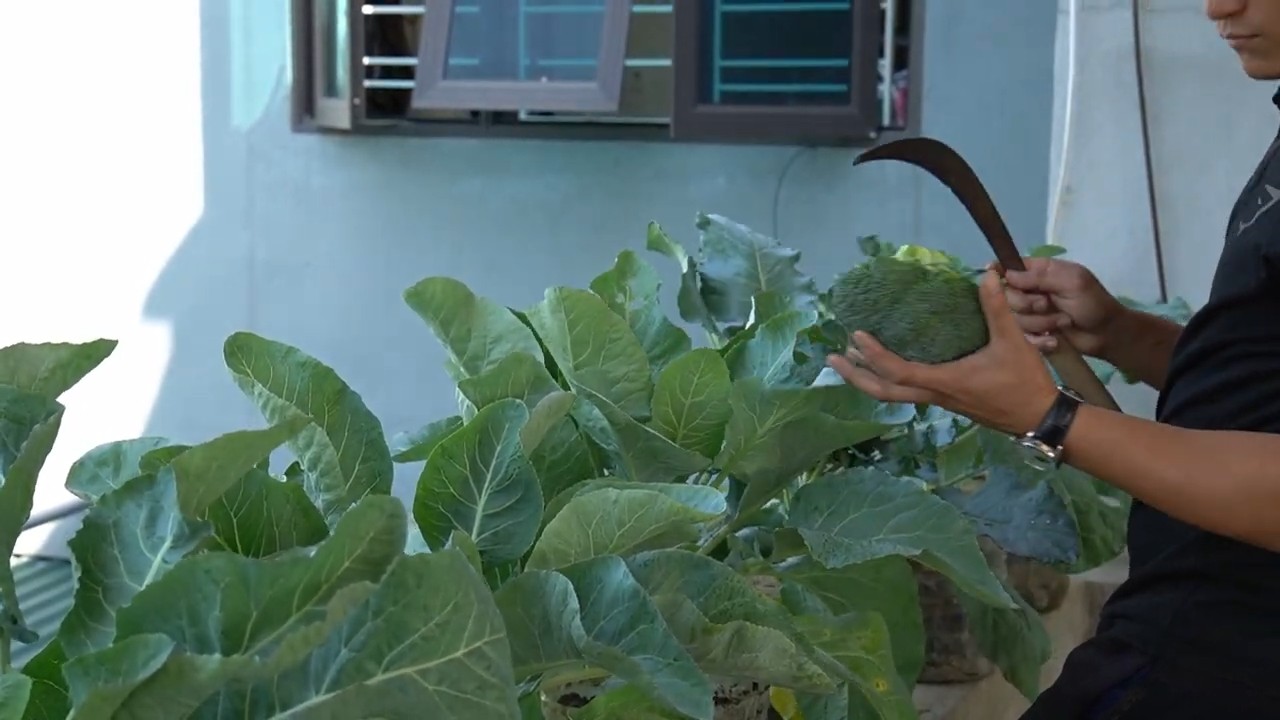
How do I know when my cauliflower is ready to harvest?
Cauliflower is ready to harvest when the head is firm, compact, and has reached the desired size. The ideal size will vary depending on the variety, but generally, a head that is 6-8 inches in diameter is considered mature. The florets should be tightly packed together and free from any signs of discoloration or looseness. To harvest, use a sharp knife to cut the head from the plant, leaving a few leaves attached to protect the head. Harvest cauliflower in the morning when the head is cool and crisp.
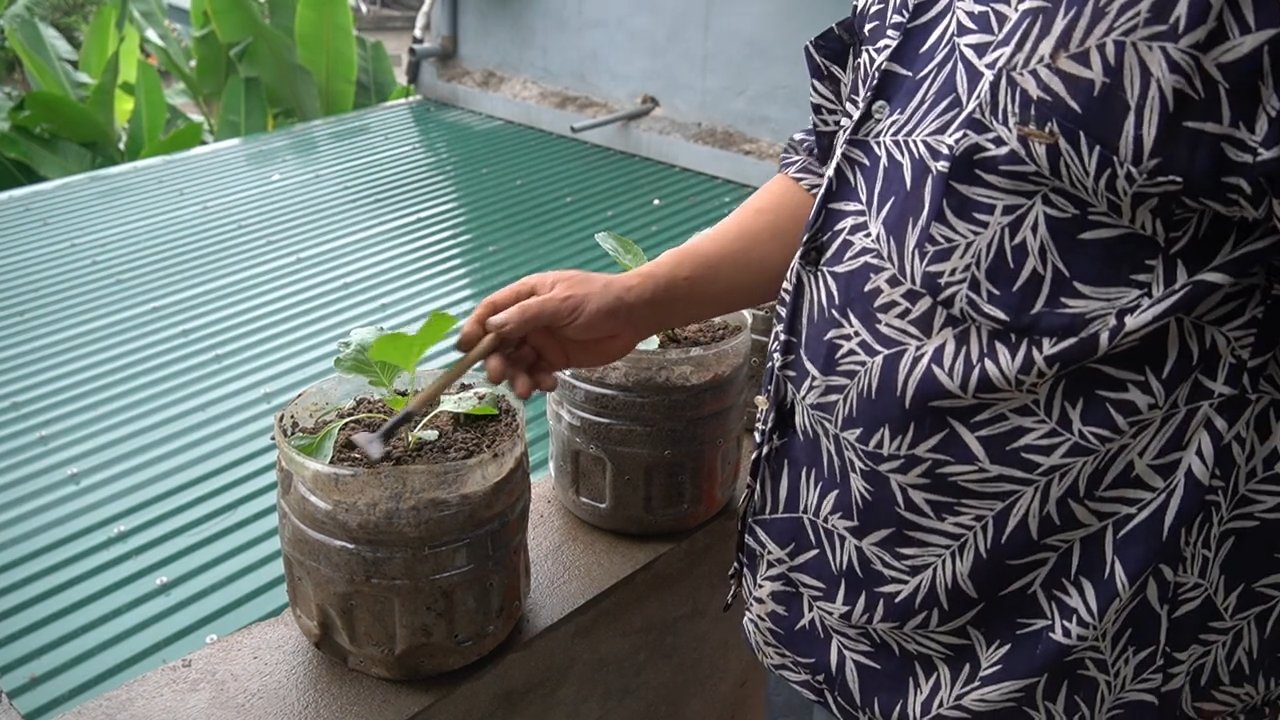
Can I use this DIY trick in container gardens?
Yes, this DIY trick can be used in container gardens, but it’s important to adjust the fertilizer application based on the size of the container. Container-grown plants tend to dry out and deplete nutrients more quickly than plants grown in the ground, so you may need to fertilize more frequently. However, be careful not to over-fertilize, as this can lead to a build-up of salts in the container. Use a well-draining potting mix and ensure that the container has adequate drainage holes to prevent waterlogging.
What are some common pests and diseases that affect cauliflower?
Some common pests that affect cauliflower include cabbage worms, aphids, flea beetles, and root maggots. Common diseases include black rot, clubroot, and downy mildew. To prevent pest and disease problems, practice good garden hygiene, such as removing plant debris and weeds. Use row covers to protect plants from pests and choose disease-resistant varieties. If you encounter pest or disease problems, treat them promptly with appropriate organic or chemical controls.
How does soil quality affect the size of cauliflower heads?
Soil quality plays a crucial role in the size and overall health of cauliflower heads. Cauliflower thrives in well-drained, fertile soil that is rich in organic matter. Poor soil quality can lead to nutrient deficiencies, stunted growth, and reduced head size. To improve soil quality, amend the soil with compost, aged manure, or other organic materials before planting. Ensure that the soil is well-drained to prevent root rot. Conduct a soil test to determine the nutrient levels and pH and amend the soil accordingly.
What role does sunlight play in growing larger cauliflower heads?
Sunlight is essential for photosynthesis, the process by which plants convert light energy into chemical energy for growth. Cauliflower requires at least 6 hours of direct sunlight per day to produce large, healthy heads. Insufficient sunlight can lead to stunted growth, pale leaves, and reduced head size. Choose a planting location that receives ample sunlight throughout the day. If you are growing cauliflower in a shady area, consider using grow lights to supplement the natural sunlight.


Leave a Comment