

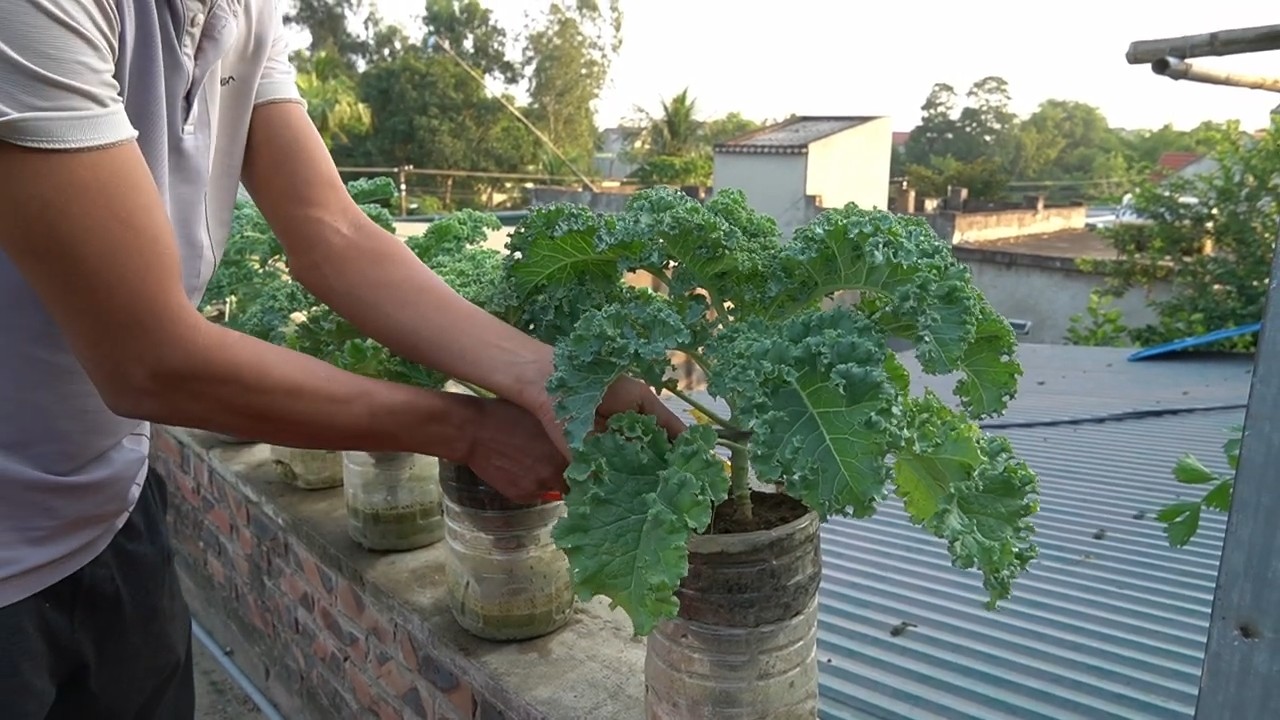
Kale growing in plastic bottles – sounds a little unconventional, right? But trust me, this simple DIY trick can revolutionize your home gardening game, especially if you’re short on space or looking for a budget-friendly way to enjoy fresh, homegrown greens. I’m so excited to share this with you!
For centuries, humans have cultivated kale, tracing its roots back to the wild cabbage. From humble peasant fare to a trendy superfood, kale has proven its resilience and adaptability. Now, we’re taking that adaptability to a whole new level by growing it in recycled plastic bottles! This isn’t just about saving money; it’s about embracing sustainable practices and making gardening accessible to everyone, regardless of their living situation.
Let’s face it, not everyone has a sprawling backyard perfect for a traditional garden. Apartment dwellers, balcony enthusiasts, and those with limited mobility often miss out on the joy of growing their own food. That’s where this DIY hack comes in. Kale growing in plastic bottles offers a compact, portable, and incredibly efficient way to cultivate this nutrient-packed leafy green. Imagine stepping onto your balcony and harvesting fresh kale for your morning smoothie – all thanks to a repurposed plastic bottle! This method is not only eco-friendly but also allows for better control over soil conditions and pest management. So, are you ready to ditch the store-bought kale and embark on a rewarding home gardening adventure? Let’s get started!
Balcony Cabbage: Your Own Little Vegetable Garden on the Balcony
Hey you! Do you also feel like harvesting fresh vegetables right on your doorstep? Then you’ve come to the right place! I’ll show you how you can easily grow cabbage on your balcony. It’s easier than you think and a lot of fun!
Why Cabbage on the Balcony?
Cabbage is not only super healthy but also surprisingly easy to grow, even if you don’t have a garden. Plus, it’s great to know where your food comes from and that it’s free of unnecessary pesticides. And let’s be honest, homegrown cabbage just tastes better!
Which Cabbage Varieties are Suitable for the Balcony?
Not every cabbage feels at home on the balcony. Here are a few varieties that I can particularly recommend:
- Dwarf or Mini Cabbage: These varieties are specially bred for growing in pots and stay nice and small.
- Cauliflower: Cauliflower can also thrive in a pot, but make sure it has enough space.
- Broccoli: Similar to cauliflower, broccoli needs enough room to develop.
- Kale: Kale is robust and low-maintenance, perfect for beginners.
- Head Lettuce: Although not a “true” cabbage, head lettuce belongs to the family and can be grown wonderfully in a pot.
- Radishes: Radishes are fast-growing and can serve as “fillers” between the cabbage plants.
What you need for your balcony cabbage:
- Pots or containers: Make sure they are of a sufficient size (at least 20 liters per cabbage plant, depending on the variety).
- High-quality potting soil: Special vegetable soil or a mixture of garden soil, compost, and sand is best.
- Cabbage plants or seeds: You can buy young plants or start the seeds yourself.
- Fertilizer: Organic fertilizer is ideal, e.g., compost, horn shavings, or vegetable fertilizer.
- Watering can or hose: For regular watering.
- Scissors or knife: For harvesting.
- Possibly: A slug fence or pellets to protect your plants from slugs.
Step-by-Step Guide: Growing Cabbage on the Balcony
1. Preparation:
- Prepare the pots: Clean your pots thoroughly and ensure good drainage. This means that excess water can run off. To do this, place a layer of clay shards or gravel at the bottom of the pot.
- Fill with soil: Fill the pots with the potting soil. Leave a rim of about 5 cm at the top.
- Choose a location: Cabbage needs a lot of sun! Choose a sunny spot on your balcony where the plants will get at least 6 hours of sun per day.
2. Planting or Sowing:
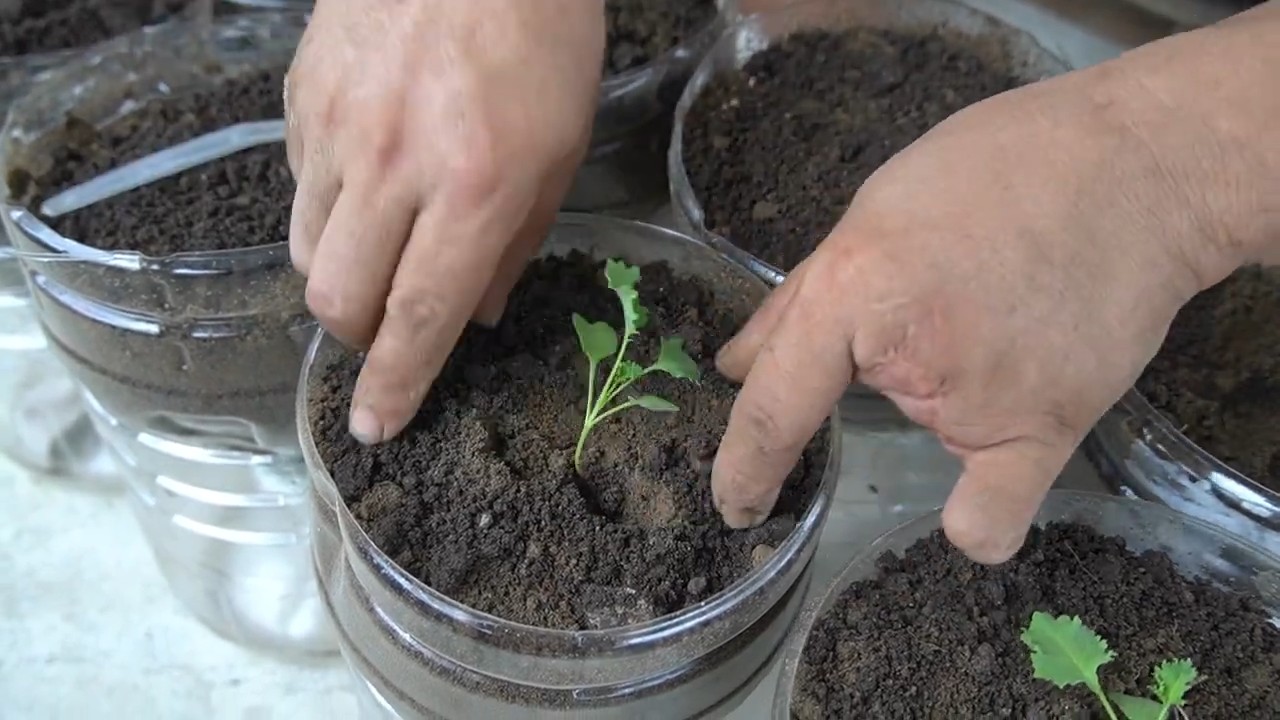
- Planting: If you have bought young plants, dig small holes in the soil that are large enough to accommodate the root balls. Carefully place the plants in and press the soil down lightly. Make sure that the root crown (the transition between the root and the stem) is not covered with soil.
- Sowing: If you want to start the seeds yourself, sow them in seed trays or small pots. Cover the seeds lightly with soil and keep them moist. After a few weeks, you can transplant the young plants into the larger pots.
- Mind the spacing: Make sure the plants have enough distance from each other. Depending on the variety, you should maintain a distance of 30-50 cm.
3. Care:
- Watering: Cabbage needs regular water, especially during the growth phase. It’s best to water in the morning or evening when the sun isn’t shining. Avoid waterlogging, as this can lead to root rot. The soil should always be slightly moist, but not wet.
- Fertilizing: Fertilize your cabbage plants regularly, about every two weeks, with organic fertilizer. This ensures healthy growth and a bountiful harvest.
- Pest control: Cabbage is susceptible to pests like cabbage white butterflies, aphids, and slugs. Check your plants regularly and remove pests by hand if necessary. You can also use natural pesticides, e.g., nettle tea or neem oil. A slug fence can also help protect your plants from slugs.
- Pruning suckers: With some cabbage varieties, such as Brussels sprouts, you should remove the side shoots (suckers) to promote the growth of the main buds.
- Supporting: If your cabbage plants get very large, it may be useful to support them with stakes so they don’t tip over.
4. The Harvest:
- Harvesting time: The harvesting time depends on the cabbage variety. Cauliflower and broccoli are ready for harvest when the heads are firm and closed. Kale can be harvested as soon as the leaves are large enough. Brussels sprouts are harvested when the sprouts are firm and closed.
- Harvesting method: Cut the cabbage heads or leaves with a sharp knife. With kale, you can harvest the outer leaves as needed.
- Storage: Fresh cabbage keeps in the refrigerator for a few days. You can also freeze it to make it last longer.
Additional Tips for Your Balcony Cabbage:
- Companion planting: Plant cabbage together with other plants that support each other. Good neighbors for cabbage are, for example, marigolds, nasturtiums, sage, and thyme. These plants can repel pests and promote the growth of the cabbage.
- Crop rotation: Do not plant cabbage in the same location every year. Rotate the plant species to prevent diseases and pests.
- Soil improvement: Improve the soil quality regularly by incorporating compost or organic fertilizer.
- Observation: Observe your plants regularly to identify and fix problems early.
Common Problems and Solutions:
- Yellow leaves: Yellow leaves can be a sign of a nutrient deficiency. Fertilize your plants with a suitable fertilizer.
- Aphids: Aphids can be washed off with a jet of water or controlled with a natural pesticide.
- Cabbage white butterflies: Cabbage white butterflies lay their eggs on the cabbage leaves. Collect the eggs and caterpillars by hand or use a net to protect the plants.
- Slugs: Slugs can be controlled with slug pellets or a slug fence.
Conclusion:
With a little patience and care, you can achieve a bountiful cabbage harvest on your balcony. It’s a great feeling to harvest fresh vegetables right on your doorstep and to know that they are free of unnecessary pesticides. So, what are you waiting for? Get started and transform your balcony into a small vegetable garden! Happy gardening!
Conclusion
So, there you have it! Growing kale in plastic bottles isn’t just a quirky gardening experiment; it’s a game-changer for urban gardeners, space-conscious individuals, and anyone looking to add a touch of green to their lives in a sustainable way. We’ve explored how this simple DIY project can transform discarded plastic into thriving vertical gardens, offering a practical and eco-friendly solution for cultivating fresh, nutritious kale right at your fingertips.
The beauty of this method lies in its accessibility and adaptability. You don’t need acres of land or expensive equipment to enjoy the benefits of homegrown kale. With a few plastic bottles, some soil, and a sunny spot, you can create a miniature kale farm that’s both visually appealing and incredibly productive.
But the advantages extend beyond mere convenience. Growing kale in plastic bottles allows for better control over the growing environment. You can easily move your kale plants to optimize sunlight exposure, protect them from harsh weather conditions, and monitor their health more closely. This level of control can lead to healthier, more robust kale plants and a more abundant harvest.
Why is this DIY trick a must-try? Because it’s sustainable, space-saving, cost-effective, and empowering. It’s a chance to reduce waste, connect with nature, and enjoy the satisfaction of growing your own food. Plus, it’s a fantastic conversation starter! Imagine the looks of amazement when your friends and neighbors see your vertical kale garden flourishing in recycled plastic bottles.
Looking for variations? Consider painting your plastic bottles to add a pop of color to your garden. Use different sizes of bottles to create a tiered effect. Experiment with different types of kale, such as curly kale, lacinato kale, or red Russian kale, to add variety to your harvest. You can even incorporate other herbs and vegetables into your plastic bottle garden, creating a diverse and thriving ecosystem. Think about adding companion plants like marigolds to deter pests naturally.
We encourage you to embrace this DIY project and experience the joy of growing your own kale in plastic bottles. It’s a rewarding and sustainable way to connect with nature, reduce waste, and enjoy fresh, healthy food. Don’t be afraid to experiment, adapt, and personalize your plastic bottle garden to suit your unique needs and preferences.
Now, it’s your turn! Gather your plastic bottles, prepare your soil, and get ready to embark on a kale-growing adventure. We’re confident that you’ll be amazed by the results. And most importantly, we want to hear about your experience! Share your photos, tips, and stories with us in the comments below. Let’s inspire each other to create a greener, more sustainable world, one plastic bottle at a time. Let us know if you have any questions, and happy gardening!
FAQ
Frequently Asked Questions About Growing Kale in Plastic Bottles
1. What type of plastic bottles are best for growing kale?
Ideally, you should use food-grade plastic bottles, such as those used for water, juice, or soda. Avoid using bottles that have contained harsh chemicals or cleaning products, as these could contaminate your kale plants. PET (Polyethylene Terephthalate) bottles, commonly used for water and soda, are a good choice. Ensure the bottles are thoroughly cleaned before use. Also, consider the size of the bottle; larger bottles will provide more room for the kale roots to grow.
2. What kind of soil should I use for growing kale in plastic bottles?
A well-draining potting mix is essential for growing healthy kale in plastic bottles. Avoid using garden soil, as it can be too heavy and compact, hindering root growth and drainage. A good potting mix will typically contain a blend of peat moss, perlite, and vermiculite. You can also add compost to enrich the soil and provide essential nutrients for your kale plants. Consider adding a slow-release fertilizer to the potting mix to provide a steady supply of nutrients throughout the growing season.
3. How often should I water my kale plants in plastic bottles?
The watering frequency will depend on several factors, including the weather, the size of the bottle, and the type of soil you’re using. Generally, you should water your kale plants when the top inch of soil feels dry to the touch. Avoid overwatering, as this can lead to root rot. Ensure that the plastic bottles have drainage holes to allow excess water to escape. During hot, dry weather, you may need to water your kale plants more frequently.
4. How much sunlight do kale plants need when grown in plastic bottles?
Kale thrives in full sun, which means at least 6 hours of direct sunlight per day. However, it can also tolerate partial shade, especially during the hottest part of the day. If you’re growing kale indoors, you may need to supplement with artificial lighting, such as grow lights. Position your plastic bottle garden in a location that receives ample sunlight, such as a south-facing window or balcony.
5. How do I prevent pests and diseases from affecting my kale plants in plastic bottles?
Regularly inspect your kale plants for signs of pests or diseases. Common pests that affect kale include aphids, cabbage worms, and flea beetles. You can control these pests by handpicking them off the plants, using insecticidal soap, or introducing beneficial insects, such as ladybugs. To prevent diseases, ensure that your kale plants have good air circulation and avoid overwatering. You can also use organic fungicides to protect your plants from fungal diseases. Consider using companion planting techniques, such as planting marigolds near your kale to deter pests.
6. How do I harvest kale from plastic bottles?
You can start harvesting kale leaves when they are about 4-6 inches long. Harvest the outer leaves first, leaving the inner leaves to continue growing. Avoid harvesting more than one-third of the plant at a time, as this can stress the plant and reduce its yield. You can harvest kale leaves throughout the growing season, even after the first frost.
7. Can I grow kale in plastic bottles indoors?
Yes, you can grow kale in plastic bottles indoors, especially if you have a sunny windowsill or access to grow lights. Ensure that your kale plants receive adequate sunlight or artificial light, and maintain a consistent watering schedule. Indoor kale plants may require less watering than outdoor plants, as they are not exposed to as much wind and sun.
8. How long does it take for kale to grow in plastic bottles?
Kale typically takes about 55-75 days to mature from seed to harvest. However, you can start harvesting leaves earlier, as soon as they are large enough to eat. The growth rate will depend on several factors, including the variety of kale, the growing conditions, and the amount of sunlight and water the plants receive.
9. Can I reuse the plastic bottles for growing kale again?
Yes, you can reuse the plastic bottles for growing kale again, as long as they are still in good condition. Thoroughly clean the bottles before reusing them to remove any soil or debris. You may also want to disinfect the bottles with a mild bleach solution to prevent the spread of diseases.
10. What are some other plants I can grow in plastic bottles besides kale?
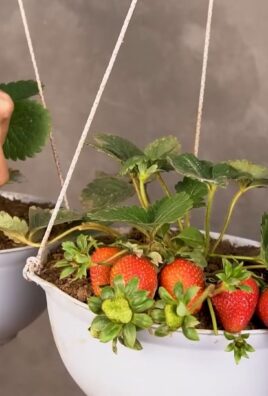
Many other herbs and vegetables can be successfully grown in plastic bottles, including lettuce, spinach, herbs like basil and mint, strawberries, and even small varieties of tomatoes and peppers. The key is to choose plants that have relatively shallow root systems and can tolerate growing in a confined space. Experiment with different plants to see what works best in your plastic bottle garden.
Leave a Comment