

Hydroponic vegetable gardening: ever dreamt of harvesting fresh, vibrant veggies right from your own home, without the hassle of soil? Imagine plump, juicy tomatoes, crisp lettuce, and flavorful herbs, all grown indoors, year-round! Well, stop dreaming and start doing! This DIY guide unlocks the secrets to effortless, soil-free gardening, bringing the bounty of nature directly to your kitchen.
Hydroponics, while seemingly modern, actually boasts a rich history. Traces of hydroponic systems have been found in the Hanging Gardens of Babylon and ancient Aztec floating gardens, demonstrating humanity’s long-standing fascination with soilless cultivation. Today, hydroponic vegetable gardening is experiencing a resurgence, fueled by a desire for sustainable food sources and a growing interest in self-sufficiency.
Let’s face it, traditional gardening can be intimidating. Soil quality, pests, unpredictable weather – the challenges can feel endless. But what if you could bypass these hurdles and enjoy a consistent, abundant harvest? That’s where hydroponics comes in! This DIY guide provides simple, step-by-step instructions and clever hacks to help you create your own thriving hydroponic garden, regardless of your experience level. I’m excited to share these tips with you, so you can enjoy fresh, healthy vegetables all year long!
DIY Hydroponic Vegetable Garden: A Beginner’s Guide
Hey there, fellow gardening enthusiasts! Are you itching to grow your own veggies but short on space or dealing with less-than-ideal soil? Well, I’ve got just the thing for you: a DIY hydroponic vegetable garden! It might sound intimidating, but trust me, it’s totally doable, even for beginners. I’m going to walk you through building a simple yet effective system that will have you harvesting fresh produce in no time.
What is Hydroponics?
Before we dive in, let’s quickly cover what hydroponics actually is. Simply put, it’s growing plants without soil. Instead, the roots are suspended in a nutrient-rich water solution. This allows the plants to absorb everything they need directly, leading to faster growth and bigger yields. Plus, it’s super water-efficient!
Why Choose Hydroponics?
* Space-Saving: Perfect for apartments, balconies, or small yards.
* Faster Growth: Plants get nutrients directly, resulting in quicker harvests.
* Water Conservation: Uses significantly less water than traditional gardening.
* Pest Control: Fewer soilborne pests and diseases.
* Year-Round Growing: You can grow indoors, regardless of the weather.
Choosing Your Hydroponic System: The Kratky Method
There are several hydroponic methods, but for beginners, I highly recommend the Kratky method. It’s incredibly simple, requires minimal maintenance, and doesn’t need any pumps or electricity. Basically, you suspend the plant’s roots in a nutrient solution, leaving an air gap for oxygen. As the plant grows and consumes the solution, the air gap increases, providing the roots with the oxygen they need.
Materials You’ll Need
Okay, let’s gather our supplies. Here’s what you’ll need to build your Kratky hydroponic system:
* Opaque Container: A dark-colored plastic tub or bucket (5-10 gallons is a good starting size). The darkness prevents algae growth.
* Net Pots: These will hold your plants and allow the roots to grow into the nutrient solution. 3-inch net pots are a common size.
* Growing Medium: Coco coir, rockwool cubes, or perlite. These provide support for the seedlings in the net pots. I personally prefer coco coir for its water retention and aeration.
* Hydroponic Nutrients: A balanced nutrient solution specifically formulated for hydroponics. Look for a two-part nutrient system (Part A and Part B) for optimal results.
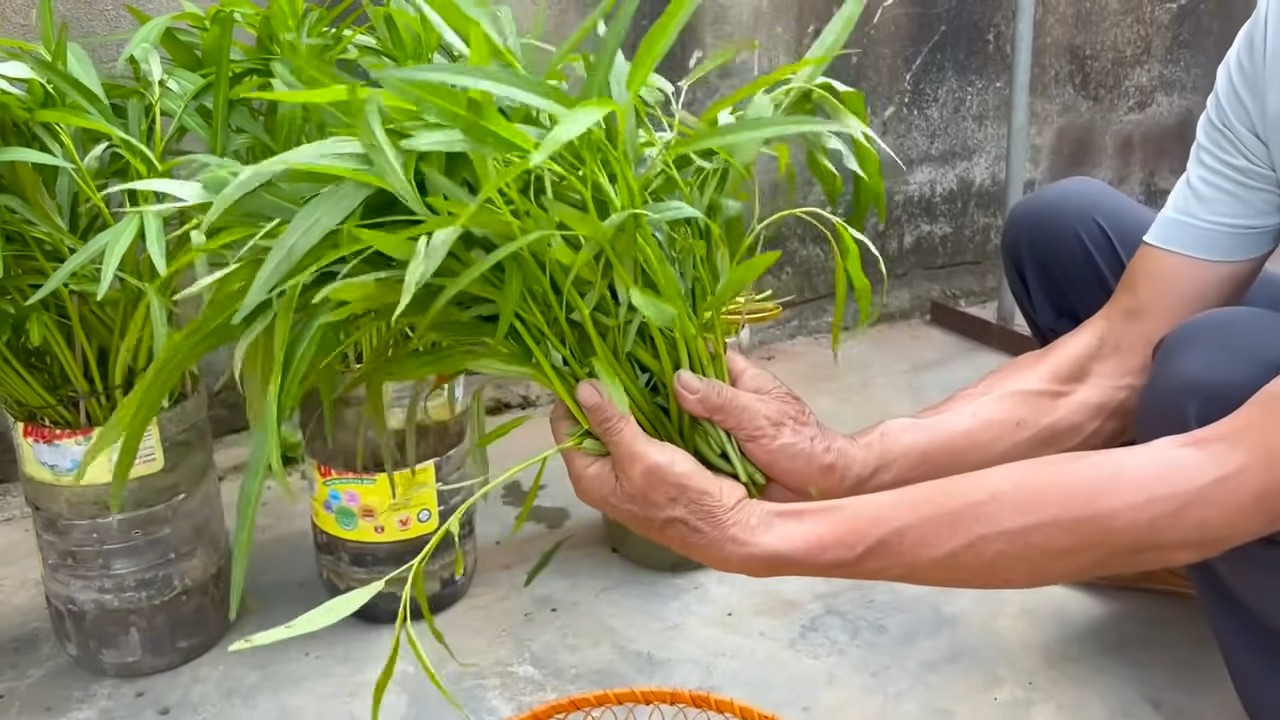
* Seedlings: Start your plants from seed or purchase seedlings from a nursery. Lettuce, spinach, herbs, and strawberries are great choices for beginners.
* Drill with Hole Saw Attachment: To create holes in the lid for the net pots.
* Measuring Cups and Spoons: For accurately measuring nutrients.
* pH Meter (Optional but Recommended): To monitor the pH of the nutrient solution.
* pH Up and pH Down (Optional but Recommended): To adjust the pH of the nutrient solution.
* Water: Tap water is usually fine, but let it sit for 24 hours to allow chlorine to dissipate.
* Marker: For marking the water level.
Step-by-Step Instructions: Building Your Kratky System
Alright, let’s get our hands dirty (well, not really, since it’s hydroponics!). Follow these steps to build your own Kratky system:
1. Prepare the Container
* Clean the Container: Thoroughly wash the container with soap and water to remove any dirt or residue. Rinse well.
* Drill Holes in the Lid: Place the net pots on the lid and trace around them with a marker. Use the hole saw attachment on your drill to carefully cut out the holes. Make sure the holes are slightly smaller than the rim of the net pots so they sit securely. The number of holes depends on the size of your container and how much space you want between plants. I usually aim for about 6-8 inches between plants.
2. Prepare the Growing Medium
* Hydrate the Growing Medium: If you’re using coco coir, rinse it thoroughly with water to remove any excess salts. Then, soak it in water for at least 30 minutes. Squeeze out the excess water before using. If you’re using rockwool cubes, soak them in pH-balanced water (pH 5.5-6.5) for a few hours before using.
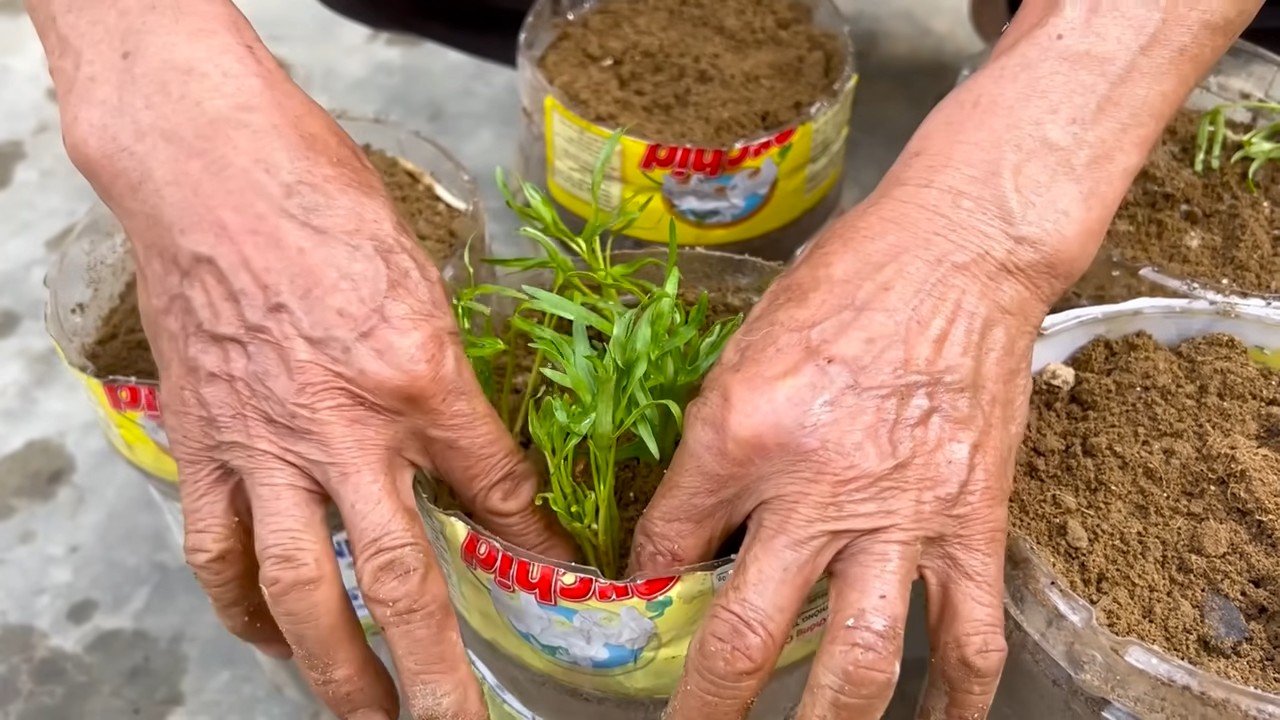
3. Transplant the Seedlings
* Gently Remove Seedlings: Carefully remove the seedlings from their starter containers. Try to keep as much of the root system intact as possible.
* Place Seedlings in Net Pots: Fill the net pots with the hydrated growing medium. Create a small well in the center and gently place the seedling inside. Add more growing medium around the roots to provide support. Make sure the base of the stem is just above the growing medium.
4. Prepare the Nutrient Solution
* Add Water to the Container: Fill the container with water, leaving about 2-3 inches of space at the top.
* Add Nutrients: Follow the instructions on your hydroponic nutrient package to determine the correct amount of Part A and Part B nutrients to add to the water. Use measuring cups and spoons to ensure accuracy. It’s crucial to follow the instructions carefully, as too much or too little nutrients can harm your plants.
* Mix Thoroughly: Stir the nutrient solution well to ensure the nutrients are evenly distributed.
5. Check and Adjust pH (Optional but Recommended)
* Test the pH: Use your pH meter to test the pH of the nutrient solution. The ideal pH range for most hydroponic vegetables is between 5.5 and 6.5.
* Adjust pH if Necessary: If the pH is too high, add a small amount of pH Down. If the pH is too low, add a small amount of pH Up. Stir well and retest the pH. Repeat until the pH is within the desired range. Always add pH adjusters in small increments, as it’s easy to overcorrect.
6. Assemble the System
* Place Net Pots in Lid: Carefully place the net pots with the seedlings into the holes in the lid.
* Place Lid on Container: Securely place the lid on the container.
* Mark the Water Level: Use a marker to mark the initial water level on the side of the container. This will help you monitor the water level and nutrient consumption.
Maintaining Your Hydroponic Garden
Now that your system is set up, here’s how to keep your plants happy and healthy:
* Light: Hydroponic vegetables need plenty of light. If you’re growing indoors, you’ll need to provide artificial light using grow lights. LED grow lights are energy-efficient and work well. Aim for 14-16 hours of light per day.
* Water Level: Monitor the water level regularly and add more nutrient solution as needed to maintain the initial water level.
* Nutrient Solution: Replace the nutrient solution every 2-3 weeks to prevent nutrient imbalances and the buildup of harmful salts.
* pH: Check the pH of the nutrient solution regularly (every few days) and adjust as needed.
* Pest Control: Inspect your plants regularly for pests. If you find any, treat them with an appropriate organic pest control method.
* Air Circulation: Good air circulation helps prevent fungal diseases. If you’re growing indoors, consider using a small fan to circulate the air.
* Root Health: Periodically check the roots to ensure they are healthy and white. If you notice any brown or slimy roots, it could be a sign of root rot. Improve air circulation and consider adding a root stimulant to the nutrient solution.
Troubleshooting
Even with the best care, you might encounter some challenges along the way. Here are a few common problems and how to fix them:
* Yellowing Leaves: This could be a sign of nutrient deficiency. Check the nutrient solution and make sure you’re using the correct concentration.
* Slow Growth: This could be due to insufficient light, incorrect pH, or nutrient deficiency. Check all these factors and adjust as needed.
* Algae Growth: Algae growth can occur if the container is not opaque or if the nutrient solution is exposed to too much light. Make sure the container is dark-colored and consider covering the top of the container with a light-blocking material.
* Root Rot: This is a fungal disease that can occur if the roots are not getting enough oxygen. Improve air circulation and consider adding a root stimulant to the nutrient solution.
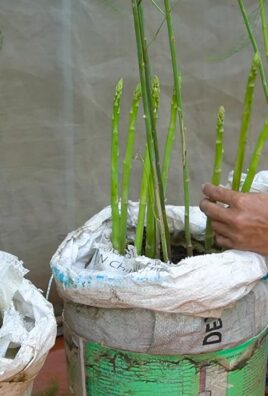
Harvesting Your Vegetables
The best part of hydroponic gardening is, of course, harvesting your own fresh vegetables! Harvest your vegetables when they are ripe and ready to eat. Lettuce and spinach can be harvested by cutting off the outer leaves,
Conclusion
So, there you have it! Embracing DIY hydroponic vegetable gardening isn’t just a fun project; it’s a gateway to fresher, healthier produce, a deeper connection with your food source, and a sustainable lifestyle. We’ve explored how you can create your own system, tailored to your space and needs, and reap the rewards of year-round harvests.
Why is this a must-try? Because it puts you in control. You dictate the nutrients, the environment, and ultimately, the quality of the vegetables you consume. Forget about mysterious origins and questionable pesticides. With hydroponics, you know exactly what’s going into your food. Plus, it’s incredibly rewarding to watch your plants thrive in a system you built yourself.
But the beauty of DIY hydroponic vegetable gardening lies in its adaptability. Feel free to experiment! Try different nutrient solutions to see which yields the best results for your chosen vegetables. Consider adding a timer to your grow lights for automated light cycles. Explore different growing mediums like coco coir or perlite to find what works best for you. You can even integrate a small aquaponics system by adding fish to your reservoir, creating a symbiotic relationship where the fish waste fertilizes the plants, and the plants filter the water.
Don’t be afraid to start small. A simple Kratky method setup with a few lettuce plants is a great way to dip your toes into the world of hydroponics. As you gain experience and confidence, you can expand your system and grow a wider variety of vegetables. Imagine fresh tomatoes, crisp cucumbers, and vibrant herbs, all grown right in your home, regardless of the season.
We strongly encourage you to give DIY hydroponic vegetable gardening a try. It’s an investment in your health, your well-being, and the environment. And most importantly, it’s a lot of fun!
Once you’ve embarked on your hydroponic journey, we’d love to hear about your experiences. Share your successes, your challenges, and your innovative solutions in the comments below. Let’s build a community of hydroponic enthusiasts, sharing knowledge and inspiring each other to grow the best possible vegetables. Your insights could be invaluable to someone just starting out. So, get your hands dirty (or rather, wet!), and let’s cultivate a greener, healthier future, one hydroponically grown vegetable at a time.
Frequently Asked Questions (FAQ)
What are the main benefits of DIY hydroponic vegetable gardening compared to traditional soil gardening?
DIY hydroponic vegetable gardening offers several advantages over traditional soil gardening. Firstly, it allows for faster growth rates. Plants in hydroponic systems receive nutrients directly to their roots, bypassing the need to search for them in the soil. This results in quicker development and earlier harvests. Secondly, hydroponics requires less space. You can grow a significant amount of produce in a relatively small area, making it ideal for urban dwellers or those with limited outdoor space. Thirdly, water usage is significantly reduced. Hydroponic systems recirculate water, minimizing waste and conserving this precious resource. Fourthly, you have greater control over the growing environment. You can adjust the nutrient solution, temperature, and lighting to optimize plant growth. Finally, hydroponics eliminates soilborne diseases and pests, reducing the need for pesticides and herbicides.
What are the initial costs associated with setting up a DIY hydroponic system?
The initial costs of setting up a DIY hydroponic system can vary depending on the size and complexity of the system. A simple Kratky system, which requires minimal equipment, can be set up for as little as $20-$50. This would include the cost of a container, net pots, growing medium, and nutrient solution. A more advanced system, such as a deep water culture (DWC) or nutrient film technique (NFT) system, may require a larger investment, ranging from $100-$300 or more. This would include the cost of a reservoir, air pump, air stone, tubing, grow lights, and a pH meter. While the initial investment may seem significant, it’s important to consider the long-term savings on groceries and the health benefits of growing your own fresh produce.
What are the best vegetables to grow in a DIY hydroponic system for beginners?
For beginners, it’s best to start with easy-to-grow vegetables that are tolerant of variations in nutrient levels and environmental conditions. Some excellent choices include lettuce, spinach, kale, herbs (such as basil, mint, and parsley), strawberries, and peppers. These vegetables are relatively fast-growing and require minimal maintenance. As you gain experience, you can experiment with more challenging crops such as tomatoes, cucumbers, and beans. Remember to research the specific needs of each vegetable to ensure optimal growth.
How often should I change the nutrient solution in my hydroponic system?
The frequency of nutrient solution changes depends on the type of system, the size of the reservoir, and the type of vegetables being grown. In general, it’s recommended to change the nutrient solution every 1-2 weeks for smaller systems and every 2-4 weeks for larger systems. Regularly monitoring the pH and EC (electrical conductivity) of the nutrient solution is crucial. If the pH or EC levels deviate significantly from the recommended range, it’s a sign that the nutrient solution needs to be changed. Additionally, if the nutrient solution becomes cloudy or develops an unpleasant odor, it should be replaced immediately.
What type of lighting is required for indoor hydroponic vegetable gardening?
Adequate lighting is essential for successful indoor hydroponic vegetable gardening. Plants require light for photosynthesis, the process by which they convert light energy into chemical energy. The type of lighting required depends on the type of vegetables being grown and the size of the growing area. Fluorescent lights, such as T5 or T8 bulbs, are a good option for leafy greens and herbs. LED grow lights are becoming increasingly popular due to their energy efficiency and long lifespan. They provide a full spectrum of light that is suitable for a wide range of vegetables. High-intensity discharge (HID) lights, such as metal halide (MH) and high-pressure sodium (HPS) lights, are the most powerful option and are typically used for larger growing areas.
How do I prevent algae growth in my hydroponic system?
Algae growth is a common problem in hydroponic systems, especially those exposed to sunlight. Algae can compete with plants for nutrients and oxygen, and it can also clog the system. To prevent algae growth, keep the nutrient solution covered and shielded from light. Use opaque containers and tubing to prevent light from penetrating the system. Regularly clean the reservoir and other components of the system to remove any algae that may have formed. You can also add a small amount of hydrogen peroxide to the nutrient solution to kill algae. However, be careful not to add too much, as it can also harm the plants.
What are some common problems encountered in DIY hydroponic vegetable gardening and how can I solve them?
Some common problems encountered in DIY hydroponic vegetable gardening include nutrient deficiencies, pH imbalances, pest infestations, and root rot. Nutrient deficiencies can be identified by observing the leaves of the plants. Yellowing leaves may indicate a nitrogen deficiency, while purple leaves may indicate a phosphorus deficiency. pH imbalances can be corrected by adjusting the pH of the nutrient solution using pH up or pH down solutions. Pest infestations can be controlled by using organic pesticides or by introducing beneficial insects. Root rot is caused by overwatering or poor aeration. To prevent root rot, ensure that the roots have adequate access to oxygen and avoid overwatering.
Can I grow organic vegetables in a hydroponic system?
While the term “organic” is traditionally associated with soil-based agriculture, it is possible to grow vegetables in a hydroponic system using organic nutrient solutions. Look for nutrient solutions that are certified organic by a reputable organization. These solutions are made from natural sources and do not contain synthetic chemicals. However, it’s important to note that the definition of “organic” in hydroponics is still evolving, and there may be some debate about whether hydroponically grown vegetables can truly be considered organic.
How do I scale up my DIY hydroponic vegetable gardening system?
Scaling up your DIY hydroponic vegetable gardening system can be a rewarding experience. Start by assessing your current space and resources. Determine how much additional space you have available and how much you are willing to invest in expanding your system. Consider adding more growing containers or building a larger hydroponic system. You may also need to upgrade your lighting and ventilation systems to accommodate the increased plant growth. As you scale up, it’s important to maintain proper nutrient levels, pH balance, and pest control to ensure the health and productivity of your plants.
Leave a Comment