

Hydroponic Vegetable Garden DIY: Ready to ditch the dirt and dive into a world of fresh, homegrown goodness right in your own home? I’m so excited to share some amazing tips and tricks to get you started! For centuries, humans have cultivated plants, but the idea of growing without soil, or hydroponics, has truly revolutionized how we think about food production. From the ancient Hanging Gardens of Babylon (though debated if truly hydroponic) to modern-day vertical farms, the concept of nurturing plants with nutrient-rich water has captured our imagination.
But why should you consider a hydroponic vegetable garden DIY project? Well, imagine having access to crisp lettuce, juicy tomatoes, and flavorful herbs all year round, regardless of the weather outside. Plus, hydroponics often uses less water than traditional gardening and can be set up in small spaces, making it perfect for apartment dwellers or anyone with limited outdoor space. I know, it sounds almost too good to be true, right?
In this article, I’ll walk you through everything you need to know to create your own thriving hydroponic vegetable garden. We’ll cover the basics of hydroponic systems, the best vegetables to grow, and some clever DIY hacks to save you money and ensure your plants flourish. Get ready to unleash your inner gardener and enjoy the satisfaction of harvesting your own delicious, soil-free bounty!
DIY Hydroponic Vegetable Garden: Grow Your Own Greens Indoors!
Hey there, fellow plant enthusiasts! Ever dreamed of having fresh, delicious veggies right at your fingertips, regardless of the season or the size of your backyard? Well, get ready to turn that dream into reality with this super fun and surprisingly easy DIY hydroponic vegetable garden! I’m going to walk you through building your own system, step-by-step, so you can start harvesting your own greens in no time. Let’s get our hands dirty (well, technically, not dirty at all!) and dive in!
What is Hydroponics, Anyway?
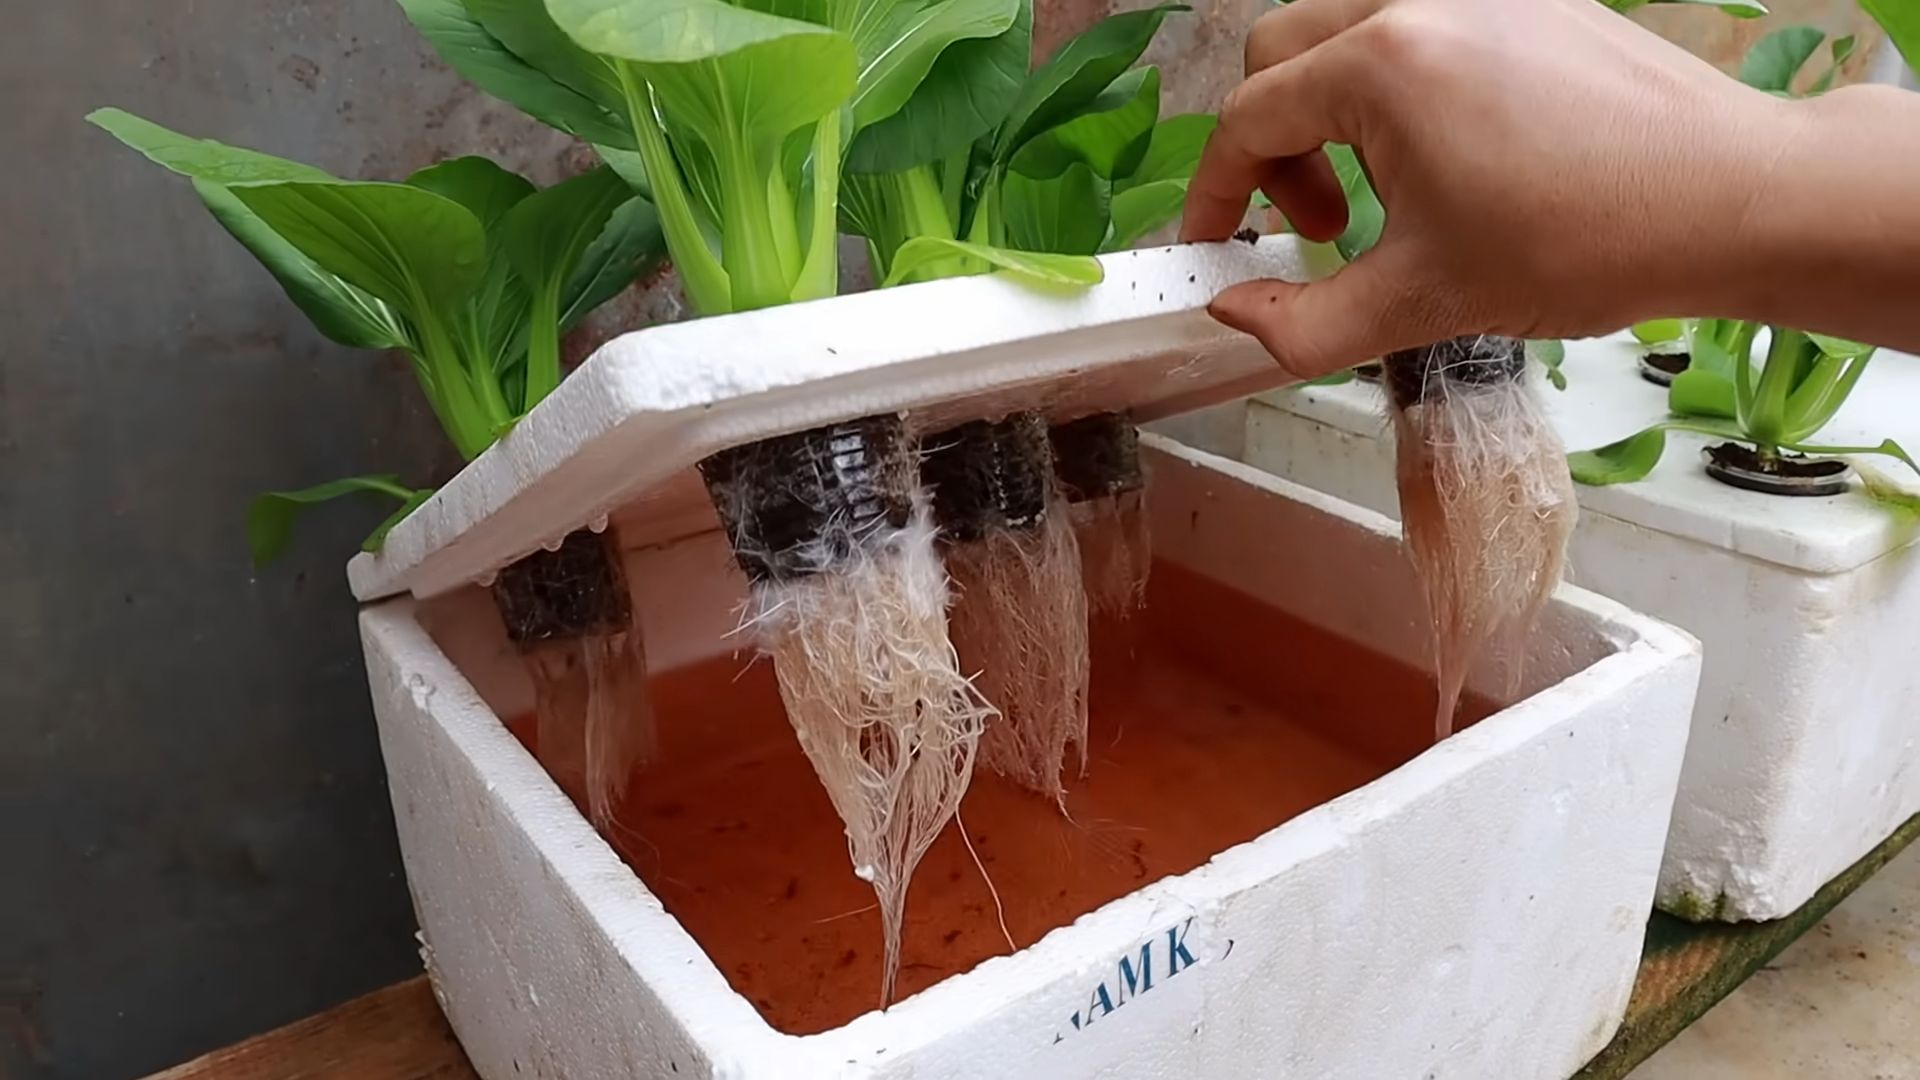
Before we jump into the building process, let’s quickly cover what hydroponics actually is. Simply put, it’s growing plants without soil. Instead, the roots are suspended in nutrient-rich water, giving them everything they need to thrive. This method is fantastic because it uses less water than traditional gardening, allows for faster growth, and eliminates soil-borne diseases and pests. Plus, you can do it indoors!
Choosing Your Hydroponic System: The Kratky Method
There are several types of hydroponic systems, but for this DIY project, we’re going to focus on the Kratky method. It’s the simplest and most beginner-friendly option because it requires no pumps, air stones, or electricity. It’s a passive system, meaning the plants take up nutrients and water as needed, and you just need to top up the reservoir occasionally. Perfect for busy folks like us!
Materials You’ll Need
Alright, let’s gather our supplies. Here’s what you’ll need to build your Kratky hydroponic system:
* A Container: This will be your reservoir. I recommend a dark-colored, opaque plastic container with a lid. A 5-gallon bucket works great, but you can also use a storage tote or even a repurposed container. The darker color helps prevent algae growth.
* Net Cups: These will hold your plants and growing medium. You can find these at most garden centers or online. 2-inch net cups are a good size for most leafy greens.
* Growing Medium: This provides support for the roots. I like to use coco coir or rockwool cubes, but you can also use perlite or a mix of these.
* Hydroponic Nutrients: This is the food for your plants! Make sure you get a nutrient solution specifically formulated for hydroponics. They usually come in two parts (A and B) that you mix with water.
* Seedlings or Seeds: Choose your favorite leafy greens! Lettuce, spinach, kale, and herbs like basil and mint are all excellent choices for hydroponics. You can start from seeds or buy small seedlings from a nursery.
* Drill with Hole Saw Attachment: You’ll need this to make holes in the lid of your container for the net cups. The hole saw should be the same size as the diameter of your net cups.
* Measuring Cups and Spoons: For accurately measuring your nutrient solution.
* pH Meter (Optional but Recommended): This helps you monitor the pH of your nutrient solution. Most plants thrive in a pH range of 5.5 to 6.5.
* pH Up and pH Down (Optional): To adjust the pH of your nutrient solution if needed.
* Marker: To mark the lid for drilling.
* Gloves: To protect your hands.
Building Your Kratky System: Step-by-Step
Okay, let’s get building! Follow these steps to create your own hydroponic vegetable garden:
1. Prepare the Lid:
* First, clean the lid of your container thoroughly.
* Decide how many plants you want to grow in your container. Space the net cups evenly across the lid, leaving enough room for the plants to grow without crowding each other. I usually aim for about 4-6 plants in a 5-gallon bucket.
* Using your marker, trace the outline of your net cups onto the lid. These will be your drilling guides.
* Carefully drill holes in the lid using your hole saw attachment. Make sure the holes are clean and the net cups fit snugly.
2. Prepare the Nutrient Solution:
* Fill your container with water, leaving a few inches of space at the top.
* Following the instructions on your hydroponic nutrient bottles, add the appropriate amount of Part A and Part B to the water. Be sure to add them separately and stir well after each addition.
* Use your pH meter to check the pH of the solution. If it’s not within the ideal range of 5.5 to 6.5, use pH Up or pH Down to adjust it. Add small amounts at a time and re-check the pH until you reach the desired level.
3. Prepare the Net Cups and Growing Medium:
* If you’re using coco coir, rinse it thoroughly with water to remove any excess salts.
* If you’re using rockwool cubes, soak them in water for a few hours before use.
* Place the growing medium into the net cups, filling them about halfway.
4. Plant Your Seedlings or Seeds:
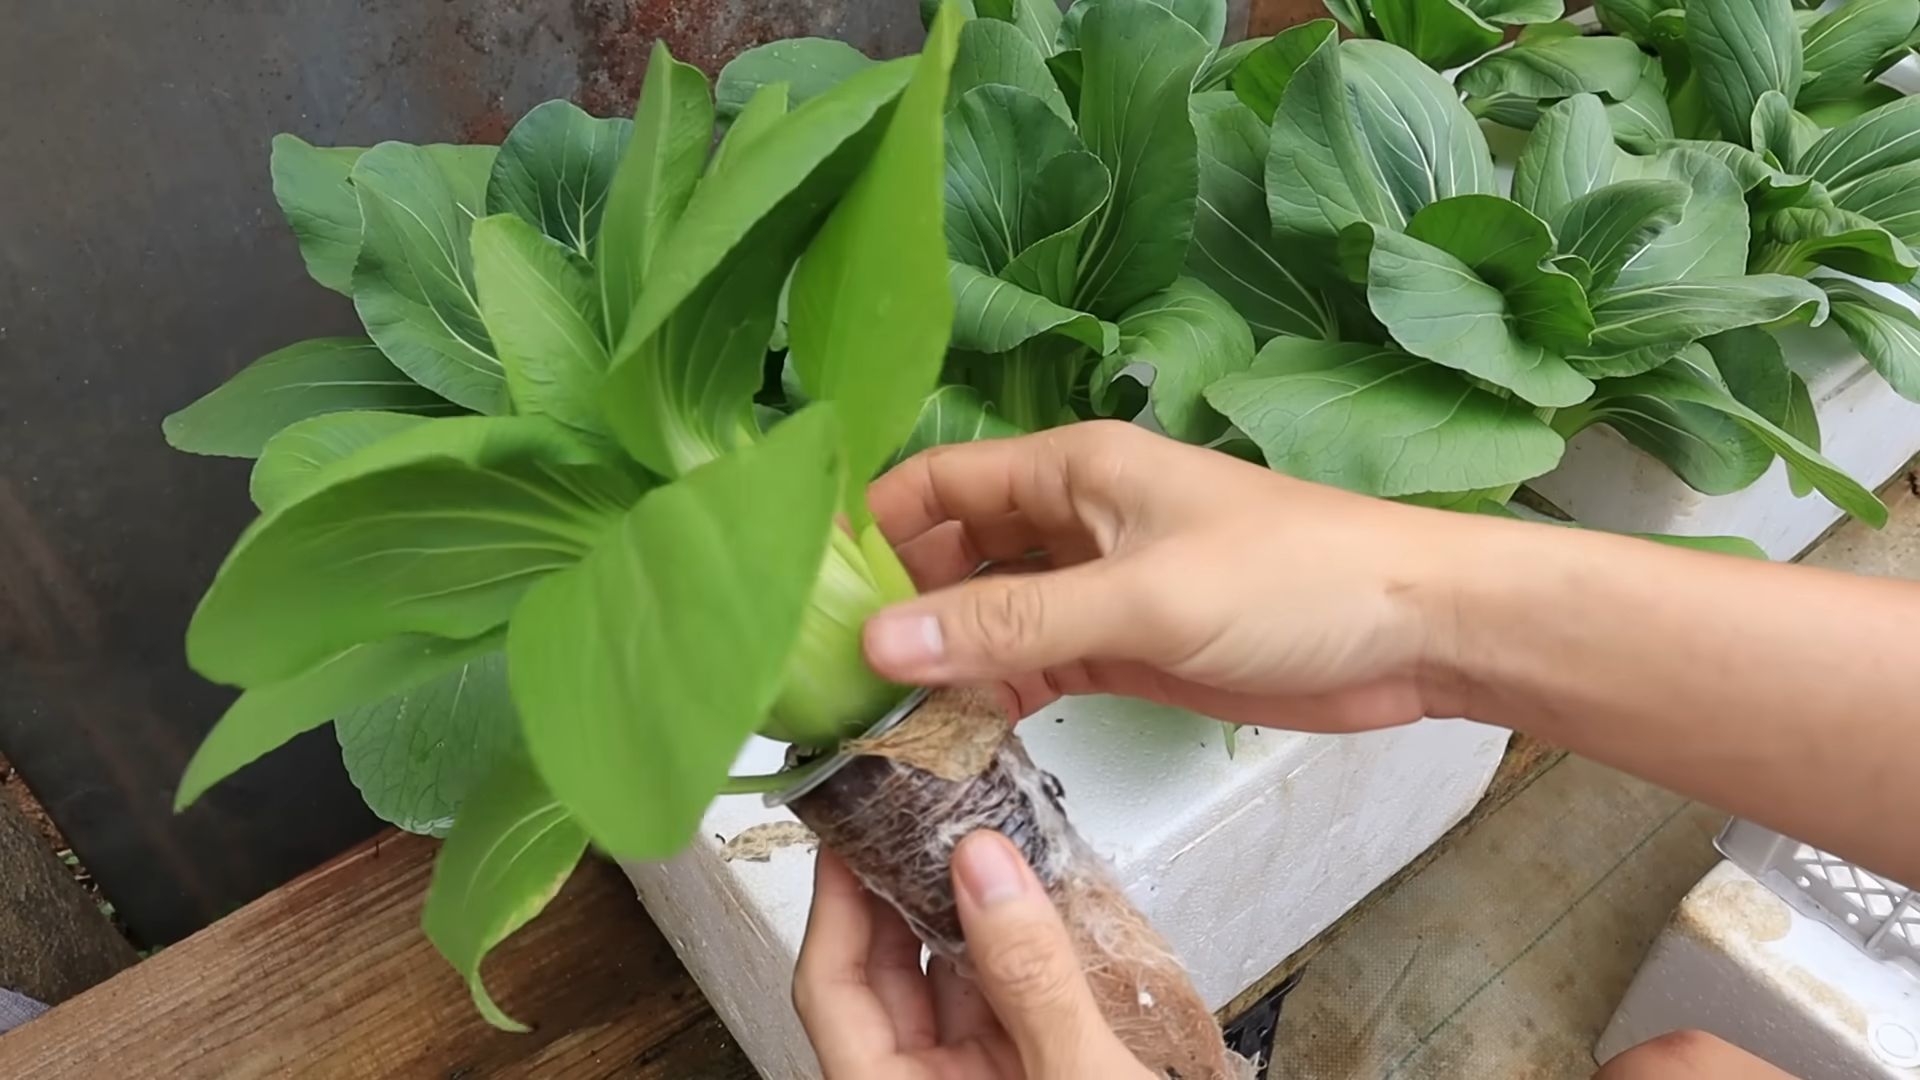
* If you’re using seedlings, gently remove them from their containers and place them in the net cups on top of the growing medium. Add more growing medium around the roots to secure them in place.
* If you’re starting from seeds, sow a few seeds in each net cup on top of the growing medium. Lightly cover them with more growing medium.
5. Assemble Your System:
* Carefully place the net cups with your plants into the holes in the lid.
* Place the lid on top of the container, making sure it’s securely fastened.
* If you are using seedlings, ensure the water level is touching the bottom of the net cup. This will help the roots reach the water. If you are using seeds, you may need to add a small amount of water to the net cup to keep the growing medium moist until the seeds germinate.
6. Find the Perfect Spot:
* Place your hydroponic garden in a location that receives plenty of sunlight. A south-facing window is ideal. If you don’t have enough natural light, you can supplement with a grow light.
7. Maintenance and Monitoring:
* Check the water level in your container regularly and top it up with fresh water and nutrients as needed. The roots should always have access to the nutrient solution.
* Monitor the pH of the solution and adjust it as needed.
* Keep an eye out for any signs of pests or diseases. If you spot any problems, address them promptly.
* As the plants grow, you may need to thin them out to prevent overcrowding.
* Harvest your vegetables as they mature!
Troubleshooting Tips
Even with the simplest systems, sometimes things don’t go exactly as planned. Here are a few common issues and how to address them:
* Algae Growth: Algae can grow in your nutrient solution if it’s exposed to too much light. To prevent this, use a dark-colored container and keep the lid tightly sealed. If you do get algae, you can try adding a small amount of hydrogen peroxide to the solution.
* Nutrient Deficiencies: If your plants are looking pale or yellow, they may be lacking nutrients. Make sure you’re using a balanced hydroponic nutrient solution and following the instructions carefully.
* Root Rot: Root rot is a fungal disease that can occur if the roots are constantly submerged in water. To prevent this, make sure the water level is not too high and that the roots have access to oxygen. You can also add a small amount of hydrogen peroxide to the solution to help prevent fungal growth.
* Pests: Even though you’re growing indoors, pests can still find their way to your plants. Inspect your plants regularly for signs of pests and take action promptly if you find any. Insecticidal soap or neem oil can be effective treatments.
Choosing the Right Plants
While many plants can be grown hydroponically, some are better suited for the Kratky method than others. Here are some of my favorites:
* Lettuce: Lettuce is a fast-growing and easy-to-grow option for hydroponics. There are many different varieties to choose from, so you can experiment and find your favorites.
* Spinach: Spinach is another great leafy green that thrives in hydroponic systems. It’s packed with nutrients and can be harvested regularly.
* Kale: Kale is a hardy and nutritious green that’s perfect for hydroponics. It can tolerate cooler temperatures, making it a good choice for growing indoors during the winter.
* Basil: Basil is a fragrant herb that’s easy to grow hydroponically. It’s a great addition to salads, sauces, and other dishes.
* Mint: Mint is another easy-to-grow herb that does well in hydroponic systems. Be careful,
Conclusion
So, there you have it! Creating your own hydroponic vegetable garden isn’t just a fun project; it’s a gateway to fresh, delicious produce right at your fingertips, regardless of your outdoor space. We’ve walked you through a simple, effective method that’s both budget-friendly and surprisingly easy to maintain. The benefits extend far beyond just having access to homegrown vegetables. You’ll be reducing your carbon footprint by minimizing trips to the grocery store, controlling the quality of your food by eliminating pesticides, and enjoying the satisfaction of nurturing life from seed to harvest.
This DIY hydroponic system offers a unique blend of convenience and control. Imagine stepping into your kitchen and snipping fresh lettuce for a salad, or harvesting ripe tomatoes for a homemade sauce, all grown in your own indoor garden. The taste difference is remarkable – vegetables grown hydroponically often boast a richer, more intense flavor due to the precise control over nutrients.
But the real magic lies in the adaptability of this system. Feel free to experiment with different types of vegetables. Leafy greens like spinach, kale, and arugula thrive in hydroponic setups, as do herbs like basil, mint, and cilantro. For the more adventurous gardener, consider trying strawberries, peppers, or even dwarf tomato varieties. The possibilities are truly endless!
Don’t be afraid to get creative with your setup. You can repurpose old containers, experiment with different nutrient solutions, and even add grow lights to extend your growing season. Consider adding a small water pump to automate the nutrient delivery process, or incorporating a timer to control the lighting schedule. These small tweaks can significantly improve the efficiency and yield of your hydroponic garden.
We understand that embarking on a new DIY project can be a little daunting, but trust us, the rewards are well worth the effort. The initial setup might require a bit of time and attention, but once your hydroponic garden is established, it becomes a self-sustaining ecosystem that requires minimal maintenance.
This hydroponic vegetable garden DIY project is more than just a trend; it’s a sustainable solution for accessing fresh, healthy food. It’s a way to connect with nature, even in the heart of the city, and to take control of your food supply.
So, what are you waiting for? Gather your materials, follow our simple steps, and get ready to experience the joy of growing your own food. We’re confident that you’ll be amazed by the results.
And most importantly, we want to hear about your experience! Share your photos, tips, and challenges in the comments below. Let’s build a community of hydroponic enthusiasts and learn from each other. Your insights could inspire others to take the plunge and discover the wonders of hydroponic gardening. Happy growing!
Frequently Asked Questions (FAQ)
What exactly *is* hydroponics, and why should I choose it over traditional gardening?
Hydroponics is a method of growing plants without soil, using mineral nutrient solutions in water. Instead of relying on soil to provide nutrients, the roots are directly exposed to a nutrient-rich solution. This allows for faster growth, higher yields, and reduced water consumption compared to traditional gardening. You also have greater control over the growing environment, minimizing the risk of pests and diseases. Plus, it’s perfect for those with limited space or poor soil conditions.
What kind of vegetables can I grow in my DIY hydroponic garden?
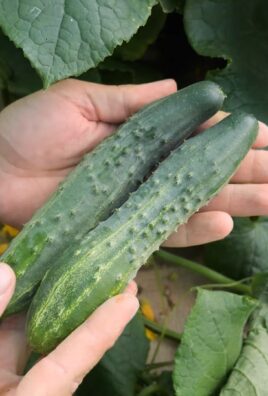
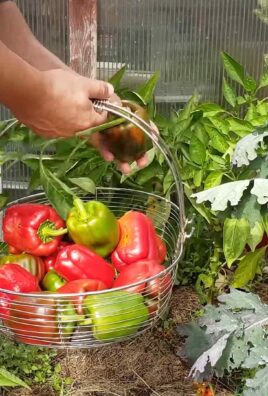
The beauty of hydroponics is its versatility. You can successfully grow a wide range of vegetables, including leafy greens like lettuce, spinach, kale, and arugula. Herbs such as basil, mint, cilantro, and parsley also thrive in hydroponic systems. For fruiting vegetables, consider tomatoes (especially dwarf varieties), peppers, cucumbers, and strawberries. Root vegetables like radishes and carrots can be grown, but they require a deeper container and careful monitoring of nutrient levels. Experiment and see what works best for you!
What kind of nutrient solution should I use, and where can I get it?
Choosing the right nutrient solution is crucial for the success of your hydroponic garden. You can purchase pre-mixed hydroponic nutrient solutions online or at your local garden center. Look for solutions specifically formulated for vegetables, and follow the manufacturer’s instructions for dilution and application. Alternatively, you can create your own nutrient solution using individual nutrient salts, but this requires more research and precision. A balanced nutrient solution should contain macronutrients like nitrogen (N), phosphorus (P), and potassium (K), as well as micronutrients like iron (Fe), manganese (Mn), and zinc (Zn).
How often should I change the nutrient solution in my hydroponic system?
The frequency of nutrient solution changes depends on the size of your system, the type of vegetables you’re growing, and the environmental conditions. As a general rule, you should change the nutrient solution every 1-2 weeks. However, it’s important to monitor the pH and EC (electrical conductivity) of the solution regularly. If the pH drifts too far from the optimal range (typically 5.5-6.5), or if the EC drops significantly, it’s a sign that the nutrients are depleted and the solution needs to be replaced.
How much light do my hydroponically grown vegetables need?
Light is essential for photosynthesis, the process by which plants convert light energy into chemical energy. The amount of light your hydroponic vegetables need depends on the type of vegetable and its growth stage. Leafy greens generally require less light than fruiting vegetables. If you’re growing your hydroponic garden indoors, you’ll likely need to supplement natural light with grow lights. LED grow lights are energy-efficient and provide the full spectrum of light that plants need. Aim for at least 12-16 hours of light per day for most vegetables.
What are some common problems I might encounter with my hydroponic garden, and how can I fix them?
Like any gardening endeavor, hydroponics can present its own set of challenges. Common problems include nutrient deficiencies, pH imbalances, algae growth, and pest infestations. Nutrient deficiencies can be identified by observing the leaves of your plants. Yellowing leaves may indicate a nitrogen deficiency, while purple leaves may indicate a phosphorus deficiency. pH imbalances can be corrected by adjusting the pH of the nutrient solution using pH up or pH down solutions. Algae growth can be prevented by keeping the nutrient solution covered and out of direct sunlight. Pest infestations can be treated with organic pesticides or by introducing beneficial insects.
How do I prevent algae growth in my hydroponic system?
Algae thrives in moist, nutrient-rich environments with plenty of light. To prevent algae growth in your hydroponic system, keep the nutrient solution covered and out of direct sunlight. Use opaque containers to block light from reaching the solution. You can also add a small amount of hydrogen peroxide to the nutrient solution to kill algae spores. Regularly clean your system to remove any algae buildup.
Can I use tap water for my hydroponic garden, or do I need to use distilled water?
Whether you can use tap water for your hydroponic garden depends on the quality of your tap water. If your tap water is heavily chlorinated or contains high levels of minerals, it’s best to use distilled water or reverse osmosis (RO) water. However, if your tap water is relatively clean and has a pH within the acceptable range (5.5-6.5), you can use it. It’s always a good idea to test your tap water before using it in your hydroponic system.
How do I know when my vegetables are ready to harvest?
The best way to determine when your vegetables are ready to harvest is to observe their size, color, and texture. Leafy greens are typically ready to harvest when they reach a desired size and have a vibrant green color. Tomatoes are ready to harvest when they are fully ripe and have a deep red color. Peppers are ready to harvest when they have reached their mature size and color. Cucumbers are ready to harvest when they are firm and have a smooth skin. Refer to specific growing guides for each vegetable for more detailed information on harvesting times.
What if I don’t have a lot of space? Can I still do this hydroponic vegetable garden DIY?
Absolutely! One of the biggest advantages of hydroponics is its space-saving potential. You can create a vertical hydroponic system using stacked containers or PVC pipes, maximizing your growing area in a small space. You can also use a small, self-contained hydroponic system that sits on a countertop or windowsill. Even a small hydroponic garden can provide you with a steady supply of fresh herbs and leafy greens.

Leave a Comment