

Harvest bean sprouts at home? Absolutely! Imagine the satisfaction of snipping fresh, crunchy bean sprouts grown right in your kitchen, ready to add a burst of flavor and nutrients to your next stir-fry or salad. Forget those limp, pre-packaged sprouts from the grocery store – we’re talking about vibrant, homegrown goodness!
Sprouting seeds for food has a rich history, dating back thousands of years to ancient China, where they were valued for their nutritional benefits and ability to provide fresh greens during the winter months. This practice has since spread across the globe, becoming a staple in various cuisines and a symbol of resourcefulness.
But why should you learn to harvest bean sprouts at home? Well, for starters, it’s incredibly easy and cost-effective. Plus, you have complete control over the growing environment, ensuring your sprouts are free from harmful chemicals and contaminants. In today’s world, where healthy eating and sustainable living are more important than ever, mastering this simple DIY trick is a game-changer. I’m excited to share my favorite tips and techniques to help you grow and harvest your own delicious bean sprouts, adding a touch of freshness and vitality to your meals!
Sprouting Your Own: A Simple Guide for Home
Hello dear DIY friends! Have you ever wondered how you can easily grow fresh, crunchy sprouts at home? I’ll show you how! It’s super easy, inexpensive, and you’ll always have fresh, healthy sprouts on hand. Let’s get started!
What you need:
- Sprouting jar or sprouter: A sprouting jar with a fine-mesh lid or a multi-tiered sprouter is ideal. You can also use a regular canning jar and a piece of muslin or gauze.
- Sproutable seeds: Make sure the seeds are specifically suitable for sprouting. Popular varieties include alfalfa, broccoli, radish, mung beans, lentils, and cress.
- Clean water: Filtered water or boiled, cooled water is best.
- A dark, cool place: Direct sunlight is not good for the sprouts.
- Patience: Sprouts need a few days to grow.
Step-by-Step Guide:
1. Preparing the Seeds:
- Put the desired amount of seeds into your sprouting jar or sprouter. The amount depends on the size of your container. Be careful not to use too many seeds, as the sprouts need space to grow. I recommend starting with one tablespoon of seeds and adjusting the amount as needed.
- Rinse the seeds thoroughly with cold water. Remove any impurities or damaged seeds.
- Fill the jar or sprouter with fresh, cold water so that the seeds are completely covered.
- Let the seeds soak for the recommended time. The soaking time varies depending on the variety. Alfalfa and broccoli need about 6-8 hours, mung beans 12 hours, and lentils 8-12 hours. It’s best to check the seed packet for information.
2. Letting them Sprout:
- After soaking, drain the water and rinse the seeds thoroughly again with cold water.
- Place the sprouting jar or sprouter in a dark, cool place. Avoid direct sunlight as it can damage the sprouts. A kitchen cabinet or a dark corner in the kitchen is ideal.
- Place the jar at an angle so that excess water can drain off and the sprouts are not sitting in water. With a sprouter, make sure the water can drain well.
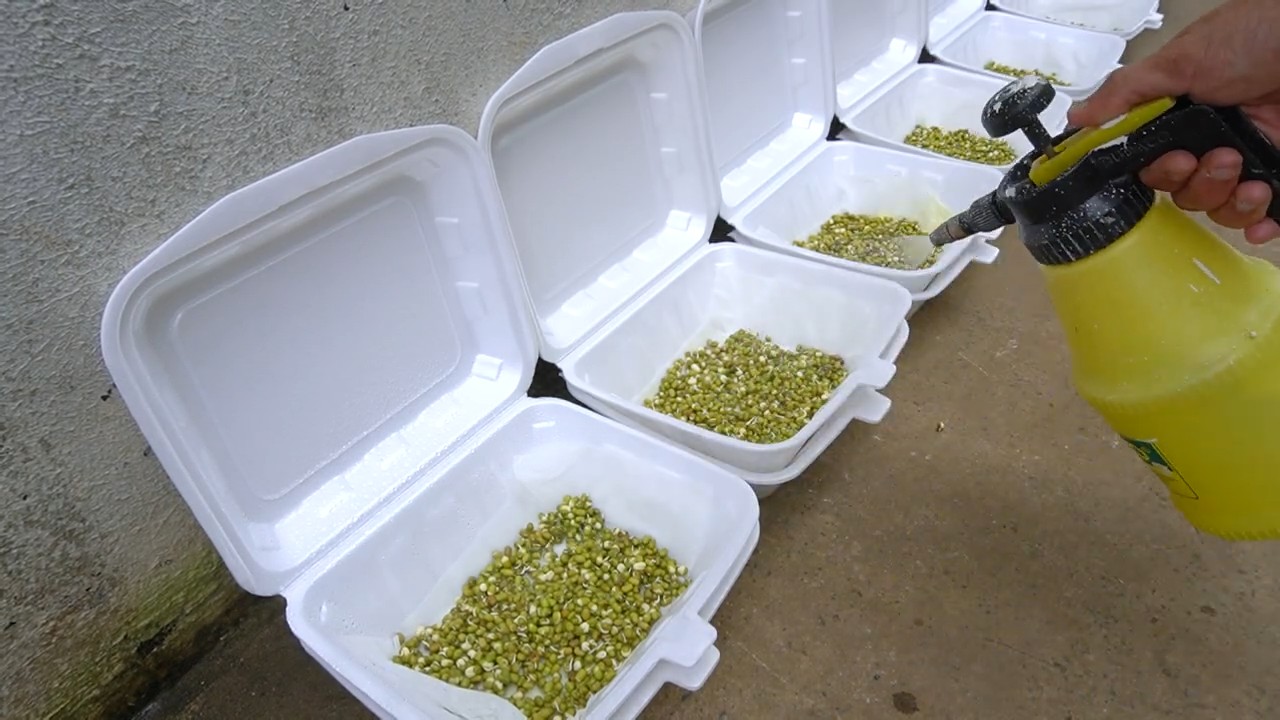
- Rinse the sprouts 2-3 times daily with fresh, cold water. This is very important to prevent mold and to keep the sprouts moist.
- Make sure the water drains well. Waterlogging can lead to rot.
3. Growing and Harvesting:
- After a few days, the sprouts will begin to germinate. You will see small roots and leaflets.
- Continue to rinse the sprouts 2-3 times daily.
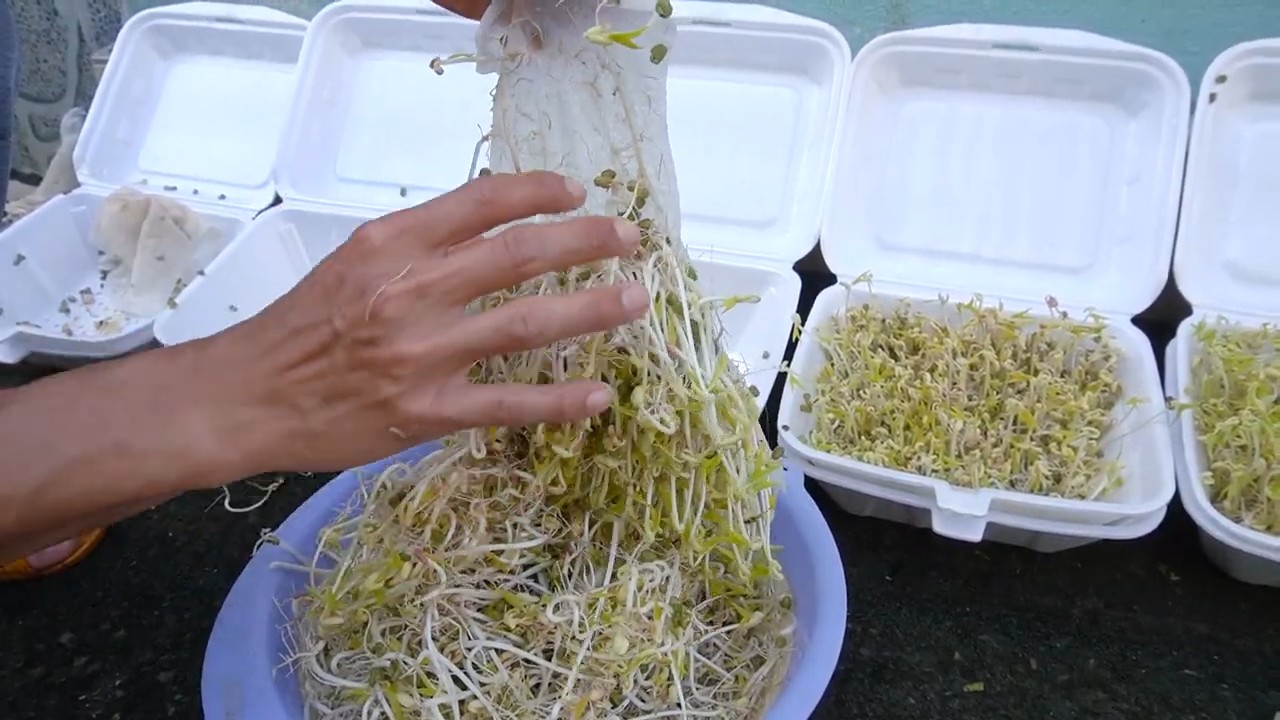
- Once the sprouts have reached the desired size (usually after 3-7 days), you can harvest them.
- Place the sprouting jar or sprouter in a bright place for a few hours (but not in direct sun) to stimulate chlorophyll production. This makes the sprouts greener and develops a better taste.
Special Tips for Different Sprout Types:
- Mung beans: Mung beans are particularly easy to sprout. Be sure to soak them sufficiently (12 hours) and rinse them regularly. They grow very quickly and are ready to harvest in about 3-4 days.
- Alfalfa: Alfalfa sprouts are very small and delicate. They take a little longer to grow (5-7 days) and should be rinsed very carefully.
- Radish: Radish sprouts have a spicy flavor. They are ready to harvest in about 4-5 days.
- Broccoli: Broccoli sprouts are rich in sulforaphane, a valuable ingredient. They take about 5-6 days to grow.
- Lentils: Lentil sprouts are a bit larger and have a nutty flavor. They take about 3-4 days to grow.
Common Problems and Solutions:
- Mold: Mold is the most common problem when sprouting. To avoid mold, it is important to rinse the seeds thoroughly, ensure good ventilation, and avoid waterlogging. If you spot mold, you should dispose of the affected sprouts immediately and clean the jar or sprouter thoroughly.
- Rot: Rot is caused by too much moisture and lack of ventilation. Make sure the water drains well and the sprouts are not sitting in water.
- Slow germination: Slow germination can have various causes, e.g., water that is too cold, not enough moisture, or poor-quality seeds. Make sure to use fresh, clean water and to rinse the seeds regularly.
Cleaning the Sprouting Jar or Sprouter:
- After each harvest, you should clean the sprouting jar or sprouter thoroughly to prevent the formation of bacteria and mold.
- Rinse the jar or device with hot water and dish soap.
- Use a brush to remove all residues.
- Then rinse the jar or device thoroughly with clean water.
- Let the jar or device dry completely before using it again.
- Occasionally, you can also disinfect the jar or device with vinegar water.
Using the Sprouts:
- Sprouts are versatile. You can use them raw in salads, sandwiches, or wraps.
- They are also suitable as a topping for soups, stews, or curries.
- You can also lightly steam them or use them in stir-fry dishes.
- Sprouts are a great addition to smoothies and juices.
Storing the Sprouts:
- Harvested sprouts should be stored in the refrigerator.
- It is best to store them in an airtight container or in a damp cloth.
- Sprouts can be kept in the refrigerator for about 3-5 days.
- Rinse the sprouts thoroughly again before consumption.
Why Sprout Your Own?
- Freshness and Flavor: Home-grown sprouts are much fresher and more aromatic than store-bought sprouts.
- Health: Sprouts are rich in vitamins, minerals, and enzymes. They are a great addition to a healthy diet.
- Cost-effective: Sprouting your own is much cheaper than buying them.
- Sustainability: You avoid packaging waste and support a sustainable lifestyle.
- Fun: It’s fun to watch the sprouts grow and then to harvest and enjoy them.
I hope this guide helps you to grow your own sprouts. It’s really easier than you think and it’s worth it! Have fun trying it out!
Conclusion
So, there you have it! Harvesting bean sprouts at home is not only incredibly simple, but it’s also a game-changer for anyone who values fresh, nutritious, and cost-effective ingredients. Forget those limp, pre-packaged sprouts from the grocery store. With just a few readily available supplies and a little patience, you can cultivate a vibrant crop of crisp, flavorful bean sprouts right in your own kitchen.
Why is this DIY trick a must-try? Because it puts you in control. You control the quality of the beans, the cleanliness of the growing environment, and ultimately, the taste and nutritional value of your sprouts. You’ll be amazed at the difference in flavor compared to store-bought varieties. The homemade sprouts are noticeably fresher, crunchier, and bursting with a natural sweetness that elevates any dish.
Beyond the superior taste and quality, growing your own bean sprouts is also incredibly economical. A single bag of dried beans can yield a substantial amount of sprouts, saving you money in the long run. Plus, it’s a sustainable practice, reducing your reliance on commercially produced and packaged goods.
Looking for variations? Experiment with different types of beans! Mung beans are the most common choice, but you can also try adzuki beans, lentils, or even alfalfa seeds for a unique flavor profile. Consider adding a touch of seaweed extract to the rinsing water for an extra boost of minerals and nutrients. For a spicier kick, try adding a pinch of chili flakes to the sprouting jar. You can also adjust the sprouting time to achieve your desired sprout length and texture. Some people prefer shorter, more delicate sprouts, while others prefer longer, heartier ones.
Don’t be intimidated by the process. It’s far easier than you might think. The key is to maintain a consistent rinsing schedule and provide adequate drainage to prevent mold growth. With a little practice, you’ll be harvesting perfect bean sprouts in no time.
We wholeheartedly encourage you to give this DIY trick a try. It’s a rewarding experience that will transform the way you think about fresh produce. Once you’ve tasted the difference between homemade and store-bought bean sprouts, you’ll never go back!
And most importantly, we want to hear about your experience! Share your tips, tricks, and variations in the comments below. Let us know what types of beans you’ve tried, what dishes you’ve used your sprouts in, and any challenges you’ve encountered along the way. Your feedback will help other readers discover the joy of harvesting bean sprouts at home and inspire them to embark on their own sprouting adventures. Let’s build a community of home sprouters and share the deliciousness together!
Frequently Asked Questions (FAQ)
What types of beans are best for sprouting?
The most common and readily available bean for sprouting is the mung bean. Mung beans sprout easily and have a mild, slightly sweet flavor that complements a wide range of dishes. However, you can also experiment with other types of beans and legumes, such as adzuki beans, lentils, chickpeas, and even alfalfa seeds. Each type will offer a slightly different flavor and texture, so it’s worth trying a few to find your favorites. Just be sure to use beans specifically intended for sprouting, as some dried beans may have been treated with chemicals that are not safe for consumption.
How long does it take to harvest bean sprouts?
The sprouting process typically takes between 3 to 5 days, depending on the type of bean, the temperature, and the humidity. Mung beans generally sprout within 3 to 4 days. You’ll know your sprouts are ready to harvest when they have developed small roots and shoots, and the bean hulls have started to loosen. The ideal length of the sprouts is a matter of personal preference, but most people prefer them to be about 1 to 2 inches long.
What is the best way to store harvested bean sprouts?
Once you’ve harvested your bean sprouts, rinse them thoroughly with cold water and drain them well. Store them in an airtight container lined with a paper towel in the refrigerator. The paper towel will help absorb excess moisture and keep the sprouts fresh for longer. Properly stored bean sprouts can last for up to a week in the refrigerator. Be sure to check them regularly for any signs of spoilage, such as a slimy texture or a foul odor.
How often should I rinse the bean sprouts during the sprouting process?
Rinsing the bean sprouts is crucial for preventing mold growth and ensuring that they stay hydrated. You should rinse them at least twice a day, preferably in the morning and evening. In warmer climates or during the summer months, you may need to rinse them more frequently, up to three or four times a day. Use cool, clean water and make sure to drain the sprouts thoroughly after each rinsing.
What if I see mold growing on my bean sprouts?
Mold growth is a common problem when sprouting beans, especially if the environment is too warm or humid, or if the sprouts are not rinsed frequently enough. If you see any signs of mold, such as fuzzy white or green patches, discard the entire batch of sprouts immediately. Do not attempt to salvage any of the sprouts, as the mold may have already contaminated the entire batch. To prevent mold growth in the future, make sure to rinse the sprouts regularly, provide adequate drainage, and avoid overcrowding the sprouting jar.
Can I eat bean sprouts raw?
While bean sprouts are often eaten raw, it’s important to be aware of the potential risks of foodborne illness. Raw bean sprouts can harbor bacteria, such as Salmonella and E. coli, which can cause serious illness. To minimize the risk, it’s best to cook bean sprouts thoroughly before eating them. Cooking kills any harmful bacteria and makes the sprouts safer to consume. If you choose to eat bean sprouts raw, make sure to wash them thoroughly with cold water and choose sprouts from a reputable source.
What are some ways to use harvested bean sprouts?
Bean sprouts are incredibly versatile and can be used in a wide variety of dishes. They can be added to salads, sandwiches, and wraps for a crunchy and refreshing element. They are also a popular ingredient in Asian cuisine, such as stir-fries, spring rolls, and noodle dishes. Bean sprouts can also be used in soups, stews, and omelets. Their mild flavor makes them a great addition to almost any dish.
Is it safe to harvest bean sprouts if I am pregnant?
Pregnant women should exercise caution when consuming bean sprouts, as they are at a higher risk of contracting foodborne illnesses. It is generally recommended that pregnant women avoid eating raw bean sprouts altogether. If you are pregnant and wish to consume bean sprouts, make sure to cook them thoroughly to kill any harmful bacteria. Consult with your doctor or healthcare provider for personalized advice.
What equipment do I need to harvest bean sprouts at home?
You don’t need any fancy equipment to harvest bean sprouts at home. All you need is a wide-mouth jar (such as a mason jar), a sprouting lid or cheesecloth, and some dried beans. A sprouting lid is a convenient option, as it allows for easy rinsing and drainage. However, you can also use a piece of cheesecloth secured with a rubber band. You’ll also need a bowl or container to soak the beans in initially.
Can I use tap water for sprouting?
It is generally safe to use tap water for sprouting, as long as your tap water is safe to drink. However, if you are concerned about the quality of your tap water, you can use filtered water or bottled water instead. Avoid using water that is heavily chlorinated, as this can inhibit the sprouting process.
Leave a Comment