

Hanging Pot Cabbage Growing: Imagine plump, vibrant cabbages cascading from hanging pots, transforming your balcony or patio into a miniature, edible Eden! Forget the sprawling garden plot – we’re taking cabbage cultivation to new heights, literally! For centuries, cabbage has been a staple in diets across the globe, from the hearty stews of Eastern Europe to the vibrant slaws of North America. But did you know you can grow this versatile vegetable in a hanging pot?
I know what you’re thinking: “Cabbage? In a hanging pot? Is that even possible?” Absolutely! And I’m here to show you how. In today’s world, where space is a premium and access to fresh, healthy produce is increasingly important, mastering the art of hanging pot cabbage growing is a game-changer. It’s perfect for apartment dwellers, urban gardeners, or anyone looking to add a touch of whimsy and self-sufficiency to their lives.
This DIY guide will unlock the secrets to successfully growing cabbages in hanging pots, offering a unique and space-saving solution for enjoying fresh, homegrown goodness. Get ready to ditch the grocery store cabbage and embrace the satisfaction of harvesting your own delicious, organically grown crop, all from the comfort of your own home!
DIY Hanging Pot Cabbage: A Space-Saving Garden Delight!
Hey there, fellow gardening enthusiasts! Ever dreamed of a lush cabbage patch but lack the ground space? Well, I’ve got just the project for you: growing cabbage in hanging pots! It’s a fantastic way to maximize your yield, add a touch of whimsy to your garden, and keep those pesky ground-dwelling critters away from your precious cabbages. Let’s dive in!
Choosing the Right Cabbage Variety
Before we get our hands dirty, it’s crucial to select the right cabbage variety for hanging pots. Not all cabbages are created equal, and some are better suited for container gardening than others.
* Compact Varieties: Look for varieties labeled as “dwarf,” “mini,” or “early.” These tend to be smaller and more manageable in a hanging pot. Some great options include ‘Dwarf Blue Vates,’ ‘Golden Acre,’ or ‘Early Jersey Wakefield.’
* Heat Tolerance: If you live in a warmer climate, opt for heat-tolerant varieties to prevent bolting (premature flowering).
* Consider Your Taste: Of course, choose a variety you enjoy eating! Red, green, Savoy – the choice is yours!
Gathering Your Supplies
Alright, let’s assemble our arsenal of gardening goodies. Here’s what you’ll need:
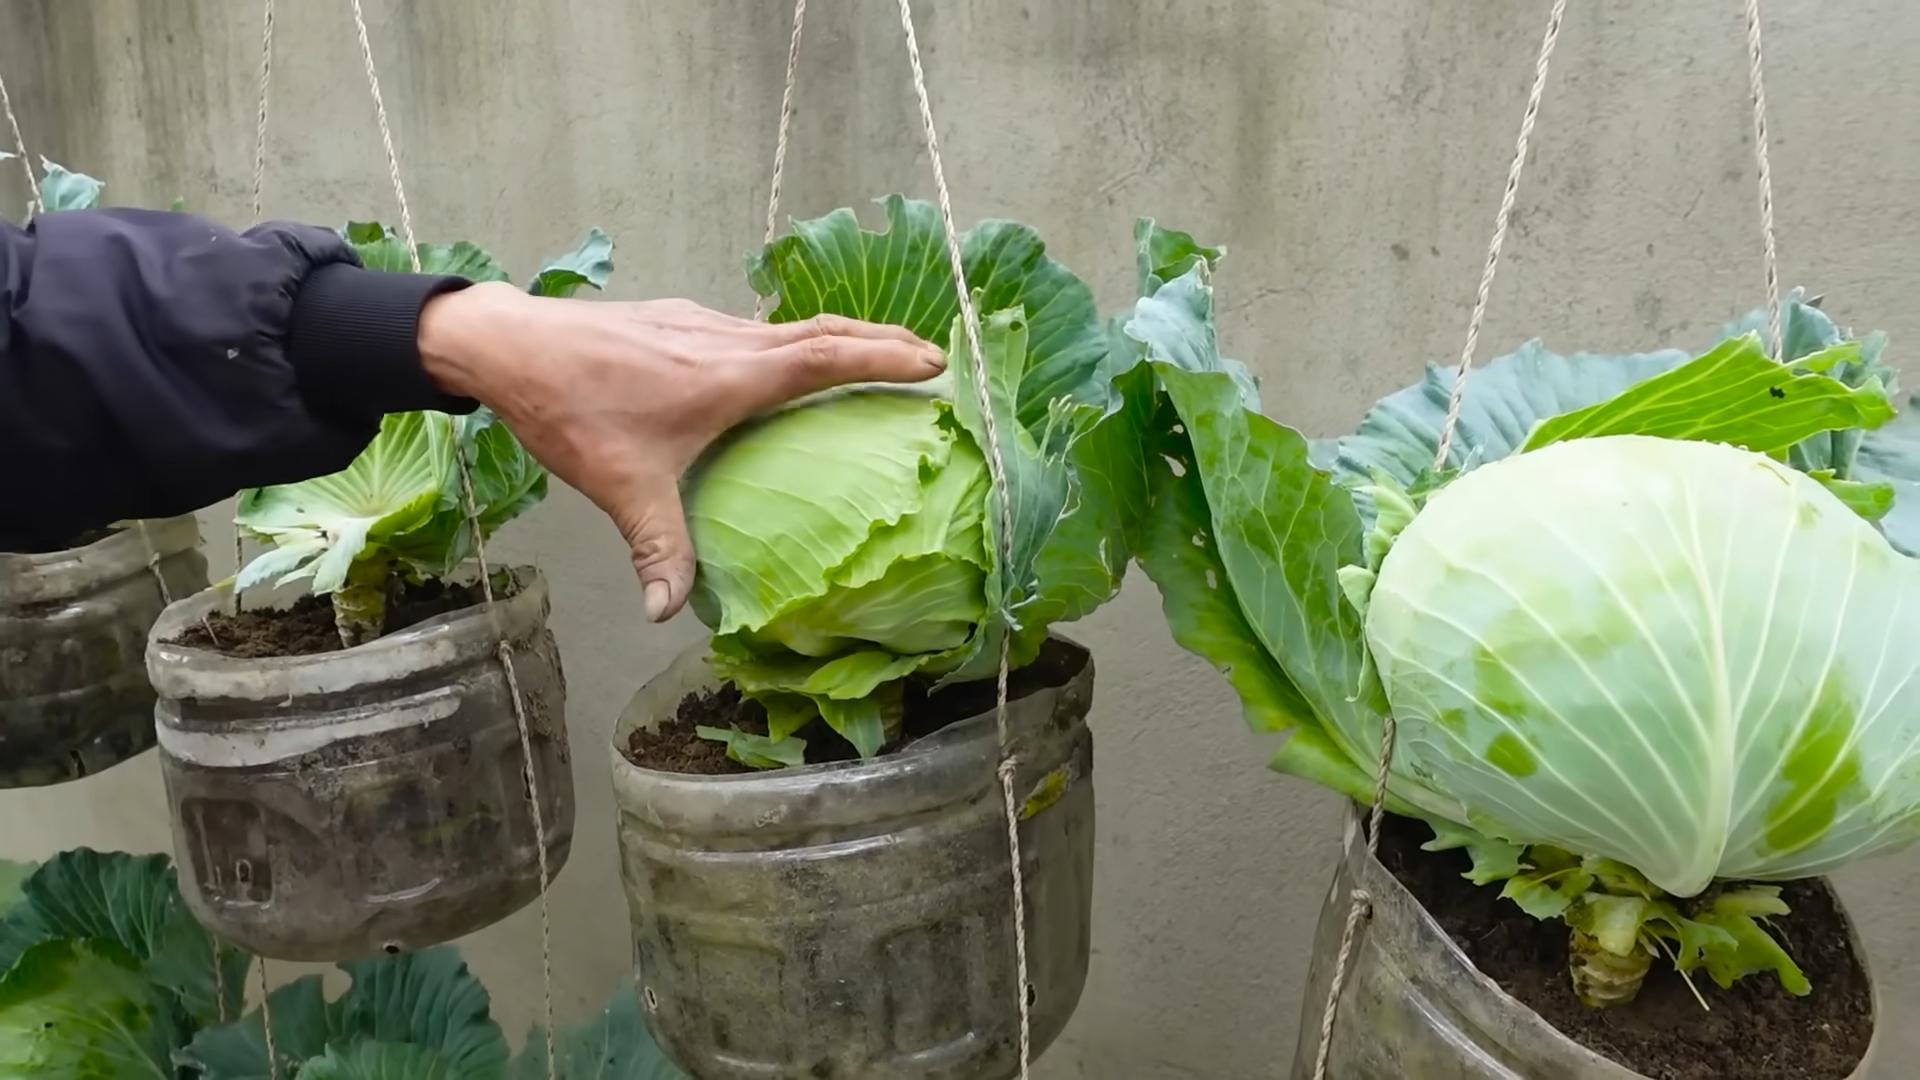
* Hanging Pot: Choose a pot that’s at least 12 inches in diameter and 10 inches deep. The bigger, the better, as cabbage needs room to grow. Make sure it has drainage holes!
* Potting Mix: Use a high-quality, well-draining potting mix. Avoid garden soil, as it can compact and hinder drainage. I prefer a mix that includes peat moss, perlite, and vermiculite.
* Cabbage Seedlings: You can start your own from seed (about 6-8 weeks before the last frost) or purchase seedlings from a local nursery.
* Slow-Release Fertilizer: Cabbage are heavy feeders, so a slow-release fertilizer will provide them with a steady supply of nutrients. Look for a balanced formula like 10-10-10 or one specifically formulated for vegetables.
* Watering Can or Hose: Essential for keeping your cabbage hydrated.
* Trowel or Small Shovel: For transplanting the seedlings.
* Optional:
* Coco Coir: Adding coco coir to your potting mix can improve water retention.
* Worm Castings: A fantastic natural fertilizer that adds beneficial microbes to the soil.
* Hanging Hardware: If your pot doesn’t come with a hanger, you’ll need sturdy chains or rope.
Planting Your Cabbage Seedlings
Now for the fun part – getting those little cabbage plants into their new home!
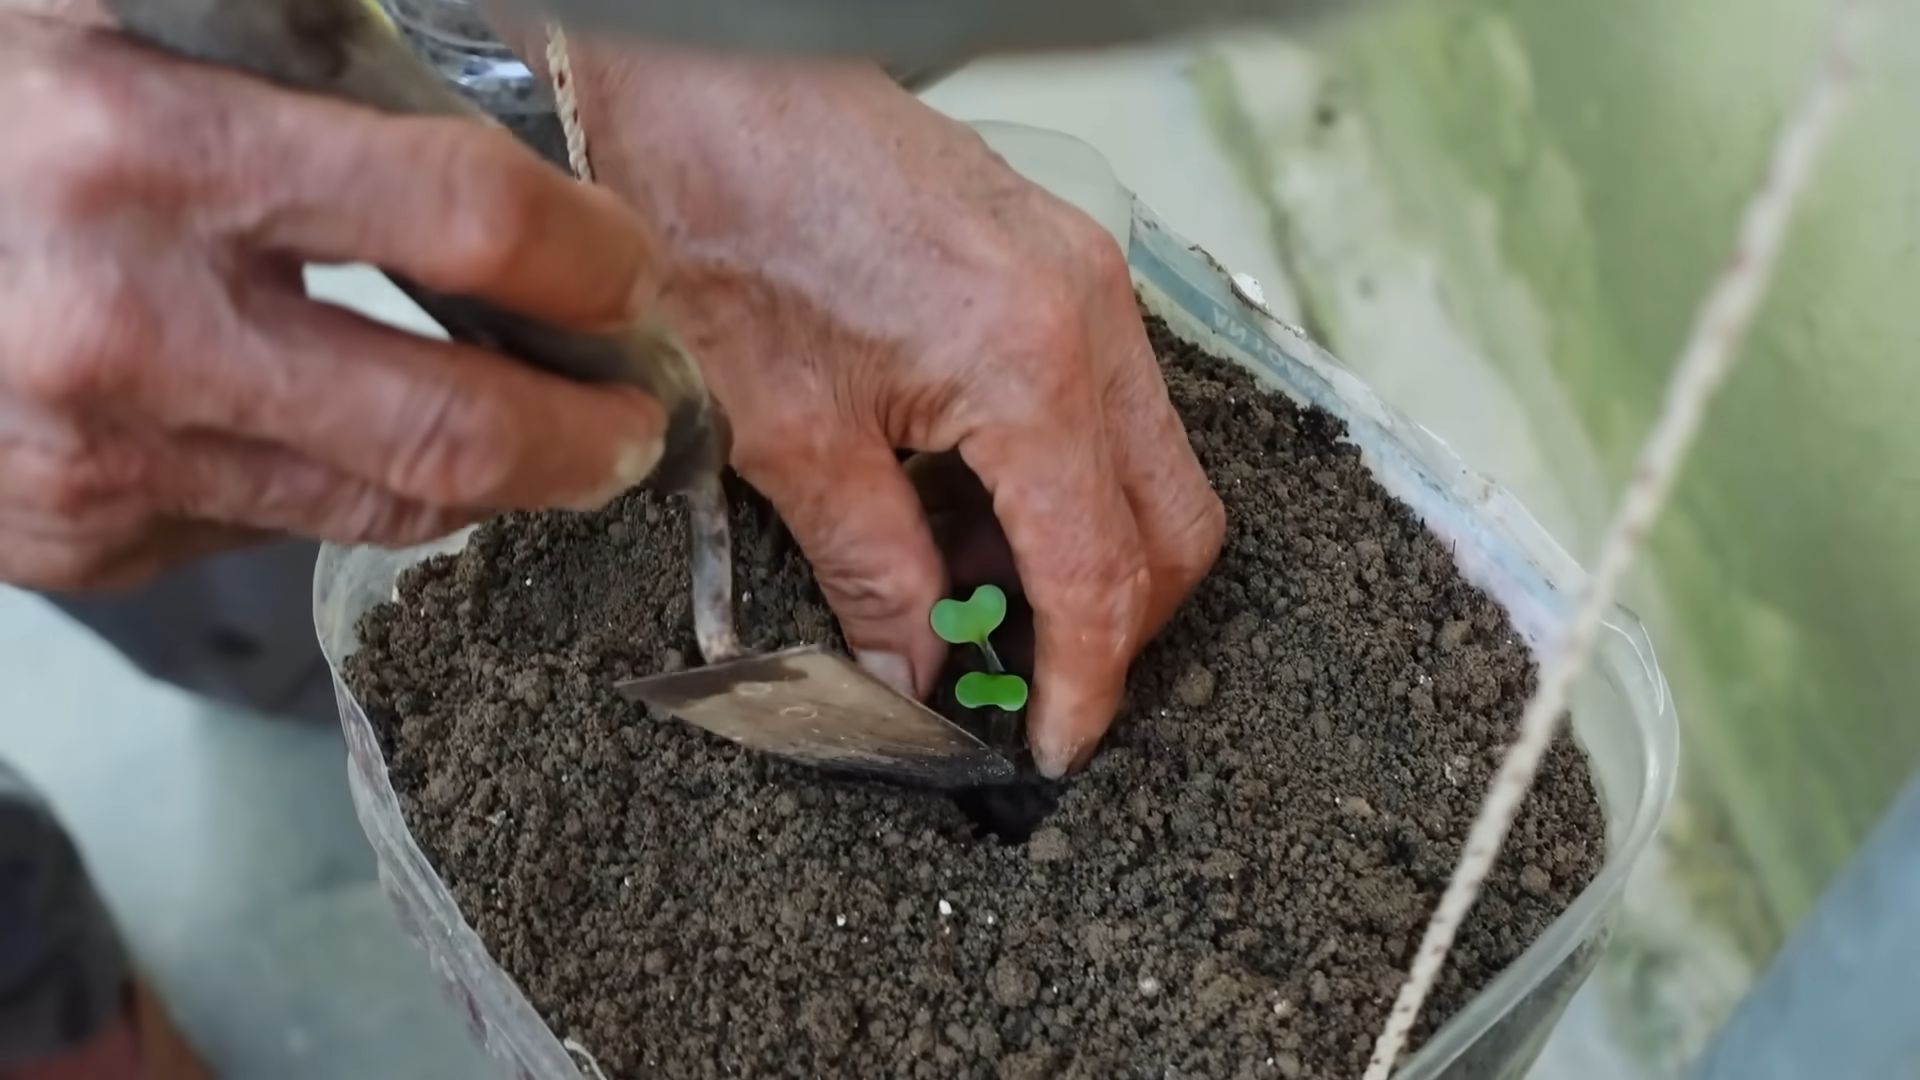
1. Prepare the Potting Mix: In a large container or wheelbarrow, thoroughly mix your potting mix with the slow-release fertilizer, coco coir (if using), and worm castings (if using). Follow the instructions on the fertilizer package for the correct amount.
2. Fill the Pot: Fill the hanging pot with the prepared potting mix, leaving about an inch or two of space at the top.
3. Create Planting Holes: Use your trowel to create planting holes in the potting mix, spacing them according to the mature size of your chosen cabbage variety. Generally, one or two plants per pot is sufficient. If you’re planting two, space them evenly.
4. Gently Remove Seedlings: Carefully remove the cabbage seedlings from their containers. Gently loosen the roots with your fingers.
5. Plant the Seedlings: Place each seedling into a planting hole and gently backfill with potting mix. Make sure the top of the root ball is level with the surrounding soil.
6. Water Thoroughly: Water the newly planted seedlings thoroughly until water drains from the bottom of the pot. This helps settle the soil and encourages root growth.
Caring for Your Hanging Pot Cabbage
Cabbage in hanging pots require consistent care to thrive. Here’s what you need to do:
* Watering: Water regularly, especially during hot, dry weather. The potting mix should be consistently moist but not soggy. Check the soil moisture by sticking your finger about an inch into the soil. If it feels dry, it’s time to water. Hanging pots tend to dry out faster than in-ground gardens, so be vigilant.
* Fertilizing: Cabbage are heavy feeders, so they need regular fertilization. In addition to the slow-release fertilizer you added at planting, you can supplement with a liquid fertilizer every 2-3 weeks. Use a balanced fertilizer or one specifically formulated for vegetables. Follow the instructions on the fertilizer package.
* Sunlight: Cabbage needs at least 6 hours of sunlight per day. Choose a location for your hanging pot that receives plenty of sunshine.
* Pest Control: Keep an eye out for common cabbage pests like cabbage worms, aphids, and flea beetles.
* Cabbage Worms: These green caterpillars can quickly decimate your cabbage leaves. Handpicking them off the plants is an effective method, especially for small infestations. You can also use Bacillus thuringiensis (Bt), a natural bacteria that kills cabbage worms.
* Aphids: These tiny insects suck the sap from plants, causing them to weaken and distort. Spraying the plants with a strong stream of water can dislodge aphids. You can also use insecticidal soap or neem oil.
* Flea Beetles: These tiny beetles chew small holes in the leaves. Covering the plants with row covers can prevent flea beetles from reaching them. You can also use insecticidal soap or diatomaceous earth.
* Weed Control: Keep the pot free of weeds, as they can compete with the cabbage for nutrients and water. Hand-pull any weeds that appear.
* Rotating the Pot: Rotate the hanging pot regularly to ensure that all sides of the plant receive equal sunlight. This will help prevent the plant from leaning towards the sun.
Harvesting Your Cabbage
The moment we’ve all been waiting for – harvesting your homegrown cabbage!
* Timing: Cabbage is typically ready to harvest 60-100 days after planting, depending on the variety. The head should be firm and dense.
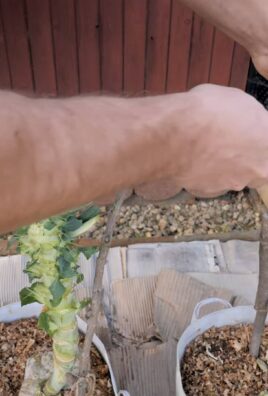
* Harvesting: Use a sharp knife to cut the cabbage head from the stem, leaving a few outer leaves intact.
* Storage: Cabbage can be stored in the refrigerator for several weeks. Wrap the head in plastic wrap or place it in a plastic bag.
Troubleshooting
Even with the best care, you might encounter some challenges along the way. Here are a few common problems and how to address them:
* Bolting (Premature Flowering): Bolting can occur if the cabbage is exposed to extreme temperatures or stress. Choose heat-tolerant varieties and provide consistent watering and fertilization to prevent bolting.
* Yellowing Leaves: Yellowing leaves can indicate a nutrient deficiency or overwatering. Check the soil moisture and adjust your watering accordingly. Fertilize with a balanced fertilizer to address nutrient deficiencies.
* Stunted Growth: Stunted growth can be caused by a variety of factors, including poor soil, lack of sunlight, or pest infestations. Ensure that the cabbage is planted in well-draining soil, receives at least 6 hours of sunlight per day, and is protected from pests.
Enjoying Your Homegrown Cabbage
Congratulations! You’ve successfully grown cabbage in a hanging pot. Now it’s time to enjoy the fruits (or rather, vegetables) of your labor. Use your homegrown cabbage in salads, slaws, soups, stews, or any other dish that calls for cabbage. The possibilities are endless!
Growing cabbage in hanging pots is a rewarding and space-saving way to enjoy fresh, homegrown vegetables. With a little care and attention, you can have a thriving cabbage patch hanging right outside your door. Happy gardening!
Conclusion
So, there you have it! Transforming your garden, balcony, or even a sunny windowsill into a thriving cabbage patch is easier than you might think with this simple yet effective hanging pot method. We’ve walked you through the steps, highlighting the benefits of this space-saving and pest-deterrent technique. But why is this DIY trick a must-try?
Firstly, it’s about maximizing your growing space. If you’re limited by a small yard or only have a balcony, traditional in-ground gardening might not be an option. Hanging pots allow you to grow vertically, utilizing otherwise unused space. Imagine a cascade of lush, green cabbage leaves dangling gracefully, adding a touch of rustic charm to your outdoor area.
Secondly, it offers a degree of pest control. While not foolproof, elevating your cabbage plants makes them less accessible to ground-dwelling pests like slugs and snails, which can wreak havoc on your harvest. This means less reliance on pesticides and a healthier, more organic crop.
Thirdly, it’s incredibly rewarding. There’s something deeply satisfying about nurturing a plant from seed to harvest, especially when you’ve employed a clever DIY solution to overcome space limitations. The taste of homegrown cabbage, fresh from your hanging pot, is simply unmatched.
But don’t stop there! This method is ripe for experimentation. Consider these variations:
* Companion Planting: Plant herbs like rosemary or thyme in the same pot to deter pests and enhance the flavor of your cabbage.
* Variety is the Spice of Life: Experiment with different cabbage varieties. Red cabbage, savoy cabbage, and even smaller, ornamental cabbages can all thrive in hanging pots.
* Upcycled Containers: Get creative with your containers! Old buckets, repurposed baskets, or even sturdy fabric bags can be transformed into stylish hanging planters. Just ensure they have adequate drainage.
* Fertilizer Boost: Supplement your soil with a slow-release fertilizer or regularly feed your cabbage plants with a liquid fertilizer to ensure they get the nutrients they need.
This hanging pot cabbage growing method isn’t just about growing vegetables; it’s about embracing a sustainable, space-saving, and rewarding gardening experience. It’s about taking control of your food source and enjoying the fruits (or rather, vegetables) of your labor. It’s about making the most of what you have and creating something beautiful and productive in the process.
We are confident that you will find this method to be a game-changer in your gardening journey. So, grab your pots, your soil, and your cabbage seedlings, and get started today! We encourage you to try this DIY trick and share your experiences with us. Post photos of your hanging cabbage gardens on social media using #HangingPotCabbage and let us know what worked best for you. We can’t wait to see your creations and learn from your successes! Happy gardening!
Frequently Asked Questions (FAQ)
What type of cabbage is best for hanging pots?
While most cabbage varieties can be grown in hanging pots, smaller varieties tend to be more manageable. Consider varieties like ‘Dwarf Blue Vates’ or ‘Golden Acre,’ which are compact and well-suited for container gardening. Red cabbage varieties also work well and add a splash of color to your hanging garden. Ultimately, the best type depends on your personal preference and the size of your hanging pot. Be sure to check the mature size of the variety you choose to ensure it will fit comfortably in your container.
How often should I water my hanging pot cabbage?
Hanging pots tend to dry out more quickly than in-ground gardens, so regular watering is crucial. Check the soil moisture daily, especially during hot or windy weather. Water thoroughly when the top inch of soil feels dry to the touch. Ensure the water drains freely from the bottom of the pot to prevent waterlogging. Overwatering can lead to root rot, so it’s important to strike a balance. A good rule of thumb is to water deeply but infrequently, allowing the soil to dry out slightly between waterings.
What kind of soil should I use for hanging pot cabbage?
Use a well-draining potting mix specifically formulated for containers. Avoid using garden soil, as it can become compacted in pots and hinder drainage. A good potting mix will retain moisture while still allowing excess water to drain away. You can also amend your potting mix with compost or other organic matter to improve its fertility and drainage. Consider adding perlite or vermiculite to further enhance drainage and aeration.
How much sunlight does hanging pot cabbage need?
Cabbage plants need at least 6 hours of direct sunlight per day to thrive. Choose a location for your hanging pot that receives ample sunlight. If you live in a particularly hot climate, some afternoon shade may be beneficial to prevent the leaves from scorching. If you don’t have a sunny spot, you can supplement with grow lights. Rotate the pot regularly to ensure all sides of the plant receive adequate sunlight.
How do I fertilize my hanging pot cabbage?
Cabbage plants are heavy feeders and require regular fertilization. Start by incorporating a slow-release fertilizer into your potting mix at planting time. Then, supplement with a liquid fertilizer every 2-3 weeks throughout the growing season. Choose a fertilizer that is high in nitrogen, which promotes leafy growth. Follow the instructions on the fertilizer label carefully to avoid over-fertilizing, which can damage your plants. Organic fertilizers, such as compost tea or fish emulsion, are also excellent options.
How do I protect my hanging pot cabbage from pests?
While hanging pots offer some protection from ground-dwelling pests, cabbage plants are still susceptible to certain insects, such as cabbage worms and aphids. Inspect your plants regularly for signs of infestation. Handpick any pests you find or use an organic insecticide, such as neem oil or insecticidal soap. You can also cover your plants with netting to prevent pests from reaching them. Companion planting with herbs like rosemary or thyme can also help deter pests.
When is the best time to plant cabbage in hanging pots?
The best time to plant cabbage depends on your climate. In cooler climates, you can start seeds indoors 6-8 weeks before the last expected frost and transplant them into hanging pots after the danger of frost has passed. In warmer climates, you can plant seeds directly into hanging pots in the fall for a winter harvest. Check your local planting calendar for specific recommendations for your region.
How long does it take for cabbage to mature in hanging pots?
The time it takes for cabbage to mature depends on the variety and growing conditions. Generally, cabbage plants take 60-100 days to mature from seed. Check the seed packet or plant label for specific information on the variety you are growing. You can harvest your cabbage when the head is firm and tightly packed.
Can I grow other vegetables in hanging pots with cabbage?
While it’s possible to grow other vegetables in the same hanging pot as cabbage, it’s generally best to avoid overcrowding. Cabbage plants need plenty of space to grow and may compete with other vegetables for resources. However, you can successfully companion plant with herbs like rosemary, thyme, or sage, which can help deter pests and enhance the flavor of your cabbage.
What do I do if my cabbage plant starts to bolt (flower)?
Bolting occurs when cabbage plants are exposed to stress, such as extreme temperatures or lack of water. Once a cabbage plant bolts, the head becomes bitter and inedible. To prevent bolting, provide your plants with consistent moisture and protect them from extreme temperatures. If your cabbage plant does start to bolt, harvest the head immediately, even if it’s not fully mature. You can still use the leaves in salads or soups.


Leave a Comment