

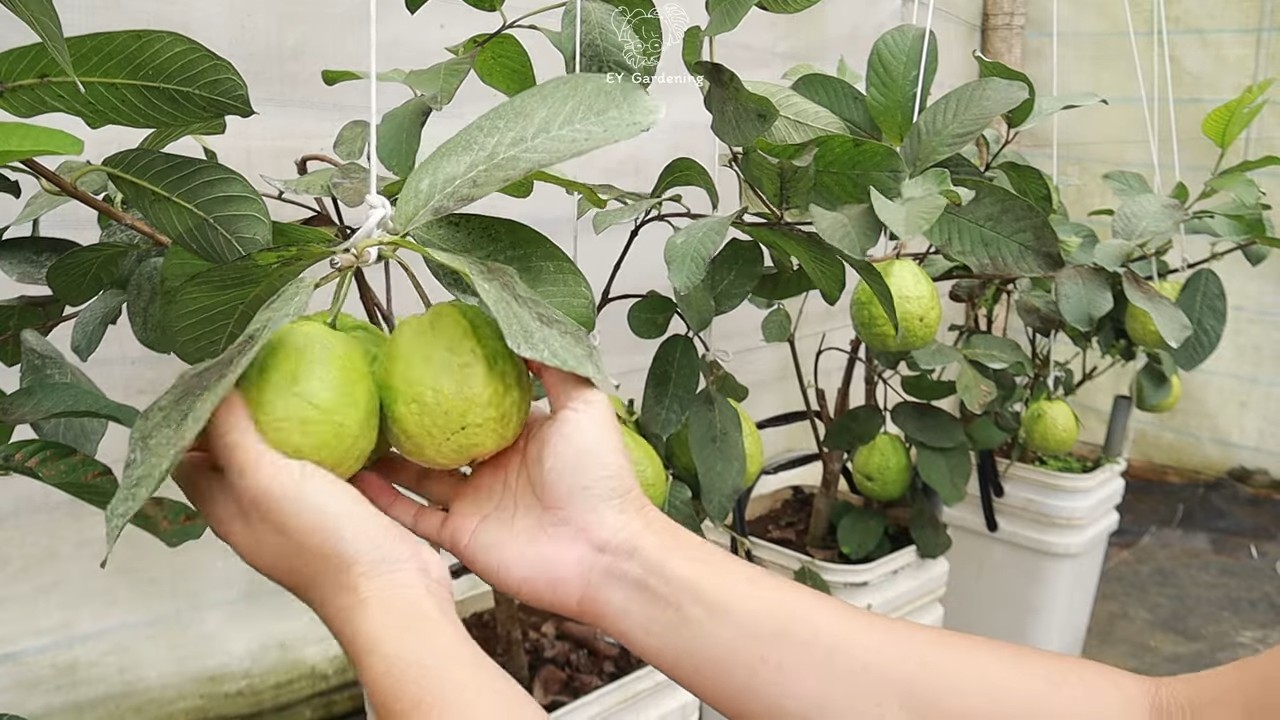
Guava tree terrace yield – dreaming of overflowing baskets of sweet, juicy guavas from your own backyard, even if you only have a small terrace? You’re not alone! For centuries, cultivating fruit trees has been a symbol of prosperity and self-sufficiency, deeply rooted in cultures worldwide. But let’s face it, not everyone has acres of land to dedicate to a sprawling orchard. That’s where clever DIY tricks and hacks come in, and I’m here to share some game-changing secrets to maximizing your guava tree terrace yield.
Imagine biting into a perfectly ripe guava, grown with your own two hands, right on your terrace. Sounds amazing, right? This article is your ultimate guide to achieving just that! We’ll explore simple yet effective techniques to boost fruit production, optimize space, and protect your precious guava tree from common problems. Whether you’re a seasoned gardener or just starting out, these DIY solutions will empower you to transform your terrace into a thriving guava haven. Get ready to unlock the secrets to a bountiful harvest and enjoy the sweet rewards of your labor!
Maximizing Your Guava Tree’s Bounty: A DIY Terrace for Increased Yield
Okay, guava lovers, let’s talk about getting more delicious fruit from your guava tree! If you’re like me, you’ve probably noticed that sometimes, even with the best care, your guava tree’s yield can be a bit… underwhelming. One of the biggest factors affecting fruit production is proper drainage and nutrient availability. That’s where a DIY terrace comes in! By creating a terraced area around your guava tree, you can improve water retention, prevent soil erosion, and ultimately, boost your guava harvest.
This project might sound intimidating, but trust me, it’s totally manageable with a little elbow grease and the right approach. I’m going to walk you through every step, from planning to planting, so you can create a thriving environment for your guava tree.
Planning Your Guava Tree Terrace
Before you start digging, it’s crucial to plan your terrace. This will save you time, effort, and potential headaches down the road.
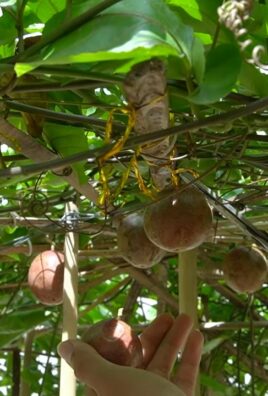
* Assess Your Tree and Location: Take a good look at your guava tree. How big is it? How far do the branches spread? This will determine the size of your terrace. Also, consider the slope of the land around the tree. A steeper slope will require a more elaborate terrace system.
* Determine the Terrace Size: I recommend creating a terrace that extends at least 3-4 feet out from the tree’s trunk in all directions. This provides ample space for root growth and nutrient absorption. For a mature tree, you might even want to go bigger, perhaps 5-6 feet.
* Choose Your Materials: You have several options for building your terrace walls. Here are a few popular choices:
* Rocks: Natural rocks are a great option if you have them readily available. They blend seamlessly into the landscape and provide excellent drainage.
* Bricks: Bricks offer a more formal and structured look. They’re durable and easy to work with.
* Treated Lumber: Treated lumber is a cost-effective option, but make sure it’s specifically treated for ground contact to prevent rotting.
* Concrete Blocks: Concrete blocks are strong and long-lasting, but they can be a bit heavy to handle.
* Consider Drainage: Proper drainage is essential to prevent waterlogging, which can harm your guava tree. Plan for drainage holes or a gravel base behind the terrace walls to allow excess water to escape.
* Think About Aesthetics: While functionality is key, don’t forget about aesthetics! Choose materials and a design that complements your garden and personal style.
Materials You’ll Need
Here’s a list of the materials you’ll likely need for this project. Adjust the quantities based on the size of your terrace and the materials you choose.
* Terrace Wall Material: Rocks, bricks, treated lumber, or concrete blocks (quantity depends on terrace size)
* Shovel: For digging and moving soil.
* Level: To ensure your terrace walls are level.
* Measuring Tape: For accurate measurements.
* Wheelbarrow (Optional): For transporting soil and materials.
* Gloves: To protect your hands.
* Safety Glasses: To protect your eyes.
* Landscape Fabric (Optional): To prevent weeds from growing in the terrace.
* Gravel (Optional): For drainage behind the terrace walls.
* Soil Amendment: Compost, aged manure, or other organic matter to improve soil fertility.
* Watering Can or Hose: For watering the soil.
* Tamper or Hand Compactor: To compact the soil.
Step-by-Step Instructions: Building Your Guava Tree Terrace
Alright, let’s get our hands dirty! Here’s a detailed guide to building your guava tree terrace.
Phase 1: Preparing the Area
1. Clear the Area: Start by clearing the area around your guava tree. Remove any grass, weeds, rocks, or debris that might be in the way. I like to use a garden fork to loosen the soil and make it easier to remove unwanted vegetation.
2. Mark the Terrace Boundaries: Use your measuring tape to mark the boundaries of your terrace. You can use stakes and string to create a visual outline. Remember to extend the terrace at least 3-4 feet out from the tree’s trunk.
3. Excavate the Soil: Now, it’s time to dig! Excavate the soil within the marked boundaries to create a level surface for your terrace. The depth of excavation will depend on the height of your terrace walls. I usually aim for a depth that’s slightly deeper than the height of the first layer of my wall material.
4. Compact the Base: Once you’ve excavated the soil, use a tamper or hand compactor to compact the base. This will provide a solid foundation for your terrace walls. A firm base is crucial for preventing settling and ensuring the stability of your terrace.
Phase 2: Constructing the Terrace Walls
1. Lay the First Layer: Begin laying the first layer of your chosen wall material along the perimeter of the excavated area. Use a level to ensure that each piece is level and aligned with the others. If you’re using rocks, try to choose relatively flat and stable rocks for the base.
2. Add Drainage (Optional): If you’re concerned about drainage, add a layer of gravel behind the first layer of your wall material. This will help to prevent water from pooling up against the walls.
3. Continue Building the Walls: Continue laying layers of your wall material, staggering the joints for added strength and stability. Use a level to ensure that each layer is level and that the walls are gradually sloping inward towards the tree. This inward slope will help to retain soil and prevent erosion.
4. Secure the Walls: Depending on the material you’re using, you may need to secure the walls with mortar, construction adhesive, or other fasteners. For rock walls, you can use smaller rocks to fill in the gaps and create a more stable structure. For lumber, use exterior-grade screws or nails.
5. Backfill Behind the Walls: As you build the walls, backfill behind them with soil. Compact the soil as you go to prevent settling. This will also help to support the walls and prevent them from collapsing.
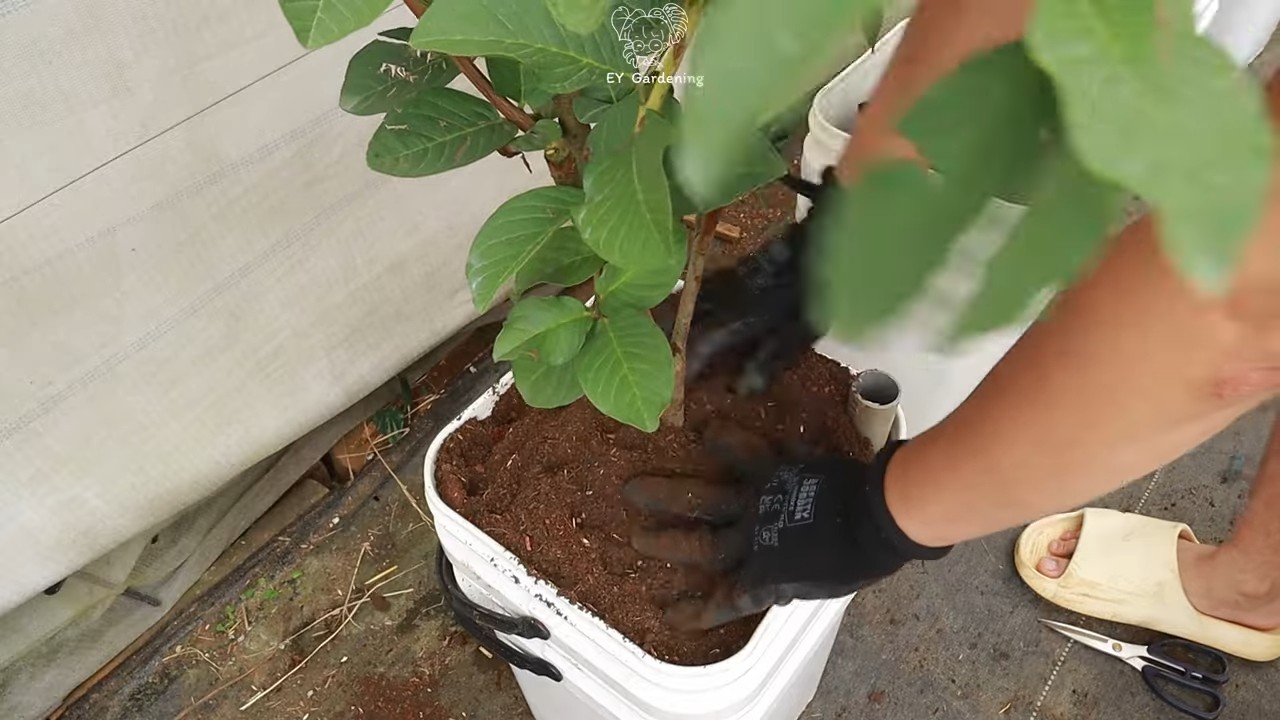
Phase 3: Preparing the Soil and Planting
1. Amend the Soil: Now, it’s time to improve the soil within the terrace. Mix in plenty of compost, aged manure, or other organic matter to improve soil fertility and drainage. I usually aim for a ratio of about 1 part organic matter to 2 parts soil.
2. Level the Soil: Use a rake to level the soil within the terrace. Make sure the soil is slightly lower than the top of the terrace walls to prevent soil from washing away during heavy rains.
3. Add Landscape Fabric (Optional): If you want to prevent weeds from growing in the terrace, lay down a layer of landscape fabric before planting. Cut holes in the fabric for your guava tree’s trunk and any other plants you plan to add.
4. Water Thoroughly: Water the soil thoroughly to help it settle and to provide moisture for your guava tree.
5. Mulch (Optional): Add a layer of mulch around the base of your guava tree to help retain moisture, suppress weeds, and regulate soil temperature. I like to use wood chips or shredded bark.
Tips for Success
* Don’t Rush: Take your time and work carefully. Building a terrace is a project that requires patience and attention to detail.
* Get Help: If you’re working with heavy materials like rocks or concrete blocks, don’t hesitate to ask for help.
* Consider the Climate: If you live in a hot, dry climate, you may want to consider adding a drip irrigation system to your terrace to ensure that your guava tree receives adequate water.
* Monitor Drainage: Keep an eye on the drainage in your terrace, especially after heavy rains. If you notice water pooling up, you may need to add more drainage holes or improve the drainage behind the walls.
* Fertilize Regularly: Fertilize your guava tree regularly with a balanced fertilizer to promote healthy growth and fruit production. Follow the instructions on the fertilizer label.
* Prune Your Tree: Prune your guava tree regularly to remove dead or diseased branches and to encourage fruit production.
Maintaining Your Terrace
Once your terrace is built, it’s important to maintain it to ensure its longevity and effectiveness.
* Inspect Regularly: Inspect your terrace walls regularly for any signs of damage or instability. Repair any cracks or loose stones promptly.
* Weed Regularly: Remove any weeds that grow in the terrace to prevent them from competing with your guava tree for nutrients and water.
* Replenish Mulch: Replenish the mulch around the base of your guava tree as needed to maintain its benefits.
*
Conclusion
So, there you have it! Transforming your guava tree terrace yield from a modest harvest to a bountiful one is not only achievable but also surprisingly simple with this DIY trick. We’ve walked you through the process, highlighting the key steps and offering insights into why this method works so effectively. It’s more than just a gardening hack; it’s a way to connect with your guava tree on a deeper level, understanding its needs and providing the optimal environment for it to flourish.
This isn’t just about getting more guavas; it’s about maximizing the potential of your existing space. Think about it: you’ve already invested time, effort, and resources into nurturing your guava tree. Why not take that investment a step further and unlock its full productive capacity? The satisfaction of harvesting a significantly larger crop, knowing that you played a direct role in its success, is truly rewarding.
But the beauty of this DIY approach lies in its adaptability. Feel free to experiment with variations to suit your specific needs and preferences. For instance, if you live in an area with particularly intense sunlight, consider using a shade cloth in conjunction with the reflective material to prevent sunscald. Or, if you’re dealing with nutrient-poor soil, supplement your regular fertilization routine with a foliar spray of seaweed extract to provide an extra boost of essential minerals. You could even try different types of reflective materials to see which yields the best results in your particular microclimate. Aluminum foil is a common choice, but consider experimenting with mylar or even white-painted surfaces for different light diffusion effects.
Remember, gardening is a journey of continuous learning and experimentation. Don’t be afraid to tweak the method, observe the results, and adapt accordingly. The key is to pay attention to your guava tree’s response and adjust your approach as needed.
We are confident that this DIY trick will make a significant difference in your guava tree terrace yield. It’s a cost-effective, environmentally friendly, and ultimately rewarding way to enhance your gardening experience. So, gather your materials, put on your gardening gloves, and get ready to witness the transformation!
We’re eager to hear about your experiences with this DIY trick. Did it work for you? What variations did you try? What challenges did you encounter? Share your stories, tips, and photos in the comments section below. Let’s create a community of guava-loving gardeners who are passionate about maximizing their harvests and sharing their knowledge with others. Your insights could be invaluable to someone else who is just starting out on their guava-growing journey. Let’s work together to unlock the full potential of our guava trees and enjoy the delicious fruits of our labor! Don’t forget to use the hashtag #GuavaYieldBoost when sharing your results on social media!
Frequently Asked Questions (FAQ)
Q: What exactly does this DIY trick do to increase guava tree yield?
A: The core principle behind this DIY trick is to maximize the amount of sunlight that reaches your guava tree, particularly the lower branches and inner canopy. Guava trees, like most fruit-bearing plants, require ample sunlight for photosynthesis, the process by which they convert light energy into the sugars that fuel growth and fruit production. By strategically placing reflective materials around the base of the tree and potentially within the canopy, you’re essentially bouncing sunlight back onto the plant, ensuring that even shaded areas receive sufficient light. This increased light exposure promotes more vigorous growth, more abundant flowering, and ultimately, a higher yield of delicious guavas. It’s like giving your guava tree a sunbath!
Q: What kind of reflective material should I use? Is aluminum foil really the best option?
A: Aluminum foil is a readily available and cost-effective option, making it a popular choice for this DIY trick. However, it’s not the only option, and depending on your specific circumstances, other materials might be even better. Mylar, for example, is a highly reflective material often used in hydroponics and indoor gardening. It’s more durable than aluminum foil and reflects a higher percentage of light. White-painted surfaces can also work well, especially if you’re looking for a more diffused light reflection. The key is to choose a material that is highly reflective, durable enough to withstand the elements, and safe for your plants and the environment. Consider the intensity of the sunlight in your area when making your choice. In areas with very intense sunlight, a more diffused reflection might be preferable to prevent scorching.
Q: How close should I place the reflective material to the guava tree?
A: The optimal distance depends on the size of your tree and the intensity of the sunlight. As a general guideline, start by placing the reflective material around the base of the tree, extending outwards to a distance roughly equal to the tree’s canopy radius. You can then adjust the placement based on your observations. If you notice that certain areas of the tree are still heavily shaded, you can move the reflective material closer to those areas. Be careful not to place the material too close, as this could potentially create hot spots and damage the foliage. Regularly check the leaves for signs of scorching or stress.
Q: Will this DIY trick work for all varieties of guava trees?
A: Yes, this DIY trick can be beneficial for most varieties of guava trees. However, the extent of the improvement in yield may vary depending on the specific variety, its age, its overall health, and the environmental conditions in your area. Some guava varieties are naturally more productive than others, and some are more tolerant of shade. Regardless of the variety, providing ample sunlight is crucial for optimal fruit production.
Q: How often should I replace the reflective material?
A: The lifespan of the reflective material will depend on the type of material you use and the weather conditions in your area. Aluminum foil, for example, may need to be replaced more frequently than mylar, as it is more susceptible to tearing and weathering. Regularly inspect the reflective material for damage and replace it as needed. A good rule of thumb is to replace it whenever it starts to lose its reflectivity or becomes significantly damaged.
Q: Is this DIY trick environmentally friendly?
A: Yes, this DIY trick can be considered environmentally friendly, especially when compared to other methods of increasing crop yields, such as using chemical fertilizers or pesticides. By maximizing the use of sunlight, you’re reducing the need for other inputs and minimizing your environmental impact. Furthermore, you can choose to use recycled or repurposed materials for your reflective surfaces, further enhancing the sustainability of this approach.
Q: Can I combine this DIY trick with other gardening techniques to further increase my guava tree terrace yield?
A: Absolutely! This DIY trick is most effective when combined with other good gardening practices. Ensure your guava tree is properly watered, fertilized, and pruned. Regular watering is essential, especially during dry periods. Fertilize your tree with a balanced fertilizer that is specifically formulated for fruit trees. Prune your tree regularly to remove dead or diseased branches and to improve air circulation and light penetration. Consider adding compost or other organic matter to the soil to improve its fertility and drainage. By combining this DIY trick with these other techniques, you can create an optimal growing environment for your guava tree and maximize its yield potential.
Q: I’m worried about the reflective material attracting pests. Is this a valid concern?
A: While it’s a valid concern, the reflective material is unlikely to significantly attract pests. In fact, in some cases, the increased light reflection can actually deter certain pests. However, it’s always a good idea to monitor your guava tree regularly for signs of pest infestation and take appropriate action if necessary. Consider using organic pest control methods, such as neem oil or insecticidal soap, to protect your tree without harming beneficial insects.
Q: How long will it take to see results from this DIY trick?
A: The time it takes to see results will vary depending on the age and health of your guava tree, as well as the environmental conditions in your area. In general, you should start to see a noticeable improvement in growth and flowering within a few weeks of implementing this DIY trick. However, it may take several months to see a significant increase in fruit yield. Be patient and consistent with your gardening practices, and you will eventually be rewarded with a bountiful harvest. Remember, gardening is a long-term investment, and the rewards are well worth the effort.
Leave a Comment