

Growing Yacon at Home can seem like an exotic gardening adventure, but trust me, it’s more achievable than you think! Have you ever dreamed of harvesting sweet, juicy tubers right from your own backyard? Imagine the satisfaction of pulling up a plant and discovering a treasure trove of delicious, low-calorie treats. This isn’t just a gardening project; it’s a culinary journey that starts with a single seed or crown.
Yacon, sometimes called the Bolivian sunroot, has a rich history rooted in the Andes Mountains, where it has been cultivated for centuries. Indigenous communities have long valued it for its nutritional benefits and unique flavor. Now, you can bring a piece of that ancient tradition to your own garden.
Why should you try growing Yacon at home? Well, besides the bragging rights of cultivating a somewhat unusual crop, Yacon offers a fantastic alternative to traditional sweeteners. If you’re looking to reduce your sugar intake or simply want to add a healthy and delicious element to your diet, Yacon is your answer. Plus, it’s a relatively low-maintenance plant, making it perfect for both seasoned gardeners and beginners alike. In this article, I’ll share my tried-and-true tips and tricks to help you successfully grow Yacon and enjoy a bountiful harvest. Let’s get started!
Growing Yacon at Home: A Beginner’s Guide
Hey there, fellow gardening enthusiasts! Ever heard of yacon? It’s this amazing South American root vegetable that tastes like a cross between an apple and a pear, with a hint of watermelon. Plus, it’s naturally sweet and low in calories – a win-win! I’ve been growing yacon in my backyard for a few years now, and I’m excited to share my tips and tricks with you so you can enjoy this delicious and healthy treat too.
What is Yacon and Why Grow It?
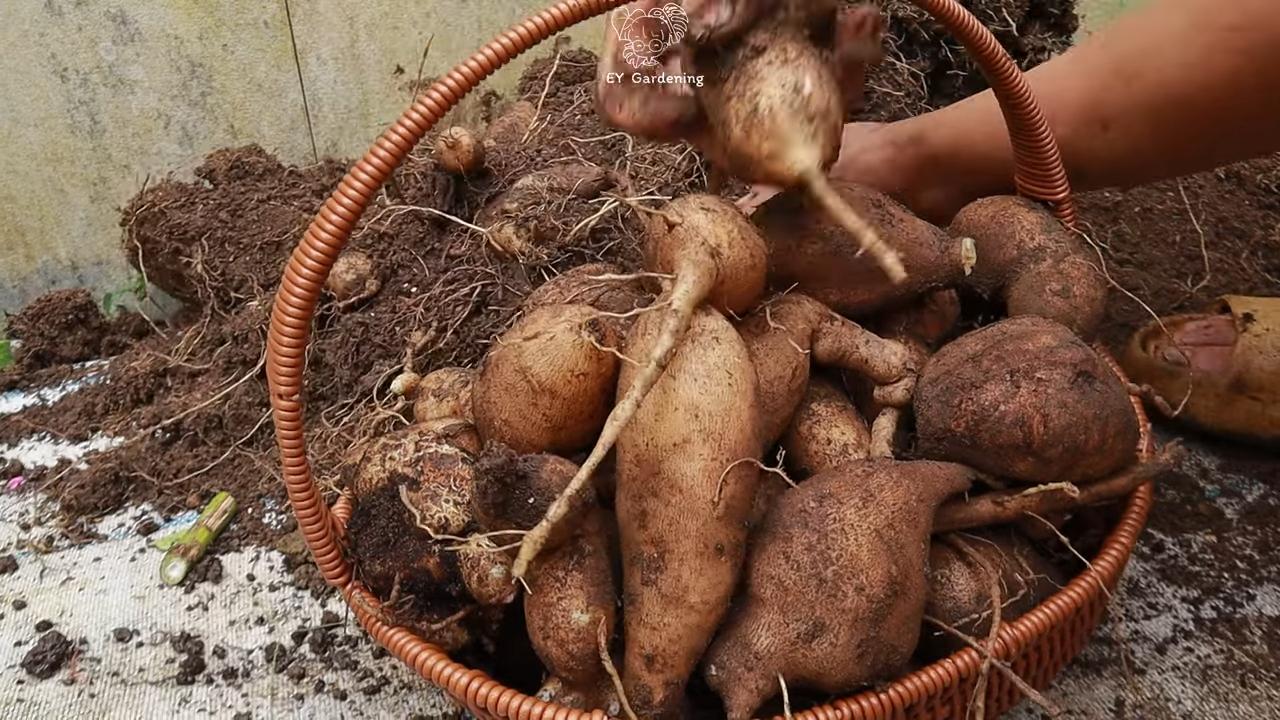
Before we dive into the how-to, let’s quickly cover what yacon actually is. Yacon (Smallanthus sonchifolius) is a perennial plant, but we usually grow it as an annual in cooler climates. The edible parts are the large, tuberous roots, which are crisp and juicy. The plant also produces smaller, reddish rhizomes near the surface, which are used for propagation.
Why should you grow yacon?
* Delicious and Healthy: As I mentioned, the taste is fantastic, and it’s packed with inulin, a prebiotic fiber that’s great for your gut health.
* Easy to Grow: Yacon is surprisingly low-maintenance once established.
* Unique and Interesting: It’s a conversation starter! Your friends and neighbors will be fascinated.
* Beautiful Plant: The plant itself is quite attractive, with large, sunflower-like leaves.
Getting Started: What You’ll Need
Okay, let’s gather our supplies. Here’s what you’ll need to get your yacon journey started:
* Yacon Rhizomes: This is the most important part! You can usually find these online or at specialty nurseries. Make sure they look healthy and firm. Each rhizome should have at least one visible bud (eye).
* Potting Mix: A good quality potting mix is essential for starting your rhizomes indoors.
* Pots: Choose pots that are at least 6 inches in diameter.
* Garden Soil: Yacon thrives in well-drained, fertile soil. Amend your garden soil with compost or other organic matter if needed.
* Compost or Aged Manure: This will provide essential nutrients for your yacon plants.
* Watering Can or Hose: For regular watering.
* Shovel or Garden Fork: For planting.
* Optional: Mulch (straw, wood chips, etc.) to help retain moisture and suppress weeds.
* Optional: Stakes or cages to support the plants if they get too tall.
Phase 1: Sprouting Your Yacon Rhizomes Indoors
This is a crucial step, especially if you live in a colder climate with a shorter growing season. Starting your rhizomes indoors gives them a head start and ensures a better harvest.
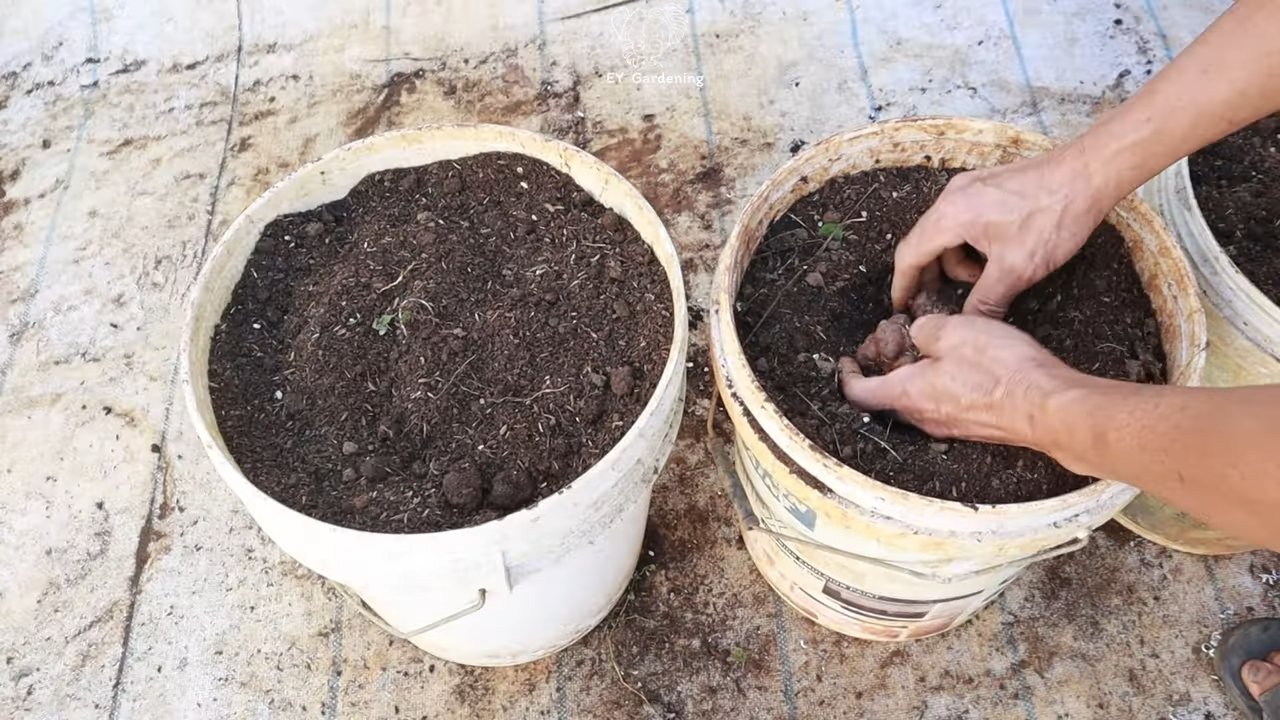
1. Prepare Your Pots: Fill your pots with potting mix, leaving about an inch of space at the top.
2. Plant the Rhizomes: Place each rhizome horizontally on top of the potting mix, with the buds (eyes) facing upwards. Cover the rhizome with about an inch of potting mix.
3. Water Gently: Water the pots gently until the potting mix is moist but not soggy.
4. Provide Warmth and Light: Place the pots in a warm location (around 70-75°F or 21-24°C) with indirect sunlight. A sunny windowsill or a grow light works well.
5. Keep Moist: Keep the potting mix consistently moist, but avoid overwatering. Check the moisture level regularly by sticking your finger into the soil.
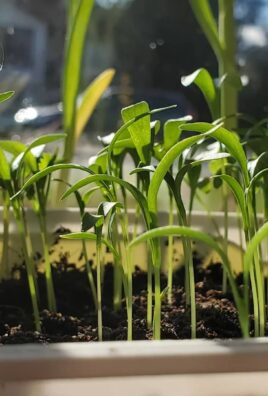
6. Wait for Sprouts: It usually takes about 2-4 weeks for the rhizomes to sprout. Be patient! Once you see green shoots emerging, you’re on your way.
Phase 2: Preparing Your Garden Bed
While your rhizomes are sprouting indoors, it’s time to get your garden bed ready. Yacon needs plenty of space and well-drained soil.
1. Choose a Sunny Location: Yacon needs at least 6-8 hours of sunlight per day.
2. Prepare the Soil: Dig a hole that is at least 12 inches deep and wide. Amend the soil with plenty of compost or aged manure. This will improve drainage and provide essential nutrients. Yacon prefers slightly acidic soil, so you can also add some peat moss if your soil is alkaline.
3. Ensure Good Drainage: Yacon doesn’t like soggy soil, so make sure your garden bed has good drainage. If your soil is heavy clay, consider adding sand or perlite to improve drainage.
4. Space Appropriately: Yacon plants can get quite large (up to 6 feet tall and wide), so space them at least 3-4 feet apart. This will allow them plenty of room to grow and prevent overcrowding.
Phase 3: Transplanting Your Yacon Seedlings
Once your yacon seedlings have developed a few sets of true leaves and the weather has warmed up (after the last frost), it’s time to transplant them into your garden bed.
1. Harden Off the Seedlings: Before transplanting, you need to harden off your seedlings. This means gradually exposing them to outdoor conditions over a period of about a week. Start by placing them outside in a sheltered location for a few hours each day, gradually increasing the amount of time they spend outdoors.
2. Dig Planting Holes: Dig holes in your prepared garden bed that are slightly larger than the pots your seedlings are in.
3. Carefully Remove Seedlings: Gently remove the seedlings from their pots, being careful not to damage the roots.
4. Plant the Seedlings: Place the seedlings in the planting holes and backfill with soil. Make sure the top of the root ball is level with the surrounding soil.
5. Water Thoroughly: Water the seedlings thoroughly after planting.
6. Mulch (Optional): Apply a layer of mulch around the plants to help retain moisture and suppress weeds.
Phase 4: Caring for Your Yacon Plants
Now that your yacon plants are in the ground, it’s time to provide them with the care they need to thrive.
1. Water Regularly: Yacon needs consistent moisture, especially during hot, dry weather. Water deeply whenever the soil feels dry to the touch.
2. Fertilize: Yacon benefits from regular fertilization. Use a balanced fertilizer or side-dress with compost or aged manure every few weeks.
3. Weed Regularly: Keep your garden bed free of weeds, as they can compete with your yacon plants for nutrients and water.
4. Provide Support (Optional): If your yacon plants get too tall and start to flop over, you may need to provide them with support. You can use stakes, cages, or trellises.
5. Watch for Pests and Diseases: Yacon is generally pest-resistant, but keep an eye out for common garden pests like aphids and slugs. If you notice any problems, take action promptly to prevent them from spreading. I’ve personally never had any major issues with pests or diseases on my yacon plants.
Phase 5: Harvesting Your Yacon
The most exciting part! Yacon is typically harvested in the fall, after the first frost. The frost signals the plant to stop growing and start storing energy in the tubers.
1. Wait for the Frost: As I mentioned, wait until after the first frost to harvest your yacon. This will ensure that the tubers are as sweet and juicy as possible.
2. Cut Back the Foliage: Cut back the foliage to about 6 inches above the ground.
3. Dig Carefully: Use a shovel or garden fork to carefully dig around the plants, being careful not to damage the tubers.
4. Lift the Plants: Gently lift the plants out of the ground, being careful not to break the tubers.
5. Separate the Tubers: Separate the tubers from the rhizomes. The tubers are the large, edible roots, while the rhizomes are the smaller, reddish roots that you’ll use for propagation next year.
6. Cure the Tubers: Cure the tubers by leaving them in the sun for a few days. This will help them to sweeten and develop their characteristic flavor.
7. Store the Tubers: Store the cured tubers in a cool, dark, and dry place. They should keep for several months. I usually store mine in a cardboard box in my basement.
8. Save the Rhizomes: Save the rhizomes for planting next year. Store them in a cool, moist place, such as a plastic bag in the refrigerator.
Enjoying Your Yacon Harvest
Now that you’ve harvested your yacon, it’s time to enjoy the fruits (or rather, roots) of your labor! Yacon can be eaten raw, cooked, or juiced.
* Raw
Conclusion
So, there you have it! Growing yacon at home is not only achievable, but it’s a deeply rewarding experience that connects you to the source of your food in a tangible way. We’ve walked through the steps, demystified the process, and hopefully, ignited a spark of horticultural curiosity within you.
Why is this DIY trick a must-try? Because it empowers you to cultivate a unique and delicious root vegetable right in your own backyard, balcony, or even a sunny windowsill. You’re not just growing food; you’re growing an experience, a conversation starter, and a healthy addition to your diet. Forget relying solely on specialty stores or farmers’ markets; you can become your own yacon provider!
Beyond the satisfaction of self-sufficiency, growing yacon offers a chance to experiment and personalize your gardening journey. Consider these variations to tailor the experience to your specific needs and preferences:
* **Container Gardening:** If you’re short on space, yacon thrives in large containers. Choose a pot at least 20 gallons in size and ensure it has excellent drainage. This allows you to move the plant to optimal sun exposure and protect it from frost if necessary.
* **Companion Planting:** Yacon benefits from companion planting. Consider planting it alongside herbs like mint or chamomile, which can help deter pests. Marigolds are also excellent companions, known for their pest-repelling properties.
* **Soil Amendments:** While yacon isn’t overly fussy about soil, amending it with compost or well-rotted manure will significantly improve its growth and yield. Consider adding bone meal to provide phosphorus, which is essential for root development.
* **Different Varieties:** While the standard yacon variety is readily available, explore different cultivars if you can find them. Some varieties may offer slightly different flavors or textures.
* **Yacon Syrup Production:** Once you’ve harvested your yacon, consider experimenting with making your own yacon syrup. This natural sweetener is a delicious and healthy alternative to refined sugar. The process involves juicing the tubers and then slowly simmering the juice until it thickens into a syrup.
Don’t be intimidated by the prospect of growing something new. Yacon is surprisingly resilient and forgiving, making it an excellent choice for beginner gardeners. The key is to provide it with plenty of sunlight, well-drained soil, and consistent watering.
We wholeheartedly encourage you to embark on this yacon-growing adventure. The rewards are well worth the effort. Imagine the satisfaction of harvesting your own sweet, crunchy tubers and sharing them with friends and family.
But the journey doesn’t end here! We want to hear about your experiences. Share your successes, your challenges, and your tips with us in the comments below. Let’s create a community of yacon enthusiasts, learning and growing together. Did you try a specific soil amendment that worked wonders? Did you discover a unique way to use your yacon harvest? Share your knowledge and inspire others to give this fantastic DIY trick a try. Let’s unlock the full potential of growing yacon at home, together!
Frequently Asked Questions (FAQ)
What is yacon, and why should I grow it?
Yacon (Smallanthus sonchifolius) is a perennial plant native to the Andes region of South America. It produces edible tubers that are sweet, crunchy, and low in calories. The tubers are rich in fructooligosaccharides (FOS), a type of prebiotic fiber that promotes gut health. Growing yacon at home allows you to access this unique and healthy food source while enjoying the satisfaction of gardening. It’s a great conversation starter and a fun way to introduce new flavors to your diet. Plus, it’s a relatively easy plant to grow, making it a rewarding experience for gardeners of all levels.
How much space do I need to grow yacon?
Yacon plants can grow quite large, reaching up to 6-7 feet in height and spreading several feet wide. If you’re planting in the ground, allow at least 3-4 feet between plants. If you’re growing in containers, choose a pot that is at least 20 gallons in size to accommodate the plant’s extensive root system. Even with container gardening, ensure the plant has ample space to spread its foliage. Consider the mature size of the plant when choosing a location, ensuring it won’t overshadow other plants in your garden.
What kind of soil is best for growing yacon?
Yacon prefers well-drained soil that is rich in organic matter. Amend your soil with compost or well-rotted manure before planting to improve its fertility and drainage. Avoid heavy clay soils, as they can become waterlogged and lead to root rot. A slightly acidic to neutral soil pH (around 6.0 to 7.0) is ideal. You can test your soil pH with a simple soil testing kit available at most garden centers. If your soil is too alkaline, you can amend it with sulfur or peat moss to lower the pH.
How often should I water my yacon plant?
Yacon requires consistent watering, especially during hot and dry periods. Water deeply whenever the top inch of soil feels dry to the touch. Avoid overwatering, as this can lead to root rot. Mulching around the base of the plant can help retain moisture and suppress weeds. During the dormant season (winter), reduce watering significantly. The goal is to keep the soil slightly moist but not waterlogged.
When is the best time to harvest yacon?
Yacon tubers are typically harvested in the fall, after the first frost has killed back the foliage. The frost signals the plant to transfer sugars from the leaves to the tubers, making them sweeter. Use a garden fork to carefully lift the tubers from the ground, being careful not to damage them. After harvesting, cure the tubers in a cool, dry place for a week or two to allow the skins to toughen up. This will improve their storage life and sweetness.
Can I grow yacon in a cold climate?
Yes, you can grow yacon in a cold climate, but you’ll need to take some precautions. Yacon is not frost-hardy, so you’ll need to protect the plants from freezing temperatures. In colder regions, it’s best to grow yacon in containers so you can move them indoors during the winter. Alternatively, you can dig up the tubers and store them in a cool, dry place over the winter, replanting them in the spring. Mulching heavily around the base of the plants can also help protect them from frost.
Are there any pests or diseases that affect yacon?
Yacon is generally resistant to pests and diseases, but it can be susceptible to slugs, snails, and aphids. These pests can be controlled with organic methods such as handpicking, using beer traps for slugs and snails, or spraying with insecticidal soap for aphids. Root rot can also be a problem if the soil is poorly drained. To prevent root rot, ensure your soil is well-drained and avoid overwatering.
How do I store yacon tubers after harvesting?
After curing the tubers for a week or two, store them in a cool, dry, and dark place. A root cellar or unheated garage is ideal. The tubers can be stored for several months if stored properly. Check the tubers periodically for signs of spoilage, such as soft spots or mold. Discard any tubers that show signs of spoilage.
Can I eat the yacon leaves?
While the tubers are the primary edible part of the yacon plant, the leaves are also edible, though they are quite bitter. They can be cooked like spinach or used to make tea. However, it’s important to note that the leaves contain small amounts of pyrrolizidine alkaloids, which can be toxic in large quantities. Therefore, it’s best to consume the leaves in moderation.
Where can I find yacon plants or tubers to start growing?
Yacon plants or tubers can be found at some nurseries, garden centers, and online retailers specializing in unusual or heirloom vegetables. Search online for “buy yacon plants” or “buy yacon tubers” to find suppliers in your area. You can also check with local gardening clubs or farmers’ markets, as some members may be growing yacon and willing to share plants or tubers.
Leave a Comment