

Growing Water Spinach Easily at home is simpler than you might think, and I’m here to show you how! Forget those expensive grocery store trips for fresh greens; imagine stepping right outside your door to harvest crisp, delicious water spinach whenever you want. For centuries, this leafy vegetable, also known as Ong Choy, has been a staple in Asian cuisine, gracing tables from bustling city restaurants to humble family homes. Its popularity stems not only from its delightful flavor but also from its impressive nutritional value and ease of cultivation.
But why should *you* learn this DIY trick? Well, in today’s world, knowing how to grow your own food is becoming increasingly important. Not only does it give you control over what you’re eating (no more worrying about pesticides!), but it’s also incredibly rewarding. Plus, growing water spinach easily is a fantastic way to connect with nature, reduce your carbon footprint, and save money. This guide will provide you with simple, step-by-step instructions and helpful tips to ensure your water spinach thrives, even if you’re a complete beginner. So, let’s get our hands dirty and embark on this exciting gardening adventure together!
Growing Water Spinach (Ong Choy) Like a Pro: A DIY Guide
Hey there, fellow gardening enthusiasts! Today, I’m super excited to share my tried-and-true method for growing water spinach, also known as Ong Choy, right at home. This leafy green is a staple in Asian cuisine, and trust me, once you taste freshly grown water spinach, you’ll never want to buy it from the store again! It’s incredibly easy to grow, even if you’re a complete beginner. So, let’s dive in!
What You’ll Need: The Essential Supplies
Before we get our hands dirty, let’s gather all the necessary materials. Here’s a checklist to make sure you’re fully prepared:
* Water Spinach Seeds or Cuttings: You can find seeds online or at your local Asian grocery store. Cuttings from mature plants also work great!
* A Container: A large bucket, tub, or even a kiddie pool will do. The bigger, the better, as water spinach loves to spread.
* Soil: A rich, well-draining potting mix is ideal. You can also use a mix of garden soil and compost.
* Water: Obviously! You’ll need plenty of water to keep your water spinach happy.
* Sunlight: Water spinach thrives in full sun, so choose a location that gets at least 6 hours of direct sunlight per day.
* Fertilizer (Optional): A balanced liquid fertilizer can boost growth, but it’s not strictly necessary.
* Gardening Gloves: To keep your hands clean and protected.
* A Watering Can or Hose: For easy watering.
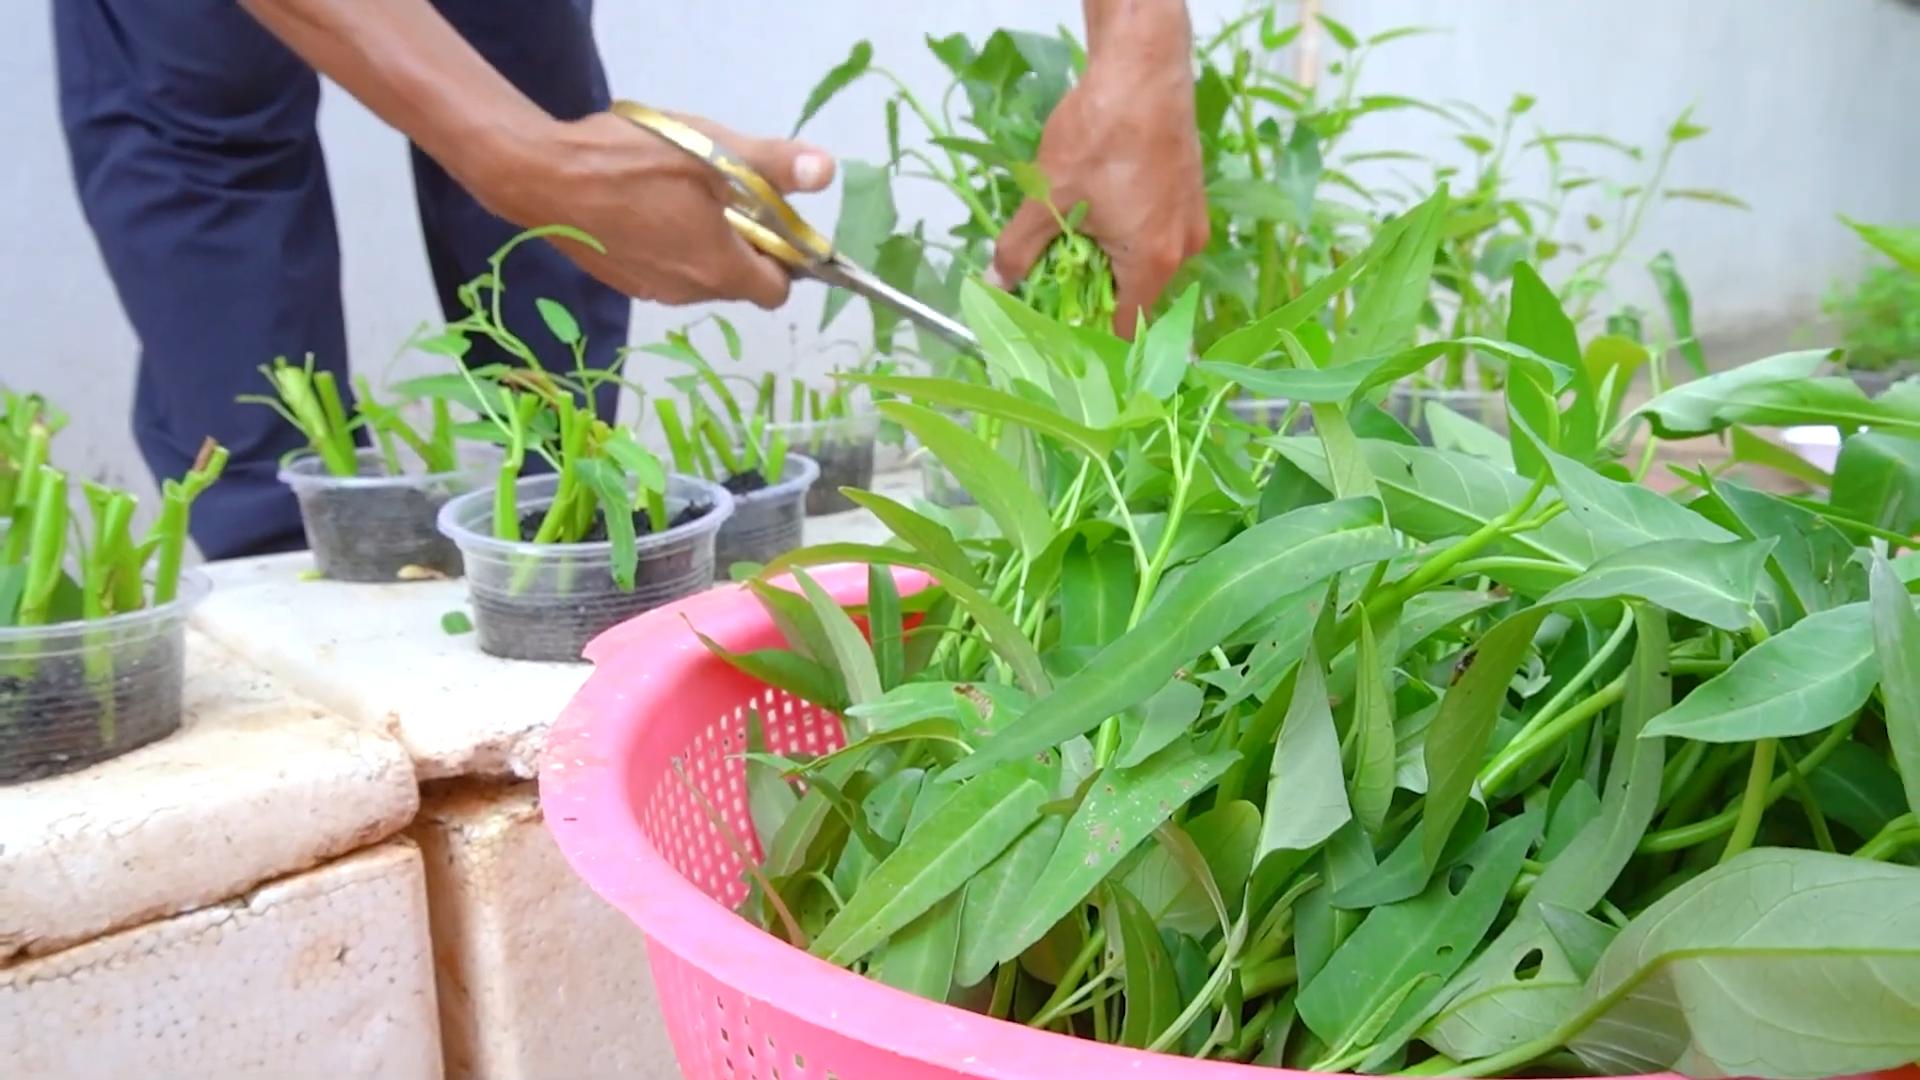
* Scissors or Pruning Shears: For harvesting.
Getting Started: Planting Your Water Spinach
Now that we have everything we need, let’s get planting! I’ll walk you through the process step-by-step.
1. Prepare Your Container: First, make sure your container has drainage holes. Water spinach loves water, but it doesn’t like to sit in soggy soil. If your container doesn’t have drainage holes, you can drill some yourself. Then, fill the container with your chosen soil mix, leaving a few inches of space at the top.
2. Sowing Seeds (If Using Seeds): If you’re starting from seeds, sow them directly into the soil, about ½ inch deep and 1-2 inches apart. Gently cover the seeds with soil and water thoroughly. Keep the soil consistently moist until the seeds germinate, which usually takes about 7-14 days.
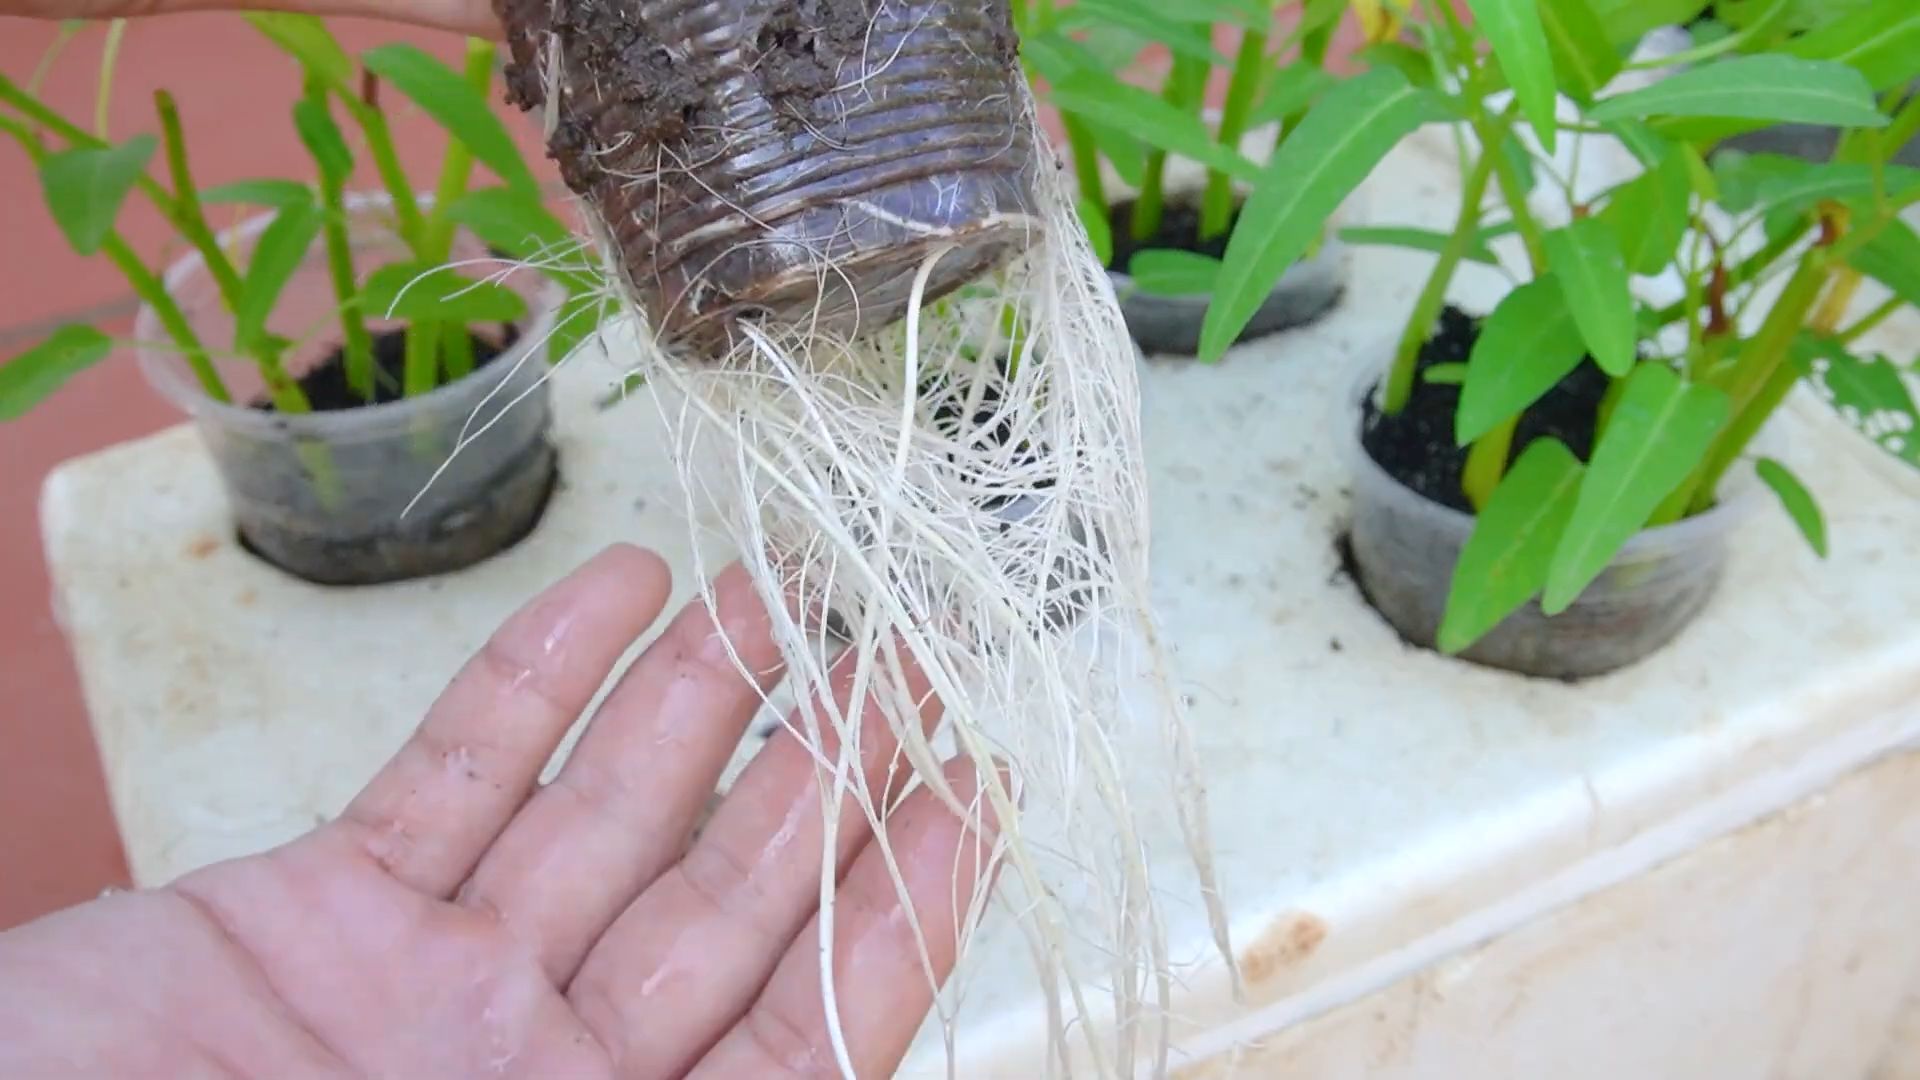
3. Planting Cuttings (If Using Cuttings): If you’re using cuttings, take cuttings that are about 6-8 inches long from a healthy water spinach plant. Remove the leaves from the bottom 2 inches of the cutting. Then, simply stick the cuttings into the soil, spacing them about 2-3 inches apart. Water thoroughly and keep the soil consistently moist. The cuttings should root within a week or two.
4. Watering: Water spinach loves water, so keep the soil consistently moist. I usually water mine every day, especially during hot weather. You can also submerge the bottom of the container in a tray of water to keep the soil consistently moist.
5. Sunlight: Place your container in a location that gets at least 6 hours of direct sunlight per day. Water spinach thrives in full sun.
Maintaining Your Water Spinach: Keeping it Happy and Healthy
Once your water spinach is planted, it’s important to provide it with the right care to ensure healthy growth. Here are a few tips:
* Watering: As I mentioned before, water spinach loves water. Keep the soil consistently moist, but not soggy. Check the soil moisture level daily and water as needed.
* Fertilizing (Optional): If you want to boost growth, you can fertilize your water spinach every 2-3 weeks with a balanced liquid fertilizer. Follow the instructions on the fertilizer label.
* Weeding: Keep your container free of weeds. Weeds can compete with your water spinach for nutrients and water.
* Pest Control: Water spinach is generally pest-resistant, but occasionally, you may encounter aphids or other pests. If you notice any pests, you can spray them with insecticidal soap or neem oil.
* Pruning: Pruning your water spinach can encourage bushier growth. Simply pinch off the tips of the stems to promote branching.
Harvesting Your Water Spinach: The Best Part!
Now for the fun part – harvesting! You can start harvesting your water spinach about 4-6 weeks after planting.
1. When to Harvest: Harvest your water spinach when the stems are about 12-18 inches long.
2. How to Harvest: Use scissors or pruning shears to cut the stems about 2-3 inches above the soil line. This will encourage new growth.
3. Harvesting Regularly: Harvest your water spinach regularly to encourage continuous growth. The more you harvest, the more it will grow!
4. Enjoying Your Harvest: Water spinach is delicious stir-fried, steamed, or added to soups. It has a mild, slightly sweet flavor and a crisp texture.
Troubleshooting: Common Issues and Solutions
Even with the best care, you may encounter some issues while growing water spinach. Here are a few common problems and their solutions:
* Yellowing Leaves: Yellowing leaves can be a sign of nutrient deficiency. Try fertilizing your water spinach with a balanced liquid fertilizer.
* Slow Growth: Slow growth can be caused by a lack of sunlight or water. Make sure your water spinach is getting at least 6 hours of direct sunlight per day and that the soil is consistently moist.
* Pests: If you notice pests, spray them with insecticidal soap or neem oil.
* Leggy Growth: Leggy growth can be caused by a lack of sunlight. Make sure your water spinach is getting enough sunlight. You can also prune the stems to encourage bushier growth.
Growing Water Spinach in Water Only: A Fun Experiment!
Did you know you can also grow water spinach in water only? It’s a fun and easy way to grow this delicious green, especially if you’re short on space or don’t want to deal with soil.
1. Prepare Your Container: Choose a container that can hold water, such as a glass jar, vase, or bucket.
2. Take Cuttings: Take cuttings that are about 6-8 inches long from a healthy water spinach plant. Remove the leaves from the bottom 2 inches of the cutting.
3. Place Cuttings in Water: Place the cuttings in the container of water, making sure that the bottom 2 inches of the cuttings are submerged.
4. Change the Water Regularly: Change the water every 2-3 days to prevent algae growth and keep the water fresh.
5. Add Nutrients (Optional): You can add a few drops of liquid fertilizer to the water every week to provide the water spinach with nutrients.
6. Sunlight: Place your container in a location that gets at least 6 hours of direct sunlight per day.
7. Harvest: You can harvest your water spinach when the stems are about 12-18 inches long.
Tips and Tricks for Supercharged Growth
Here are a few extra tips and tricks I’ve learned over the years to really maximize your water spinach harvest:
* Start with Healthy Seeds or Cuttings: The foundation of a successful crop is healthy starting material. Choose seeds from a reputable source or take cuttings from a vigorous, disease-free plant.
* Maintain Consistent Moisture: I can’t stress this enough! Water spinach is a water-loving plant. Don’t let the soil dry out, especially during hot weather.
* Provide Adequate Sunlight: Sunlight is essential for photosynthesis, which is how plants produce energy. Make sure your water spinach is getting enough sunlight.
* Rotate Your Crops: If you’re growing water spinach in the same container year after year, consider rotating your crops to prevent soil depletion.
* Don’t Be Afraid to Experiment: Gardening is all about experimentation. Try different techniques and see what works best for you.
Enjoying Your Homegrown Water Spinach: Recipe Ideas
Now that you’ve harvested your delicious water spinach, it’s time to enjoy it! Here are a few of my favorite recipes:
* Stir-Fried Water Spinach with Garlic: This is a classic dish that’s quick, easy, and delicious. Simply stir-fry water spinach with garlic, soy sauce, and a touch of sesame oil.
* Water Spinach Soup: Add water spinach to your favorite soup for a healthy and flavorful boost.
* Water Spinach Salad: Toss water spinach with your favorite salad dressing and toppings for a refreshing salad.
* Water Spinach with Fermented Bean Curd (Fu Yu):
Conclusion
So, there you have it! Growing water spinach easily at home is not only achievable but also incredibly rewarding. We’ve walked you through the simple steps, from selecting the right container to harvesting your own fresh, vibrant greens. This DIY trick is a must-try for anyone looking to add a nutritious and delicious element to their meals while also enjoying the satisfaction of cultivating their own food.
Why is this a must-try? Because beyond the convenience of having fresh water spinach readily available, you’re also gaining control over the quality of your produce. No more worrying about pesticides or long transportation times diminishing the flavor and nutritional value. You’re getting the freshest, most vibrant water spinach possible, straight from your own little garden.
But the beauty of this method lies in its adaptability. Feel free to experiment with different container sizes and materials. While we recommended a large tub, you can also use smaller buckets or even repurposed containers, adjusting the number of plants accordingly. Consider adding companion plants like basil or mint around the edges of your container to deter pests and enhance the overall ecosystem.
For those with limited space, try growing water spinach in a vertical garden setup. This maximizes your growing area and adds a visually appealing element to your balcony or patio. You can also explore different growing mediums. While soil works perfectly well, you can also experiment with hydroponics for faster growth and potentially higher yields.
And don’t be afraid to get creative with your water spinach recipes! While stir-fries are a classic, water spinach can also be added to soups, salads, and even smoothies for a nutritional boost. Its mild, slightly sweet flavor makes it a versatile ingredient that complements a wide range of dishes.
We wholeheartedly encourage you to give this DIY trick a try. It’s a simple, cost-effective, and incredibly satisfying way to enjoy fresh, homegrown water spinach. Once you experience the joy of harvesting your own greens, you’ll never look at store-bought water spinach the same way again.
More importantly, we want to hear about your experiences! Share your photos, tips, and variations in the comments below. Let us know what worked for you, what challenges you faced, and any creative ways you’ve found to grow and enjoy your water spinach. Your feedback will not only help other readers but also contribute to a thriving community of home gardeners. So, get your hands dirty, embrace the process, and let’s grow some delicious water spinach together!
Frequently Asked Questions (FAQ)
What exactly is water spinach, and why should I grow it?
Water spinach, also known as Ong Choy or Kang Kong, is a semi-aquatic leafy green vegetable popular in Southeast Asian cuisine. It’s packed with vitamins and minerals, including vitamin A, vitamin C, iron, and calcium. Growing it yourself ensures you have access to fresh, pesticide-free greens, and it’s a surprisingly easy and rewarding process. Plus, it tastes fantastic in stir-fries, soups, and salads!
How long does it take to grow water spinach from seed to harvest?
Generally, you can expect to harvest your water spinach about 4-6 weeks after planting the seeds. The exact time will depend on factors like temperature, sunlight, and the specific variety of water spinach you’re growing. Consistent watering and fertilization will also contribute to faster growth.
What kind of soil is best for growing water spinach?
Water spinach thrives in rich, well-draining soil. A good mix would be equal parts of garden soil, compost, and peat moss. The compost provides essential nutrients, while the peat moss helps retain moisture. Ensure the soil pH is slightly acidic to neutral, around 6.0 to 7.0.
How much sunlight does water spinach need?
Water spinach needs at least 6 hours of direct sunlight per day to thrive. If you’re growing it indoors, supplement with grow lights to ensure adequate light exposure. Insufficient sunlight can lead to leggy growth and reduced yields.
How often should I water my water spinach?
Water spinach loves moisture, so keep the soil consistently damp but not waterlogged. Water deeply whenever the top inch of soil feels dry to the touch. During hot weather, you may need to water daily or even twice a day. Remember, it’s a semi-aquatic plant, so don’t be afraid to keep the soil quite moist.
What kind of fertilizer should I use for water spinach?
A balanced fertilizer with equal parts nitrogen, phosphorus, and potassium (e.g., 10-10-10) is a good option for water spinach. You can also use a liquid seaweed fertilizer or compost tea to provide essential nutrients. Fertilize every 2-3 weeks during the growing season.
How do I harvest water spinach?
You can harvest water spinach by cutting the stems about 6-8 inches from the base of the plant. This encourages new growth and allows you to harvest multiple times. Use sharp scissors or pruning shears to make clean cuts. Harvest in the morning for the best flavor.
Are there any pests or diseases that affect water spinach?
Water spinach is generally resistant to pests and diseases, but aphids, spider mites, and snails can sometimes be a problem. Regularly inspect your plants and treat any infestations promptly with insecticidal soap or neem oil. Good air circulation can also help prevent fungal diseases.
Can I grow water spinach indoors?
Yes, you can grow water spinach indoors, especially if you have a sunny windowsill or grow lights. Use a large container with drainage holes and follow the same watering and fertilization guidelines as you would for outdoor plants.
Is water spinach safe to eat?
Yes, water spinach is safe to eat when grown in clean water and soil. However, avoid growing it in areas with contaminated water sources, as it can absorb pollutants. Always wash your water spinach thoroughly before eating.
Can I grow water spinach from cuttings?
Yes, growing water spinach from cuttings is a very effective method. Simply take a stem cutting about 6-8 inches long and place it in a glass of water. Roots will typically develop within a week or two. Once the roots are a few inches long, you can transplant the cutting into soil.
What are some variations I can try when growing water spinach?
Experiment with different varieties of water spinach, such as the green-stemmed or white-stemmed types. You can also try growing it in a hydroponic system for faster growth. Consider adding companion plants like basil or mint to deter pests.
How do I store harvested water spinach?
Store harvested water spinach in the refrigerator in a plastic bag or container. It will stay fresh for about 3-5 days. You can also blanch and freeze it for longer storage.
What if my water spinach isn’t growing well?
If your water spinach isn’t growing well, check the following:
* **Sunlight:** Ensure it’s getting at least 6 hours of direct sunlight per day.
* **Watering:** Keep the soil consistently moist but not waterlogged.
* **Fertilization:** Fertilize every 2-3 weeks with a balanced fertilizer.
* **Soil:** Make sure the soil is rich, well-draining, and slightly acidic to neutral.
* **Pests:** Inspect for pests and treat any infestations promptly.
By addressing these factors, you can often improve the growth of your water spinach.


Leave a Comment