

Growing Water Spinach Bottles: Unlock the secrets to fresh, homegrown greens right from your windowsill! Have you ever dreamed of having a constant supply of crisp, delicious water spinach without the hassle of a traditional garden? Well, get ready to turn that dream into reality with this incredibly simple and rewarding DIY project.
Water spinach, also known as Ong Choy, has a rich history deeply rooted in Asian cuisine. For centuries, it’s been a staple in stir-fries, soups, and salads, prized for its mild flavor and impressive nutritional value. Imagine bringing that vibrant, healthy tradition into your own home!
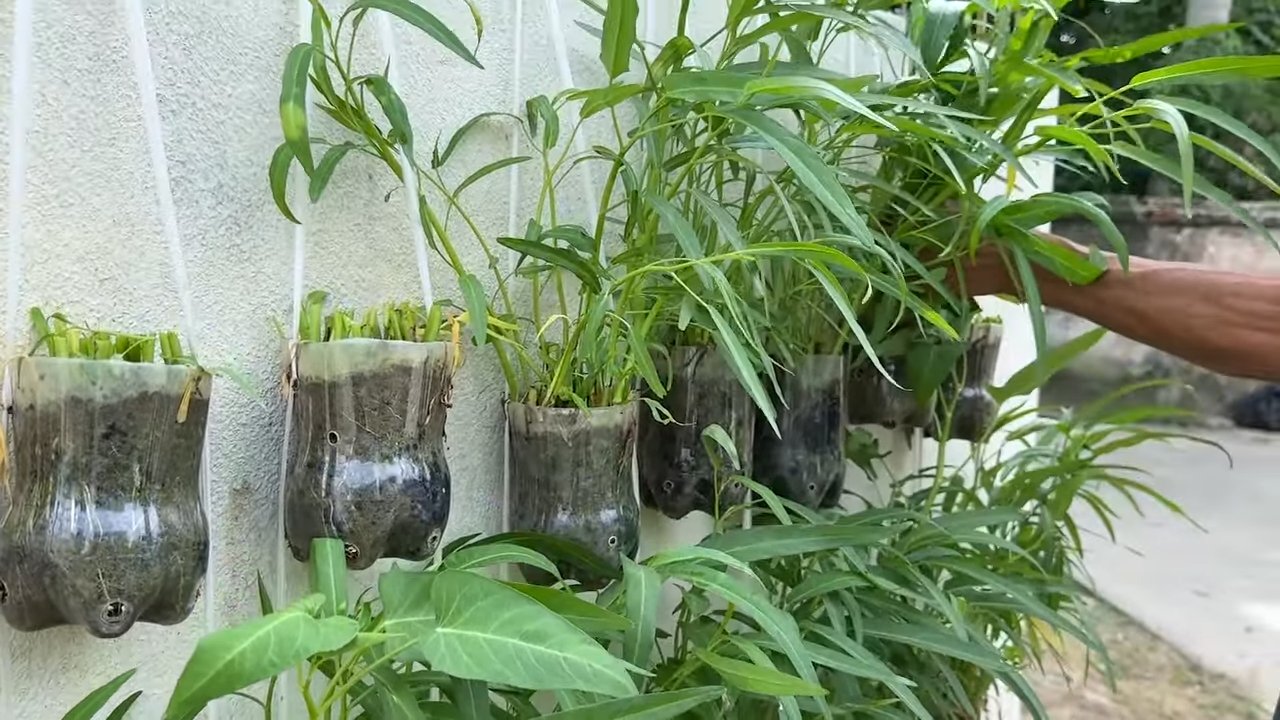
In today’s fast-paced world, finding time and space for a full-fledged garden can be a challenge. That’s where this ingenious hack comes in. Growing Water Spinach Bottles is the perfect solution for urban dwellers, apartment residents, or anyone looking to add a touch of green to their lives without a lot of effort. I’m excited to show you how to transform ordinary plastic bottles into thriving mini-gardens, providing you with a continuous harvest of fresh, organic water spinach. Not only is it eco-friendly and cost-effective, but it’s also incredibly satisfying to nurture your own food. Let’s get started and discover the joy of homegrown goodness!
Growing Water Spinach in Bottles: Your DIY Garden for Home
Hey everyone! Do you fancy fresh, crisp vegetables straight from your kitchen? Then you’ve come to the right place! I’ll show you how to easily grow water spinach (also known as kangkong or morning glory) in recycled plastic bottles. This is not only super sustainable but also a great project for anyone who doesn’t have a garden or just wants to bring a little green into their life. Let’s go!
What you’ll need:
- Plastic bottles: 1.5 or 2-liter bottles are best. The bigger, the better!
- Water spinach seeds: You can get these at a garden center or online. Make sure they are suitable for growing in water.
- Seed starting mix or coconut coir: For seed germination.
- Expanded clay or gravel: For drainage and stability in the bottle.
- Water: Preferably rainwater or stale tap water.
- Scissors or a knife: To cut the bottles.
- Dark paint or tape (optional): To protect the bottle from algae growth.
- Spray bottle: To moisten the soil.
- Patience and love: The most important things!
Step-by-Step Instructions:
1. Preparing the Bottles
- Cleaning: First, you need to thoroughly clean the plastic bottles. Remove all labels and rinse them with warm water and dish soap. Make sure no soap residue is left behind.
- Cutting: Now for the fun part! Cut the bottles into two parts. You can either cut them in the middle or slightly below the bottleneck. I prefer to cut them a little below the bottleneck, as the upper part then fits better into the lower part and offers more stability.
- Drainage holes: Drill or cut a few small holes in the bottom of the upper part of the bottle. These holes are important so that excess water can drain away and the roots don’t rot.
- Darkening (optional): Water spinach grows best when its roots are protected from light. You can paint the lower half of the bottle with dark paint or wrap it with dark tape. This prevents algae growth and promotes root development.
2. Sowing the Seeds
- Prepare the seed starting mix: Fill the upper part of the bottle with seed starting mix or coconut coir. Make sure the soil is loose and airy.
- Sow the seeds: Distribute the water spinach seeds evenly on the soil. Press them down lightly, but don’t cover them too deeply. They need light to germinate.
- Moisten: Spray the soil with water until it is well moistened. Make sure the soil is not too wet, as the seeds could rot.
- Location: Place the bottle in a warm and bright place. A windowsill with direct sunlight is ideal.
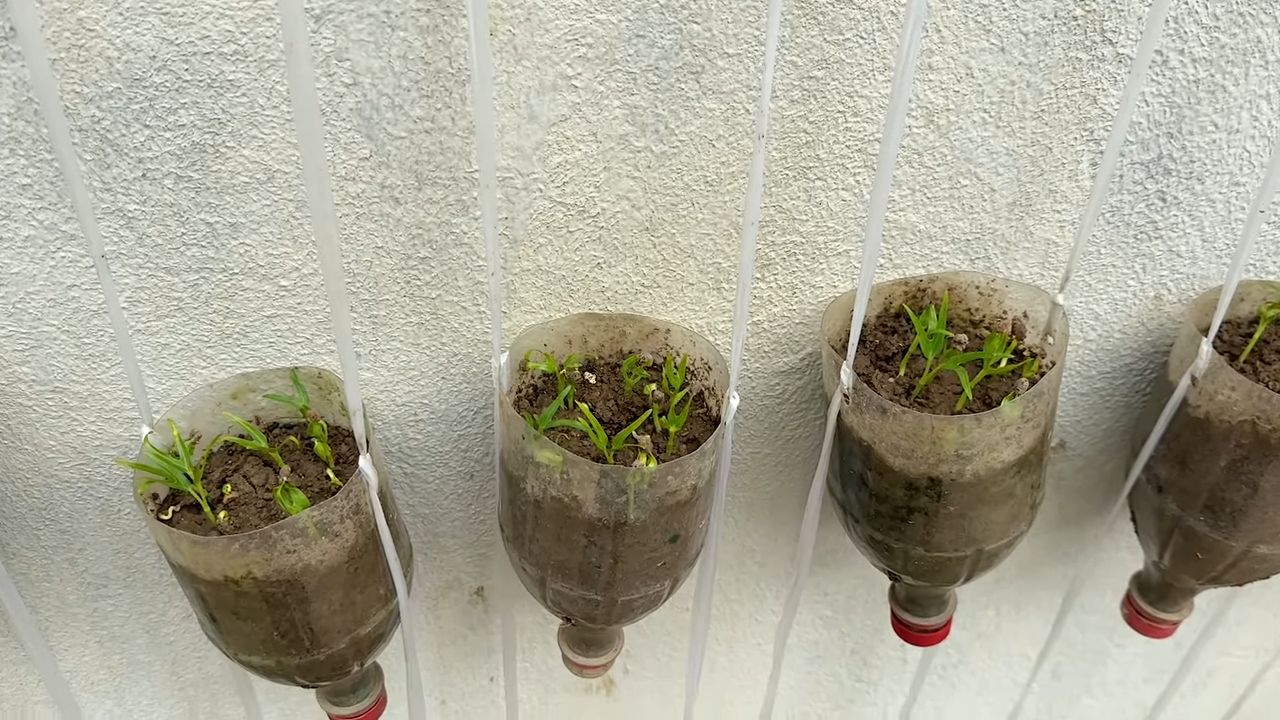
3. Germination and Growth
- Maintain moisture: Keep the soil moist by spraying it regularly with water. Avoid waterlogging.
- Be patient: Germination can take a few days to a week, depending on the temperature and humidity. Be patient and don’t give up!
- Thinning out (optional): When the seedlings are large enough (about 5-7 cm high), you can thin them out to give them more space to grow. Carefully remove the weakest seedlings, leaving only the strongest in the bottle.
- Repotting: As soon as the seedlings are a little larger, you can repot them into the lower part of the bottle. Fill the lower part of the bottle with expanded clay or gravel for drainage. Place the upper part of the bottle with the seedlings into the lower part.
- Add water: Fill the lower part of the bottle with water so that the roots of the seedlings are in the water. Make sure the leaves are not in the water, as they could rot.
4. Care
- Check the water level: Check the water level regularly and top it up if necessary. The water should always cover the roots.
- Change the water: Change the water every few days to prevent algae growth and ensure the plants are getting nutrients.
- Fertilizing (optional): If you like, you can add a little liquid fertilizer to the water from time to time. Make sure the fertilizer is suitable for growing in water.
- Light: Water spinach needs a lot of light. Place the bottle in a bright place or use a plant lamp if there is not enough natural light.
- Cutting: If the plants get too long, you can simply cut them. This encourages the growth of new shoots, and you can add the harvested leaves directly to your salad or dish.
5. The Harvest
- Harvest time: You can harvest the water spinach as soon as the leaves are large enough. This is usually after about 4-6 weeks.
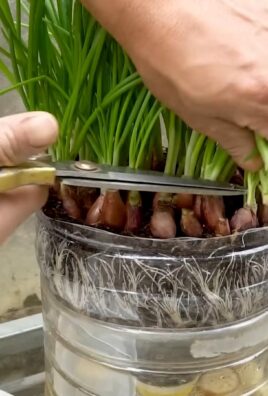
- Harvesting method: Cut the leaves with scissors or a knife. Leave a few leaves on the plant so that it can continue to grow.
- Enjoy: The water spinach is now ready to eat! You can eat it raw in salads, cook it, fry it, or use it in soups. It is super versatile and tastes delicious!
Additional Tips and Tricks:
- Preventing algae growth: To prevent algae growth, you can add a little charcoal to the water. Charcoal filters the water and prevents the growth of algae.
- Controlling pests: Water spinach is relatively resistant to pests. If you do discover pests, you can combat them with a natural insecticide.
- Different varieties: There are different varieties of water spinach. Try different varieties to find out which one you like best.
- Get creative: You can design the bottles according to your own ideas. Paint them, stick things on them, or hang them up. There are no limits to your creativity!
- Sustainability: Use recycled plastic bottles to do your part for the environment.
Common Problems and Solutions:
- Yellow leaves: Yellow leaves can be a sign of a nutrient deficiency. Add some liquid fertilizer to the water.
- Rotten roots: Rotten roots can be caused by waterlogging. Make sure the soil is not too wet and that the water can drain well.
- Slow growth: Slow growth can be caused by too little light or a lack of nutrients. Place the bottle in a brighter spot and add some liquid fertilizer to the water.
- Algae growth: Algae growth can be caused by too much light or nutrients in the water. Change the water regularly and add a little charcoal to the water.
I hope this guide has helped you grow your own water spinach in bottles. It’s a super easy and rewarding project that will provide you with fresh, healthy vegetables. Happy gardening! And don’t forget to share your successes with me! I’m excited to see your results
Conclusion
So, there you have it! Transforming humble plastic bottles into thriving water spinach gardens is not just a fun project; it’s a sustainable, space-saving, and incredibly rewarding way to enjoy fresh, homegrown greens. We’ve walked you through the simple steps, highlighting the ease and accessibility of this DIY method. Forget complicated gardening setups and expensive equipment. With a few repurposed bottles, some basic supplies, and a little bit of patience, you can cultivate your own vibrant patch of water spinach, right on your balcony, patio, or even windowsill.
But why is this DIY trick a must-try? Beyond the obvious benefit of having a readily available supply of fresh, organic water spinach, this method offers a multitude of advantages. It’s an excellent way to reduce your environmental footprint by repurposing plastic bottles that would otherwise end up in landfills. It’s also a fantastic educational opportunity, especially for children, teaching them about plant growth, sustainability, and the importance of reducing waste. Plus, let’s be honest, there’s something incredibly satisfying about nurturing a plant from seed to harvest, knowing that you played an active role in providing fresh food for yourself and your family.
Looking for variations? Absolutely! Experiment with different bottle sizes and configurations. You could create a vertical garden by stacking multiple bottle planters, maximizing your space and creating a visually stunning display. Try adding different nutrient solutions to see which one yields the best results for your water spinach. You can also explore growing other leafy greens or herbs using this same bottle gardening technique. Imagine a wall of fresh herbs just steps away from your kitchen! Consider adding a small air pump and airstone to your water reservoir to provide additional oxygen to the roots, potentially boosting growth. You can also experiment with different growing mediums, such as coco coir or perlite, to see which works best for you.
Don’t be afraid to get creative and personalize your bottle garden to suit your specific needs and preferences. The possibilities are truly endless. The key is to start small, experiment, and learn from your experiences.
We wholeheartedly encourage you to give this DIY water spinach bottle gardening trick a try. It’s a simple, affordable, and incredibly rewarding project that will not only provide you with fresh, delicious greens but also contribute to a more sustainable lifestyle. And most importantly, we want to hear about your experiences! Share your photos, tips, and challenges in the comments section below. Let’s create a community of bottle gardeners, sharing our knowledge and inspiring each other to grow our own food, one bottle at a time. Let’s see your amazing water spinach creations!
Frequently Asked Questions (FAQ)
What kind of plastic bottles are best for growing water spinach?
Ideally, you should use food-grade plastic bottles, such as those that previously contained water, juice, or soda. These are generally considered safe for growing edible plants. Avoid using bottles that contained harsh chemicals or cleaning products, as these could leach into the soil and contaminate your water spinach. Thoroughly wash and rinse the bottles before using them to remove any residual residue. The size of the bottle will depend on your space and desired yield, but larger bottles generally provide more room for root growth.
How often should I water my water spinach in bottle planters?
Water spinach thrives in moist conditions, so it’s crucial to keep the soil consistently damp. Check the moisture level daily, especially during hot weather. If the top inch of soil feels dry to the touch, it’s time to water. Water thoroughly until excess water drains out of the drainage holes. In warmer climates, you may need to water your water spinach plants multiple times a day. Consider using a self-watering system or adding water-retaining crystals to the soil to help maintain consistent moisture levels.
What type of soil is best for growing water spinach in bottles?
Water spinach prefers a rich, well-draining soil. A good potting mix specifically formulated for vegetables is an excellent choice. You can also create your own soil mix by combining equal parts of compost, peat moss, and perlite. Compost provides essential nutrients, peat moss helps retain moisture, and perlite improves drainage. Avoid using garden soil, as it can be too heavy and compacted, hindering root growth.
How much sunlight does water spinach need?
Water spinach requires at least 6 hours of direct sunlight per day to thrive. Choose a location that receives ample sunlight, such as a sunny balcony, patio, or windowsill. If you don’t have access to enough natural sunlight, you can supplement with grow lights. Position the grow lights a few inches above the plants and provide them with 12-16 hours of light per day.
How long does it take for water spinach to grow in bottles?
Water spinach is a fast-growing plant. You can typically expect to harvest your first crop within 4-6 weeks of planting the seeds or seedlings. The exact time will depend on factors such as temperature, sunlight, and nutrient availability. Regular harvesting will encourage continued growth and production.
What kind of fertilizer should I use for water spinach in bottle planters?
Water spinach is a heavy feeder and requires regular fertilization to maintain healthy growth. Use a balanced liquid fertilizer specifically formulated for vegetables. Follow the instructions on the fertilizer label for application rates and frequency. You can also supplement with organic fertilizers, such as compost tea or fish emulsion. Avoid over-fertilizing, as this can lead to nutrient burn and damage the plants.
How do I harvest water spinach from bottle planters?
Harvest water spinach by cutting the stems about 4-6 inches above the soil level. This will encourage new growth and allow you to harvest multiple times from the same plant. Use sharp scissors or pruning shears to make clean cuts. Harvest regularly to prevent the plants from becoming too leggy and to encourage continuous production.
Are there any pests or diseases that commonly affect water spinach in bottle gardens?
Water spinach is generally resistant to pests and diseases, but it can occasionally be affected by aphids, spider mites, or fungal diseases. Inspect your plants regularly for any signs of infestation or disease. If you notice any problems, treat them promptly with an appropriate insecticide or fungicide. You can also use organic pest control methods, such as neem oil or insecticidal soap. Ensure good air circulation around the plants to prevent fungal diseases.
Can I grow water spinach indoors in bottles?
Yes, you can grow water spinach indoors in bottles, provided you can provide them with enough light. A sunny windowsill or a grow light setup is essential for indoor cultivation. Ensure that the plants receive at least 6 hours of light per day. You may also need to adjust your watering and fertilization schedule to account for the indoor environment.
How do I prevent algae growth in my water spinach bottle planters?
Algae growth can be a common problem in bottle planters, especially if they are exposed to direct sunlight. To prevent algae growth, try painting the outside of the bottles with a dark color or wrapping them in opaque material to block out light. You can also add a small amount of hydrogen peroxide to the water to kill algae. Regularly clean the bottles to remove any algae buildup.
Leave a Comment