

Growing Sweet Potatoes Beginners, listen up! Have you ever dreamt of harvesting a bounty of vibrant, earthy sweet potatoes right from your own backyard? Imagine the satisfaction of roasting those homegrown beauties, knowing you nurtured them from tiny slips to deliciousness. Well, dream no more! This isn’t just another gardening article; it’s your personal guide to unlocking the secrets of sweet potato cultivation, even if you’re a complete newbie.
Sweet potatoes have a rich history, dating back thousands of years in South America. They’ve nourished civilizations and continue to be a staple in cuisines worldwide. But you don’t need to be a seasoned farmer to enjoy their goodness. In fact, growing sweet potatoes beginners often find it surprisingly rewarding.
Why should you embark on this DIY adventure? Because store-bought sweet potatoes simply can’t compare to the flavor and freshness of homegrown ones. Plus, with rising food costs and a growing desire for sustainable living, learning to cultivate your own food is more relevant than ever. This article will provide you with easy-to-follow, step-by-step instructions, clever hacks, and insider tips to ensure your sweet potato patch thrives. Get ready to dig in and discover the joy of homegrown goodness!
Growing Sweet Potatoes: A Beginner’s Guide to Bountiful Harvests
Hey there, fellow gardening enthusiasts! I’m so excited you’re thinking about growing sweet potatoes. They’re not only delicious and nutritious but also surprisingly easy to cultivate, even if you’re a complete beginner. I’ve had great success with them in my own garden, and I’m here to share all my secrets to help you achieve a sweet potato harvest you’ll be proud of.
What You’ll Need
Before we dive into the nitty-gritty, let’s gather our supplies. Here’s what you’ll need to get started:
* Sweet Potato “Slips”: These are sprouts grown from a sweet potato. You can buy them online or at your local garden center, or even grow your own (more on that later!).
* Well-Draining Soil: Sweet potatoes thrive in loose, well-draining soil. Sandy loam is ideal, but you can amend your existing soil to improve drainage.
* Compost or Aged Manure: This will enrich the soil and provide essential nutrients for your sweet potatoes.
* Raised Beds or Garden Space: Sweet potatoes need plenty of room to spread out, so choose a location with ample space. Raised beds are a great option if your soil is less than ideal.
* Gardening Gloves: Protect your hands from dirt and potential irritants.
* Watering Can or Hose: For keeping your sweet potatoes hydrated.
* Mulch (Optional): Mulch helps retain moisture, suppress weeds, and regulate soil temperature. Straw, hay, or wood chips work well.
* Gardening Trowel or Shovel: For planting and digging.
* Row Covers (Optional): To protect young plants from pests and frost.
Growing Your Own Sweet Potato Slips (Optional but Recommended!)
Okay, so you can totally buy slips, but honestly, growing your own is super rewarding and saves you money! Plus, you get to choose the exact variety you want. Here’s how I do it:
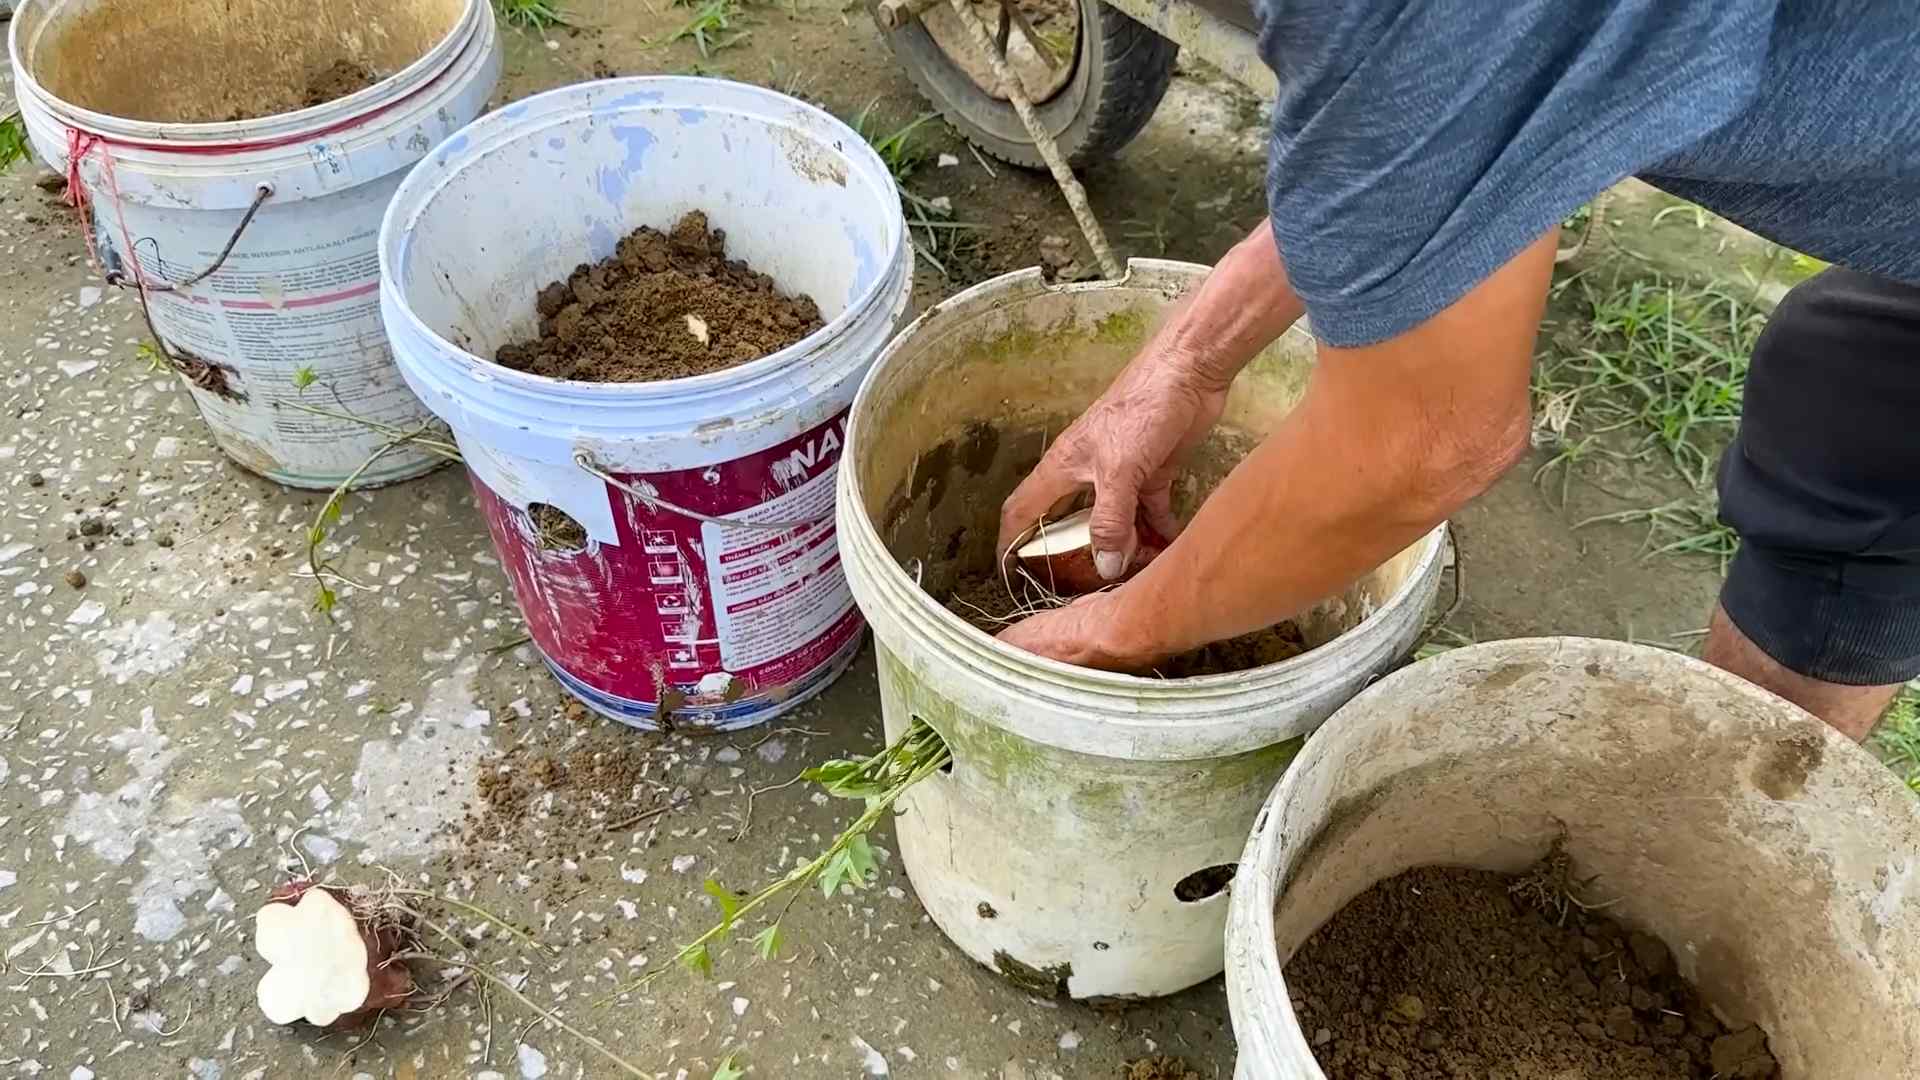
1. Choose a Healthy Sweet Potato: Select a sweet potato that’s organic (to avoid any sprout inhibitors) and free from blemishes or soft spots. I usually pick one from my last harvest that I’ve stored properly.
2. Prepare the Potato: You have two options here:
* Water Method: Suspend the sweet potato in a jar or glass of water, with the bottom half submerged. You can use toothpicks to hold it in place.
* Soil Method: Bury the sweet potato horizontally in a container filled with moist potting mix, leaving the top exposed.
3. Provide Warmth and Light: Place the jar or container in a warm, sunny location. A windowsill works perfectly.
4. Maintain Moisture: Keep the water level consistent in the jar, or keep the soil consistently moist but not soggy.
5. Wait for Sprouts: In a few weeks, you should start to see sprouts (slips) emerging from the sweet potato.
6. Separate the Slips: Once the slips are 6-8 inches long and have several leaves, gently twist or cut them off the sweet potato.
7. Root the Slips: Place the slips in a jar of water, ensuring that the bottom inch or two is submerged. Change the water every day or two.
8. Wait for Roots: In about a week, the slips will develop roots. They’re now ready to be planted in your garden!
Preparing Your Garden Bed
Before planting, it’s crucial to prepare your garden bed properly. Sweet potatoes need loose, well-draining soil to thrive.
1. Choose a Sunny Location: Sweet potatoes need at least 6-8 hours of direct sunlight per day.
2. Clear the Area: Remove any weeds, rocks, or debris from the planting area.
3. Amend the Soil: If your soil is heavy clay or compacted, amend it with plenty of compost or aged manure. This will improve drainage and provide essential nutrients. I usually dig in about 4-6 inches of compost.
4. Create Mounds or Ridges: Sweet potatoes grow best in mounds or ridges. This helps with drainage and allows the tubers to develop more easily. I usually make mounds about 12 inches high and 12 inches wide, spaced about 3 feet apart.
5. Water the Soil: Water the soil thoroughly before planting to ensure it’s moist.
Planting Your Sweet Potato Slips
Now for the fun part – planting!
1. Choose the Right Time: Sweet potatoes are warm-weather crops and should be planted after the last frost when the soil temperature has warmed to at least 60°F (15°C). I usually wait until late spring or early summer.
2. Dig Holes: Dig holes in the mounds or ridges, spaced about 12-18 inches apart. The holes should be deep enough to accommodate the roots of the slips.
3. Plant the Slips: Gently remove the slips from the water and plant them in the holes, burying the roots and the bottom portion of the stem. Leave the top leaves exposed.
4. Water Thoroughly: Water the newly planted slips thoroughly to help them establish.
5. Mulch (Optional): Apply a layer of mulch around the plants to help retain moisture, suppress weeds, and regulate soil temperature.
Caring for Your Sweet Potato Plants
Once your sweet potato plants are in the ground, it’s important to provide them with proper care to ensure a bountiful harvest.
1. Water Regularly: Sweet potatoes need consistent moisture, especially during the first few weeks after planting. Water deeply whenever the soil feels dry to the touch. Avoid overwatering, as this can lead to root rot.
2. Fertilize Sparingly: Sweet potatoes don’t need a lot of fertilizer. In fact, too much nitrogen can promote leafy growth at the expense of tuber development. If your soil is poor, you can apply a balanced fertilizer (10-10-10) at planting time, but avoid over-fertilizing.
3. Weed Regularly: Keep the garden bed free of weeds, as they can compete with your sweet potato plants for nutrients and water. Hand-pull weeds carefully to avoid disturbing the roots of the sweet potatoes.
4. Control Pests and Diseases: Sweet potatoes are relatively pest-resistant, but they can be susceptible to certain pests and diseases, such as sweet potato weevils and fungal diseases. Inspect your plants regularly for signs of problems and take appropriate action if necessary. Row covers can help protect young plants from pests.
5. Vine Management: Sweet potato vines can spread quite a bit. While you don’t need to prune them, you can gently lift and redirect them to keep them from rooting at the nodes. Rooting at the nodes can divert energy away from tuber development.
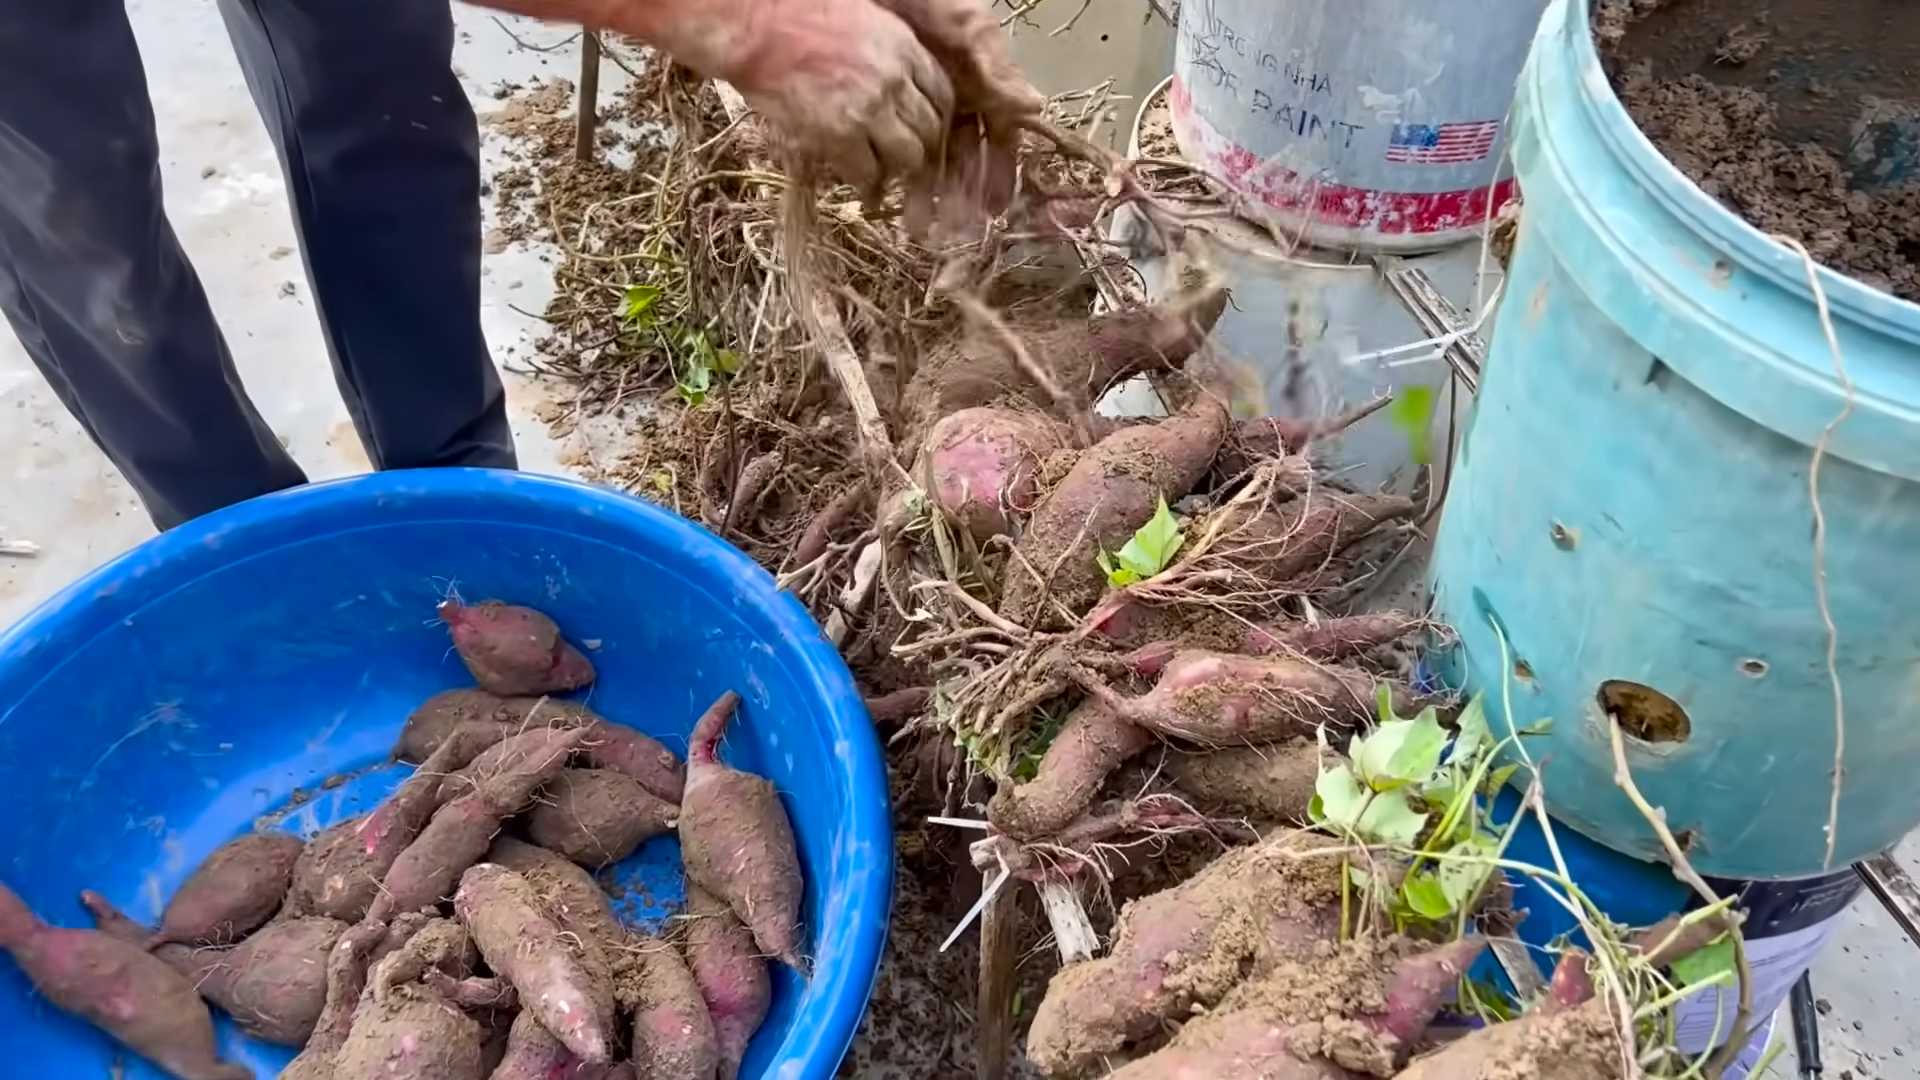
Harvesting Your Sweet Potatoes
The moment we’ve all been waiting for! Harvesting sweet potatoes is so satisfying.
1. Timing is Key: Sweet potatoes are typically ready to harvest about 90-120 days after planting, depending on the variety. The leaves will start to turn yellow and the vines will begin to die back.
2. Choose a Dry Day: Harvest your sweet potatoes on a dry day to prevent them from rotting.
3. Dig Carefully: Use a garden fork or shovel to carefully dig around the plants, being careful not to damage the tubers. Start digging a foot or so away from the base of the plant.
4. Lift the Tubers: Gently lift the tubers from the soil.
5. Cure the Sweet Potatoes: Curing is essential for developing the sweet flavor and improving storage life. Place the sweet potatoes in a warm, humid location (80-85°F and 85-90% humidity) for 7-10 days. A greenhouse or enclosed porch works well. You can also use a humidifier to increase humidity.
6. Store Properly: After curing, store the sweet potatoes in a cool, dry, and dark place (55-60°F). Avoid storing them in the refrigerator, as this can cause them to develop a hard core. Properly cured and stored sweet potatoes can last for several months.
Troubleshooting
Even with the best planning, sometimes things don’t go exactly as expected. Here are a few common problems and how to address them:
* Yellowing Leaves: This could indicate a nutrient deficiency, overwatering, or a pest infestation. Check the soil moisture, fertilize if necessary, and inspect for pests.
* Small Tubers: This could be due to poor soil, insufficient sunlight, or over-fertilizing with nitrogen. Amend the soil with compost, ensure adequate sunlight, and avoid over-fertilizing.
* Cracked Tubers: This is often caused by inconsistent watering. Water regularly and deeply, especially during dry periods.
Conclusion
So, there you have it! Growing sweet potatoes doesn’t have to be a daunting task reserved for seasoned gardeners. With a little patience, the right conditions, and this simple DIY trick, you can cultivate your own delicious and nutritious sweet potatoes right in your backyard, or even in containers on your patio. This method simplifies the process, making it accessible to beginners and seasoned gardeners alike.
Why is this DIY approach a must-try? Because it bypasses the complexities of starting from seed, which can be unpredictable and time-consuming. By focusing on sprouting slips from an existing sweet potato, you’re essentially giving yourself a head start. You’re working with established growth, increasing your chances of a successful harvest. Plus, it’s incredibly rewarding to witness the transformation of a single sweet potato into a bountiful supply of slips ready to be planted.
But the fun doesn’t stop there! Feel free to experiment with different varieties of sweet potatoes. Beauregard, with its vibrant orange flesh, is a classic choice, but don’t be afraid to explore other options like Japanese sweet potatoes with their purple skin and creamy white interior, or even the more exotic varieties with reddish or even almost black skin. Each variety offers a unique flavor profile and texture, adding diversity to your homegrown harvest.
Consider also experimenting with different growing mediums. While well-draining soil is essential, you can amend it with compost, aged manure, or even coconut coir to improve its fertility and water retention. For container gardening, choose a large pot with drainage holes and use a high-quality potting mix specifically formulated for vegetables.
Another variation to consider is the timing of your planting. In cooler climates, you may need to start your slips indoors earlier in the spring to ensure they have enough time to mature before the first frost. Use a heat mat to encourage faster sprouting and provide supplemental light if needed.
Finally, remember that growing sweet potatoes is a journey, not a race. Be patient, observe your plants closely, and adjust your care as needed. Don’t be discouraged if you encounter challenges along the way. Every mistake is a learning opportunity.
We wholeheartedly encourage you to try this DIY trick for growing sweet potatoes. It’s a fun, educational, and ultimately delicious experience. And most importantly, we want to hear about your success! Share your photos, tips, and experiences with us in the comments below. Let’s create a community of sweet potato enthusiasts and learn from each other. Happy growing!
Frequently Asked Questions (FAQ)
Q: How long does it take for sweet potato slips to grow?
A: The time it takes for sweet potato slips to grow varies depending on several factors, including the variety of sweet potato, the temperature, and the amount of light they receive. Generally, you can expect to see sprouts emerging from the sweet potato within 2-4 weeks. Once the sprouts are a few inches long, they will begin to develop leaves and roots. It typically takes another 2-4 weeks for the slips to be large enough to transplant into the garden. So, from start to finish, you’re looking at approximately 4-8 weeks to grow transplantable slips. Remember to keep the sweet potato consistently moist and in a warm location to encourage faster growth.
Q: What is the best time to plant sweet potato slips in the garden?
A: The ideal time to plant sweet potato slips is when the soil temperature has warmed up to at least 65°F (18°C) and all danger of frost has passed. This is typically in late spring or early summer, depending on your climate. Sweet potatoes are heat-loving plants and will not thrive in cold soil. Planting too early can stunt their growth and reduce your yield. Before planting, harden off the slips by gradually exposing them to outdoor conditions for a few days. This will help them adjust to the change in environment and reduce transplant shock.
Q: How much sun do sweet potatoes need?
A: Sweet potatoes require at least 6-8 hours of direct sunlight per day to thrive. They are sun-loving plants and need plenty of light to produce a good crop of tubers. Choose a planting location that receives full sun throughout the day. If you are growing sweet potatoes in containers, make sure to place them in a sunny spot on your patio or balcony. Insufficient sunlight can result in smaller tubers and a lower overall yield.
Q: What kind of soil is best for growing sweet potatoes?
A: Sweet potatoes prefer well-draining, sandy loam soil that is rich in organic matter. Heavy clay soil can become waterlogged and prevent the tubers from developing properly. Before planting, amend the soil with compost, aged manure, or other organic matter to improve its drainage and fertility. The ideal soil pH for sweet potatoes is between 5.5 and 6.5. You can test your soil pH using a soil testing kit and adjust it accordingly. Avoid using nitrogen-rich fertilizers, as they can promote excessive vine growth at the expense of tuber development.
Q: How often should I water sweet potatoes?
A: Sweet potatoes need consistent moisture, especially during the first few weeks after planting. Water deeply and regularly, keeping the soil consistently moist but not waterlogged. Once the plants are established, you can reduce the frequency of watering, but make sure to water thoroughly whenever the top inch of soil feels dry. Avoid overhead watering, as this can promote fungal diseases. Instead, water at the base of the plants. During periods of drought, you may need to water more frequently to prevent the plants from wilting.
Q: How do I know when my sweet potatoes are ready to harvest?
A: Sweet potatoes are typically ready to harvest about 90-120 days after planting, depending on the variety. The leaves will start to turn yellow and the vines will begin to die back. You can also dig up a test potato to check its size and maturity. To harvest, carefully dig around the plants with a garden fork, being careful not to damage the tubers. Gently lift the plants from the soil and brush off any excess dirt. Cure the sweet potatoes by placing them in a warm, humid location for 7-10 days. This will help to heal any cuts or bruises and improve their flavor and storage life.
Q: Can I grow sweet potatoes in containers?
A: Yes, you can successfully grow sweet potatoes in containers, provided you choose a large enough pot. A 20-gallon container or larger is recommended to give the tubers enough room to develop. Use a high-quality potting mix that is well-draining and rich in organic matter. Make sure the container has drainage holes to prevent waterlogging. Place the container in a sunny location that receives at least 6-8 hours of direct sunlight per day. Water regularly and fertilize with a balanced fertilizer every few weeks.
Q: What are some common pests and diseases that affect sweet potatoes?
A: Sweet potatoes can be susceptible to several pests and diseases, including sweet potato weevils, wireworms, flea beetles, and fungal diseases like stem rot and black rot. To prevent pest and disease problems, choose disease-resistant varieties, practice crop rotation, and keep the garden free of weeds and debris. Inspect your plants regularly for signs of pests or diseases and take action promptly if you notice any problems. Organic pest control methods, such as insecticidal soap or neem oil, can be used to control many common pests.
Q: How do I store sweet potatoes after harvesting?
A: Proper storage is essential for preserving the quality and flavor of your sweet potatoes. After curing, store them in a cool, dark, and dry location with good ventilation. The ideal storage temperature is between 55°F and 60°F (13°C and 16°C). Avoid storing sweet potatoes in the refrigerator, as this can cause them to develop a hard core and lose their flavor. Properly stored sweet potatoes can last for several months. Check them periodically for signs of spoilage and discard any that are soft or rotten.


Leave a Comment