

Growing pineapples on your terrace might sound like an exotic dream reserved for tropical climates, but I’m here to tell you it’s totally achievable, even if you’re miles away from Hawaii! Forget those expensive grocery store pineapples – imagine plucking your own sun-ripened, juicy fruit right from your own urban oasis.
For centuries, pineapples have been a symbol of hospitality and luxury, gracing royal tables and signifying welcome. Originating in South America, they spread throughout the tropics, becoming a beloved fruit worldwide. Now, you can bring a touch of that tropical history to your own home.
Why bother with this DIY project? Well, for starters, homegrown pineapples taste infinitely better than store-bought ones. Plus, it’s incredibly rewarding to nurture a plant from start to finish, witnessing the miracle of nature unfold right before your eyes. More importantly, growing pineapples on your terrace is a fantastic way to add a unique and sustainable element to your garden. It’s also a great conversation starter! In this article, I’ll share my tried-and-true tips and tricks for successfully cultivating these spiky beauties in containers, ensuring you’ll be enjoying your own homegrown pineapple harvest in no time. Let’s get started!
Growing Pineapples on Your Terrace: A Tropical Dream Come True!
Hey there, fellow plant enthusiasts! Ever dreamt of sipping on a freshly squeezed pineapple juice made from a fruit you grew yourself, right on your terrace? Well, dream no more! Growing pineapples at home is surprisingly easier than you might think, and I’m here to guide you through the entire process. Get ready to transform your terrace into a mini tropical paradise!
Choosing Your Pineapple
Before we dive into the nitty-gritty, let’s talk about pineapples. You have a couple of options here:
* The Top: This is the most common and, in my opinion, the most rewarding way to grow a pineapple. You simply use the leafy top of a store-bought pineapple.
* Slips: These are the small plantlets that sometimes grow around the base of the pineapple fruit. If you can find a pineapple with slips, grab it!
* Suckers: Similar to slips, suckers grow from the stem of the pineapple plant.
For this guide, we’ll focus on growing from the top, as it’s the most accessible method.
Preparing the Pineapple Top
Okay, you’ve got your pineapple. Now, let’s get that top ready for planting!
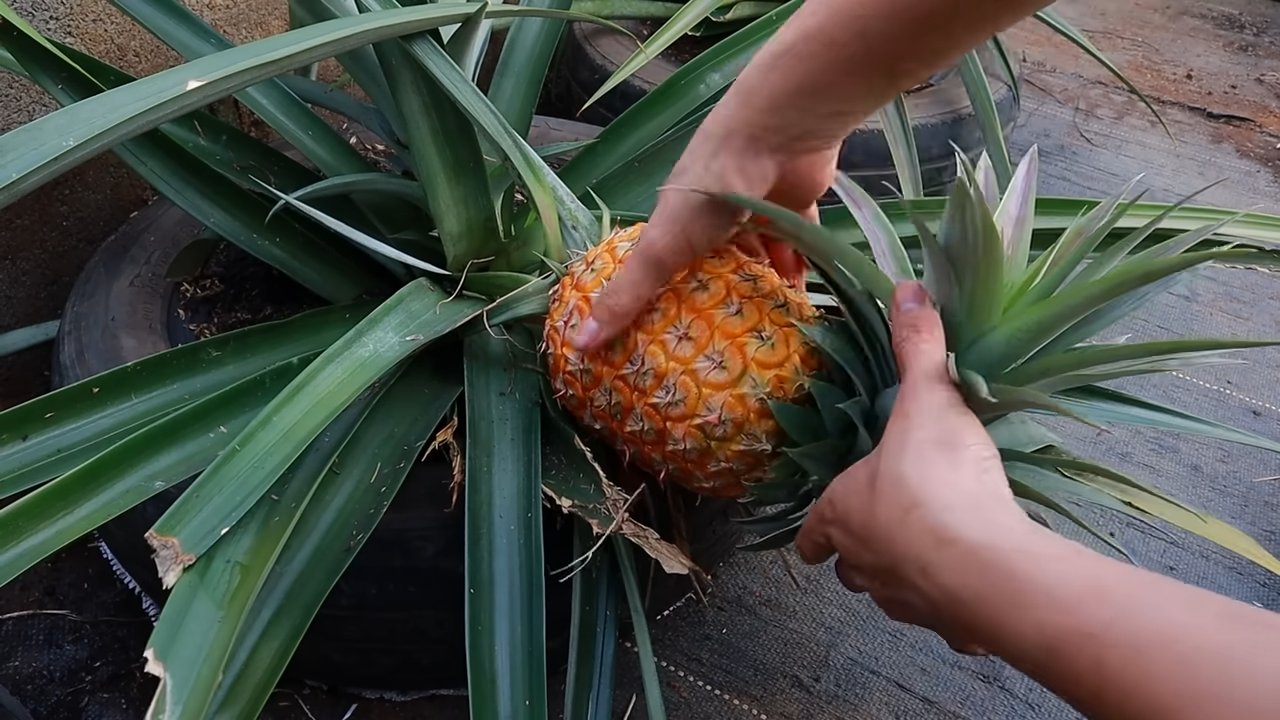
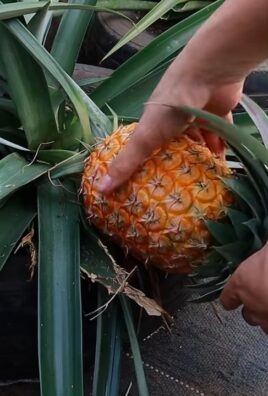
1. Twist and Shout (Gently!): Hold the pineapple fruit firmly in one hand and the leafy top in the other. Gently twist and pull the top away from the fruit. If it doesn’t come off easily, you might need to use a sharp knife to carefully cut it off, making sure to leave about an inch of fruit attached.
2. Remove the Bottom Leaves: This is crucial! You need to remove the bottom few layers of leaves to expose the stem. This is where the roots will emerge. I usually remove about 1-2 inches of leaves. Be careful not to damage the stem.
3. Let it Dry: This step is super important to prevent rot. Place the pineapple top in a cool, dry place for about a week. This allows the cut end to callous over. I usually just leave mine on a paper towel on my kitchen counter.
Rooting Your Pineapple Top
Now for the fun part – getting those roots to sprout! You have two main options here: water rooting and direct planting. I personally prefer water rooting because you can actually see the roots growing, which is incredibly satisfying.
Water Rooting Method
1. Find a Suitable Container: Choose a glass or jar that’s wide enough to hold the pineapple top and deep enough to submerge the bottom inch or two of the stem.
2. Fill with Water: Use clean, room-temperature water. I prefer using filtered water, but tap water works just fine.
3. Submerge the Stem: Place the pineapple top in the water, ensuring that only the exposed stem is submerged. The leaves should be above the water line.
4. Find a Sunny Spot: Place the jar in a bright, indirect sunlight location. Avoid direct sunlight, as this can scorch the leaves.
5. Change the Water Regularly: Change the water every 2-3 days to prevent algae growth and keep the water fresh.
6. Patience is Key: This is where the waiting game begins. It can take anywhere from 2 to 8 weeks for roots to appear. Don’t get discouraged if you don’t see anything happening right away. Just keep changing the water and be patient.
7. Planting Time: Once the roots are about 2-3 inches long, it’s time to plant your pineapple top in soil!
Direct Planting Method
1. Prepare Your Pot: Choose a pot that is at least 10 inches in diameter. Pineapples need room to grow!
2. Use Well-Draining Soil: Pineapples hate soggy feet! Use a well-draining potting mix. A mix of potting soil, perlite, and sand works well.
3. Plant the Top: Dig a hole in the center of the pot and plant the pineapple top, burying the stem up to the base of the leaves.
4. Water Thoroughly: Water the soil thoroughly after planting.
5. Find a Sunny Spot: Place the pot in a bright, sunny location.
6. Keep the Soil Moist: Keep the soil consistently moist, but not waterlogged.
Planting Your Rooted Pineapple Top
Alright, you’ve got roots! Now it’s time to give your pineapple a permanent home.
1. Choose the Right Pot: Pineapples need a pot that’s at least 10-12 inches in diameter. A larger pot is always better, as it gives the roots more room to grow.
2. Prepare Your Soil: Pineapples thrive in well-draining soil. I like to use a mix of potting soil, perlite, and a little bit of sand. This ensures that the water drains quickly and prevents root rot.
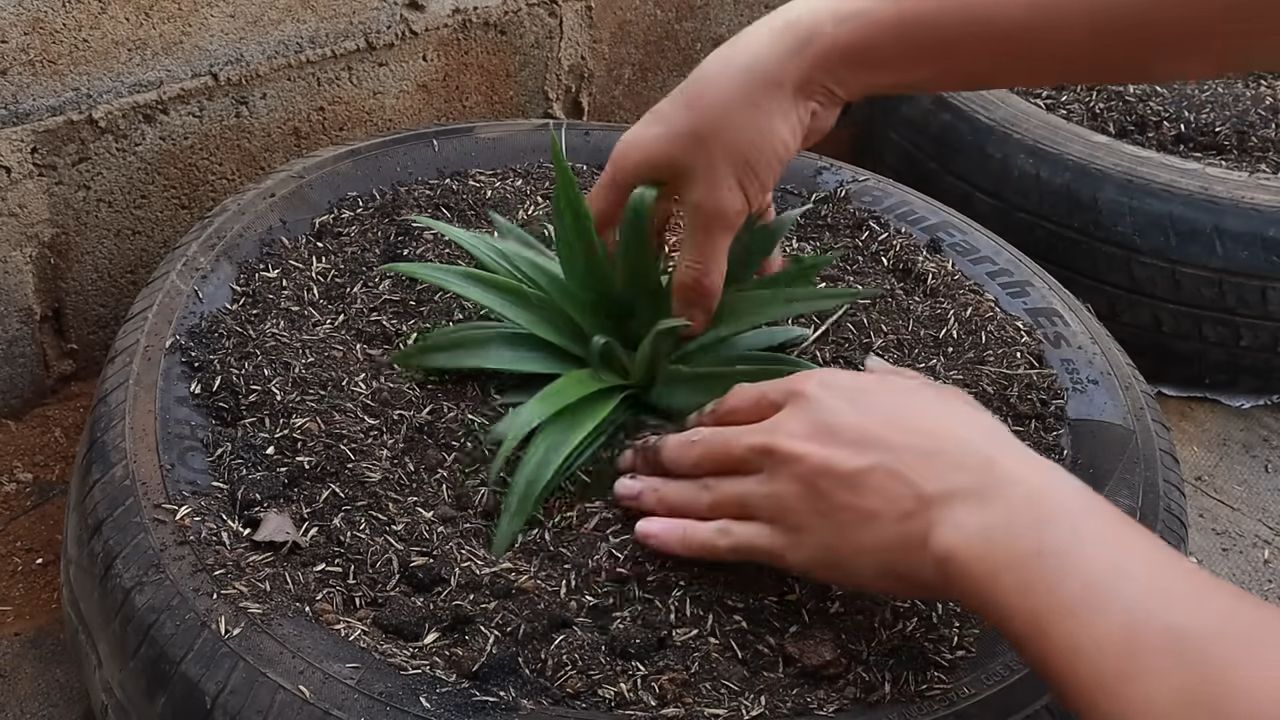
3. Planting Time: Gently remove the pineapple top from the water. Dig a hole in the center of the pot that’s large enough to accommodate the roots. Carefully place the pineapple top in the hole and backfill with soil. Make sure the base of the leaves is just above the soil line.
4. Water Thoroughly: Water the soil thoroughly after planting. This helps to settle the soil around the roots.
Caring for Your Pineapple Plant
Now that your pineapple is planted, it’s time to provide it with the care it needs to thrive.
* Sunlight: Pineapples love sunlight! They need at least 6 hours of direct sunlight per day. If you’re growing your pineapple indoors, place it near a sunny window.
* Watering: Water your pineapple plant regularly, especially during the growing season (spring and summer). Allow the soil to dry out slightly between waterings. Avoid overwatering, as this can lead to root rot.
* Fertilizing: Feed your pineapple plant every 2-3 months with a balanced fertilizer. I like to use a liquid fertilizer diluted to half strength.
* Temperature: Pineapples prefer warm temperatures, ideally between 65°F and 85°F (18°C and 29°C). They can tolerate temperatures as low as 60°F (16°C), but they won’t grow as quickly. Protect your pineapple plant from frost.
* Humidity: Pineapples appreciate humidity. If you live in a dry climate, you can increase the humidity around your plant by misting it regularly or placing it on a pebble tray filled with water.
* Repotting: You’ll likely need to repot your pineapple plant every year or two as it grows. Choose a pot that’s a few inches larger in diameter than the previous pot.
Encouraging Fruiting
This is the part everyone’s waiting for! Getting your pineapple plant to actually produce a fruit can take some time and patience. It typically takes 2-3 years for a pineapple plant grown from a top to produce a fruit.
* Ethylene Gas: One trick to encourage fruiting is to expose your pineapple plant to ethylene gas. You can do this by placing a ripe apple near the plant for a few days. Ripe apples release ethylene gas, which can stimulate flowering.
* Magnesium Sulfate (Epsom Salts): Some gardeners swear by Epsom salts to encourage fruiting. Dissolve 1 tablespoon of Epsom salts in 1 gallon of water and water your pineapple plant with this solution every few months.
* Patience, Patience, Patience: The most important thing is to be patient. Your pineapple plant will eventually produce a fruit if you provide it with the right care.
Harvesting Your Pineapple
Finally! The moment you’ve been waiting for! You’ll know your pineapple is ripe when it turns a golden-yellow color and has a sweet, fragrant aroma.
1. Check for Ripeness: Gently tug on one of the leaves near the top of the pineapple. If it comes off easily, the pineapple is ripe.
2. Cut it Off: Use a sharp knife to cut the pineapple from the plant.
3. Enjoy! Slice it up and enjoy the fruits (literally!) of your labor.
Troubleshooting
Even with the best care, you might encounter some problems along the way. Here are a few common issues and how to address them:
* Root Rot: This is usually caused by overwatering. Make sure your soil is well-draining and allow the soil to dry out slightly between waterings.
* Yellowing Leaves: This can be caused by a variety of factors, including overwatering, underwatering, nutrient deficiencies, or pests. Check the soil moisture and fertilize your plant if necessary.
* Pests: Pineapples can be susceptible to pests like mealybugs and scale. Inspect your plant regularly and treat any infestations promptly with insecticidal soap or neem oil.
Final Thoughts
Growing pineapples on
Conclusion
So, there you have it! Growing pineapples on your terrace isn’t just a whimsical dream; it’s a tangible reality within your reach. We’ve walked you through the process, from selecting the perfect pineapple top to nurturing your plant to its fruiting glory. But why should you embark on this tropical adventure?
Firstly, the sheer satisfaction of harvesting your own pineapple, grown with your own hands, is unparalleled. Imagine the burst of sweet, tangy flavor, knowing you cultivated it from a simple discarded top. It’s a connection to nature, a small victory against the concrete jungle, and a conversation starter all rolled into one.
Secondly, growing pineapples on your terrace is surprisingly sustainable. You’re repurposing food waste, reducing your carbon footprint, and potentially avoiding the pesticides often used in commercial pineapple farming. You’re contributing to a greener lifestyle, one delicious bite at a time.
Thirdly, it’s a fantastic learning experience. You’ll gain a deeper understanding of plant biology, soil science, and the patience required for successful gardening. It’s an educational journey that can be shared with children, fostering a love for nature and a sense of responsibility.
But the best reason to try this DIY trick is the sheer joy of it. Watching your pineapple plant grow, day by day, is a rewarding experience. The anticipation of that first fruit, the pride in your accomplishment – it’s all worth the effort.
Don’t be afraid to experiment! Try different varieties of pineapple to see which thrives best in your terrace environment. Consider using different potting mixes to optimize drainage and nutrient availability. You can even try companion planting with herbs like basil or rosemary to deter pests and enhance the flavor of your pineapple.
For those in colder climates, consider bringing your pineapple plant indoors during the winter months. A sunny windowsill or a grow light can provide the necessary warmth and light to keep it healthy and thriving.
We encourage you to take the plunge and try growing pineapples on your terrace. It’s a rewarding, sustainable, and delicious experience that you won’t regret. And once you’ve harvested your first pineapple, be sure to share your success story with us! We’d love to see your photos, hear your tips, and celebrate your tropical triumph. Let’s create a community of terrace pineapple growers, sharing our knowledge and inspiring others to embrace the joy of homegrown fruit. This DIY project is more than just a recipe; it’s an invitation to connect with nature, learn new skills, and enjoy the fruits (literally!) of your labor. So, grab a pineapple top, get your hands dirty, and start growing!
Frequently Asked Questions (FAQ)
How long does it take to grow a pineapple from a top?
Patience is key! Growing pineapples from a top is a long-term project. It typically takes anywhere from 2 to 3 years for a pineapple plant to mature and produce fruit. The exact timeframe depends on factors such as climate, sunlight, soil quality, and the specific pineapple variety. Don’t be discouraged if you don’t see fruit right away. Consistent care and attention will eventually pay off.
What kind of soil is best for growing pineapples?
Pineapples thrive in well-draining, slightly acidic soil. A mixture of equal parts potting soil, perlite, and peat moss is a good starting point. The perlite ensures good drainage, while the peat moss helps retain moisture and provides acidity. You can also add some compost to enrich the soil with nutrients. Avoid heavy clay soils, as they can become waterlogged and lead to root rot.
How much sunlight do pineapples need?
Pineapples are sun-loving plants and require at least 6 hours of direct sunlight per day. Choose a sunny spot on your terrace where your pineapple plant will receive ample sunlight. If you live in a particularly hot climate, you may need to provide some afternoon shade to prevent the leaves from scorching. If you’re growing your pineapple indoors, place it near a sunny window or use a grow light to supplement natural light.
How often should I water my pineapple plant?
Water your pineapple plant regularly, but avoid overwatering. Allow the soil to dry out slightly between waterings. During the growing season (spring and summer), you may need to water more frequently than during the dormant season (fall and winter). A good rule of thumb is to water when the top inch of soil feels dry to the touch. Be sure to water thoroughly, allowing the water to drain out of the bottom of the pot.
Do I need to fertilize my pineapple plant?
Yes, fertilizing your pineapple plant is essential for healthy growth and fruit production. Use a balanced fertilizer (e.g., 10-10-10) diluted to half strength. Fertilize every 2-3 months during the growing season. You can also use a foliar fertilizer, spraying the leaves with a diluted solution. Avoid over-fertilizing, as this can damage the plant.
How do I encourage my pineapple plant to fruit?
Getting your pineapple plant to fruit can sometimes be tricky. One common method is to expose the plant to ethylene gas, which stimulates flowering. You can do this by placing a ripe apple or banana near the plant, covering it with a plastic bag for a few days. The ripening fruit will release ethylene gas, which should trigger flowering. Another method is to pour a small amount of calcium carbide solution (available at garden centers) into the center of the plant. However, use this method with caution, as calcium carbide can be harmful if not used properly.
What are some common pests and diseases that affect pineapple plants?
Pineapple plants are relatively pest-resistant, but they can be susceptible to certain pests and diseases. Mealybugs and scale insects are common pests that can suck sap from the leaves. You can control these pests by wiping them off with a cotton swab dipped in rubbing alcohol or by using an insecticidal soap. Root rot is a common disease that can occur if the soil is too wet. To prevent root rot, ensure that your pineapple plant is planted in well-draining soil and avoid overwatering.
Can I grow pineapples in containers?
Absolutely! Growing pineapples in containers is ideal for terrace gardening. Choose a pot that is at least 12 inches in diameter and has drainage holes. As the plant grows, you may need to repot it into a larger container. Make sure the container is sturdy enough to support the weight of the mature plant and the fruit.
What varieties of pineapple are best for terrace growing?
While most pineapple varieties can be grown on a terrace, some are better suited for container gardening than others. Dwarf varieties, such as ‘Red Spanish’ and ‘Smooth Cayenne’, are popular choices because they are smaller and more manageable. These varieties also tend to fruit earlier than larger varieties.
What do I do with the pineapple after I harvest it?
Congratulations on harvesting your own pineapple! Once you’ve cut the pineapple from the plant, you can enjoy it fresh. You can also use it in a variety of recipes, such as smoothies, salads, and desserts. Don’t forget to save the top to start growing another pineapple plant!
Leave a Comment