

Growing pineapples at home might sound like an exotic dream reserved for tropical climates, but I’m here to tell you it’s totally achievable, even if you’re miles away from Hawaii! Forget those expensive supermarket pineapples – imagine plucking a sweet, juicy pineapple straight from your own backyard (or even your windowsill!).
For centuries, the pineapple has been a symbol of hospitality and luxury. Originating in South America, it was so prized that it became a status symbol in Europe, often rented out as a centerpiece for lavish parties! Now, you can bring that touch of tropical elegance to your own home, and it’s easier than you think.
Let’s face it, store-bought pineapples can be a gamble. Sometimes they’re perfectly ripe, other times they’re sour and disappointing. Plus, they can be quite pricey! That’s where this DIY guide comes in. I’m going to share my tried-and-true secrets for successfully growing pineapples at home, saving you money and guaranteeing you the freshest, most delicious fruit imaginable. This isn’t just about saving money; it’s about the joy of nurturing a plant from start to finish and enjoying the fruits (literally!) of your labor. So, grab your gardening gloves, and let’s get started on this exciting tropical adventure!
Growing Your Own Pineapple: A Tropical Dream for Your Home!
Hey everyone! Have you ever wondered what it would be like to grow your own pineapple? I’ve tried it, and it’s easier than you think! It does take some patience, but the result is simply fantastic: a homegrown, juicy pineapple! In this article, I’ll show you step-by-step how you can do it too. Let’s get started!
What You Need: The Ingredients for Your Tropical Garden
Before we begin, we need a few things. Don’t worry, you probably have most of them at home already!
- A ripe pineapple: It’s important that the pineapple is ripe, but not overripe. The leaves should look green and healthy. One from the supermarket or organic store is best.
- A sharp knife: To cut off the pineapple crown. Watch your fingers!
- A glass of water: For rooting the pineapple crown.
- A flower pot: With a diameter of at least 20 cm.
- Potting soil: A mixture of potting soil and sand is best.
- Optional: Rooting hormone: Speeds up rooting, but is not strictly necessary.
- Patience: Pineapples take time to grow!
Preparing the Pineapple Crown: The Foundation for Your Pineapple
Now let’s get down to it! We are preparing the pineapple crown so that it can take root.
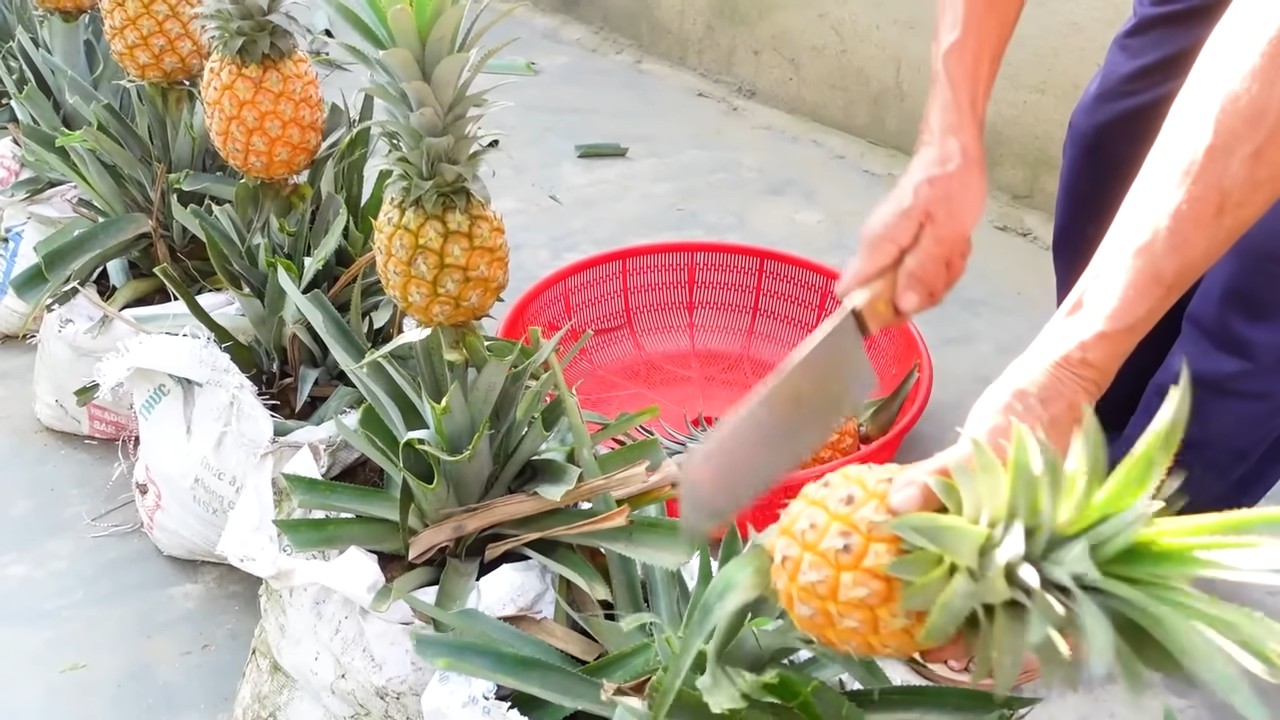
- Cut off the pineapple crown: Take your sharp knife and cut off the top of the pineapple about 2-3 cm below the leaves. Make sure you make a clean cut.
- Remove the fruit pulp: Carefully remove the remaining fruit pulp from the pineapple crown. This is important to prevent it from rotting. You can simply scrape off the pulp with a knife.
- Remove the lower leaves: Remove the bottom leaves of the pineapple crown, about 2-3 cm high. This exposes the root nubs.
- Let it dry: Let the pineapple crown dry for 2-3 days in a dry, airy place. This helps to prevent rot.
Rooting: Sprouting Roots for Healthy Growth
Now comes the exciting part: We get the pineapple crown to sprout roots!
- Place the pineapple crown in water: Fill a glass with water and place the pineapple crown in it so that only the lower part, where you removed the leaves, is in the water. The leaves should not be in the water, as they can rot.
- Choose a location: Place the glass with the pineapple crown in a bright, warm place, but not in direct sunlight.
- Change the water: Change the water every 2-3 days to prevent rot.
- Be patient: It can take several weeks for roots to form. Be patient and don’t give up! After about 4-8 weeks, you should see small roots.
Planting: Into the Soil!
Once the roots are about 2-3 cm long, it’s time to plant the pineapple crown.
- Prepare the flower pot: Fill the flower pot with a mixture of potting soil and sand. The soil should be loose and well-draining.
- Plant the pineapple crown: Make a small hole in the soil and carefully place the pineapple crown in it. Be careful not to damage the roots.
- Water: Water the soil carefully until it is moist. Avoid waterlogging.
- Choose a location: Place the flower pot in a bright, warm place, but not in direct sunlight. Pineapples love warmth and light!
Care: Making Your Pineapple Feel at Home
Proper care is crucial for the growth of your pineapple.
- Watering: Water the pineapple regularly, but not too much. The soil should always be slightly moist, but not wet. Let the soil dry out slightly between waterings.
- Fertilizing: Fertilize the pineapple every 2-3 weeks with a liquid fertilizer for fruit plants.
- Temperature: Pineapples love warmth. The ideal temperature is between 20 and 30 degrees Celsius.
- Humidity: Pineapples like high humidity. You can increase the humidity by placing the flower pot on a saucer with water and pebbles.
- Repotting: When the pineapple gets too big for the flower pot, you will need to repot it into a larger pot.
- Overwintering: In colder regions, you will need to bring the pineapple indoors for the winter. Place it in a bright, warm place and water it less.
The Bloom: A Sign of Hope
After about 2-3 years, your pineapple should flower. The bloom is a beautiful event and a sign that you will soon be able to harvest your own pineapple!
- Be patient: The bloom can take several weeks.
- Do not water: During the flowering period, you should not water the pineapple.
- Pollination: Pineapples are self-pollinating, so you don’t have to do anything.
The Harvest: The Reward for Your Effort
After flowering, it will take about another 6 months for the pineapple to ripen.
- Recognizing ripeness: The pineapple is ripe when it has a golden-yellow color and emits a sweet fragrance.
- Harvesting: Cut the pineapple off with a sharp knife.
- Enjoy: Enjoy your homegrown pineapple! It is guaranteed to taste better than any store-bought pineapple.
Common Problems and Solutions: Don’t Panic!
Problems can also occur when growing pineapples. Here are some common problems and how you can solve them:
- Rot: If the pineapple crown rots, you probably left too much fruit pulp on it or watered it too much. Cut off the rotten parts and let the pineapple crown dry before putting it back in water.
- No roots: If no roots form after a few weeks, the pineapple crown may not be healthy or the water may not be clean. Change the water regularly and try again with a different pineapple crown.
- Yellow leaves: Yellow leaves can be a sign of too much or too little water. Check the moisture of the soil and adjust the watering accordingly.
- Pests: Pineapples can be infested by pests such as spider mites or mealybugs. Combat the pests with a suitable insecticide.
Additional Tips and Tricks: For Even More Success
Here are a few more tips and tricks that can help you grow pineapples:
- Rooting hormone: Using rooting hormone can speed up rooting.
- Rainwater: Use rainwater for watering, as it contains less lime than tap water.
- Mulching: Mulch the soil around the pineapple to retain moisture and suppress weeds.
- Rotating: Rotate the flower pot regularly so that the pineapple grows evenly.
- Patience: Growing pineapples takes time. Be patient and don’t give up!
I hope this article has helped you grow your own pineapple. It’s a great feeling to grow and harvest something yourself. Good luck and have fun gardening!

Conclusion
So, there you have it! Growing pineapples at home, while it might seem like a tropical fantasy, is entirely within your reach. This isn’t just about saving a few dollars at the grocery store; it’s about experiencing the sheer joy of nurturing life, witnessing the slow, steady growth of a plant, and ultimately, savoring the sweet reward of your own homegrown pineapple.
This DIY trick is a must-try for several compelling reasons. First, it’s incredibly rewarding. There’s a unique satisfaction that comes from eating something you’ve cultivated yourself, from the initial planting to the final harvest. Second, it’s a fantastic learning experience, especially for families with children. It teaches patience, responsibility, and an appreciation for the natural world. Third, you control the growing process. You can ensure your pineapple is grown organically, free from harmful pesticides and chemicals. Finally, and perhaps most importantly, the taste of a homegrown pineapple is simply unparalleled. It’s sweeter, juicier, and more flavorful than anything you can buy in a store.
Don’t be afraid to experiment with variations! Try different types of pineapples – perhaps a Sugarloaf or a Red Spanish. Consider using different potting mixes to see which one yields the best results. You can even try growing your pineapple in a container indoors if you live in a colder climate, providing it with ample sunlight using grow lights. Another variation is to experiment with different fertilizers. Organic options like compost tea or fish emulsion can provide essential nutrients without the risk of chemical runoff. Remember to adjust your watering schedule based on the humidity and temperature of your environment. Overwatering is a common mistake, so err on the side of caution.
We understand that embarking on this journey might seem daunting, but trust us, the process is simpler than you think. With a little patience, care, and the right conditions, you’ll be enjoying your own homegrown pineapple in no time. The key is to provide consistent warmth, adequate sunlight, and well-draining soil. Remember to monitor your plant regularly for any signs of pests or diseases and address them promptly.
We wholeheartedly encourage you to give this DIY trick a try. It’s a fun, educational, and ultimately delicious experience. And once you’ve harvested your first pineapple, don’t forget to share your experience with us! We’d love to hear about your successes, challenges, and any tips you’ve learned along the way. Share your photos and stories on social media using [Your Hashtag Here] and let’s create a community of home pineapple growers! Let’s spread the joy of growing pineapples at home!
Frequently Asked Questions (FAQ)
How long does it take to grow a pineapple from a top?
Growing a pineapple from the top of a store-bought fruit is a patience game! Generally, it takes anywhere from 2 to 3 years for a pineapple plant to mature and produce fruit. The exact timeframe depends on several factors, including the variety of pineapple, the climate, the amount of sunlight it receives, and the quality of the soil. Don’t be discouraged if it takes longer than expected; the reward is well worth the wait. Remember to provide consistent care and monitor your plant regularly for optimal growth.
What is the best soil for growing pineapples?
Pineapples thrive in well-draining, slightly acidic soil. A mixture of equal parts potting soil, perlite, and peat moss is an excellent choice. The perlite ensures good drainage, preventing root rot, while the peat moss helps retain moisture and provides acidity. Avoid heavy clay soils, as they tend to retain too much water. You can also amend your soil with compost or other organic matter to improve its fertility and drainage. Before planting, test the soil’s pH level to ensure it’s within the ideal range of 5.5 to 6.5.
How much sunlight does a pineapple plant need?
Pineapples are sun-loving plants and require at least 6 hours of direct sunlight per day. If you’re growing your pineapple indoors, place it near a south-facing window where it can receive ample sunlight. If natural light is insufficient, consider using grow lights to supplement its needs. Insufficient sunlight can lead to stunted growth and reduced fruit production. During the hottest part of the day, especially in warmer climates, you may need to provide some shade to prevent the leaves from scorching.
How often should I water my pineapple plant?
Water your pineapple plant when the top inch of soil feels dry to the touch. Avoid overwatering, as this can lead to root rot. During the growing season (spring and summer), you may need to water more frequently than during the dormant season (fall and winter). Ensure that the pot has good drainage to prevent water from accumulating at the bottom. You can also mist the leaves occasionally to increase humidity, especially in dry climates.
What kind of fertilizer should I use for my pineapple plant?
Pineapples benefit from regular fertilization, especially during the growing season. Use a balanced fertilizer with a ratio of 10-10-10 or 14-14-14. Apply the fertilizer according to the package instructions, typically every 2-3 months. You can also use organic fertilizers such as compost tea or fish emulsion. Avoid over-fertilizing, as this can damage the plant. Consider using a slow-release fertilizer to provide a steady supply of nutrients over time.
How do I know when my pineapple is ripe?
Determining when a pineapple is ripe can be tricky, but there are several indicators to look for. First, the pineapple should have a vibrant color, typically a golden yellow or orange hue. Second, the fruit should have a fragrant aroma, especially at the base. Third, the “eyes” or scales of the pineapple should be relatively flat and slightly separated. Finally, you can gently tug on one of the leaves near the top; if it comes out easily, the pineapple is likely ripe. Avoid squeezing the pineapple, as this can damage the fruit.
What are some common problems when growing pineapples and how do I fix them?
Some common problems include root rot (caused by overwatering), mealybugs (small, white insects that suck sap from the plant), and nutrient deficiencies (resulting in yellowing leaves). To prevent root rot, ensure that the soil is well-draining and avoid overwatering. To control mealybugs, you can use insecticidal soap or neem oil. For nutrient deficiencies, fertilize your plant regularly with a balanced fertilizer. Regularly inspect your plant for any signs of pests or diseases and address them promptly to prevent them from spreading.
Can I grow a pineapple indoors?
Yes, you can absolutely grow a pineapple indoors, especially if you live in a colder climate. The key is to provide it with ample sunlight, either through a south-facing window or with the help of grow lights. Maintain a warm temperature and ensure that the soil is well-draining. You may also need to increase humidity by misting the leaves regularly. Choose a pot that is large enough to accommodate the plant’s root system and repot it as needed. With proper care, you can successfully grow a pineapple indoors and enjoy the fruits of your labor.
Leave a Comment