

Growing Mint Indoors can seem like a daunting task, conjuring images of brown, wilted leaves and a sad, neglected herb struggling for survival. But fear not, fellow plant enthusiasts! I’m here to tell you that cultivating a thriving mint patch within the cozy confines of your home is not only achievable but surprisingly simple with a few clever DIY tricks and hacks. Forget expensive store-bought mint that wilts within days; imagine the satisfaction of snipping fresh, fragrant leaves for your tea, cocktails, or culinary creations, all grown with your own two hands.
Mint, with its invigorating aroma and refreshing flavor, has a rich history steeped in tradition. Ancient civilizations, from the Egyptians to the Romans, revered mint for its medicinal properties and culinary uses. It was even believed to symbolize hospitality and was often strewn on floors to welcome guests. Today, the allure of fresh mint remains strong, but access to it can be limited, especially during colder months or for those without outdoor garden space. That’s where the magic of DIY comes in!
Why should you embrace these growing mint indoors DIY tricks? Because it empowers you to take control of your herb supply, ensuring a constant source of fresh, organic mint, free from harmful pesticides. Plus, it’s a fantastic way to add a touch of greenery and vibrancy to your living space, boosting your mood and creating a more inviting atmosphere. So, let’s dive into the wonderful world of indoor mint cultivation and unlock the secrets to a flourishing, fragrant herb garden right in your home!
Successfully Growing Mint Indoors: Your DIY Guide
Hello dear plant friends! Are you also tired of expensive mint from the supermarket that wilts after just a few days? Then you’ve come to the right place! I’ll show you how to easily grow your own mint indoors – fresh, aromatic, and always on hand for tea, cocktails, or delicious dishes. No green thumb needed, I promise!
What You Need: Your Shopping List
Before we get started, here’s a list of everything you’ll need for your indoor mint project:
- Mint seeds or mint cuttings: Seeds are a cheap option, but cuttings yield results faster. You can take cuttings from a purchased mint plant or get them from a friend.
- Seed starting mix or potting soil: Special seed starting mix is ideal for seeds because it’s low in nutrients and loose. But potting soil also works well, especially for cuttings.
- Pots with drainage holes: The size depends on how much mint you want to grow. Small pots (about 10-15 cm in diameter) are sufficient to start with.
- Saucers: To catch excess water.
- Spray bottle: For watering the seeds and young plants.
- Watering can: For later watering.
- Bright windowsill or plant lamp: Mint needs a lot of light!
- Optional: Liquid fertilizer for herbs.
Growing Mint from Seed: Patience Pays Off
Growing mint from seed requires a little more patience, but it’s a great way to try out different mint varieties.
Step-by-Step Guide:
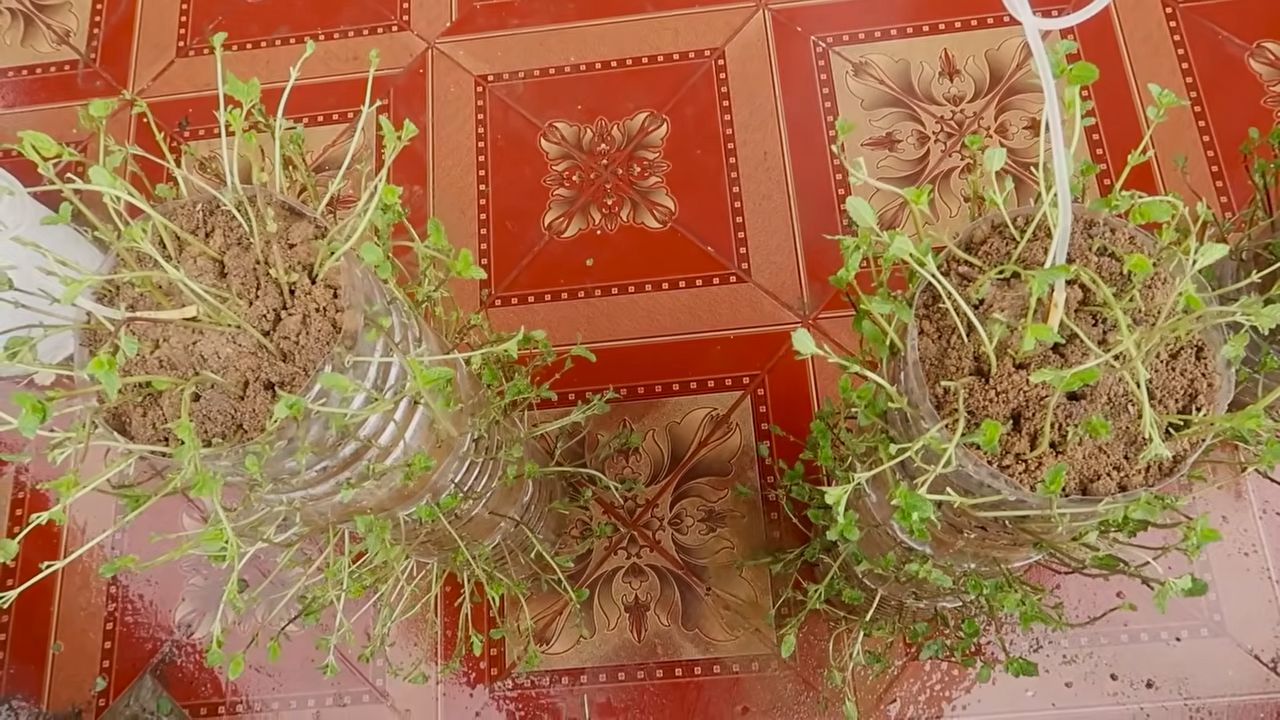
- Prepare the pots: Fill the pots with seed starting mix, leaving about 2 cm of space to the rim. Press the soil down lightly.
- Sow the seeds: Distribute the mint seeds evenly on the soil. Mint is a light germinator, which means the seeds need light to germinate. So only cover them very lightly with soil or just press them down.
- Watering: Moisten the soil carefully with the spray bottle. It should be moist, but not wet.
- Covering: Cover the pots with plastic wrap or a clear plastic bag to increase the humidity. Poke a few holes in the wrap so that the air can circulate.
- Location: Place the pots in a bright, warm place, but not in direct sun. A windowsill is ideal.
- Patience test: Keep the soil moist, but avoid waterlogging. After about 10-14 days, the first seedlings should appear.
- Removing the cover: Once the seedlings are there, remove the wrap or bag.
- Pricking out: When the seedlings are large enough (about 5 cm high), you can prick them out, i.e., transplant them into larger pots. Be careful not to damage the roots.
Propagating Mint from Cuttings: Quick and Easy
Propagating mint from cuttings is a faster and easier way to get a new mint plant.
Here’s how:
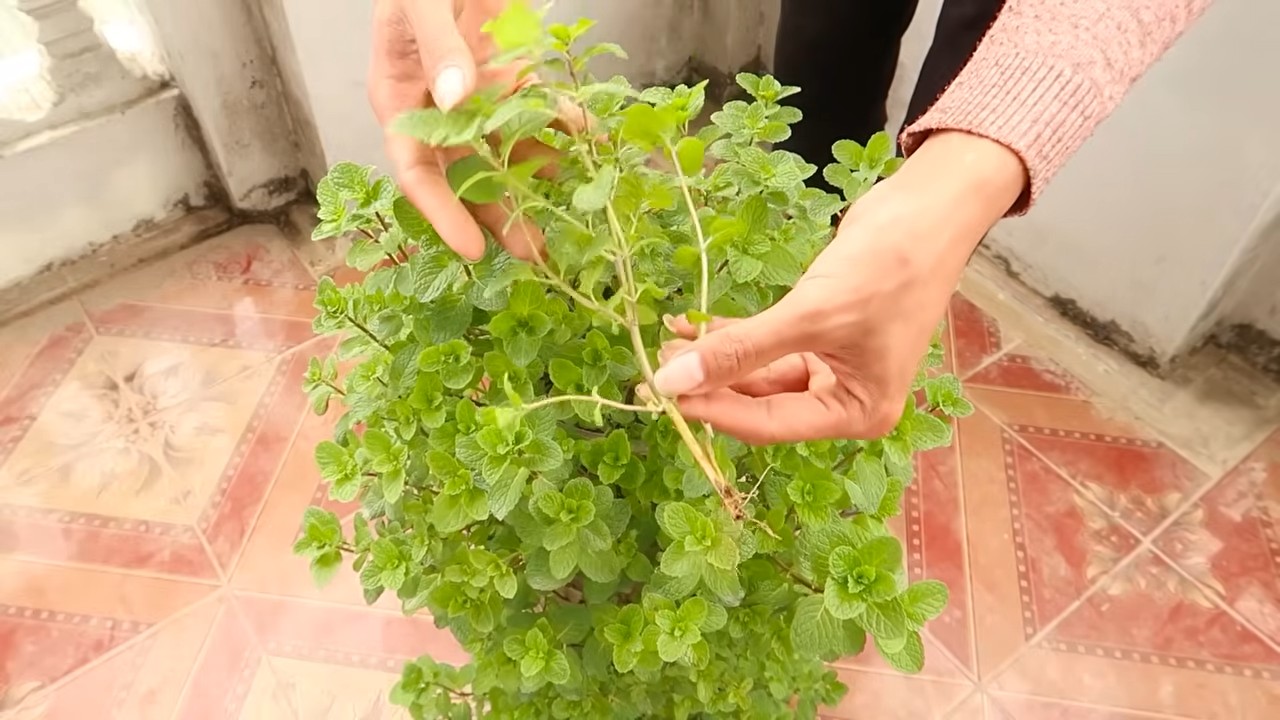
- Select the cuttings: Look for healthy, strong shoots on an existing mint plant. The shoots should be about 10-15 cm long.
- Cut the cuttings: Cut the shoots just below a leaf node. Remove the lower leaves so they don’t rot in the water.
- Rooting in water: Place the cuttings in a glass of water. Make sure the lower leaf nodes are in the water.
- Location: Place the glass in a bright place, but not in direct sun.
- Patience: Change the water every few days. After about 1-2 weeks, roots should form.
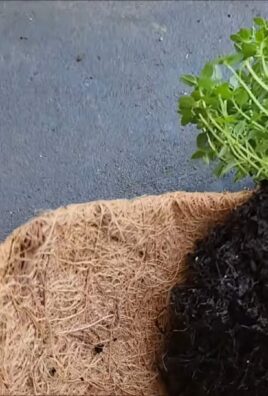
- Planting: Once the roots are about 2-3 cm long, you can plant the cuttings in pots with potting soil.
The Right Care: So Your Mint Thrives
Mint is relatively easy to care for, but you should pay attention to a few things so that it feels at home with you.
Light:
Mint needs a lot of light, at least 6 hours a day. A bright windowsill is ideal. If you don’t have enough natural light, you can use a plant lamp.
Watering:
Keep the soil moist, but avoid waterlogging. Water regularly, especially in summer. The soil should feel slightly moist when you touch it.
Fertilizing:
Mint is not very demanding, but occasional fertilization with liquid fertilizer for herbs can promote growth. Fertilize about every 2-4 weeks during the growing season (spring and summer).
Pruning:
Regular pruning promotes growth and prevents the mint from flowering. Flowering mint loses its aroma. Simply cut the shoots with scissors. You can use the cut leaves immediately or dry them.
Repotting:
Mint grows quickly and can quickly fill the pot with roots. Repotting into a larger pot is therefore necessary regularly, about every 6-12 months.
Common Problems and Solutions:
- Yellow leaves: Can be a sign of overwatering, nutrient deficiency, or too little light. Check your watering habits, fertilize the plant, and move it to a brighter location.
- Brown leaves: Can be caused by air that is too dry or too little water. Spray the leaves regularly with water and water the plant sufficiently.
- Pests: Mint can be infested with aphids or spider mites. Spray the plant with a solution of water and a little dish soap or use a biological pesticide.
Mint Varieties: Variety for Your Garden
There are countless mint varieties with different aromas. Here are a few popular varieties:
- Peppermint: The classic with an intense, refreshing taste.
- Spearmint: Mild and sweet, ideal for mojitos and teas.
- Chocolate mint: With a hint of chocolate, perfect for desserts.
- Strawberry mint: With a fruity strawberry aroma, delicious in salads and drinks.
- Moroccan mint: Popular for traditional Moroccan mint tea.
Harvesting and Using Mint: Freshness for Your Kitchen
You can harvest the mint as soon as the plant is large enough. Simply cut the shoots with scissors. The leaves are most aromatic when you harvest them just before flowering.
Mint is versatile:
- Tea: Fresh or dried mint for a refreshing tea.
- Cocktails: Mojitos, mint juleps, and other cocktails.
- Salads: Fresh mint in salads for a special taste.
- Desserts: Mint in chocolate mousse, ice cream, or other desserts.
- Sauces: Mint sauce with lamb or other dishes.
Drying Mint: For Your Winter Supply
If you have more mint than you can use, you can dry it to preserve it for the winter.
Conclusion
So, there you have it! Growing mint indoors isn’t just a whimsical idea for plant enthusiasts; it’s a practical, aromatic, and incredibly rewarding endeavor that anyone can undertake. We’ve walked through the simple steps, from selecting the right container and soil to providing the ideal light and watering conditions. But why is this DIY trick a must-try?
Firstly, having fresh mint readily available at your fingertips elevates your culinary creations to a whole new level. Imagine the burst of flavor in your homemade mojitos, the refreshing touch it adds to your salads, or the soothing warmth it brings to your herbal teas. No more last-minute trips to the grocery store or settling for dried, lackluster mint. You’ll have vibrant, fragrant leaves whenever inspiration strikes.
Secondly, growing mint indoors is a fantastic way to bring a touch of nature into your home, especially during the colder months when outdoor gardening is limited. The vibrant green foliage adds a splash of color and life to any room, creating a more inviting and calming atmosphere. Plus, the delightful aroma of mint can naturally freshen your home, acting as a subtle and pleasant air freshener.
But the benefits don’t stop there. This DIY project is incredibly cost-effective. Instead of constantly buying bunches of mint that often go to waste, you can cultivate your own supply for a fraction of the price. It’s also a sustainable choice, reducing your reliance on commercially grown herbs that may have traveled long distances.
Now, let’s talk about variations. Feel free to experiment with different varieties of mint, such as peppermint, spearmint, chocolate mint, or even apple mint. Each variety offers a unique flavor profile that can enhance your culinary adventures. You can also get creative with your containers, using repurposed jars, decorative pots, or even hanging baskets to add a touch of personal style to your indoor garden. Consider companion planting your mint with other herbs like basil or rosemary, but be mindful of their individual needs and growth habits. Remember that mint is an aggressive grower, so keeping it contained is crucial to prevent it from taking over your entire garden.
Don’t be afraid to experiment with different lighting conditions to find what works best for your mint plant. If you don’t have a sunny windowsill, consider using a grow light to supplement the natural light. And remember to regularly prune your mint plant to encourage bushier growth and prevent it from becoming leggy.
Ultimately, growing mint indoors is a simple yet transformative DIY project that offers a multitude of benefits. It’s a way to enhance your culinary creations, bring nature into your home, save money, and reduce your environmental impact. So, what are you waiting for? Grab a pot, some soil, and a mint plant, and embark on this rewarding journey today!
We’re confident that you’ll love the experience of growing your own fresh mint indoors. And we’d love to hear about your successes (and any challenges you encounter along the way!). Share your experiences, tips, and photos with us in the comments below. Let’s create a community of indoor mint growers and inspire others to embrace this delightful DIY trick! Let us know what you think about this guide to growing mint indoors.
Frequently Asked Questions (FAQ)
1. What kind of pot and soil should I use for growing mint indoors?
The best pot for growing mint indoors is one that is at least 6 inches in diameter and has drainage holes. This allows excess water to escape, preventing root rot. As for the material, terracotta pots are a good choice because they allow the soil to breathe, but plastic pots are also fine as long as they have drainage.
For soil, use a well-draining potting mix. A mix of peat moss, perlite, and vermiculite is ideal. Avoid using garden soil, as it can be too heavy and compact, hindering root growth. You can also add some compost to the potting mix to provide extra nutrients.
2. How much sunlight does indoor mint need?
Mint thrives in bright, indirect sunlight. Ideally, your mint plant should receive at least 4-6 hours of sunlight per day. A south-facing or east-facing window is usually a good location. If you don’t have access to a sunny window, you can use a grow light to supplement the natural light. Place the grow light a few inches above the plant and keep it on for 12-14 hours per day.
If your mint plant is not getting enough light, it may become leggy (tall and spindly) and the leaves may be pale. If this happens, try moving the plant to a sunnier location or using a grow light.
3. How often should I water my indoor mint plant?
Water your mint plant when the top inch of soil feels dry to the touch. Water thoroughly until water drains out of the drainage holes. Avoid overwatering, as this can lead to root rot. Mint prefers consistently moist soil, but not soggy.
During the warmer months, you may need to water your mint plant more frequently than during the cooler months. Check the soil moisture regularly and adjust your watering schedule accordingly.
4. How do I prune my indoor mint plant?
Pruning is essential for keeping your mint plant healthy and productive. Regularly pinch off the top leaves to encourage bushier growth. You can also trim back the stems to maintain the desired shape and size.
When pruning, use clean, sharp scissors or pruning shears. Cut the stems just above a leaf node (the point where a leaf grows out of the stem). This will encourage new growth from that point.
You can use the pruned leaves for cooking, tea, or other purposes.
5. How do I propagate mint from cuttings?
Propagating mint from cuttings is a simple and effective way to create new plants. To propagate mint, take a 4-6 inch cutting from a healthy stem. Remove the lower leaves, leaving only a few leaves at the top.
Place the cutting in a glass of water, making sure that the lower nodes are submerged. Place the glass in a bright, indirect location. Change the water every few days.
After a few weeks, roots will begin to grow. Once the roots are about an inch long, you can plant the cutting in a pot with well-draining potting mix. Water thoroughly and keep the soil moist until the plant is established.
6. What are some common problems with growing mint indoors and how can I fix them?
Some common problems with growing mint indoors include:
* **Pests:** Mint can be susceptible to pests such as aphids, spider mites, and whiteflies. Inspect your plant regularly for signs of infestation. If you find pests, you can try washing them off with a strong stream of water or using an insecticidal soap.
* **Diseases:** Mint can also be affected by diseases such as powdery mildew and rust. These diseases can cause white or orange spots on the leaves. To prevent diseases, make sure your plant has good air circulation and avoid overwatering. If your plant is affected by a disease, you can try using a fungicide.
* **Yellowing leaves:** Yellowing leaves can be a sign of overwatering, underwatering, or nutrient deficiency. Check the soil moisture and adjust your watering schedule accordingly. You can also fertilize your plant with a balanced fertilizer.
* **Leggy growth:** Leggy growth is a sign that your plant is not getting enough light. Move the plant to a sunnier location or use a grow light.
7. Can I grow different varieties of mint together in the same pot?
While it’s tempting to grow different varieties of mint together, it’s generally not recommended. Mint is an aggressive grower and different varieties can cross-pollinate, resulting in unpredictable flavors and growth habits. It’s best to keep each variety in its own separate pot to maintain its unique characteristics.
8. How often should I fertilize my indoor mint plant?
Fertilize your indoor mint plant every 2-4 weeks during the growing season (spring and summer). Use a balanced liquid fertilizer diluted to half strength. Avoid over-fertilizing, as this can burn the roots. During the dormant season (fall and winter), you can reduce the frequency of fertilization to once a month or stop fertilizing altogether.
9. Is mint safe for pets?
While mint is generally considered safe for pets in small quantities, it’s best to keep your mint plant out of reach of your furry friends. Some varieties of mint, such as pennyroyal, can be toxic to pets if ingested in large amounts. If you suspect that your pet has ingested a large amount of mint, contact your veterinarian immediately.
10. How do I harvest mint leaves?
Harvest mint leaves by pinching or cutting them off the stem. You can harvest leaves at any time, but the flavor is usually strongest in the morning. To encourage continued growth, avoid harvesting more than one-third of the plant at a time. You can use the fresh mint leaves immediately or dry them for later use. To dry mint leaves, hang them upside down in a cool, dry place or use a dehydrator.
Leave a Comment