

Growing Melons in Small Spaces might seem like a far-fetched dream, especially if you’re picturing sprawling vines taking over your entire balcony or patio. But guess what? I’m here to tell you that juicy, homegrown melons are totally achievable, even without a sprawling garden! For centuries, gardeners have been finding clever ways to cultivate their favorite fruits and vegetables, adapting techniques to suit their environments. Think of the hanging gardens of Babylon – a testament to human ingenuity in creating green spaces where they seemed impossible!
Let’s face it, who doesn’t love the sweet, refreshing taste of a perfectly ripe melon on a hot summer day? But store-bought melons often lack that intense flavor and satisfying crunch. That’s where the magic of growing melons in small spaces comes in. I’m going to share some amazing DIY tricks and hacks that will empower you to cultivate your own delicious melons, no matter how limited your space may be. Imagine the satisfaction of harvesting your own cantaloupe or watermelon, knowing you nurtured it from seed to table. Plus, you’ll be reducing your carbon footprint and enjoying the freshest, most flavorful melons imaginable. So, grab your gardening gloves, and let’s get started on this exciting journey to melon-growing success!
Growing Melons in Small Spaces: A DIY Vertical Trellis Guide
Hey there, fellow gardeners! Dreaming of juicy, homegrown melons but short on space? Don’t despair! I’m going to show you how to grow melons vertically, maximizing your yield even in the tiniest of gardens, balconies, or patios. This DIY trellis system is easy to build, budget-friendly, and will have you enjoying sweet, sun-ripened melons in no time.
Why Grow Melons Vertically?
Before we dive into the how-to, let’s talk about why vertical gardening is a game-changer for melon lovers with limited space:
* Space Saving: Melons can sprawl! Growing them vertically keeps them contained and frees up valuable ground space for other plants.
* Improved Air Circulation: Vertical growth promotes better airflow around the plants, reducing the risk of fungal diseases like powdery mildew.
* Increased Sunlight Exposure: All parts of the plant get more sunlight, leading to sweeter and more flavorful melons.
* Easier Harvesting: No more bending and searching under sprawling vines! Harvesting becomes a breeze.
* Aesthetic Appeal: A melon-covered trellis is a beautiful and productive addition to any garden.
Materials You’ll Need
Okay, let’s gather our supplies. I tried to keep this project as affordable as possible, using readily available materials:
* Wooden Posts: (2) 4×4 posts, 8 feet long. These will be the main supports for your trellis. Cedar or pressure-treated wood is best for longevity.
* Wooden Boards: (4) 2×4 boards, 8 feet long. These will be used to create the frame for the trellis.
* Heavy-Duty Trellis Netting: Choose a netting with large enough openings for the melon vines to easily grab onto. I recommend a mesh size of at least 6×6 inches. You’ll need enough to cover the entire frame you’ll be building.
* Heavy-Duty Staples or U-Nails: For attaching the netting to the frame.
* Wood Screws: 3-inch exterior wood screws for assembling the frame.
* Post Hole Digger or Shovel: For digging the holes for the support posts.
* Level: Essential for ensuring your trellis is straight and stable.
* Measuring Tape: For accurate measurements.
* Drill: With a screwdriver bit for driving in the screws.
* Staple Gun: If using staples to attach the netting.
* Gloves: To protect your hands.
* Safety Glasses: Always a good idea when working with tools.
* Concrete Mix (Optional): For extra stability, especially in windy areas.
* Twine or Plant Ties: For supporting the melons as they grow.
Building Your Vertical Melon Trellis: Step-by-Step
Alright, let’s get building! This project should take a few hours, depending on your experience level.
Phase 1: Preparing the Posts and Frame
1. Cut the Posts (If Necessary): If your 8-foot posts are too tall for your space, you can cut them down to a more manageable height. I recommend leaving at least 6 feet above ground for ample growing space. Remember to bury at least 2 feet of the post in the ground.
2. Cut the Boards: Cut two of the 2×4 boards in half, so you have four 4-foot pieces. These will be the top and bottom horizontal supports of your trellis frame. The other two 2×4 boards will remain at 8 feet and will be the vertical supports.
3. Assemble the Frame: Lay out the four 4-foot pieces and two 8-foot pieces on a flat surface to form a rectangle. The 8-foot pieces should be on the outside, forming the vertical sides of the rectangle.
4. Attach the Frame: Using your drill and wood screws, attach the 4-foot pieces to the inside of the 8-foot pieces. Make sure the corners are square. I recommend pre-drilling pilot holes to prevent the wood from splitting. Use at least two screws per corner for a strong connection.
Phase 2: Installing the Support Posts
1. Dig the Post Holes: Decide where you want to place your trellis. Dig two holes, approximately 2 feet deep, and spaced 8 feet apart (the width of your frame).
2. Position the Posts: Place the 4×4 posts into the holes.
3. Level the Posts: Use a level to ensure the posts are perfectly vertical. This is crucial for the stability of your trellis.
4. Secure the Posts: Backfill the holes with soil, tamping it down firmly around the posts. For extra stability, you can mix concrete according to the package directions and pour it into the holes around the posts. Let the concrete cure completely before proceeding.
Phase 3: Attaching the Frame to the Posts
1. Position the Frame: Carefully lift the frame you assembled earlier and position it between the two support posts.
2. Attach the Frame: Using your drill and wood screws, attach the frame to the posts. Make sure the frame is level and securely fastened. I recommend using at least three screws per post for a strong connection.
Phase 4: Installing the Trellis Netting
1. Unroll the Netting: Carefully unroll your trellis netting.
2. Attach the Netting: Starting at one corner of the frame, attach the netting using heavy-duty staples or U-nails. Stretch the netting taut as you go, ensuring it’s evenly distributed across the frame. Work your way around the entire frame, securing the netting every few inches. Make sure the netting is securely attached, as it will need to support the weight of the melon vines and fruits.
Planting Your Melons
Now for the fun part – planting your melons!
1. Choose Your Melon Variety: Select a melon variety that is well-suited for your climate and growing conditions. Smaller melon varieties, like cantaloupes and personal-sized watermelons, are generally easier to grow vertically.
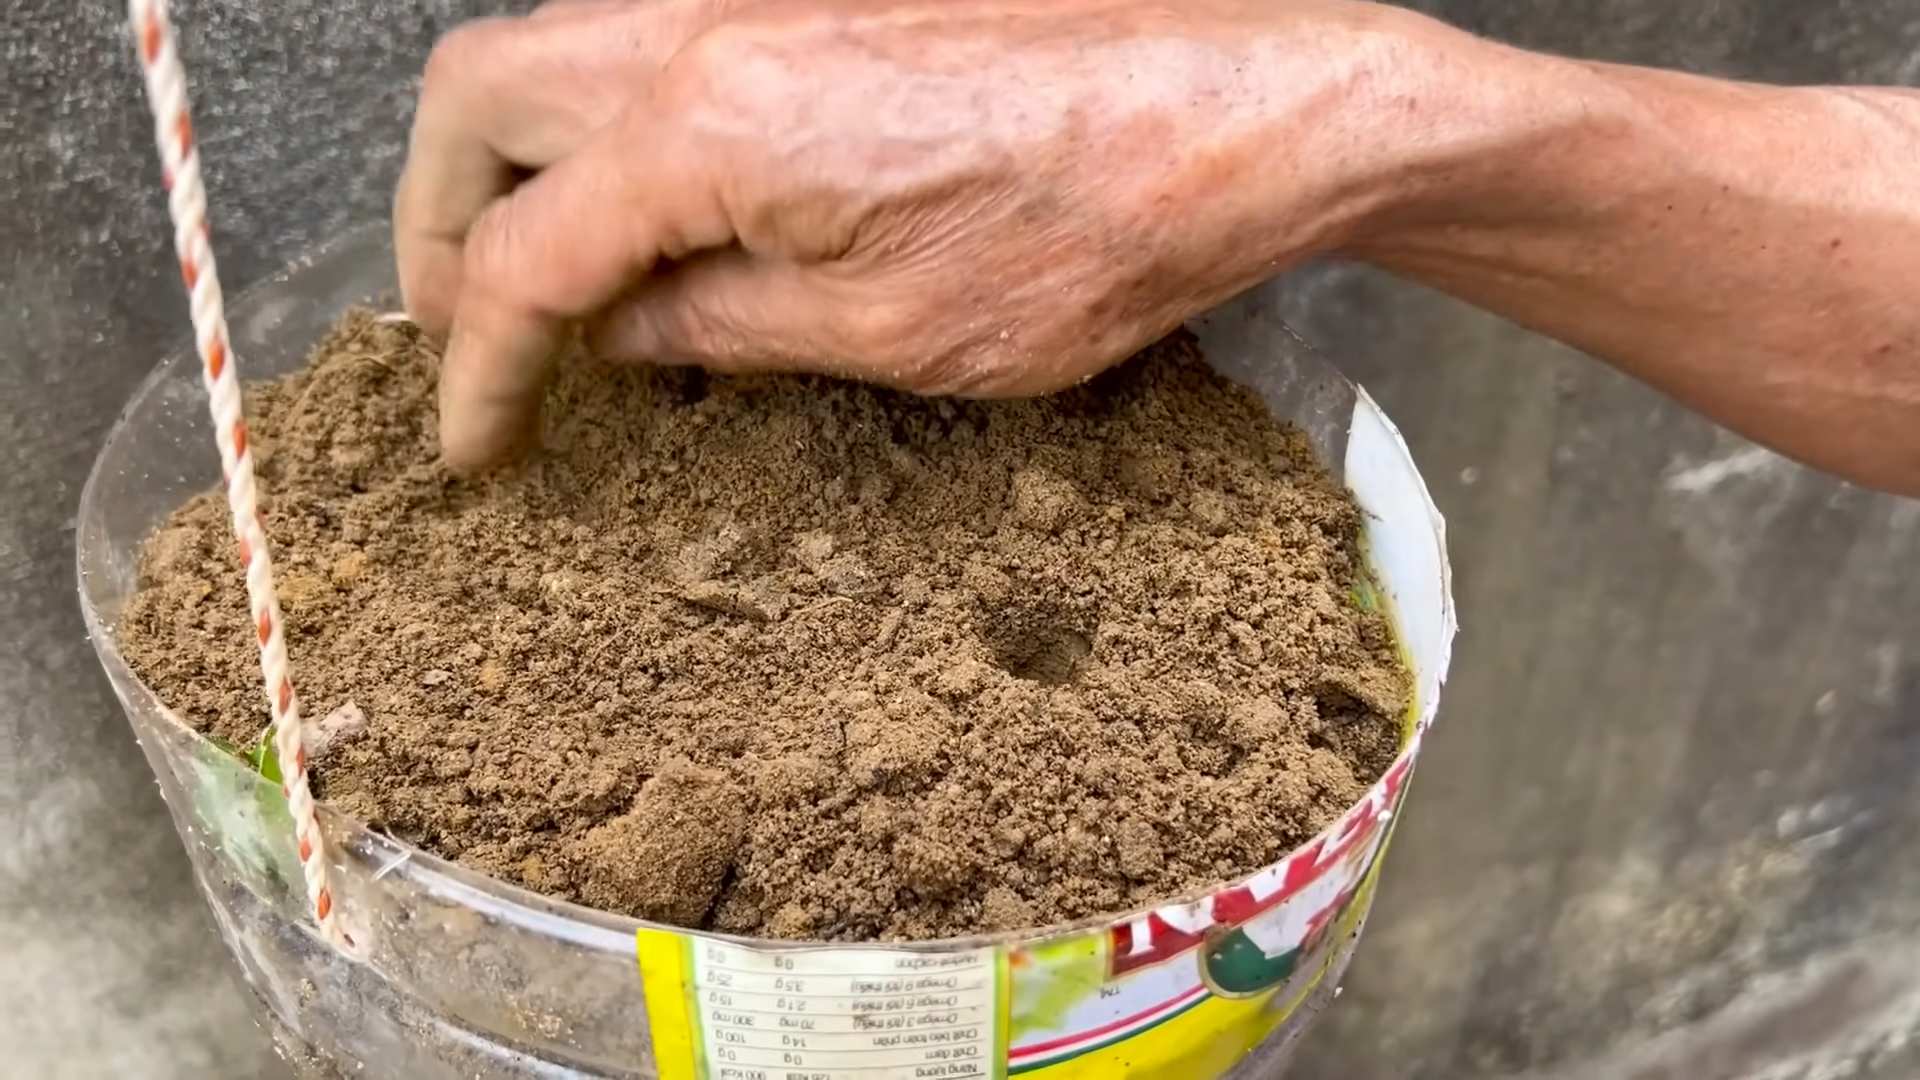
2. Prepare the Soil: Melons need well-drained, fertile soil. Amend your soil with compost or other organic matter to improve its drainage and nutrient content.
3. Plant the Seeds or Seedlings: Follow the instructions on your seed packet or seedling label for proper planting depth and spacing. I usually start my melon seeds indoors a few weeks before the last frost.
4. Water Thoroughly: Water the newly planted seeds or seedlings thoroughly.
Training and Supporting Your Melons
As your melon vines grow, you’ll need to train them to climb the trellis and provide support for the developing fruits.
1. Train the Vines: Gently guide the melon vines up the trellis, weaving them through the netting. You may need to use plant ties to secure the vines to the trellis in the early stages.
2. Support the Fruits: As the melons grow larger, they will need additional support to prevent them from breaking off the vine. You can use slings made from old t-shirts, pantyhose, or netting to support the fruits. Tie the slings to the trellis, ensuring they are securely supporting the weight of the melon.
3. Water Regularly: Melons need consistent watering, especially during hot weather. Water deeply and regularly, but avoid overwatering, which can lead to root rot.
4. Fertilize Regularly: Feed your melon plants with a balanced fertilizer every few weeks to promote healthy growth and fruit production.
5. Prune as Needed: Prune away any dead or diseased leaves or vines to improve air circulation and prevent the spread of disease.
Harvesting Your Melons
The moment you’ve been waiting for! Knowing when to harvest your melons is key to enjoying their sweet, juicy flavor.
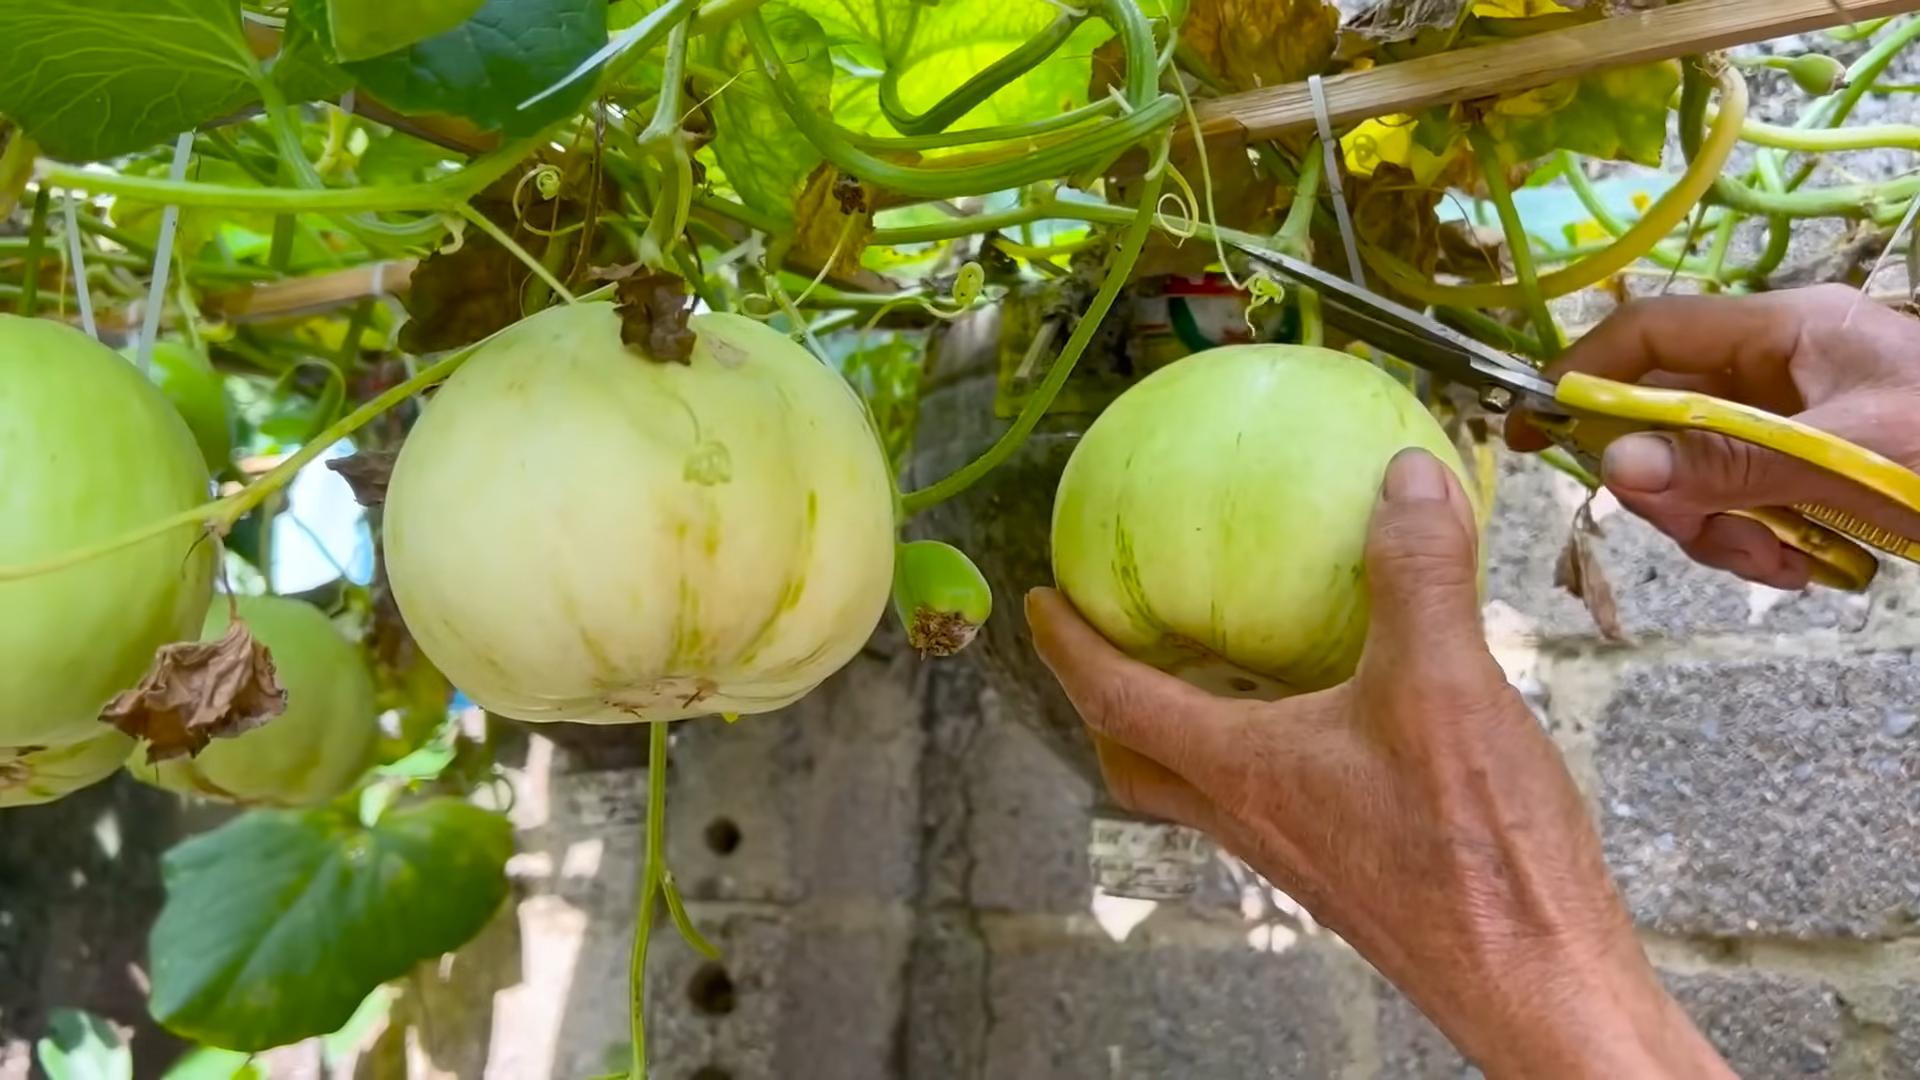
1. Check for Ripeness: Different melon varieties have different indicators of ripeness. Generally, ripe melons will have a sweet aroma, a slight softening at the blossom end, and a change in color. For watermelons, look for a dull thud when you tap them.
2. Harvest Carefully: Use a sharp knife or pruning shears to carefully cut the melon from the vine. Leave a short stem attached to the melon.
3. Enjoy! Savor the fruits of your labor! Enjoy your homegrown melons fresh, in salads, or in your favorite recipes.
Tips for Success
Here are a few extra tips to help you succeed with your vertical melon garden:
* Choose the Right Location: Melons need at least 6-8 hours of sunlight per day. Choose a location that receives plenty of sun.
* Protect from Pests: Keep an eye out for common melon pests, such as squash bugs and aphids. Use organic pest control methods to protect your plants.
* Rotate Your Crops: Avoid planting melons
Conclusion
So, there you have it! Growing melons in small spaces might seem like a daunting task, but with a little ingenuity and the right techniques, you can absolutely enjoy the sweet taste of homegrown melons, even if you’re limited to a balcony, patio, or small garden. This DIY trick of vertical gardening and strategic pruning is a game-changer for urban gardeners and anyone looking to maximize their yield in a limited area.
Why is this a must-try? Because it unlocks the potential of your small space! Instead of sprawling vines taking over your entire garden, you’re training them to grow upwards, saving valuable ground space for other vegetables, herbs, or flowers. Plus, the improved air circulation around the melons reduces the risk of fungal diseases, leading to healthier plants and a more abundant harvest. And let’s be honest, there’s something incredibly satisfying about nurturing a melon from seed to ripe fruit, especially when you’ve overcome the challenge of limited space.
But don’t stop there! Experiment with different melon varieties suited for smaller spaces. Consider bush varieties like ‘Minnesota Midget’ or ‘Sugar Baby,’ which naturally have a more compact growth habit. You can also try different support systems, such as trellises, netting, or even repurposed ladders. Get creative with your container choices too! Large fabric pots are excellent for drainage and aeration, while upcycled containers can add a touch of personality to your garden.
Another variation to consider is companion planting. Marigolds, for example, can help deter pests, while basil can improve the flavor of your melons. Research which plants thrive alongside melons and incorporate them into your small-space garden for a synergistic effect.
The key to success with this DIY trick is consistent monitoring and care. Regularly check your plants for pests or diseases, water them deeply and consistently, and provide them with the nutrients they need to thrive. Don’t be afraid to experiment and adjust your techniques as needed. Every garden is unique, and what works for one person may not work for another.
We wholeheartedly encourage you to give this DIY trick for growing melons in small spaces a try. It’s a rewarding experience that will not only provide you with delicious, homegrown melons but also enhance your gardening skills and creativity. And most importantly, don’t forget to share your experience! We’d love to hear about your successes, challenges, and any variations you’ve tried. Share your photos and stories on social media using #SmallSpaceMelons or leave a comment below. Let’s inspire each other to make the most of our limited spaces and enjoy the bounty of homegrown goodness! Your insights could help other gardeners achieve their melon-growing dreams, no matter how small their space may be. Happy gardening!
Frequently Asked Questions (FAQ)
What are the best melon varieties to grow in small spaces?
Choosing the right melon variety is crucial for success in a small space. Look for bush or dwarf varieties that naturally have a more compact growth habit. Some excellent options include:
* **’Minnesota Midget’:** A small, personal-sized cantaloupe that matures quickly and is well-suited for containers.
* **’Sugar Baby’:** A compact watermelon variety that produces small, sweet fruits.
* **’Bush Sugar Baby’:** An even more compact version of ‘Sugar Baby,’ specifically bred for container gardening.
* **’Jenny Lind’:** A unique cantaloupe with a turban-shaped rind and sweet, juicy flesh. It’s relatively compact and can be grown in a large container.
* **’Tigger’:** A visually striking melon with orange stripes and a sweet, aromatic flavor. It’s a smaller variety that can be trained to grow vertically.
Always check the seed packet or plant label for information on the plant’s mature size and growth habit before making your selection.
What size container do I need for growing melons?
Melons are heavy feeders and need plenty of space for their roots to develop. A minimum of 20-gallon container is recommended for most melon varieties. Larger is always better, as it provides more room for root growth and helps retain moisture. Choose a container that is at least 18 inches in diameter and 18 inches deep. Make sure the container has adequate drainage holes to prevent waterlogging. Fabric pots are a great option as they allow for excellent drainage and aeration.
How do I support the melons as they grow?
Supporting the melons is essential when growing them vertically. As the fruits develop, they can become quite heavy and may break the vine if not properly supported. Here are a few options:
* **Trellises:** A sturdy trellis is a great option for supporting melon vines. Choose a trellis that is tall enough to accommodate the mature height of the vine.
* **Netting:** You can use netting to create a support system for the melons. Simply attach the netting to a frame or structure and allow the vines to grow through it.
* **Slings:** For individual melons, you can create slings out of old t-shirts, pantyhose, or burlap. Tie the sling to the trellis or support structure to cradle the melon and prevent it from breaking off the vine.
* **Repurposed Ladders:** An old ladder can be repurposed as a unique and functional support system for melon vines.
How often should I water my melon plants?
Melons need consistent moisture, especially during fruit development. Water deeply and regularly, aiming to keep the soil consistently moist but not waterlogged. Check the soil moisture level daily, especially during hot, dry weather. Water when the top inch of soil feels dry to the touch. Avoid overhead watering, as this can increase the risk of fungal diseases. Instead, water at the base of the plant. Mulching around the base of the plant can help retain moisture and suppress weeds.
What kind of fertilizer do melons need?
Melons are heavy feeders and require a balanced fertilizer to thrive. Start with a fertilizer that is high in nitrogen to promote vegetative growth. Once the plants start to flower, switch to a fertilizer that is higher in phosphorus and potassium to support fruit development. You can also supplement with compost tea or other organic fertilizers. Follow the instructions on the fertilizer label carefully and avoid over-fertilizing, as this can damage the plants.
How do I prune melon vines in a small space?
Pruning is essential for managing melon vines in a small space. Pruning helps to improve air circulation, reduce the risk of diseases, and encourage fruit production. Here are some tips for pruning melon vines:
* **Remove suckers:** Suckers are small shoots that grow from the base of the plant. Remove them regularly to prevent them from competing with the main vine for resources.
* **Pinch off the ends of the vines:** Pinching off the ends of the vines encourages the plant to produce more side shoots, which will bear fruit.
* **Remove yellowing or damaged leaves:** Remove any leaves that are yellowing, browning, or damaged to prevent the spread of diseases.
* **Limit the number of fruits:** If you want to grow larger melons, you may need to limit the number of fruits on each vine. Remove some of the smaller fruits to allow the remaining fruits to develop fully.
How do I know when my melons are ripe?
Knowing when your melons are ripe is key to enjoying their full flavor. Here are some signs to look for:
* **Color change:** The rind of the melon will change color as it ripens. For example, watermelons will often develop a yellowish spot on the underside where they rest on the ground.
* **Stem separation:** The stem of the melon will begin to separate from the vine when it is ripe. You should be able to gently tug on the melon and it will easily detach from the vine.
* **Sound:** Tap on the melon and listen for a hollow sound. A ripe melon will sound hollow when tapped.
* **Aroma:** Ripe cantaloupes will have a sweet, musky aroma.
What are some common pests and diseases that affect melons?
Melons can be susceptible to a variety of pests and diseases. Here are some common problems and how to address them:
* **Aphids:** These small, sap-sucking insects can weaken plants and spread diseases. Control aphids with insecticidal soap or neem oil.
* **Squash bugs:** These pests can damage leaves and stems. Handpick squash bugs or use insecticidal soap.
* **Powdery mildew:** This fungal disease causes a white, powdery coating on the leaves. Improve air circulation and treat with a fungicide.
* **Fusarium wilt:** This soilborne disease can cause wilting and death. Choose disease-resistant varieties and practice crop rotation.
Regularly inspect your plants for pests and diseases and take action promptly to prevent problems from spreading.
Can I grow melons indoors?
While it’s more challenging, you can attempt growing melons in small spaces indoors, provided you can meet their needs for sunlight and pollination. You’ll need a very sunny location (ideally a south-facing window) or grow lights. Hand-pollination will be necessary, as there won’t be any bees or other pollinators indoors. Ensure good air circulation to prevent fungal diseases. Choose a compact variety and use a large container.

Leave a Comment