

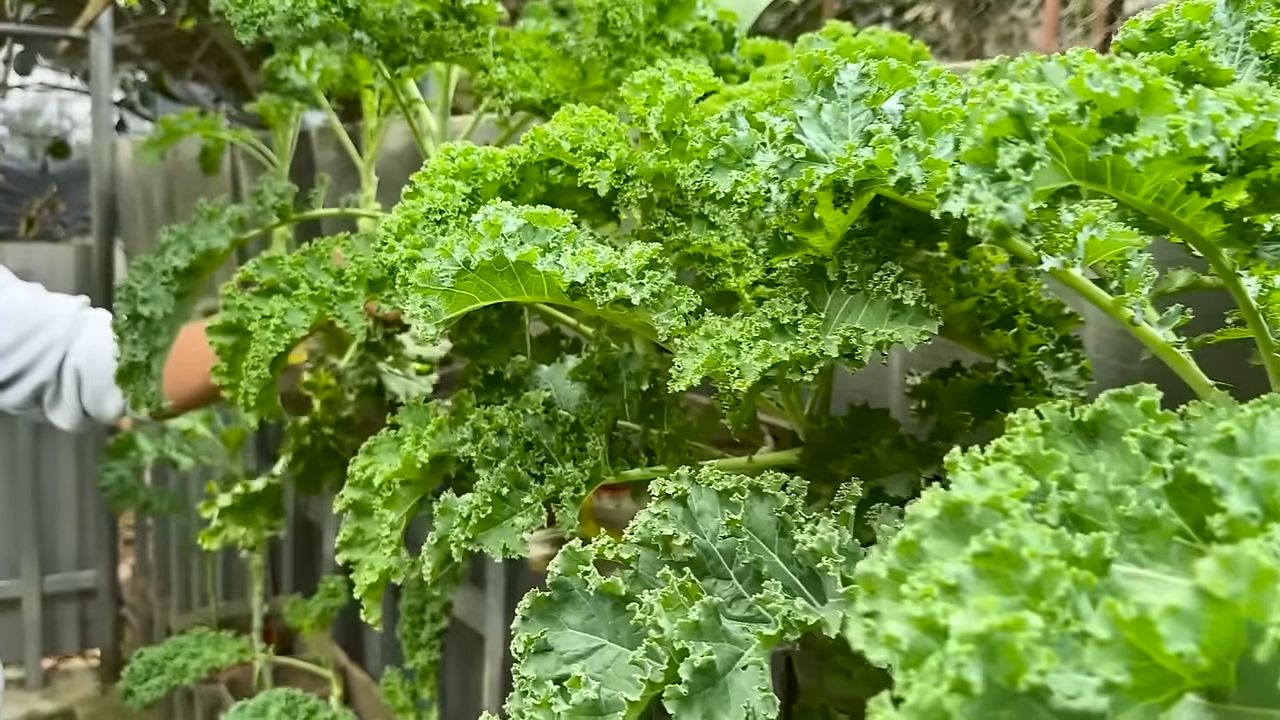
Growing Kale in Bottles: Sounds a little unconventional, right? But trust me, this quirky DIY project is about to revolutionize your small-space gardening game! Forget sprawling garden beds and endless weeding; we’re taking kale cultivation vertical and totally portable.
For centuries, humans have sought innovative ways to cultivate food, adapting to diverse environments and limited resources. From ancient terraced farming to modern hydroponics, the spirit of ingenuity has always been at the heart of gardening. This bottle gardening method taps into that same resourceful energy, offering a sustainable and space-saving solution for urban dwellers and gardening enthusiasts alike.
Why should you try growing kale in bottles? Well, imagine fresh, vibrant kale just steps from your kitchen, ready to be tossed into salads, smoothies, or stir-fries. No more trips to the grocery store for wilted greens! This DIY project is not only incredibly rewarding but also a fantastic way to reduce waste by repurposing plastic bottles. Plus, it’s a fun and engaging activity for the whole family. I’m excited to show you how easy it is to transform discarded bottles into thriving mini-kale gardens. Let’s get started!
Growing Cabbage in Bottles: A DIY Garden Project for Small Spaces
Hello dear garden friends! Do you also have the problem of wanting fresh vegetables but not having a huge garden available? Don’t worry, I have a great solution for you: growing cabbage in bottles! Yes, you read that right. With a few plastic bottles, some soil, and of course, cabbage seeds, you can create your own little cabbage patch, even on the smallest balcony or windowsill. I’ll show you how!
What you need:
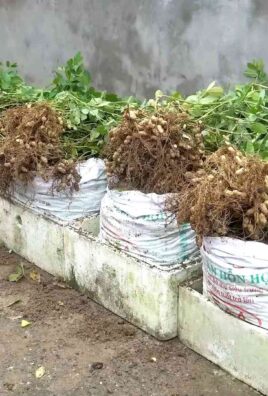
- Plastic bottles: 1.5-liter or 2-liter bottles are best. Make sure they are clean and empty.
- Cabbage seeds: There are many different types of cabbage suitable for growing in bottles. I recommend kale, Lacinato kale (dinosaur kale), or even mini Brussels sprouts.
- Soil: It’s best to use high-quality potting soil or a mixture of garden soil and compost.
- Scissors or knife: For cutting the bottles.
- Drill or nail: To make drainage holes.
- Watering can or spray bottle: For watering the plants.
- Optional: Fertilizer (organic or mineral) for nutrient supply.
- Optional: Small stones or clay shards for drainage.
Preparing the Bottles:
- Cleaning: First, you need to clean the plastic bottles thoroughly. Remove all labels and rinse them with warm water and dish soap. Make sure no soap residue is left behind.
- Cutting: Now for the fun part! Cut the bottles with scissors or a knife. You have two options:
- Option 1: Cut the bottle about 10-15 cm below the neck. The top part will later be used as a kind of mini-greenhouse.
- Option 2: Cut the bottle in the middle. The top part is turned upside down and placed into the bottom part, creating a self-watering pot.
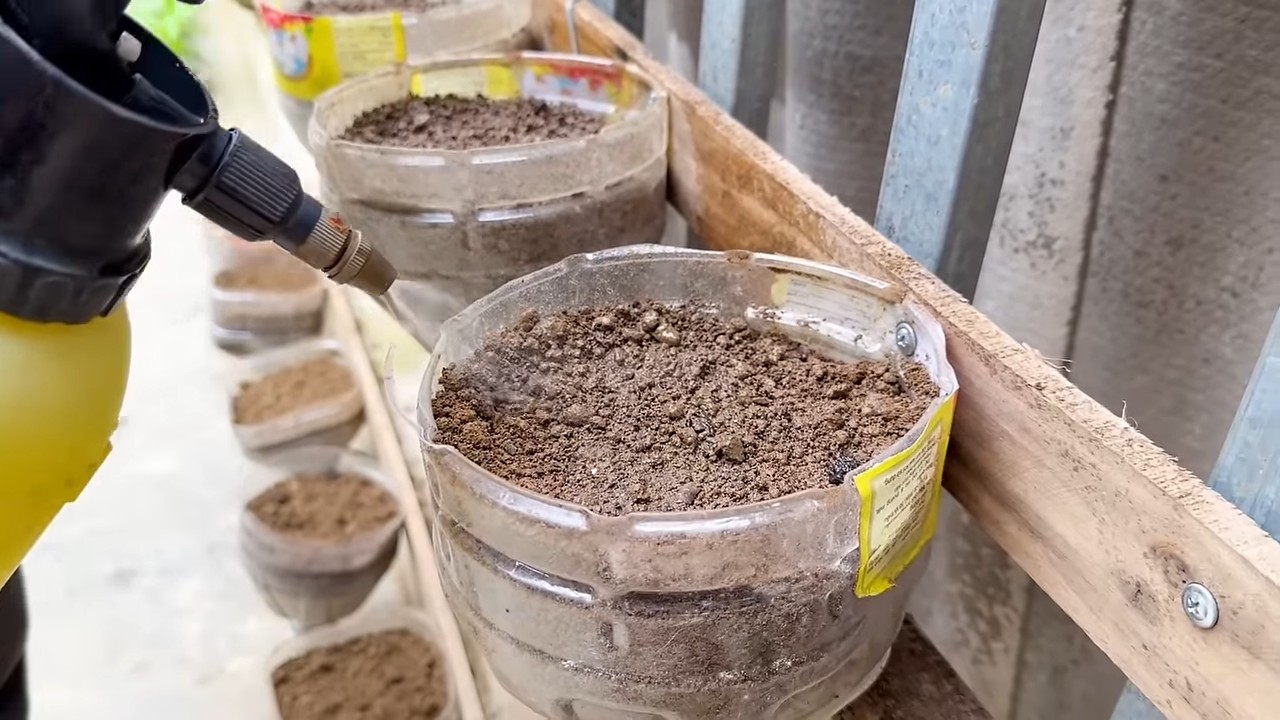
- Drainage holes: It is essential to make drainage holes! Drill or poke several holes in the bottom of the bottles with a nail. This is important so that excess water can drain away and the roots do not rot.
- Optional: Drainage layer: To improve drainage, you can place a layer of small stones or clay shards at the bottom of the bottles before filling them with soil.
Sowing the Cabbage Seeds:
- Fill with soil: Fill the prepared bottles with soil. Leave about 2-3 cm of space to the rim.
- Sow the seeds: Distribute the cabbage seeds evenly over the soil. Make sure they are not too close together. The exact number of seeds depends on the type of cabbage and the size of the bottle. I usually sow 3-5 seeds per bottle.
- Cover with soil: Cover the seeds with a thin layer of soil (approx. 0.5-1 cm).
- Water in: Water the soil gently with a watering can or spray bottle. The soil should be moist, but not wet.
- Mini-greenhouse (optional): If you cut the bottles as in Option 1, you can place the top part of the bottle upside down over the bottom part. This creates a mini-greenhouse that speeds up germination. However, make sure you ventilate regularly to avoid mold.
Caring for the Cabbage Plants:
- Location: Place the bottles in a bright and sunny location. Cabbage needs a lot of light to grow well.
- Watering: Water the plants regularly, but not too much. The soil should always be slightly moist. Avoid waterlogging.
- Fertilizing: After about 2-3 weeks, when the plants are a little larger, you can start fertilizing. Use an organic or mineral fertilizer for vegetables. Pay attention to the dosage instructions on the package.
- Thinning out: If several plants are growing in one bottle, you need to thin them out. This means you remove the weakest plants so that the strongest plants have enough space and nutrients.
- Pest control: Watch out for pests like aphids or cabbage white caterpillars. If necessary, you can use organic pesticides.
- Harvesting: Depending on the type of cabbage, you can start harvesting after a few weeks or months. Kale and Lacinato kale can be harvested gradually by picking the outer leaves. Mini Brussels sprouts are harvested when the sprouts are firm and closed.
Special Tips for Growing in Bottles:
- Choose the right cabbage variety: Not all cabbage varieties are equally suitable for growing in bottles. Choose varieties that do not grow too large and do well in pots.
- Sufficient space: Even if you grow cabbage in bottles, the plants need enough space. Do not place the bottles too close together.
- Regular repotting: If the plants become too large for the bottles, you can repot them into larger pots.
- Creative design: You can also paint or decorate the bottles to make your little cabbage garden even more beautiful.
Challenges and Solutions:
- Lack of space: If you have very little space, you can also hang the bottles on a wall or railing. There are special holders for plastic bottles.
- Pests: Pests can be a problem, especially when the plants are close together. Check the plants regularly and remove pests immediately.
- Nutrient deficiency: If the leaves turn yellow or the plants grow poorly, this can be a sign of a nutrient deficiency. Fertilize the plants regularly.
- Overwatering: Overwatering can lead to root rot. Make sure the soil is well-drained and do not water too much.
Additional Ideas:
- Vertical garden: Build a vertical garden from several bottles. This saves space and looks great.
- Combination with other plants: Combine the cabbage with other plants that have similar requirements, e.g., herbs or lettuce.
- Upcycling: Use old plastic bottles to contribute to environmental protection.
I hope this guide has inspired you to create your own little cabbage garden in bottles. It’s a great project that is fun and rewards you with fresh vegetables. Happy gardening!
Conclusion
So, there you have it! Growing kale in bottles isn’t just a quirky gardening experiment; it’s a practical, space-saving, and surprisingly effective way to enjoy fresh, homegrown greens, even if you’re short on space or dealing with less-than-ideal soil conditions. We’ve walked you through the entire process, from selecting the right bottles and preparing your growing medium to planting your kale seedlings and providing them with the care they need to thrive.
But why is this DIY trick a must-try? Beyond the obvious benefits of fresh, organic kale at your fingertips, growing in bottles offers several compelling advantages. It’s an incredibly accessible method, requiring minimal investment and readily available materials. It’s perfect for apartment dwellers, balcony gardeners, or anyone looking to maximize their yield in a small area. Plus, it’s a fantastic way to recycle plastic bottles, turning potential waste into a productive and beautiful mini-garden.
And the possibilities don’t stop there! Feel free to experiment with different varieties of kale. Curly kale, Lacinato kale (also known as dinosaur kale), and Red Russian kale all adapt well to container growing. You can also try companion planting. Consider adding herbs like thyme or rosemary to your bottles; they can help deter pests and enhance the flavor of your kale. For a decorative touch, paint your bottles or arrange them in creative ways to add a pop of color to your space. You could even create a vertical kale garden by stacking the bottles!
Remember to monitor your kale plants regularly for signs of pests or diseases. A simple solution of insecticidal soap can usually take care of most common problems. And don’t be afraid to adjust your watering schedule based on the weather conditions and the needs of your plants.
Ultimately, the success of your bottle kale garden depends on your willingness to experiment and learn. Don’t be discouraged if you encounter a few challenges along the way. Gardening is a journey, and every mistake is an opportunity to grow (pun intended!).
We are confident that you will find this method of growing kale incredibly rewarding. The satisfaction of harvesting your own fresh, nutritious greens is truly unmatched. So, gather your bottles, prepare your soil, and get ready to embark on this exciting gardening adventure!
We encourage you to try this DIY trick and share your experience with us! Post photos of your bottle kale gardens on social media using [Your Hashtag Here] and let us know what you learned along the way. We can’t wait to see your creations and hear your success stories! Happy gardening!
Frequently Asked Questions (FAQ)
1. What type of bottles are best for growing kale?
The ideal bottles are sturdy plastic bottles, such as those used for water, soda, or juice. Look for bottles that are at least 2 liters in size to provide enough space for the kale roots to develop. Avoid bottles that are too thin or flimsy, as they may not be able to support the weight of the soil and plants. Clear or translucent bottles are preferable, as they allow you to monitor the moisture level of the soil. Thoroughly clean the bottles with soap and water before using them to remove any residue.
2. What kind of soil should I use for growing kale in bottles?
A well-draining potting mix is essential for growing healthy kale in bottles. Avoid using garden soil, as it can become compacted and prevent proper drainage. A good potting mix will typically contain a blend of peat moss, perlite, and vermiculite. You can also add compost to enrich the soil and provide essential nutrients for your kale plants. Consider using an organic potting mix to ensure that your kale is free from harmful chemicals.
3. How often should I water my kale plants in bottles?
The watering frequency will depend on several factors, including the weather conditions, the size of the bottles, and the type of potting mix you are using. As a general rule, water your kale plants when the top inch of soil feels dry to the touch. Avoid overwatering, as this can lead to root rot. During hot, dry weather, you may need to water your plants more frequently. Check the moisture level of the soil regularly and adjust your watering schedule accordingly. Ensure the bottles have adequate drainage holes to prevent waterlogging.
4. How much sunlight does kale need when grown in bottles?
Kale thrives in full sun, which means it needs at least 6 hours of direct sunlight per day. If you are growing your kale indoors, place the bottles near a sunny window or use grow lights to provide supplemental lighting. If you live in a hot climate, you may need to provide some shade during the hottest part of the day to prevent the leaves from scorching. Monitor your kale plants for signs of sun stress, such as wilting or yellowing leaves, and adjust their location accordingly.
5. What kind of fertilizer should I use for kale grown in bottles?
Kale is a heavy feeder, so it benefits from regular fertilization. Use a balanced, water-soluble fertilizer that is specifically formulated for vegetables. Follow the instructions on the fertilizer package for application rates. You can also use organic fertilizers, such as compost tea or fish emulsion. Fertilize your kale plants every 2-3 weeks during the growing season to ensure they receive the nutrients they need to thrive.
6. How do I protect my kale plants from pests and diseases?
Regularly inspect your kale plants for signs of pests or diseases. Common pests that affect kale include aphids, cabbage worms, and flea beetles. You can control these pests by handpicking them off the plants, using insecticidal soap, or applying neem oil. Diseases that can affect kale include powdery mildew and black rot. Prevent these diseases by providing good air circulation, avoiding overwatering, and removing any infected leaves.
7. When can I harvest my kale from the bottles?
You can start harvesting kale leaves when they are about 4-6 inches long. Harvest the outer leaves first, leaving the inner leaves to continue growing. Avoid harvesting more than one-third of the plant at a time to allow it to recover. Kale leaves are most tender and flavorful when they are young. You can harvest kale throughout the growing season, even after the first frost.
8. Can I grow other vegetables in bottles besides kale?
Yes, you can grow a variety of other vegetables in bottles, including lettuce, spinach, herbs, and even some smaller varieties of tomatoes and peppers. The key is to choose vegetables that have shallow root systems and don’t require a lot of space. Be sure to provide adequate drainage and nutrients for your chosen vegetables.
9. How do I overwinter my kale plants in bottles?
Kale is a relatively hardy vegetable that can tolerate light frosts. In mild climates, you may be able to overwinter your kale plants outdoors. In colder climates, you can move the bottles indoors to a sunny location or provide them with protection from the cold, such as a cold frame or greenhouse. Reduce watering during the winter months and avoid fertilizing your plants.
10. Is growing kale in bottles organic?
Yes, growing kale in bottles can be organic if you use organic potting mix, organic fertilizers, and organic pest control methods. Avoid using synthetic fertilizers, pesticides, and herbicides. By following organic gardening practices, you can ensure that your kale is free from harmful chemicals and safe to eat.
Leave a Comment