

Growing Hibiscus Sabdariffa, also known as Roselle, might sound exotic, but trust me, it’s more achievable than you think! Have you ever dreamt of sipping on homemade hibiscus tea, bursting with vibrant color and tangy flavor, all sourced directly from your own backyard? Well, stop dreaming and start doing! This DIY guide is your passport to cultivating this beautiful and beneficial plant right at home.
Hibiscus Sabdariffa boasts a rich history, deeply intertwined with cultures across the globe. From its origins in West Africa, where it was prized for its medicinal properties and culinary uses, to its adoption in Southeast Asia and the Americas, this plant has been a staple for centuries. Imagine, you’re not just growing a plant; you’re connecting with a global heritage!
But why should *you* bother with growing Hibiscus Sabdariffa? In today’s world, where we’re increasingly conscious of what we consume, having control over our food sources is more important than ever. Plus, store-bought hibiscus tea often lacks the freshness and potency of the homemade variety. This DIY project empowers you to create a sustainable source of delicious tea, jams, and even natural dyes, all while adding a touch of tropical beauty to your garden. Let’s dive in and unlock the secrets to successfully cultivating this amazing plant!
Growing Hibiscus Sabdariffa Yourself: A Comprehensive DIY Guide
Hello garden friends! I’m so excited to take you on a journey today where we’ll grow Hibiscus Sabdariffa, also known as Roselle or African Mallow, together. This beautiful plant is not only a real eye-catcher in the garden, but also provides the basis for delicious hibiscus tea and other delicacies. Don’t worry, it’s easier than you think! Let’s get started!
What you need for growing Hibiscus Sabdariffa:
- Hibiscus Sabdariffa seeds: Best sourced from a reputable supplier.
- Seed starting pots or trays: For starting indoors.
- Seed starting soil: Light and low in nutrients.
- Garden soil: For later transplanting.
- Compost or organic fertilizer: For a good supply of nutrients.
- Watering can or spray bottle: For watering.
- Location: A sunny and warm spot in the garden or on the balcony.
- Patience: Because good things take time!
The Preparation: The Key to Success
Before we start with the actual cultivation, good preparation is the be-all and end-all. Here are the steps you should follow:
- Select seeds: Make sure you buy high-quality seeds of Hibiscus Sabdariffa. They should be fresh and viable.
- Determine the location: Hibiscus Sabdariffa loves the sun! Choose a location that receives at least 6 hours of direct sunlight per day. A warm, sheltered place is ideal.
- Prepare the soil: The soil should be well-drained and rich in nutrients. Loosen the soil thoroughly and mix in compost or organic fertilizer.
Sowing and Starting Indoors: The Start in Life
Starting indoors is especially important if you live in a region with shorter summers. This gives your hibiscus plants a head start.
- Prepare seed pots: Fill the seed starting pots or trays with seed starting soil.
- Sow seeds: Place the seeds about 1 cm deep in the soil and cover them lightly with soil.
- Water: Moisten the soil carefully with a spray bottle. It should be moist, but not wet.
- Keep warm: Place the seed pots in a warm place (approx. 20-25°C). A mini-greenhouse or a windowsill above the heater are ideal.
- Keep moist: Keep the soil evenly moist, but avoid waterlogging.
- Be patient: Germination can take 1-3 weeks. As soon as the first seedlings appear, move the pots to a brighter place.
Transplanting: Out into Freedom!
Once the young hibiscus plants are strong enough (approx. 10-15 cm high), they can be transplanted outdoors.
- Harden off: Before you plant the plants outdoors, you should harden them off for a few days. Put them outside for a few hours during the day and bring them back in at night. This way they slowly get used to the new conditions.
- Prepare the planting hole: Dig a sufficiently large planting hole that is twice as wide and deep as the root ball.
- Insert plants: Carefully place the hibiscus plants in the planting holes and fill them with garden soil.
- Water thoroughly: Water the plants thoroughly.
- Keep your distance: Make sure the plants have enough space to develop. A distance of 60-90 cm is ideal.
Care: So Your Hibiscus Thrives
Proper care is crucial for a rich harvest. Here are some tips:
- Watering: Hibiscus Sabdariffa needs regular watering, especially during the flowering period. Make sure the soil is always slightly moist, but avoid waterlogging.
- Fertilizing: Fertilize the plants regularly with an organic fertilizer or compost. This will provide them with all the important nutrients.
- Pruning: Regular pruning promotes growth and flowering. Regularly remove wilted flowers and dry leaves.
- Pest protection: Regularly check the plants for pests such as aphids or spider mites. If necessary, you can use natural pesticides.
- Overwintering: Hibiscus Sabdariffa is not winter-hardy. If you live in a region with cold winters, you should transplant the plants into pots in the fall and overwinter them in a bright, cool place.
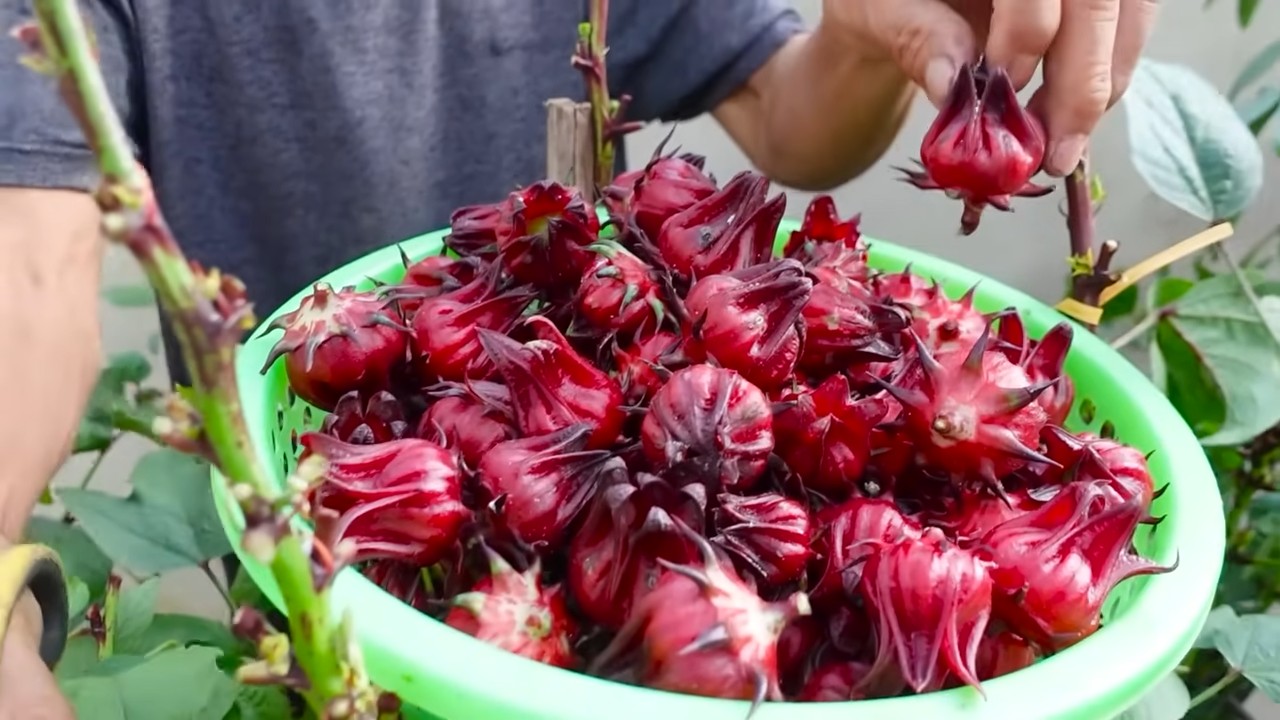
The Harvest: The Reward for Your Efforts
The harvest time usually begins in late summer or autumn, when the flower calyxes have turned red and fleshy.
- Determine harvest time: The calyxes are ripe when they can be easily detached from the stem.
- Harvest calyxes: Carefully cut the calyxes with scissors.
- Processing: The calyxes can be used fresh or dried. For hibiscus tea, they are usually dried.
Use: Versatile and Delicious
Hibiscus Sabdariffa is incredibly versatile and can be used for various purposes:
- Hibiscus tea: The dried calyxes are the basis for a refreshing and healthy hibiscus tea.
- Jam: A delicious jam can be made from the fresh calyxes.
- Syrup: Hibiscus syrup is a great ingredient for cocktails and desserts.
- Salads: The young leaves can be used raw in salads.
- Culinary dishes: In some countries, the calyxes are also used in savory dishes.
Additional Tips for Successful Cultivation:
- Test the soil: A soil test can help you determine the pH and nutrient content of your soil. This way you can prepare the soil optimally.
- Mulching: A layer of mulch made of straw or bark mulch helps to retain moisture in the soil and suppress weeds.
- Wind protection: If your garden is very windy, you should protect the hibiscus plants with a windbreak.
- Regular inspection: Regularly check the plants for signs of disease or pests. The sooner you identify problems, the easier they are to solve.
- Documentation: Keep a garden diary in which you record your experiences with growing Hibiscus Sabdariffa. This way you can learn from year to year.
Common Problems and Solutions:
- Yellow leaves: Can indicate a nutrient deficiency or overwatering. Fertilize the plants and ensure good drainage.
- Aphids: Combat aphids with natural pesticides such as neem oil or soap solution.
- Spider mites: Spider mites love dry air. Increase the humidity and combat them with predatory mites or neem oil.
- No flowers: Could be due to too little sun or a lack of nutrients. Move the plants to a sunnier location and fertilize them regularly.
Conclusion
So, there you have it! Growing Hibiscus Sabdariffa, also known as Roselle, at home is not only achievable but also incredibly rewarding. From the vibrant crimson calyces that promise a tangy, refreshing tea to the sheer joy of nurturing a plant from seed to harvest, this DIY project offers a unique connection to nature and a sustainable source of deliciousness.
Why is this a must-try? Because it empowers you to control the quality of your Roselle. You know exactly what goes into your plants – no hidden pesticides or questionable farming practices. Plus, the flavor of homegrown Roselle is simply unmatched. It’s fresher, more vibrant, and bursting with the unique terroir of your garden. Imagine the satisfaction of serving a homemade hibiscus tea to your friends and family, knowing you cultivated every ingredient yourself.
Beyond the classic hibiscus tea, the possibilities are endless. Experiment with Roselle jam, adding its tartness to sweeten your morning toast. Infuse it into syrups for cocktails or mocktails, creating a signature drink that’s both beautiful and delicious. Dry the calyces and grind them into a powder to add a vibrant color and flavor boost to baked goods. You can even use the young leaves in salads or as a cooked green, adding a slightly acidic note to your meals.
Consider these variations to tailor your Roselle growing experience:
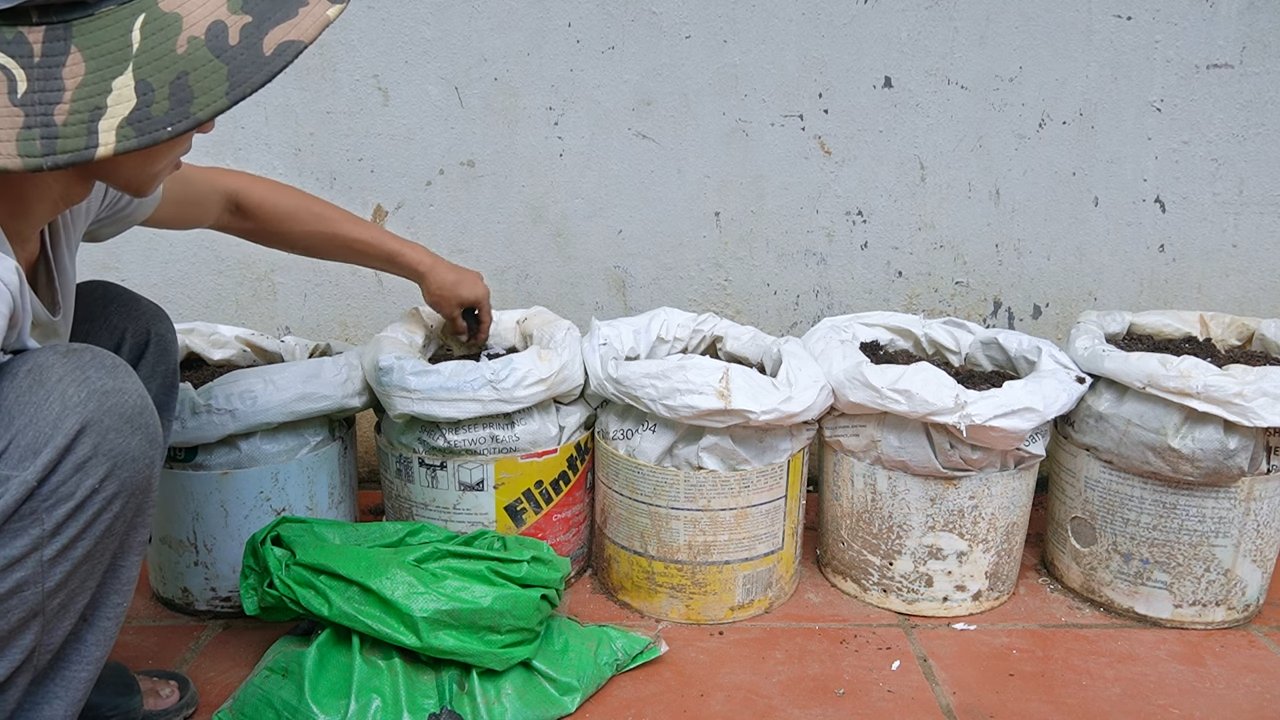
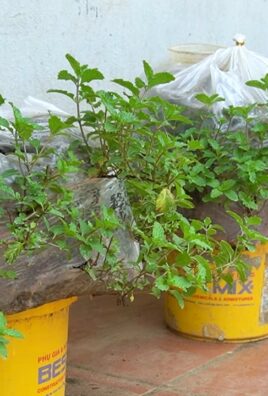
* Container Gardening: If you have limited space, Roselle thrives in large containers. Choose a pot at least 15 gallons in size and ensure it has excellent drainage. This allows you to move the plant indoors during colder months in regions with harsh winters.
* Companion Planting: Roselle benefits from companion planting. Basil, marigolds, and nasturtiums can help deter pests and attract beneficial insects.
* Soil Amendments: While Roselle isn’t overly fussy about soil, amending it with compost or well-rotted manure will provide essential nutrients and improve drainage.
* Different Varieties: Explore different varieties of Hibiscus Sabdariffa. Some are known for their larger calyces, while others have a more intense flavor. Experiment to find your favorite!
Don’t be intimidated by the prospect of growing your own Roselle. It’s a relatively low-maintenance plant that rewards your efforts with an abundance of flavorful calyces. The key is to provide it with plenty of sunlight, well-drained soil, and consistent watering.
We wholeheartedly encourage you to embark on this DIY adventure. Start small, learn as you go, and don’t be afraid to experiment. The rewards are well worth the effort.
And most importantly, we want to hear about your experience! Share your photos, tips, and challenges in the comments below. Let’s create a community of Roselle growers and learn from each other. What varieties did you try? What recipes did you create? What challenges did you overcome? Your insights will help others succeed in their own Roselle growing journey. Let’s cultivate a world filled with the vibrant color and tangy flavor of homegrown Hibiscus Sabdariffa!
Frequently Asked Questions (FAQ)
What is the best time of year to plant Hibiscus Sabdariffa?
The ideal time to plant Hibiscus Sabdariffa is in the spring, after the last frost has passed and the soil has warmed up. Roselle thrives in warm weather and requires a long growing season to produce a bountiful harvest. If you live in a region with a short growing season, you can start the seeds indoors 6-8 weeks before the last frost and transplant them outdoors once the weather is suitable.
How much sunlight does Roselle need?
Hibiscus Sabdariffa requires at least 6-8 hours of direct sunlight per day to thrive. Insufficient sunlight can result in leggy growth, reduced flowering, and smaller calyces. Choose a location in your garden that receives ample sunlight throughout the day. If you are growing Roselle in containers, you can move the plants to follow the sun.
What type of soil is best for growing Roselle?
Roselle prefers well-drained soil that is rich in organic matter. The ideal soil pH is between 6.0 and 6.5. Before planting, amend the soil with compost or well-rotted manure to improve drainage and fertility. Avoid heavy clay soils, as they can become waterlogged and lead to root rot. If you have clay soil, consider growing Roselle in raised beds or containers.
How often should I water my Roselle plants?
Water Roselle plants regularly, especially during hot and dry weather. The soil should be kept consistently moist but not waterlogged. Water deeply, allowing the water to penetrate the root zone. Avoid overhead watering, as it can promote fungal diseases. Mulching around the plants can help retain moisture and suppress weeds.
How do I fertilize my Roselle plants?
Roselle benefits from regular fertilization, especially during the growing season. Use a balanced fertilizer with equal amounts of nitrogen, phosphorus, and potassium. Apply the fertilizer according to the package instructions. You can also use organic fertilizers, such as compost tea or fish emulsion. Avoid over-fertilizing, as it can lead to excessive vegetative growth and reduced flowering.
When is the best time to harvest Roselle calyces?
The best time to harvest Roselle calyces is when they are plump, firm, and bright red. This typically occurs 5-6 months after planting. Harvest the calyces before they become dry and woody. Use sharp scissors or pruning shears to cut the calyces from the plant. Leave a small portion of the stem attached to the calyx.
How do I dry Roselle calyces?
To dry Roselle calyces, spread them out in a single layer on a clean, dry surface. Place them in a well-ventilated area, away from direct sunlight. You can also use a dehydrator to dry the calyces. The drying process typically takes 1-2 weeks, depending on the humidity and temperature. The calyces are dry when they are brittle and snap easily. Store the dried calyces in an airtight container in a cool, dark place.
Are there any pests or diseases that affect Roselle?
Roselle is generally resistant to pests and diseases, but it can be susceptible to aphids, whiteflies, and root rot. Aphids and whiteflies can be controlled with insecticidal soap or neem oil. Root rot can be prevented by planting Roselle in well-drained soil and avoiding overwatering. Regularly inspect your plants for signs of pests or diseases and take action promptly to prevent them from spreading.
Can I grow Roselle indoors?
While Roselle prefers to be outdoors, it can be grown indoors if you provide it with enough light and warmth. Place the plant near a sunny window or use grow lights to supplement the natural light. Ensure the plant receives at least 6-8 hours of light per day. Keep the soil consistently moist but not waterlogged. Provide good air circulation to prevent fungal diseases.
Is Hibiscus Sabdariffa safe to consume?
Hibiscus Sabdariffa is generally safe to consume in moderation. However, some people may experience side effects, such as stomach upset or allergic reactions. If you have any concerns, consult with your doctor before consuming Roselle. Pregnant and breastfeeding women should also consult with their doctor before consuming Roselle.
Leave a Comment