

Growing healthy bean plants can feel like a daunting task, especially if you’re new to the world of home gardening. But fear not, fellow plant enthusiasts! I’m here to share some incredible DIY tricks and hacks that will transform your bean-growing experience from frustrating to fruitful. Imagine harvesting baskets overflowing with crisp, delicious beans, all thanks to a few simple techniques you can implement right in your own backyard.
Beans have a rich history, dating back thousands of years. They’ve been a staple food in cultures across the globe, providing essential nutrients and playing a vital role in sustainable agriculture. From ancient civilizations to modern-day gardens, beans have consistently proven their worth. But let’s be honest, sometimes they need a little help to thrive!
Why do you need these DIY tricks? Well, growing healthy bean plants isn’t always straightforward. Pests, diseases, and poor soil conditions can all sabotage your efforts. These hacks will empower you to overcome common challenges, optimize your growing environment, and ultimately, enjoy a bountiful bean harvest. I’ll guide you through easy-to-follow steps, using readily available materials, so you can create a thriving bean patch that will be the envy of the neighborhood. Let’s get our hands dirty and unlock the secrets to successful bean cultivation!
Bean Bliss: Your DIY Guide for a Bountiful Harvest
Hey garden friends! I love harvesting fresh beans straight from the garden. The taste is simply unbeatable! And the best part? It’s not that hard to grow healthy and productive bean plants. In this article, I’ll show you step-by-step how you can do it too. Let’s get started!
The Preparation: The Key to Success
Before we start planting, good preparation is essential. Here are the most important points you should consider:
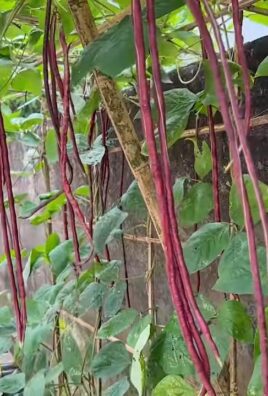
- Choosing the right bean variety: There are bush beans, pole beans, and runner beans. Bush beans are compact and ideal for smaller gardens. Pole beans need a trellis but yield a harvest over a longer period. Runner beans are not only delicious but also beautiful to look at. Consider which variety best suits your garden and your needs.
- The perfect location: Beans love the sun! Choose a sunny location with at least six hours of direct sunlight per day. The soil should be loose, well-draining, and rich in nutrients.
- Preparing the soil: Beans are heavy feeders, meaning they need a lot of nutrients. Loosen the soil thoroughly and work in compost or well-rotted manure. This improves the soil structure and provides the plants with important nutrients. Avoid fresh manure, as it contains too much nitrogen and promotes leaf growth but inhibits flowering.
- The right time: Beans are sensitive to frost. Wait to sow until there is no more danger of frost. This is usually the case from mid-May onwards. You can also start the beans indoors to bring the harvest time forward.
Sowing: How to Get the Beans in the Ground
Now let’s get down to it! Here I’ll show you how to sow the beans correctly:
- Soaking beans (optional): Soaking the beans in water overnight can speed up germination. Simply place the beans in a bowl of water and let them swell overnight.
- Sowing outdoors: Use a hoe or a stick to draw furrows in the prepared soil. The distance between the furrows should be about 40-60 cm, depending on the bean variety.
- Placing the beans: Place the beans in the furrows. The distance between the beans should be about 5-10 cm for bush beans and about 15-20 cm for pole beans.
- Covering the beans: Cover the beans with about 2-3 cm of soil. Press the soil down lightly.
- Watering: Water the beans carefully. Make sure the soil is moist but not wet.
- Attaching a trellis (for pole beans): If you have planted pole beans, you need to provide them with a trellis. This can be a fence, a trellis, or a self-made structure. I like to use bamboo poles that I tie together to form a tipi.
Care: So Your Beans Thrive
After sowing, it is important to care for the beans properly so that they grow healthy and strong. Here are the most important care measures:
- Watering: Beans need regular water, especially during flowering and fruiting. It is best to water the plants in the morning so that the leaves can dry by evening. Avoid waterlogging, as this can lead to root rot.
- Weeding: Keep the soil around the bean plants free of weeds. Weeds compete with the beans for nutrients and water.
- Hilling: Hill up the bean plants regularly. This means that you pile up soil around the stems. This promotes root formation and gives the plants more stability.
- Fertilizing: Beans are heavy feeders and need a regular supply of nutrients. Fertilize the plants during flowering and fruiting with an organic fertilizer, e.g., with nettle tea or compost tea.
- Controlling pests and diseases: Beans can be infested by various pests and diseases. Look for signs of infestation and combat the pests and diseases early.
- Aphids: Aphids suck plant sap and can weaken the plants. You can spray them off with a jet of water or treat them with a soap solution.
- Bean fly: The bean fly lays its eggs in the soil. The larvae feed on the roots and can cause the plants to die. You can cover the soil with a fleece to prevent egg-laying.
- Bean rust: Bean rust is a fungal disease that manifests as brown spots on the leaves. Remove infested leaves and ensure good ventilation for the plants.
- Slugs: Slugs love bean plants! Protect your plants with slug fences or slug pellets.
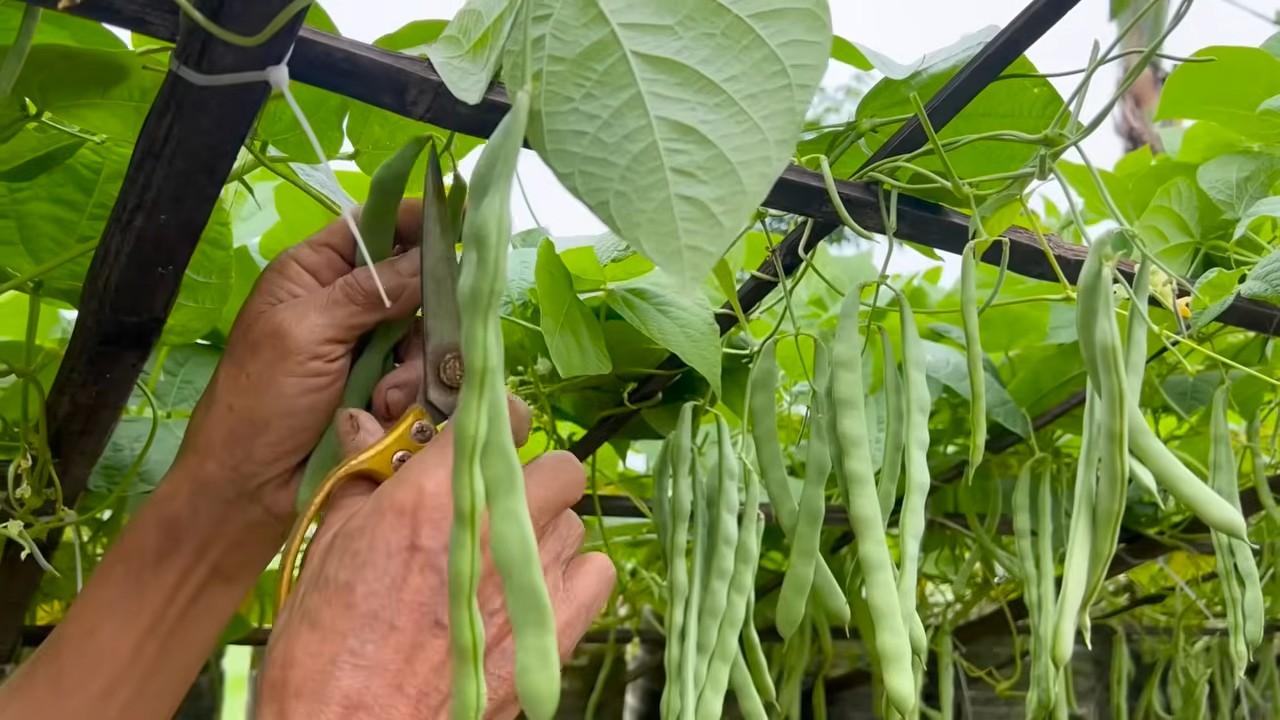
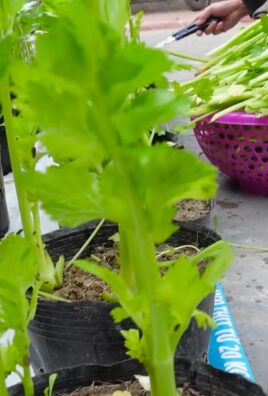
Harvest: The Reward for Your Efforts
Finally, the time has come! The beans are ripe and can be harvested. Here are a few tips for harvesting:
- The right time: Harvest the beans when they are plump and firm. The pods should not yet be dry and hard.
- The right technique: Pick the beans carefully without damaging the plants.
- Harvest regularly: Harvest the beans regularly to encourage the formation of new pods.
- Storage: Fresh beans have a limited shelf life. You can store them in the refrigerator or freeze them.
Extra Tips for an Even Better Harvest
Here are a few additional tips that can help you optimize your bean harvest:
- Companion planting: Plant beans together with other plants that support each other. Good neighbors for beans are, for example, carrots, cucumbers, lettuce, and marigolds. Avoid planting beans next to onions or garlic.
- Green manure: Green manure plants such as clover or lupins improve the soil structure and provide the soil with nutrients. Sow green manure after the bean harvest to prepare the soil for the next season.
- Mulching: Mulch the soil around the bean plants with straw or grass clippings. This keeps the soil moist, suppresses weeds, and protects the plants from soil splash.
- Starting beans indoors: If you live in a region with a short summer, you can start the beans indoors. Sow the beans in pots about 2-3 weeks before the last frost. Plant the seedlings outdoors after the last frost.
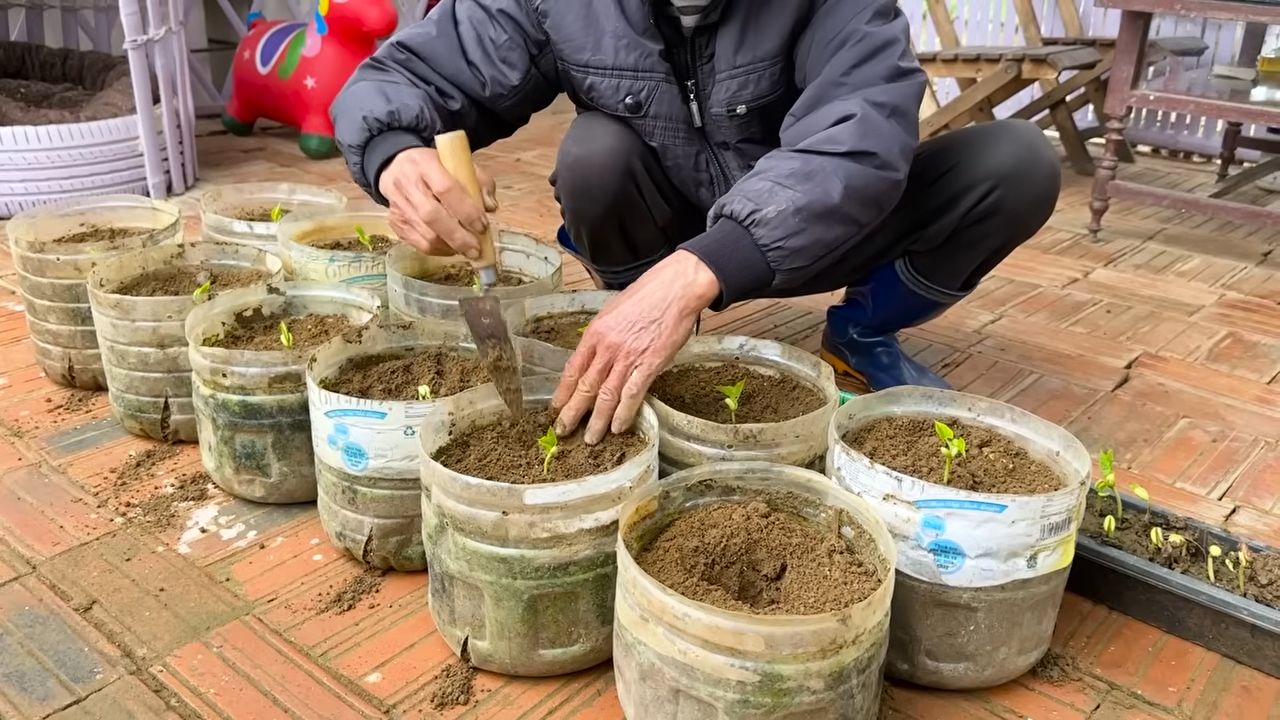
Starting Beans Indoors – Here’s How!
If you want to get a head start on your bean harvest, starting them indoors is a great option. Here’s a detailed guide:
Watering: Moisten the soil carefully, but avoid waterlogging.
The right time: Start about 2-3 weeks before the expected last frost date in your region.
The right pots: Use small pots or seed trays with good drainage. Peat-free seed starting mix is ideal.
Sowing: Place 1-2 beans about 2-3 cm deep in the soil in each pot.
Conclusion
So, there you have it! Mastering the art of growing healthy bean plants doesn’t require a green thumb blessed by the gardening gods. It’s about understanding their needs, providing the right environment, and employing a few simple, yet effective, DIY tricks. This method, focusing on soil preparation, support structures, and natural pest control, is a game-changer for both novice and experienced gardeners alike.
Why is this DIY approach a must-try? Because it empowers you to take control of your bean plant’s health and productivity from seed to harvest. You’re not just passively waiting for beans to appear; you’re actively creating the optimal conditions for them to thrive. This translates to a more abundant yield, healthier plants resistant to common diseases, and the satisfaction of knowing you nurtured your beans every step of the way. Plus, it’s incredibly rewarding to harvest beans you’ve grown yourself, knowing exactly where they came from and what went into their cultivation.
But don’t stop there! Experiment with different bean varieties to discover your favorites. Try pole beans for vertical gardening, bush beans for compact spaces, or even heirloom varieties for unique flavors and colors. Consider companion planting – marigolds to deter pests, or nasturtiums to attract beneficial insects. You can also explore different support structures, from simple bamboo stakes to elaborate trellises, adding a touch of artistry to your garden.
For those looking to enhance the soil even further, consider adding compost tea regularly. This liquid fertilizer, rich in beneficial microbes, will give your bean plants an extra boost of nutrients and help them resist disease. You can easily make compost tea at home using a bucket, compost, and water.
Remember, gardening is a journey of learning and experimentation. Don’t be afraid to make mistakes – they’re valuable lessons in disguise. The most important thing is to get your hands dirty, connect with nature, and enjoy the process of growing your own food.
We are confident that this DIY guide will significantly improve your success in growing healthy bean plants. Now, it’s your turn! We encourage you to try these techniques in your own garden and share your experiences with us. Let us know what worked best for you, any variations you tried, and any challenges you encountered. Your feedback will help us refine this guide and empower even more gardeners to grow their own delicious and nutritious beans. Share your photos and stories in the comments below – we can’t wait to see your thriving bean plants! Let’s cultivate a community of successful bean growers!
Frequently Asked Questions (FAQ)
What kind of soil is best for growing healthy bean plants?
Bean plants thrive in well-draining soil that is rich in organic matter. A slightly acidic to neutral pH (around 6.0 to 7.0) is ideal. Before planting, amend your soil with compost or well-rotted manure to improve drainage, fertility, and water retention. Avoid heavy clay soils, as they can become waterlogged and lead to root rot. If you have clay soil, consider adding sand and organic matter to improve its structure. Raised beds are also an excellent option for growing beans, as they provide excellent drainage.
How often should I water my bean plants?
Bean plants need consistent moisture, especially during flowering and pod development. Water deeply and regularly, aiming to keep the soil consistently moist but not waterlogged. The frequency of watering will depend on the weather conditions and the type of soil you have. In hot, dry weather, you may need to water daily, while in cooler, wetter weather, you may only need to water every few days. A good rule of thumb is to check the soil moisture level by sticking your finger about an inch into the soil. If it feels dry, it’s time to water. Avoid overhead watering, as this can promote fungal diseases. Instead, water at the base of the plants.
What are some common pests and diseases that affect bean plants, and how can I control them naturally?
Bean plants are susceptible to several pests and diseases, including aphids, bean beetles, spider mites, powdery mildew, and bean rust. To control these problems naturally, start by practicing good garden hygiene. Remove any diseased or infested plants promptly. Encourage beneficial insects, such as ladybugs and lacewings, which prey on aphids and other pests. You can attract these beneficial insects by planting flowers like marigolds and dill. For aphids, try spraying the plants with a strong stream of water or using insecticidal soap. For bean beetles, hand-picking them off the plants can be effective. To prevent powdery mildew and bean rust, ensure good air circulation around the plants and avoid overhead watering. You can also spray the plants with a solution of baking soda and water. Neem oil is another effective natural pesticide that can be used to control a variety of pests and diseases.
Do bean plants need support?
Yes, most bean varieties, especially pole beans, require support to grow properly. Support structures help the plants climb, improve air circulation, and make harvesting easier. You can use a variety of support structures, such as trellises, stakes, or fences. For pole beans, a trellis or teepee made of bamboo stakes is a good option. For bush beans, which are more compact, you may not need support, but providing some support can help prevent the plants from falling over and improve air circulation.
When is the best time to harvest bean plants?
The best time to harvest bean plants depends on the variety and your personal preference. For snap beans, harvest them when the pods are young, tender, and plump, before the beans inside become too large. For dry beans, allow the pods to dry completely on the plant before harvesting. The pods should be brittle and the beans inside should be hard and dry. To harvest snap beans, gently snap the pods off the plant. To harvest dry beans, pull up the entire plant and hang it upside down in a dry, well-ventilated place until the pods are completely dry. Then, shell the beans and store them in an airtight container.
Can I grow bean plants in containers?
Yes, you can successfully grow bean plants in containers, especially bush bean varieties. Choose a container that is at least 12 inches deep and wide to provide enough room for the roots to grow. Use a well-draining potting mix and ensure that the container has drainage holes. Water regularly and fertilize every few weeks with a balanced fertilizer. Place the container in a sunny location that receives at least 6 hours of sunlight per day. You may need to provide support for the plants, even bush beans, if they become too heavy.
How do I save seeds from my bean plants?
Saving seeds from your bean plants is a great way to preserve your favorite varieties and save money. To save seeds, allow the pods to dry completely on the plant. Once the pods are brittle and the beans inside are hard and dry, shell the beans and spread them out on a screen or tray to dry for a few more days. Store the dried beans in an airtight container in a cool, dark, and dry place. Label the container with the variety and date. It’s important to note that hybrid bean varieties may not produce true-to-type seeds, so it’s best to save seeds from heirloom or open-pollinated varieties.
What are some good companion plants for bean plants?
Companion planting can help improve the health and productivity of your bean plants. Some good companion plants for beans include:
* **Marigolds:** Deter pests like bean beetles and nematodes.
* **Nasturtiums:** Attract aphids away from bean plants and attract beneficial insects.
* **Rosemary:** Deters bean beetles.
* **Carrots:** Improve soil structure and deter bean flies.
* **Cucumbers:** Provide shade and support for bean plants.
* **Corn:** Provides support for pole beans.
* **Potatoes:** Improve soil structure and deter bean beetles.
Avoid planting beans near onions or garlic, as they can inhibit bean growth.
How can I improve the germination rate of my bean seeds?
To improve the germination rate of your bean seeds, soak them in water for 12-24 hours before planting. This will help soften the seed coat and speed up germination. You can also scarify the seeds by gently rubbing them with sandpaper to create small scratches on the seed coat. Plant the seeds in warm soil (at least 60°F) and keep the soil consistently moist but not waterlogged. Avoid planting the seeds too deep, as this can prevent them from germinating. A good rule of thumb is to plant the seeds about 1 inch deep.
Leave a Comment