

Growing chilies in plastic bottles might sound unconventional, but trust me, it’s a game-changer for any home gardener, especially if you’re short on space or looking for a budget-friendly way to spice up your life! For centuries, chilies have been prized not only for their fiery flavor but also for their medicinal properties and cultural significance. From ancient Aztec rituals to the vibrant curries of India, chilies have traveled the globe, adding zest and zing to countless cuisines.
But let’s be honest, sometimes the thought of starting a garden can feel overwhelming. Where do you even begin? That’s where this DIY trick comes in! I’m going to show you how to transform those discarded plastic bottles into mini chili paradises. Not only is it a fantastic way to recycle, but it also allows you to control the growing environment, protect your precious plants from pests, and enjoy a bountiful harvest of fresh chilies right at your doorstep.
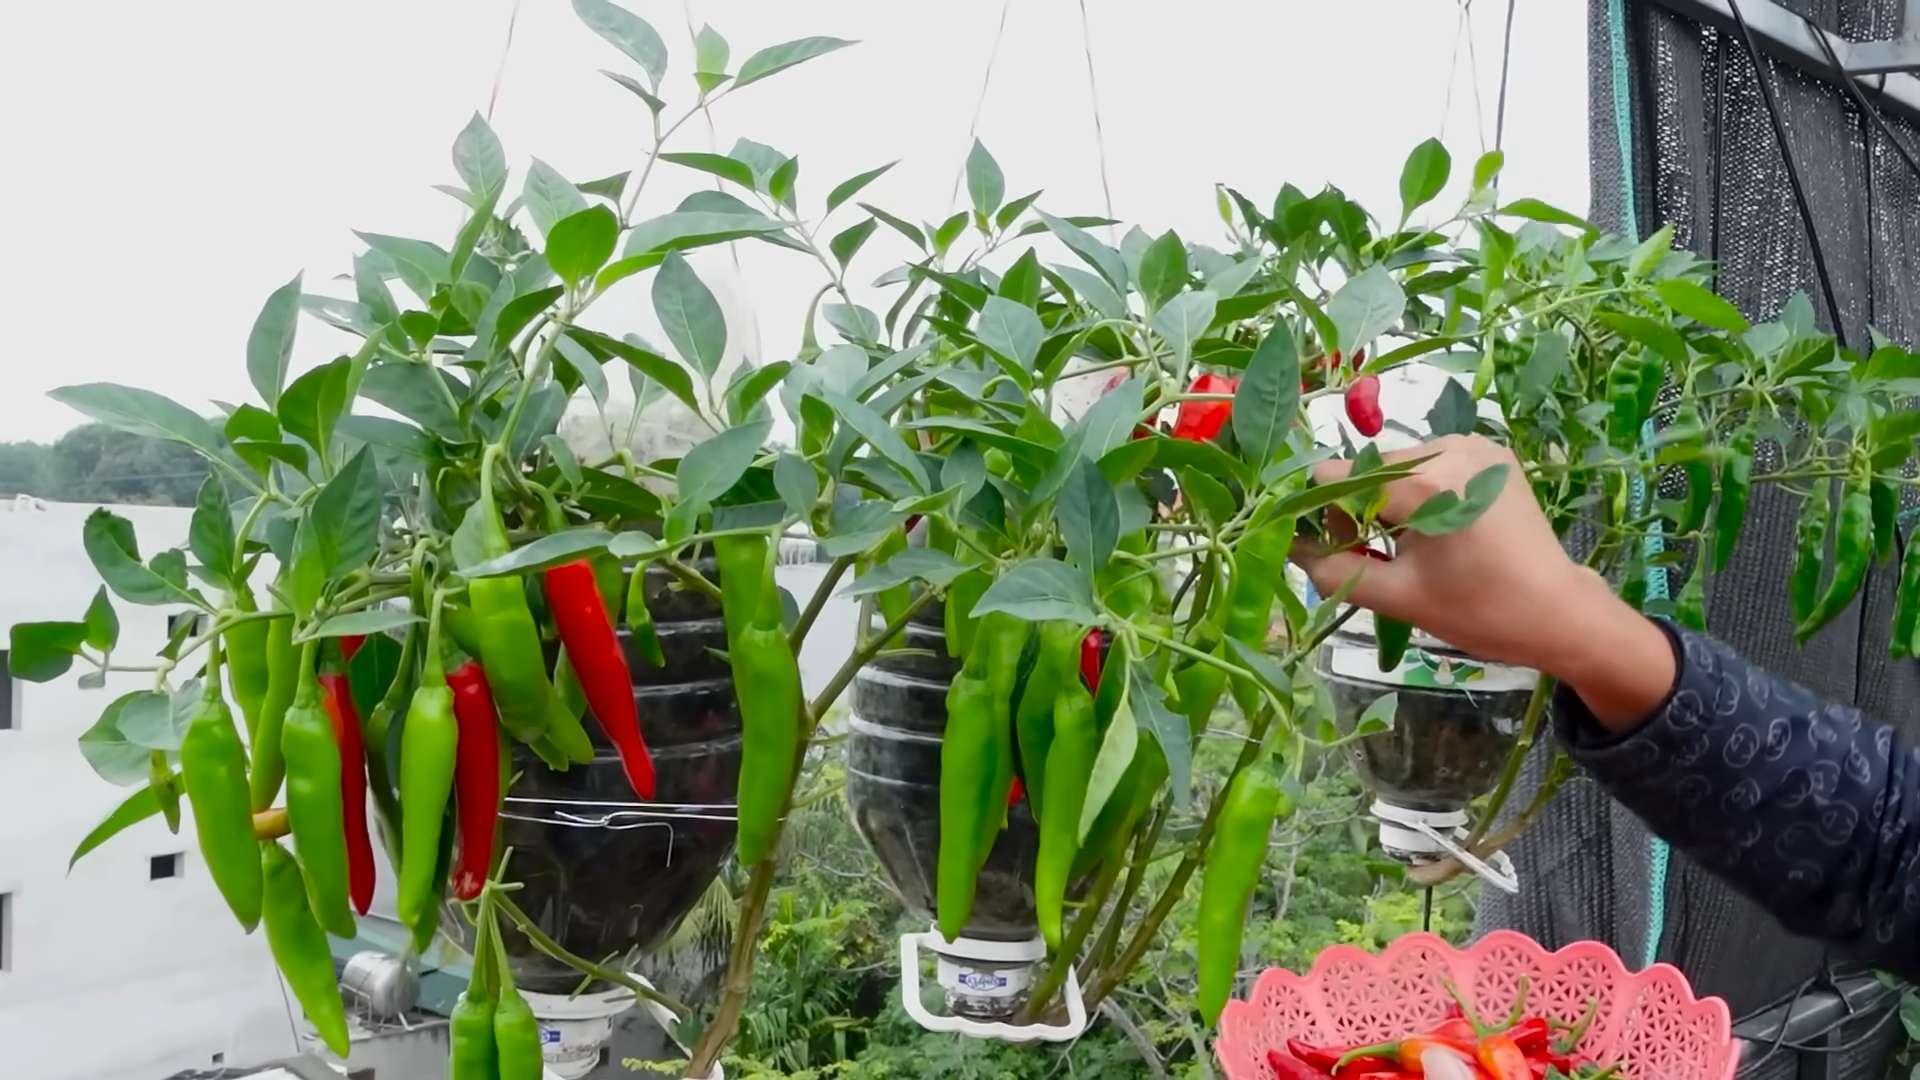
Imagine plucking ripe, vibrant chilies straight from your upcycled bottle garden, ready to add a kick to your favorite dishes. No more expensive trips to the grocery store for subpar chilies! This method of growing chilies in plastic bottles is perfect for beginners and seasoned gardeners alike. So, grab your bottles, some soil, and let’s get started on this exciting and sustainable gardening adventure!
DIY Chili Growing in Recycled Plastic Bottles: A Spicy Adventure!
Hey there, fellow chili enthusiasts! Are you ready to turn those empty plastic bottles into mini chili paradises? I’m going to walk you through a super fun and eco-friendly way to grow your own fiery peppers right at home. This project is perfect for beginners, apartment dwellers, or anyone looking to add a little spice to their life (and reduce waste!).
What You’ll Need: The Chili Grower’s Toolkit
Before we dive in, let’s gather our supplies. Don’t worry, most of this stuff is probably already lying around your house!
* Plastic Bottles: The stars of the show! Look for sturdy bottles, like 2-liter soda bottles or larger juice containers. Clear or slightly translucent bottles work best.
* Chili Seeds: Choose your adventure! Jalapeños, habaneros, serranos – the spicier, the better (in my opinion!). You can buy seeds online, at garden centers, or even harvest them from existing chilies.
* Potting Soil: A good quality potting mix is crucial for healthy chili plants. Avoid using garden soil, as it can be too dense and may contain pests or diseases.
* Scissors or Utility Knife: For cutting the plastic bottles. Be careful!
* Drill or Nail and Hammer: To create drainage holes.
* Watering Can or Spray Bottle: For keeping your chili plants hydrated.
* Optional:
* Gravel or Pebbles: For drainage at the bottom of the bottle.
* Plant Labels: To keep track of your chili varieties.
* Gloves: To protect your hands, especially when handling chili seeds or peppers later on.
* Liquid Fertilizer: To give your plants an extra boost.
Preparing the Plastic Bottle Planters: The Foundation for Success
This is where we transform those discarded bottles into cozy homes for our chili plants.
1. Clean the Bottles: Thoroughly wash the plastic bottles with soap and water to remove any residue. Rinse them well and let them dry completely. This helps prevent mold and bacteria growth.
2. Cut the Bottles: There are a couple of ways to cut the bottles, depending on the size and shape you want for your planters.
* Option 1: Single Planter: Cut the bottle in half horizontally. You’ll use the bottom half as the planter and discard the top half (or save it for another project!).
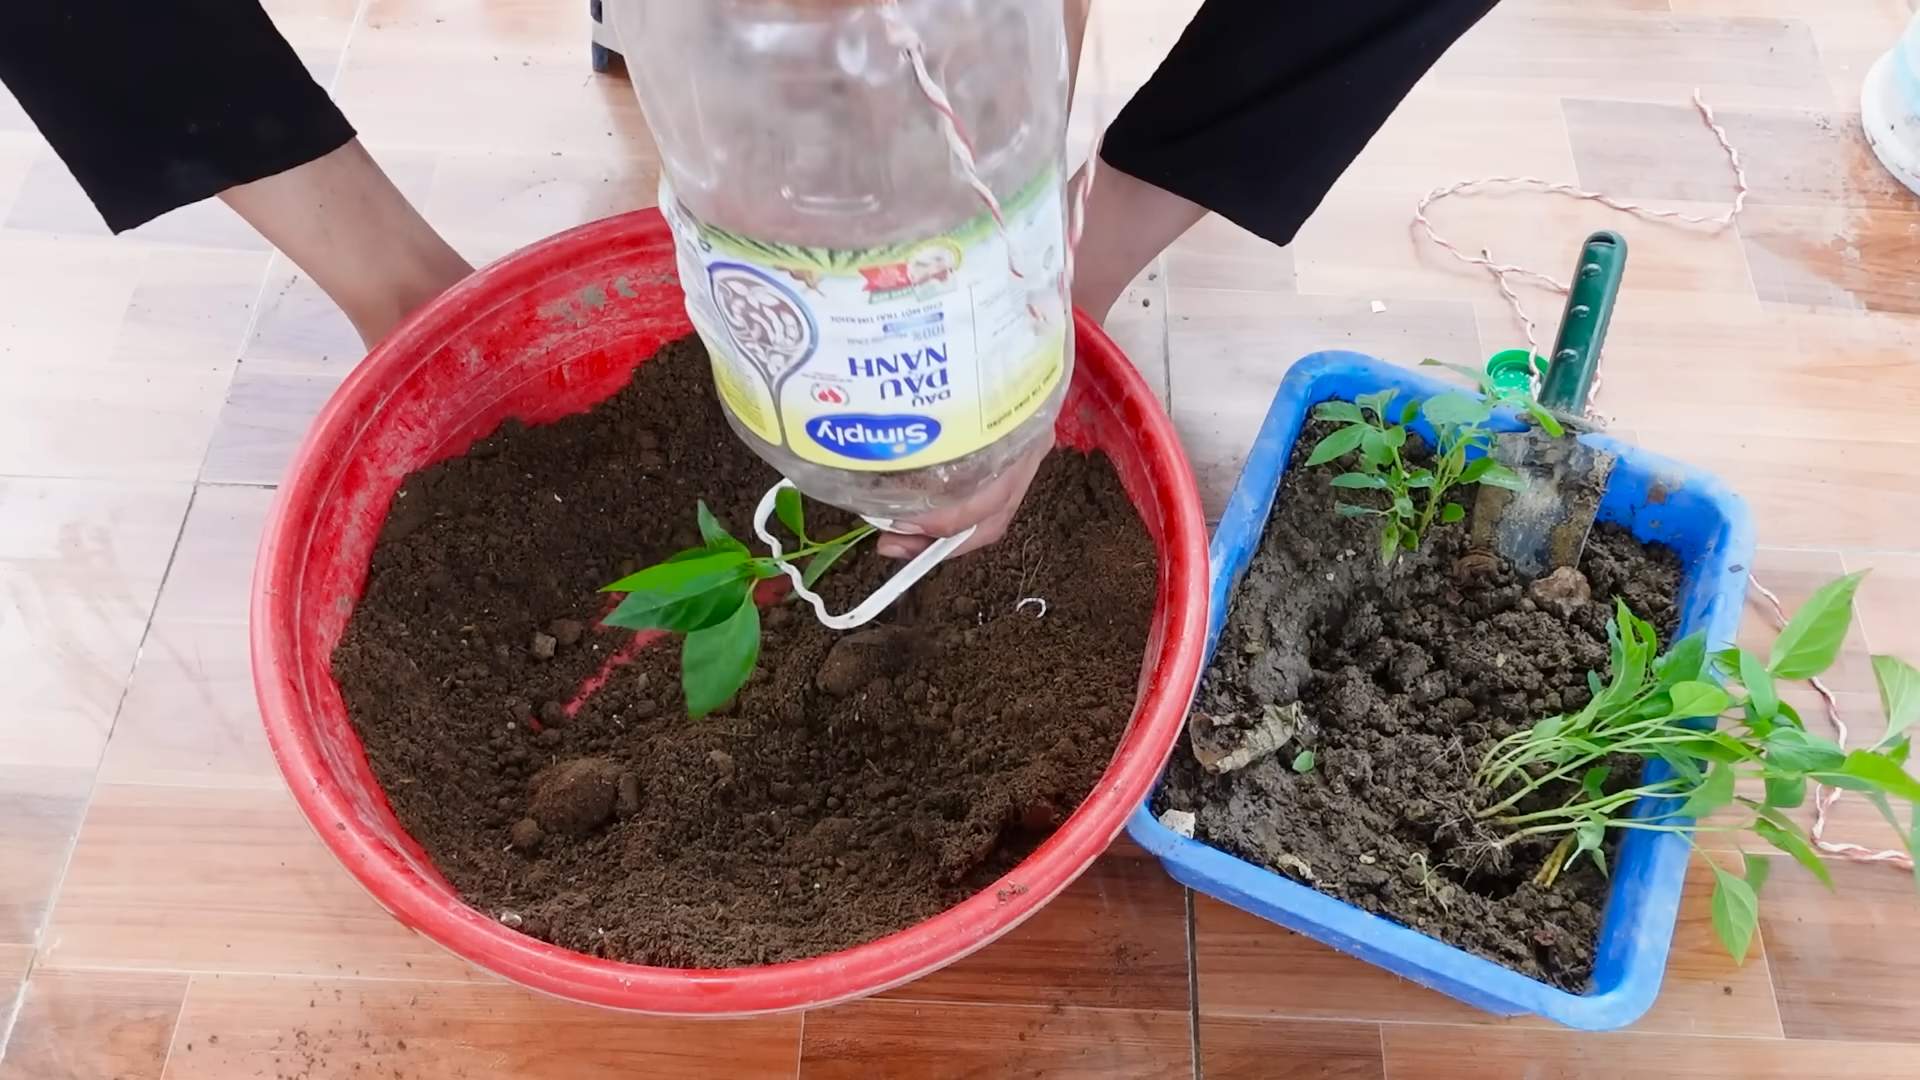
* Option 2: Self-Watering Planter (My Favorite!): Cut the bottle about two-thirds of the way up. Invert the top portion and nest it inside the bottom portion. This creates a self-watering system where the roots can draw water from the reservoir in the bottom.
3. Create Drainage Holes: This is super important! Chili plants don’t like sitting in soggy soil. Use a drill or a nail and hammer to create several drainage holes in the bottom of the bottle. If you’re making a self-watering planter, drill holes in the bottle cap as well to allow water to wick up to the soil.
4. Add Drainage Layer (Optional): If you’re using a single planter, you can add a layer of gravel or pebbles to the bottom of the bottle to improve drainage. This helps prevent root rot.
Planting the Chili Seeds: The Spark of Life
Now for the exciting part – planting the seeds!
1. Fill the Planter with Potting Soil: Fill the prepared plastic bottle planter with high-quality potting soil, leaving about an inch of space at the top. If you’re using a self-watering planter, fill the top portion with soil.
2. Sow the Seeds: Sprinkle the chili seeds evenly over the surface of the soil. Don’t plant them too deep – about ¼ inch is perfect.
3. Cover the Seeds: Gently cover the seeds with a thin layer of potting soil.
4. Water Gently: Use a watering can or spray bottle to gently moisten the soil. Be careful not to overwater, as this can cause the seeds to rot.
5. Create a Mini Greenhouse (Optional): To help the seeds germinate, you can create a mini greenhouse by covering the planter with a clear plastic bag or plastic wrap. This will help retain moisture and warmth. Make sure to poke a few holes in the bag for ventilation.
6. Place in a Warm Location: Place the planter in a warm, sunny location. Chili seeds need warmth to germinate. A windowsill or a spot under a grow light is ideal.
Caring for Your Chili Plants: Nurturing the Fire
Once the seeds have germinated and the seedlings have emerged, it’s time to provide them with the care they need to thrive.
1. Watering: Water your chili plants regularly, but don’t overwater. The soil should be moist but not soggy. Check the soil moisture by sticking your finger into the soil. If the top inch feels dry, it’s time to water. If you’re using a self-watering planter, make sure the water reservoir in the bottom is always filled.
2. Sunlight: Chili plants need plenty of sunlight – at least 6-8 hours per day. If you don’t have a sunny location, you can supplement with a grow light.
3. Fertilizing: Feed your chili plants with a liquid fertilizer every 2-3 weeks. Choose a fertilizer that is specifically formulated for vegetables or flowering plants. Follow the instructions on the fertilizer label.
4. Thinning: If you planted multiple seeds in each planter, you’ll need to thin out the seedlings once they have a few sets of leaves. Choose the strongest, healthiest seedling and carefully remove the others.
5. Transplanting (If Necessary): If your chili plants outgrow their plastic bottle planters, you can transplant them into larger pots or directly into the garden. Be careful not to damage the roots when transplanting.
6. Pest Control: Keep an eye out for pests, such as aphids, spider mites, and whiteflies. If you spot any pests, you can try spraying them with insecticidal soap or neem oil.
7. Pruning (Optional): Pruning can help encourage bushier growth and more fruit production. You can prune your chili plants by pinching off the tips of the branches.
Harvesting Your Chilies: The Spicy Reward
After a few months of care and attention, your chili plants will start producing peppers.
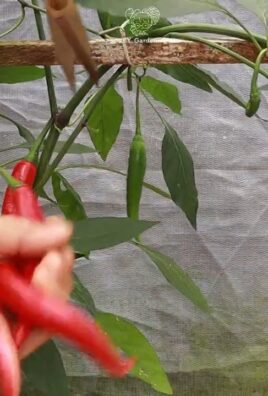
1. Harvesting Time: The time it takes for chilies to mature depends on the variety. Generally, you can start harvesting chilies when they reach their mature size and color.
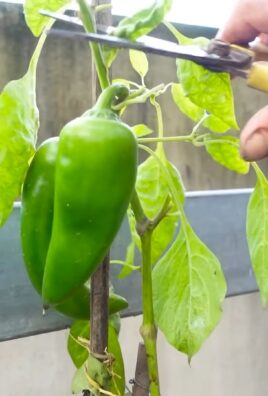
2. Harvesting Technique: Use scissors or pruning shears to cut the chilies from the plant. Be careful not to damage the plant.
3. Enjoy Your Harvest: Now you can enjoy the fruits (or should I say, peppers!) of your labor. Use your homegrown chilies in your favorite recipes, make hot sauce, or dry them for later use.
Troubleshooting: When Things Get a Little Hot
Even with the best care, sometimes things can go wrong. Here are a few common problems and how to fix them:
* Yellowing Leaves: This can be caused by overwatering, underwatering, nutrient deficiencies, or pests. Check the soil moisture and adjust your watering accordingly. Fertilize your plants regularly. Inspect the leaves for pests.
* Dropping Flowers or Fruit: This can be caused by temperature fluctuations, lack of pollination, or nutrient deficiencies. Keep your plants in a stable environment. Gently shake the plants to help with pollination. Fertilize your plants regularly.
* Slow Growth: This can be caused by lack of sunlight, poor soil, or pests. Move your plants to a sunnier location. Repot them with fresh potting soil. Inspect the leaves for pests.
Extra Tips for Chili Growing Success:
* Choose the Right Chili Variety: Consider your climate and your spice preference when choosing chili seeds. Some varieties are better suited for certain climates than others.
* Start Seeds Indoors: If you live in a cold climate, start your chili seeds indoors 6-8 weeks before the last frost. This will give them a head start.
* Harden Off Seedlings: Before transplanting seedlings outdoors, gradually acclimate them to the outdoor environment by exposing them to increasing amounts of sunlight and wind over a period of a week or two.
* Provide Support: As your chili plants grow, they may need support to prevent them from falling over. You can use stakes or cages to support the plants.
* Experiment with Different Growing Techniques: There are many different ways to grow chilies. Experiment with different techniques to find what works best for you.
Growing chilies in recycled plastic bottles is a rewarding and sustainable way to enjoy fresh, spicy peppers at home. With a little care and attention, you can transform those discarded bottles into a thriving chili garden. So, grab your bottles, seeds, and soil, and get ready to spice up your
Conclusion
So, there you have it! Growing chilies in plastic bottles isn’t just a quirky gardening experiment; it’s a genuinely effective and rewarding way to cultivate your own spicy bounty, even with limited space or resources. We’ve walked you through the entire process, from preparing your bottles to nurturing your seedlings, and hopefully, you’re feeling inspired to give it a try.
Why is this DIY trick a must-try? Because it democratizes gardening. It breaks down the barriers of entry, making fresh, homegrown chilies accessible to everyone, regardless of their living situation or gardening experience. Apartment dwellers, balcony gardeners, and even those with just a sunny windowsill can now enjoy the satisfaction of harvesting their own peppers. Beyond accessibility, it’s incredibly sustainable. Repurposing plastic bottles reduces waste and gives these materials a new lease on life, aligning your gardening efforts with eco-conscious practices. Plus, the contained environment of the bottle can offer some protection against pests and diseases, leading to healthier and more productive plants.
But the beauty of this method lies in its adaptability. Feel free to experiment with different varieties of chilies. From the mild jalapeño to the fiery habanero, the choice is yours! Consider using different types of soil mixes to see what works best for your local climate and the specific needs of your chosen chili variety. You can also explore different watering techniques, such as bottom watering, to ensure your plants receive adequate moisture without overwatering. For those in colder climates, consider bringing your bottle gardens indoors during the winter months to extend your growing season. You can even get creative with decorating your bottles! Paint them, add labels, or create unique designs to personalize your mini chili gardens.
This DIY chili growing method is more than just a project; it’s an invitation to connect with nature, learn new skills, and enjoy the delicious rewards of your labor.
We wholeheartedly encourage you to embark on this chili-growing adventure. It’s a fun, educational, and ultimately delicious experience. Don’t be afraid to get your hands dirty, experiment with different techniques, and most importantly, have fun!
Once you’ve harvested your first batch of homegrown chilies, we’d love to hear about your experience. Share your photos, tips, and stories with us in the comments below. Let’s create a community of bottle-gardeners, sharing our knowledge and inspiring others to embrace this sustainable and rewarding method of growing chilies. What kind of chilies did you grow? What challenges did you face, and how did you overcome them? Your insights could be invaluable to other aspiring chili growers. So, grab some plastic bottles, some soil, and some chili seeds, and get ready to experience the joy of growing your own spicy goodness! Let’s see those bottle gardens flourish!
Frequently Asked Questions (FAQ)
What kind of plastic bottles are best for growing chilies?
Ideally, you should use PET (polyethylene terephthalate) plastic bottles, which are commonly used for soda and water bottles. These are generally considered food-safe and durable enough to withstand the elements. Avoid using bottles that have contained harsh chemicals or cleaning products, as these could contaminate the soil and harm your plants. Make sure to thoroughly clean and rinse the bottles before using them. The size of the bottle will depend on the variety of chili you’re growing. Smaller chilies can thrive in smaller bottles, while larger varieties will need more space for their root systems. A good starting point is a 2-liter bottle.
How often should I water my chili plants in plastic bottles?
Watering frequency depends on several factors, including the climate, the type of soil you’re using, and the size of the plant. As a general rule, check the soil moisture regularly by sticking your finger about an inch into the soil. If it feels dry, it’s time to water. Avoid overwatering, as this can lead to root rot. Ensure the bottle has adequate drainage holes to prevent waterlogging. During hot weather, you may need to water more frequently, possibly even daily. In cooler weather, you can reduce the watering frequency. Look for signs of underwatering, such as wilting leaves, and signs of overwatering, such as yellowing leaves.
What kind of soil should I use for growing chilies in plastic bottles?
A well-draining potting mix is essential for growing healthy chili plants in plastic bottles. Avoid using garden soil, as it can be too heavy and compact, hindering drainage and root growth. A good potting mix should contain a blend of peat moss, perlite, and vermiculite. You can also add compost to enrich the soil with nutrients. Consider using a potting mix specifically formulated for vegetables or herbs. The ideal pH level for chili plants is between 6.0 and 7.0. You can test the pH of your soil using a soil testing kit and adjust it accordingly.
How much sunlight do chili plants need when grown in plastic bottles?
Chili plants thrive in full sun, meaning they need at least 6-8 hours of direct sunlight per day. Place your bottle gardens in a sunny location, such as a south-facing window or a balcony that receives plenty of sunlight. If you don’t have access to enough natural sunlight, you can supplement with grow lights. LED grow lights are a good option, as they are energy-efficient and provide the necessary spectrum of light for plant growth. Rotate your bottle gardens regularly to ensure that all sides of the plants receive adequate sunlight.
How do I fertilize my chili plants in plastic bottles?
Chili plants are heavy feeders and require regular fertilization to produce a bountiful harvest. Use a balanced fertilizer with an NPK ratio (nitrogen, phosphorus, potassium) of 10-10-10 or 14-14-14. You can also use a fertilizer specifically formulated for tomatoes or peppers, as these contain the nutrients that chili plants need. Fertilize your plants every 2-3 weeks during the growing season. Follow the instructions on the fertilizer packaging for proper dosage. Avoid over-fertilizing, as this can burn the roots and damage the plants. You can also use organic fertilizers, such as compost tea or fish emulsion.
How do I protect my chili plants from pests and diseases when growing in plastic bottles?
The contained environment of a plastic bottle can help protect your chili plants from some pests and diseases, but it’s still important to be vigilant. Regularly inspect your plants for signs of pests, such as aphids, spider mites, and whiteflies. If you find any pests, you can try washing them off with a strong stream of water or using insecticidal soap. To prevent fungal diseases, ensure good air circulation around your plants and avoid overwatering. If you notice any signs of disease, such as leaf spots or powdery mildew, remove the affected leaves and treat the plants with a fungicide. Consider using organic pest control methods, such as neem oil, to minimize the use of harsh chemicals.
Can I grow different varieties of chilies in the same plastic bottle?
While it’s technically possible to grow different varieties of chilies in the same plastic bottle, it’s generally not recommended. Different chili varieties have different growth habits and nutrient requirements, which can make it difficult to manage them in the same container. Additionally, cross-pollination can occur, which can result in unexpected and potentially undesirable traits in the offspring. It’s best to grow each chili variety in its own separate bottle to ensure optimal growth and prevent cross-pollination.
How do I harvest my chilies from the plastic bottles?
The time it takes for chilies to mature and be ready for harvest depends on the variety. Generally, chilies are ready to harvest when they have reached their mature color and size. Use a sharp knife or scissors to cut the chilies from the plant, leaving a small stem attached. Handle the chilies carefully to avoid bruising them. Wear gloves when harvesting hot chilies to protect your skin from irritation. You can use your harvested chilies fresh, or you can dry them, pickle them, or make them into sauces or powders.
What do I do with the plastic bottles after the growing season is over?
After the growing season is over, you can reuse the plastic bottles for other gardening projects or recycle them. Thoroughly clean the bottles and remove any remaining soil or plant debris. If the bottles are damaged or worn out, recycle them according to your local recycling guidelines. You can also use the bottles to start new seedlings or to create other DIY gardening projects. Consider donating the bottles to a local school or community garden.
Leave a Comment