

Growing Chili Peppers at home can seem daunting, but trust me, it’s more rewarding (and less intimidating) than you think! Imagine plucking fiery, vibrant peppers straight from your own garden, ready to spice up your favorite dishes. Forget those bland, store-bought varieties – we’re talking about flavor explosions right at your fingertips!
For centuries, chili peppers have been a staple in cuisines around the globe, adding not just heat, but also depth and complexity. From the ancient Aztecs using them in rituals to the vibrant street food of Southeast Asia, these little dynamos have a rich and fascinating history. But you don’t need to be a seasoned gardener to tap into this culinary heritage.
Why should you try growing chili peppers yourself? Well, for starters, you’ll have access to a wider range of varieties than you’ll ever find in a supermarket. Plus, you’ll know exactly what’s gone into growing them – no nasty pesticides or hidden chemicals. And let’s be honest, there’s something incredibly satisfying about nurturing a plant from seed to harvest. In this article, I’m going to share some simple, DIY tricks and hacks that will help you cultivate a thriving chili pepper garden, even if you’re a complete beginner. Get ready to turn up the heat!
Growing Chili Peppers: From Seed to Spicy Harvest!
Hey there, fellow chili enthusiasts! I’m so excited to share my tried-and-true method for growing vibrant, fiery chili peppers right in your own backyard (or even on your balcony!). Forget those bland, store-bought peppers – we’re talking about homegrown flavor that will kick your dishes up a notch. This guide is packed with everything you need to know, from choosing the right seeds to harvesting your spicy bounty. Let’s get started!
Choosing Your Chili Pepper Variety
First things first, you need to decide what kind of heat you’re craving! The Scoville scale measures the pungency (spiciness) of chili peppers, so use that as a guide. Here’s a quick rundown of some popular varieties:
* Mild (0-5,000 SHU): Bell peppers (0 SHU), Poblano (1,000-2,000 SHU), Anaheim (500-2,500 SHU)
* Medium (5,000-50,000 SHU): Jalapeño (2,500-8,000 SHU), Serrano (10,000-25,000 SHU), Cayenne (30,000-50,000 SHU)
* Hot (50,000-300,000 SHU): Thai Chili (50,000-100,000 SHU), Scotch Bonnet (100,000-350,000 SHU)
* Extremely Hot (300,000+ SHU): Habanero (100,000-350,000 SHU), Ghost Pepper (800,000-1,000,000 SHU), Carolina Reaper (1,500,000-2,200,000 SHU)
Tip: If you’re new to chili growing, I recommend starting with a milder variety like Jalapeño or Poblano. You can always work your way up to the hotter stuff later!
Starting Your Chili Pepper Seeds Indoors
Since chili peppers need a long growing season, starting them indoors is crucial, especially if you live in a cooler climate. I usually start my seeds about 8-10 weeks before the last expected frost.
What You’ll Need:
* Chili pepper seeds
* Seed starting tray or small pots
* Seed starting mix (a light, well-draining mix is best)
* Spray bottle
* Heat mat (optional, but highly recommended)
* Grow light (optional, but helps prevent leggy seedlings)
* Clear plastic dome or plastic wrap
Step-by-Step Instructions:
1. Prepare Your Seed Starting Tray: Fill your seed starting tray or small pots with seed starting mix. Gently tap the tray to settle the mix.
2. Sow the Seeds: Make a small indentation (about ¼ inch deep) in the center of each cell or pot. Place 1-2 seeds in each indentation.
3. Cover the Seeds: Gently cover the seeds with seed starting mix.
4. Water the Seeds: Use a spray bottle to thoroughly moisten the soil. Avoid overwatering, as this can lead to damping off (a fungal disease that kills seedlings).
5. Create a Humid Environment: Cover the seed starting tray with a clear plastic dome or plastic wrap. This will help retain moisture and create a warm, humid environment that’s ideal for germination.
6. Provide Bottom Heat (Optional): Place the seed starting tray on a heat mat. This will help speed up germination, as chili pepper seeds prefer warm soil (around 80-85°F).
7. Provide Light (Optional): Place the seed starting tray under a grow light. This will help prevent the seedlings from becoming leggy (tall and spindly). If you don’t have a grow light, place the tray in a sunny window, but be sure to rotate it regularly to prevent the seedlings from leaning towards the light.
8. Monitor and Water: Check the seed starting tray daily. Keep the soil consistently moist, but not soggy. Remove the plastic dome or plastic wrap for a few hours each day to allow for air circulation.
9. Wait for Germination: Chili pepper seeds can take anywhere from 7 to 21 days to germinate, depending on the variety and growing conditions. Be patient!
10. Remove from Heat Mat and Dome: Once the seedlings have emerged, remove the heat mat and plastic dome or plastic wrap.
11. Continue Growing Under Lights: Continue growing the seedlings under the grow light or in a sunny window.
12. Thin the Seedlings: Once the seedlings have developed their first true leaves (the leaves that appear after the initial seed leaves), thin them to one seedling per cell or pot. Choose the strongest, healthiest seedling and snip off the others at the soil line.
Transplanting Your Chili Pepper Seedlings
Once the danger of frost has passed and the soil has warmed up, it’s time to transplant your chili pepper seedlings outdoors.
What You’ll Need:
* Chili pepper seedlings
* Gardening gloves
* Trowel or shovel
* Compost or well-rotted manure
* Watering can or hose
* Mulch (optional)
* Stakes or cages (optional, for taller varieties)
Choosing the Right Location:
Chili peppers need at least 6-8 hours of sunlight per day to thrive. Choose a location that receives plenty of sun and has well-draining soil.
Preparing the Soil:
Before transplanting, amend the soil with compost or well-rotted manure. This will improve drainage, fertility, and water retention.
Hardening Off Your Seedlings:
Before transplanting your seedlings outdoors, you need to harden them off. This means gradually exposing them to outdoor conditions over a period of 7-10 days. Start by placing the seedlings in a sheltered location (like a porch or patio) for a few hours each day. Gradually increase the amount of time they spend outdoors each day. This will help them acclimate to the sun, wind, and temperature changes.
Step-by-Step Instructions:
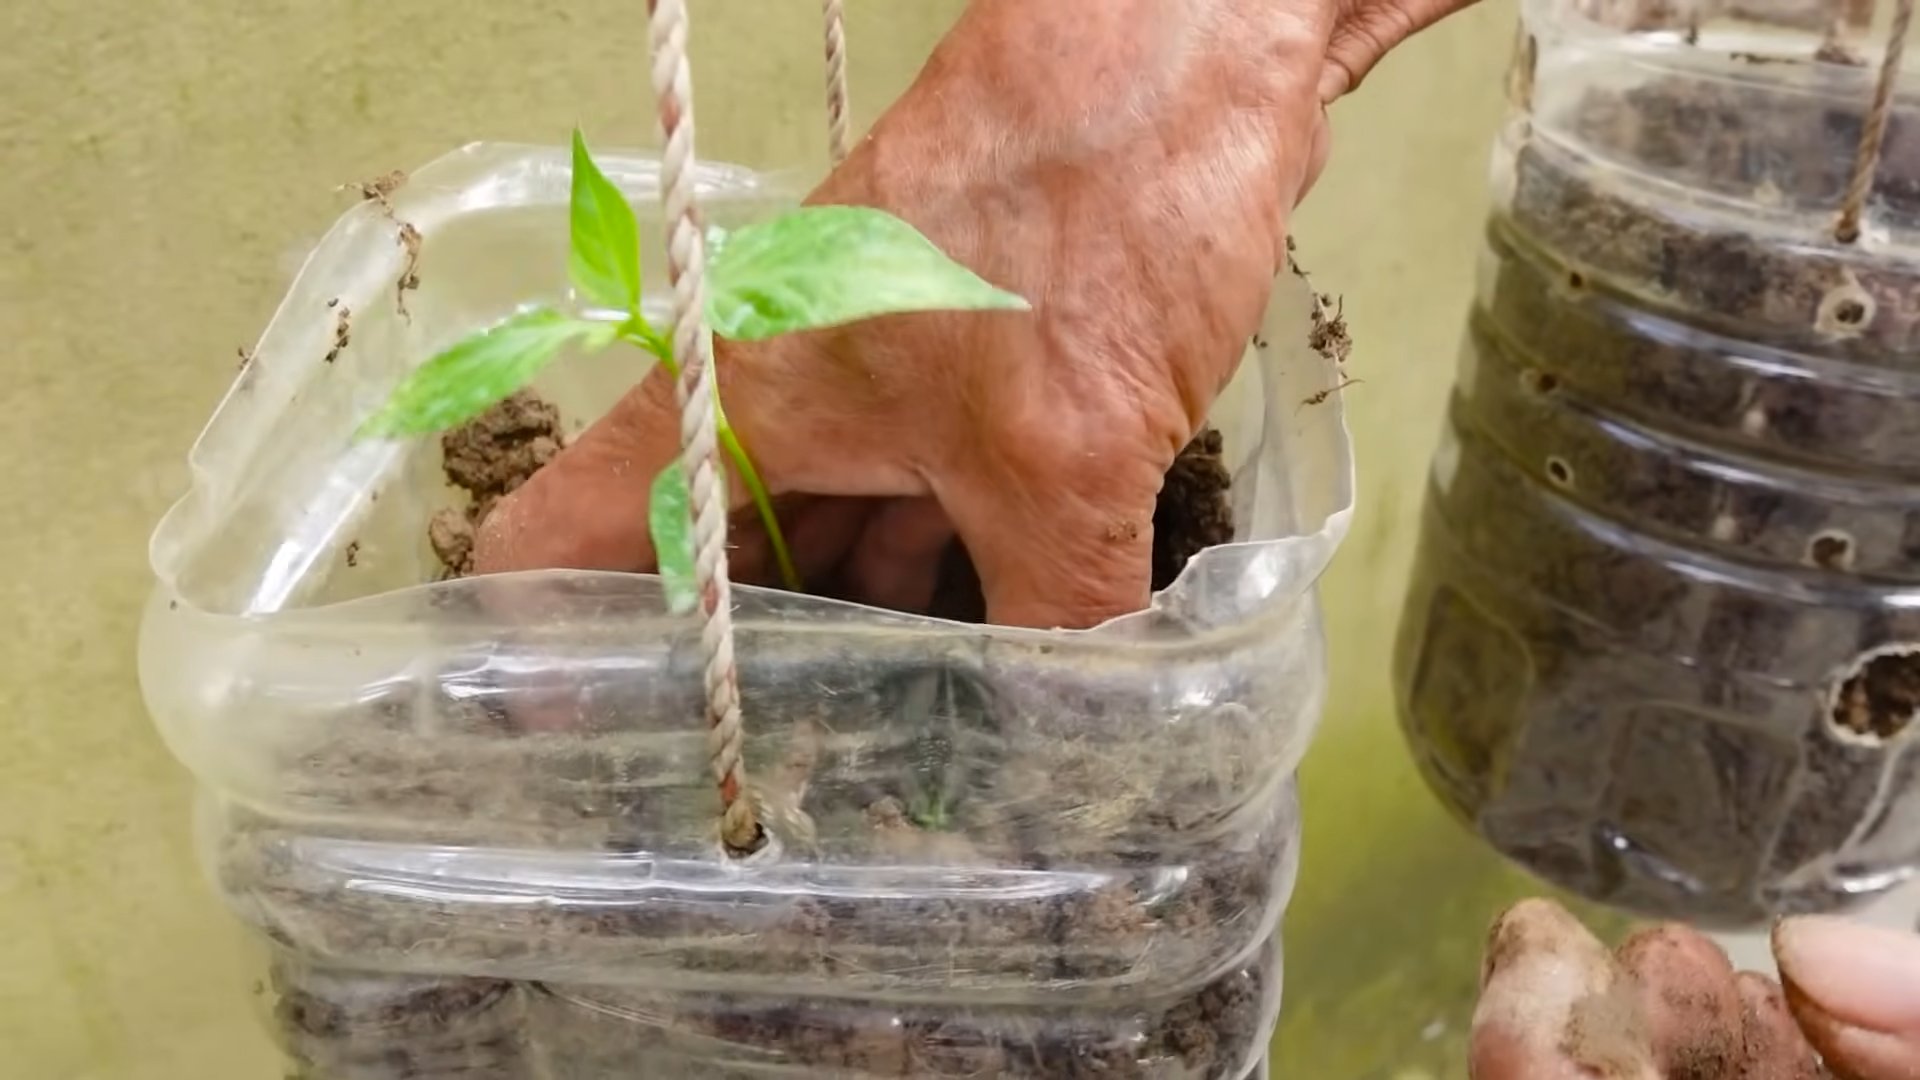
1. Dig the Holes: Dig holes that are slightly larger than the root balls of your seedlings. Space the holes about 18-24 inches apart, depending on the variety.
2. Remove the Seedlings from Their Containers: Gently remove the seedlings from their containers. If the roots are tightly bound, gently loosen them with your fingers.
3. Plant the Seedlings: Place the seedlings in the holes and backfill with soil. Gently firm the soil around the base of the plants.
4. Water the Seedlings: Water the seedlings thoroughly.
5. Mulch (Optional): Apply a layer of mulch around the base of the plants. This will help retain moisture, suppress weeds, and regulate soil temperature.
6. Stake or Cage (Optional): If you’re growing taller varieties, provide support with stakes or cages. This will prevent the plants from toppling over in windy conditions.
Caring for Your Chili Pepper Plants
Now that your chili pepper plants are in the ground, it’s time to provide them with the care they need to thrive.
Watering:
Water your chili pepper plants regularly, especially during hot, dry weather. Water deeply and infrequently, allowing the soil to dry out slightly between waterings. Avoid overwatering, as this can lead to root rot.
Fertilizing:
Fertilize your chili pepper plants every 2-3 weeks with a balanced fertilizer. Look for a fertilizer that’s specifically formulated for vegetables or tomatoes. You can also use a liquid seaweed fertilizer for an extra boost of nutrients.
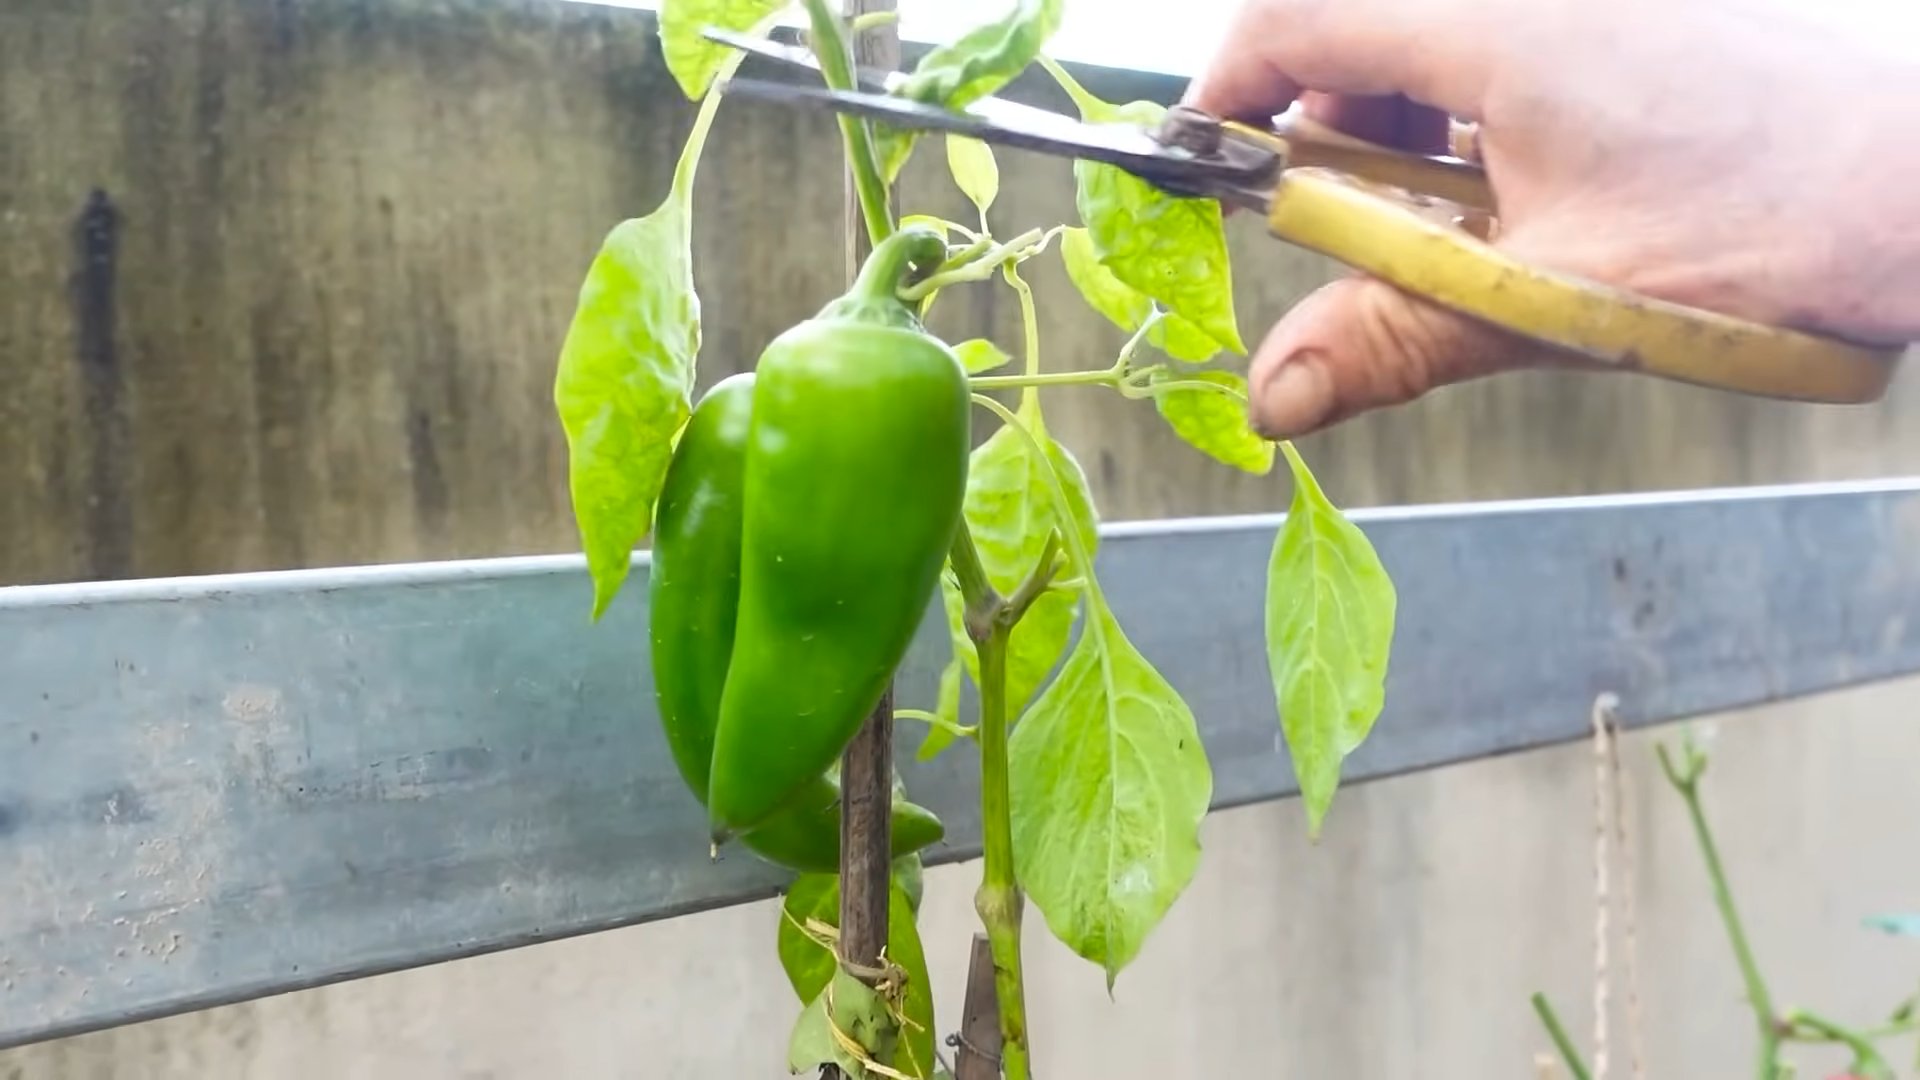
Pruning:
Pruning isn’t strictly necessary for chili peppers, but it can help improve air circulation and encourage bushier growth. You can prune off any dead or yellowing leaves, as well as any suckers (small shoots that grow from the base of the plant).
Pest and Disease Control:
Chili peppers are generally resistant to pests and diseases, but they can be susceptible to aphids, spider mites, and blossom end rot.
* Aphids and Spider Mites: These pests can be controlled with insecticidal soap or neem oil.
* Blossom End Rot: This is a calcium deficiency that causes the bottom of the peppers to rot. To prevent blossom end rot, make sure your soil is well-drained and that you’re providing your plants with adequate calcium. You can add calcium to the soil by mixing in crushed eggshells or bone meal.
Supporting the Plants:
As the plants grow and the peppers develop, the branches can become heavy and prone to breaking. Use stakes or cages
Conclusion
So, there you have it! Mastering the art of growing chili peppers at home is not only achievable but also incredibly rewarding. We’ve explored a simple yet effective DIY trick that can significantly boost your pepper production, ensuring a bountiful harvest of fiery goodness. This isn’t just about saving money; it’s about connecting with your food, understanding the growing process, and experiencing the satisfaction of nurturing something from seed to table.
The beauty of this DIY approach lies in its adaptability. Feel free to experiment with different types of containers, soil mixtures, and even nutrient solutions to find what works best for your specific climate and chili pepper variety. Consider adding companion plants like basil or marigolds to your chili pepper garden to deter pests and attract beneficial insects. For those living in colder climates, you can easily adapt this method for indoor growing, using grow lights to supplement natural sunlight. You might even try different methods of pollination, such as gently shaking the plants or using a small brush to transfer pollen between flowers.
Remember, the key to success is observation and patience. Pay close attention to your chili pepper plants, noting any changes in their appearance or growth patterns. Adjust your watering and feeding schedules as needed, and don’t be afraid to experiment with different techniques. The more you learn about your plants, the better equipped you’ll be to provide them with the optimal growing conditions.
This DIY trick for growing chili peppers is more than just a method; it’s an invitation to embark on a culinary adventure. Imagine the delicious salsas, spicy sauces, and flavorful dishes you can create with your homegrown peppers. Think of the joy of sharing your harvest with friends and family, knowing that you cultivated these peppers with your own hands.
We wholeheartedly encourage you to try this DIY trick and experience the thrill of growing your own chili peppers. Don’t be intimidated by the process; it’s easier than you might think. With a little bit of effort and attention, you’ll be amazed at the results.
And most importantly, we want to hear about your experiences! Share your photos, tips, and stories with us in the comments section below. Let us know what worked well for you, what challenges you encountered, and any variations you tried. Your feedback will not only help us improve this guide but also inspire other gardeners to embark on their own chili pepper growing journeys. Let’s build a community of passionate pepper growers, sharing our knowledge and celebrating our successes together. So, grab your seeds, get your hands dirty, and get ready to experience the fiery flavor of homegrown chili peppers! This DIY trick is your gateway to a world of spicy possibilities.
FAQ
What kind of chili peppers are best suited for this DIY growing trick?
This DIY trick is versatile and works well with a wide variety of chili peppers. However, some varieties tend to thrive more readily in container environments. Smaller to medium-sized peppers like Jalapeños, Serrano peppers, Thai chili peppers, and Poblano peppers are excellent choices for beginners. These varieties generally have shorter growing seasons and are well-suited for container gardening. For more experienced growers, Habaneros, Scotch Bonnets, and even some milder varieties like Anaheim peppers can be successfully grown using this method. The key is to choose varieties that match your climate and personal preference for heat level. Remember to research the specific needs of your chosen pepper variety, such as its preferred temperature range, sunlight requirements, and watering schedule.
How often should I water my chili pepper plants grown using this DIY method?
Watering frequency depends on several factors, including the size of your container, the type of soil you’re using, the climate, and the stage of growth of your chili pepper plants. As a general rule, water your plants when the top inch of soil feels dry to the touch. Avoid overwatering, as this can lead to root rot. During hot and dry weather, you may need to water your plants daily, while during cooler or more humid periods, you may only need to water them every few days. When you water, water deeply, ensuring that the water reaches the bottom of the container. This encourages deep root growth, which makes your plants more resilient to drought and other stresses. Also, consider using a moisture meter to accurately gauge the moisture level in the soil.
What type of fertilizer should I use for my chili pepper plants?
Chili peppers are heavy feeders, meaning they require a good supply of nutrients to thrive. A balanced fertilizer with an NPK ratio (nitrogen, phosphorus, potassium) of 5-10-10 or 10-10-10 is a good starting point. Nitrogen promotes leafy growth, phosphorus supports root development and flowering, and potassium enhances fruit production and overall plant health. During the early stages of growth, you can use a fertilizer with a slightly higher nitrogen content to encourage strong vegetative growth. Once your plants start to flower, switch to a fertilizer with a higher phosphorus and potassium content to promote abundant fruit production. Organic fertilizers, such as compost tea, fish emulsion, and bone meal, are also excellent choices for feeding your chili pepper plants. Apply fertilizer according to the instructions on the product label, and avoid over-fertilizing, as this can burn the roots and damage your plants.
How much sunlight do chili pepper plants need?
Chili peppers thrive in full sun, requiring at least 6-8 hours of direct sunlight per day. If you’re growing your plants indoors, you’ll need to supplement natural sunlight with grow lights. Position your plants in a south-facing window if possible, and use grow lights to provide additional light during cloudy days or in areas with limited sunlight. The intensity and duration of the light will affect the growth and productivity of your plants. Insufficient sunlight can lead to leggy growth, reduced flowering, and smaller, less flavorful peppers.
How do I prevent pests and diseases from affecting my chili pepper plants?
Prevention is key when it comes to pests and diseases. Start by using healthy, disease-free seeds or seedlings. Choose a well-draining soil mix to prevent root rot. Provide adequate spacing between plants to improve air circulation and reduce humidity. Regularly inspect your plants for signs of pests or diseases, such as aphids, spider mites, whiteflies, or fungal infections. If you spot any problems, take action immediately. You can use organic pest control methods, such as insecticidal soap, neem oil, or diatomaceous earth, to control pests. For fungal diseases, you can use copper-based fungicides or baking soda sprays. Encourage beneficial insects, such as ladybugs and lacewings, to prey on pests. Remove any infected leaves or plants to prevent the spread of disease.
What do I do if my chili pepper plants are not producing peppers?
Several factors can contribute to a lack of pepper production. First, ensure that your plants are receiving enough sunlight (at least 6-8 hours per day). Second, check the soil pH; chili peppers prefer a slightly acidic soil pH of 6.0-6.8. Third, make sure your plants are receiving adequate nutrients, especially phosphorus and potassium. Fourth, ensure that your plants are being properly pollinated. You can hand-pollinate your plants by gently shaking them or using a small brush to transfer pollen between flowers. Fifth, check for pests or diseases that may be stressing your plants. Finally, be patient; some chili pepper varieties take longer to mature than others.
Can I grow chili peppers indoors using this DIY trick?
Yes, absolutely! This DIY trick is easily adaptable for indoor growing. The key is to provide your plants with adequate light, warmth, and humidity. Use grow lights to supplement natural sunlight, and maintain a consistent temperature of 70-80°F (21-27°C). Increase humidity by misting your plants regularly or using a humidifier. Choose smaller chili pepper varieties that are well-suited for container gardening. Ensure that your containers have drainage holes to prevent waterlogging. With a little bit of care and attention, you can successfully grow chili peppers indoors year-round.
Leave a Comment