

Growing cabbage for beginners might seem daunting, but trust me, it’s more rewarding than you think! Imagine harvesting your own crisp, flavorful cabbage heads, knowing you nurtured them from tiny seedlings. That’s the magic of home gardening, and it’s totally achievable, even if you’re just starting out.
Cabbage has a rich history, dating back thousands of years. Ancient Romans and Greeks prized it for its nutritional value and medicinal properties. Over time, different varieties emerged, each with its unique flavor and texture. Today, cabbage remains a staple in cuisines worldwide, from sauerkraut in Germany to kimchi in Korea.
But why bother growing your own cabbage? Well, for starters, homegrown cabbage tastes infinitely better than store-bought. Plus, you have complete control over what goes into your garden, ensuring your cabbage is free from harmful pesticides and chemicals. And let’s be honest, there’s something incredibly satisfying about harvesting food you’ve grown yourself. This DIY guide will provide you with all the essential tips and tricks for growing cabbage for beginners, ensuring a bountiful harvest. So, grab your gardening gloves, and let’s get started!
Growing Cabbage for Beginners: Your DIY Guide for a Bountiful Harvest
Hey garden friends! Have you always wanted to grow your own cabbage but weren’t sure where to start? Don’t worry, I’ll show you how! Growing cabbage isn’t as hard as you might think, and with a little patience and the right tips, you’ll soon be enjoying your own fresh harvest. In this article, I will guide you step-by-step through the entire process, from sowing to harvesting. Let’s get started!
The Basics: What You Need to Know About Cabbage
Before we begin, here is some important information about cabbage that will help you succeed:
- Cabbage is diverse: There are countless types of cabbage, from white and red cabbage to Brussels sprouts and cauliflower, to kale and savoy cabbage. Each variety has its own preferences and growing conditions.
- Cabbage is a heavy feeder: This means it needs a lot of nutrients to grow well. A nutrient-rich soil is therefore essential.
- Cabbage needs sun: At least 6 hours of sun per day are ideal for healthy growth.
- Cabbage likes it cool: Most cabbage varieties prefer cool temperatures, especially during the growth phase.
- Cabbage can be susceptible to pests: Cabbage white butterflies, flea beetles, and cabbage flies are just a few of the uninvited guests that love to feast on your cabbage. But don’t panic, I’ll show you how to keep them in check!
Preparation: What You Need
Before we start sowing, we need to make sure we have everything we need. Here is a list of the most important things:
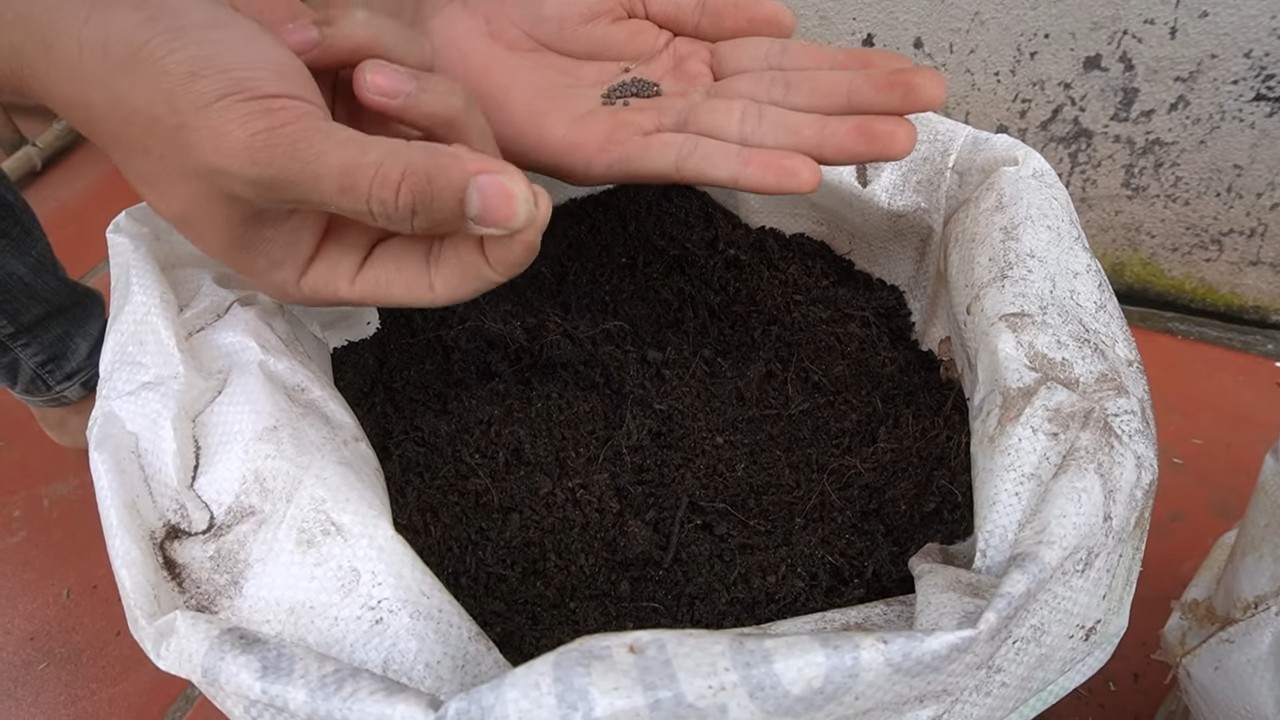
- Cabbage seeds: Choose the cabbage variety you like best and that is suitable for your region. Look for high-quality seeds from a trusted supplier.
- Seed starting mix: Special seed starting mix is low in nutrients and loose, ideal for seed germination.
- Seedling pots or trays: Small pots or trays in which you can start the seeds.
- Watering can with a fine rose head: For gently watering the seedlings.
- Pricking-out tool (dibber): For separating the seedlings.
- Vegetable garden soil: For the bed where you will later transplant the young plants.
- Compost or organic fertilizer: To enrich the soil with nutrients.
- Garden tools: Spade, rake, hoe.
- Protective netting (optional): To protect against pests.
Sowing: The Start of a Cabbage-Rich Life
There are two ways to grow cabbage: either you sow the seeds directly into the bed, or you start the young plants indoors. I recommend starting the plants indoors, as this increases the chances of success and gives you a head start.
Sowing Indoors (Starting Early):
- Prepare the seedling pots: Fill the seedling pots or trays with seed starting mix. Press the soil down lightly.
- Sow the seeds: Place 1-2 seeds in each pot. Cover the seeds with a thin layer of soil (approx. 0.5 cm).
- Watering: Gently water the soil with a watering can with a fine rose head. The soil should be moist, but not wet.
- Location: Place the seedling pots in a bright and warm place (approx. 18-20°C / 64-68°F). A windowsill or a greenhouse is ideal.
- Moisture: Keep the soil moist by spraying or watering it regularly.
- Germination: The seeds usually germinate within 5-10 days.
Pricking Out: Giving the Seedlings More Space
Once the seedlings have developed their first true leaves (after the seed leaves), it’s time to prick them out. This means you transplant them into larger pots so they have more space to grow.
- Prepare the pots: Fill larger pots (approx. 8-10 cm / 3-4 inches in diameter) with vegetable garden soil.
- Separate the seedlings: Gently loosen the seedlings from the seedling pots with a pricking-out tool. Be careful not to damage the roots.
- Transplant: Place each seedling in its own pot. The roots should be well covered with soil.
- Watering: Gently water the young plants.
- Location: Place the young plants in a bright and slightly cooler place (approx. 15-18°C / 59-64°F).
Planting Out: Off to the Garden Bed!
After the young plants are strong enough (approx. 10-15 cm / 4-6 inches high), they can be transplanted into the garden bed. This is usually the case after 4-6 weeks.
- Prepare the bed: Loosen the soil thoroughly and remove weeds. Enrich the soil with compost or organic fertilizer.
- Harden off the young plants: A few days before planting out, place the young plants outdoors during the day so they can get used to the sun and temperatures.
- Spacing: The spacing depends on the cabbage variety. Find out what spacing is recommended for your variety. It is usually between 40 and 60 cm (16-24 inches).
- Planting holes: Dig planting holes that are slightly larger than the root balls of the young plants.
- Transplant: Place the young plants in the planting holes. The root balls should be well covered with soil.
- Watering: Water the young plants thoroughly after transplanting.
- Pest protection: Cover the young plants with a protective net to shield them from cabbage white butterflies and other pests.
Care: To Make Your Cabbage Thrive
After planting out, it’s important to care for the cabbage regularly so that it grows well and produces a rich harvest.
- Watering: Cabbage needs regular water, especially during dry periods. It’s best to water in the morning so the leaves can dry by evening.
- Fertilizing: Fertilize the cabbage regularly with organic fertilizer or compost. Make sure the fertilizer contains enough nitrogen, as cabbage is a heavy feeder.
- Weed control: Remove weeds regularly, as they take nutrients and water from the cabbage.
- Pest control: Check the cabbage regularly for pests. In case of infestation, you can use natural pesticides, e.g., nettle tea or neem oil.
- Hilling up: Hill up the soil around the cabbage regularly to increase stability and promote root formation.
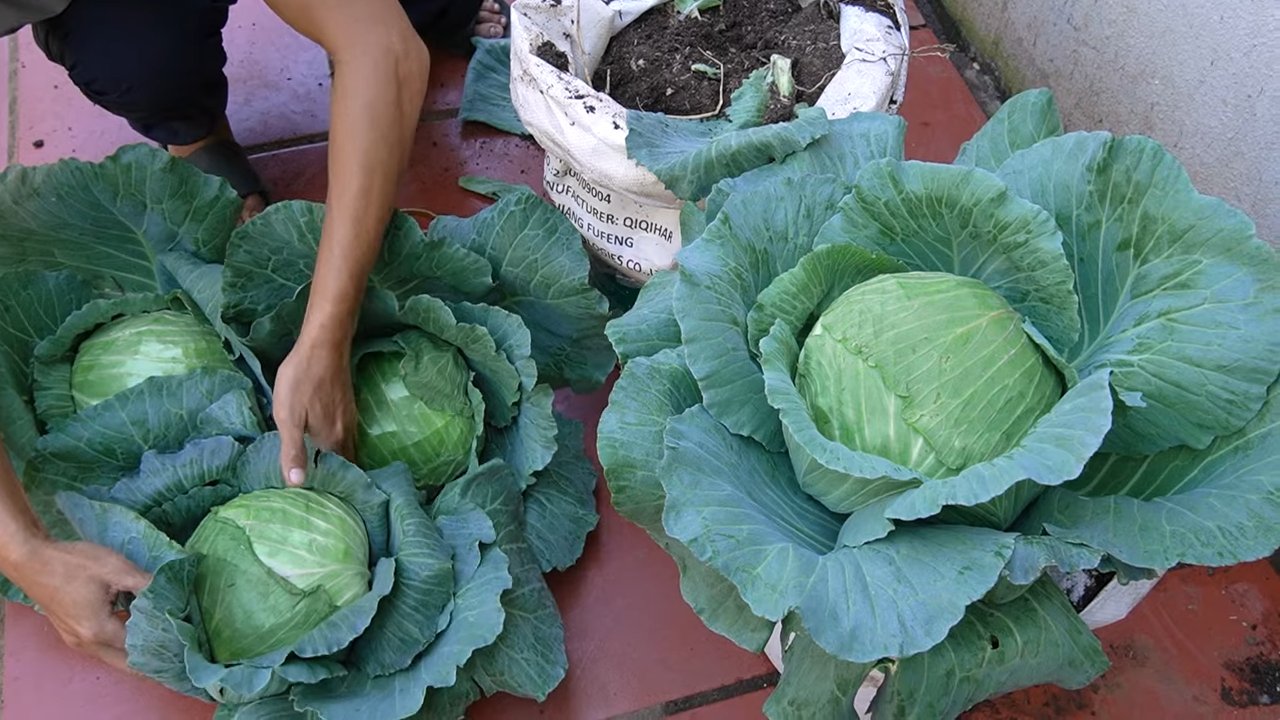
Harvest: The Reward for Your Effort
The harvest time depends on the cabbage variety. As a rule, you can harvest the cabbage when the heads are firm and plump.
- Harvest time: The right time to harvest is crucial for the taste and storage life of the cabbage.
- Harvesting method: Cut the cabbage with a sharp knife or an axe just above the ground.
- Storage: Cabbage can be stored in the refrigerator or in a cellar.
Conclusion
So, there you have it! Mastering the art of growing cabbage, even for beginners, is entirely within your reach. This isn’t just about saving money at the grocery store; it’s about connecting with your food, nurturing something from seed to table, and experiencing the immense satisfaction of harvesting your own fresh, crisp cabbage.
We’ve walked you through the essential steps, from selecting the right variety for your climate and preparing your soil to planting, nurturing, and protecting your precious cabbage heads. Remember, patience is key. Growing cabbage takes time and attention, but the rewards are well worth the effort. Imagine the delicious slaws, hearty soups, and flavorful stir-fries you’ll be able to create with your homegrown bounty!
This DIY approach to growing cabbage offers a level of control and customization you simply can’t achieve with store-bought produce. You can choose organic methods, ensuring your cabbage is free from harmful pesticides and chemicals. You can also experiment with different varieties, discovering unique flavors and textures that will elevate your culinary creations.
Consider these variations to further personalize your cabbage-growing experience:
* Succession Planting: Plant new cabbage seedlings every few weeks to ensure a continuous harvest throughout the growing season.
* Companion Planting: Plant cabbage alongside beneficial companions like dill, chamomile, or rosemary to deter pests and attract pollinators.
* Container Gardening: If you have limited space, grow cabbage in large containers on your patio or balcony. Choose smaller varieties that are well-suited for container gardening.
* Fermented Cabbage: Once you have a successful harvest, try your hand at making sauerkraut or kimchi using your homegrown cabbage. The possibilities are endless!
Growing your own cabbage is more than just a gardening project; it’s an investment in your health, your well-being, and your connection to the natural world. Don’t be intimidated by the process. Start small, learn as you go, and embrace the challenges and triumphs along the way.
We encourage you to take the plunge and embark on your own cabbage-growing adventure. We are confident that you’ll be amazed by what you can achieve. And most importantly, we want to hear about your experiences! Share your tips, tricks, and photos with us in the comments below. Let’s build a community of cabbage-growing enthusiasts and inspire others to discover the joy of homegrown goodness. Happy gardening!
Frequently Asked Questions (FAQ)
What is the best time of year to start growing cabbage?
The best time to start growing cabbage depends largely on your climate. Cabbage is a cool-season crop, meaning it thrives in temperatures between 60°F and 70°F (15°C and 21°C). In regions with mild winters, you can plant cabbage in the fall for a winter or early spring harvest. In colder climates, start seeds indoors 6-8 weeks before the last expected frost and transplant them outdoors in the spring. For a fall harvest in colder climates, start seeds indoors in late spring or early summer. Always check your local frost dates to determine the optimal planting time for your area.
How much sunlight does cabbage need?
Cabbage needs at least 6 hours of direct sunlight per day to thrive. Choose a planting location that receives full sun for the majority of the day. If you live in a particularly hot climate, some afternoon shade can be beneficial to prevent the cabbage heads from bolting (going to seed prematurely).
What kind of soil is best for growing cabbage?
Cabbage prefers well-drained, fertile soil that is rich in organic matter. The ideal soil pH is between 6.0 and 7.0. Before planting, amend your soil with compost, aged manure, or other organic materials to improve drainage, fertility, and water retention. A soil test can help you determine the specific nutrient needs of your soil.
How often should I water my cabbage plants?
Cabbage plants need consistent moisture to develop large, healthy heads. Water deeply and regularly, especially during dry periods. Aim to keep the soil consistently moist but not waterlogged. Mulching around the plants can help retain moisture and suppress weeds. A good rule of thumb is to water when the top inch of soil feels dry to the touch.
What are some common pests and diseases that affect cabbage?
Cabbage can be susceptible to a variety of pests and diseases, including cabbage worms, cabbage loopers, aphids, flea beetles, and clubroot. Regularly inspect your plants for signs of infestation or disease. Use organic pest control methods such as handpicking pests, using insecticidal soap, or applying Bacillus thuringiensis (Bt) to control cabbage worms and loopers. To prevent clubroot, ensure your soil is well-drained and has a pH above 6.5. Crop rotation can also help reduce the risk of disease.
How do I know when my cabbage is ready to harvest?
Cabbage is ready to harvest when the head is firm and solid to the touch. The size of the head will vary depending on the variety, but generally, a mature cabbage head will be about 6-12 inches in diameter. To harvest, use a sharp knife to cut the head from the stem, leaving a few outer leaves intact.
Can I grow cabbage in containers?
Yes, you can grow cabbage in containers, but you’ll need to choose a large container (at least 12 inches in diameter) and select a smaller cabbage variety that is well-suited for container gardening. Use a high-quality potting mix and ensure the container has good drainage. Water regularly and fertilize as needed.
What are some good companion plants for cabbage?
Good companion plants for cabbage include dill, chamomile, rosemary, thyme, onions, garlic, and marigolds. These plants can help deter pests, attract beneficial insects, and improve the overall health of your cabbage plants. Avoid planting cabbage near strawberries, tomatoes, or grapes, as these plants can compete for nutrients or attract pests that also affect cabbage.
My cabbage is bolting (going to seed). What can I do?
Bolting is when a cabbage plant prematurely produces a flower stalk and seeds. This can be caused by stress, such as extreme temperatures, drought, or poor soil. Once a cabbage plant bolts, the head will become loose and bitter. To prevent bolting, choose heat-tolerant varieties, provide consistent moisture, and protect your plants from extreme temperatures. If your cabbage plant bolts, you can still harvest the leaves for cooking, but the head will not be as palatable.
How can I store my harvested cabbage?
To store harvested cabbage, remove any damaged or yellowing outer leaves. Wrap the cabbage head in plastic wrap or place it in a plastic bag and store it in the refrigerator. Cabbage can typically be stored for several weeks in the refrigerator. You can also freeze cabbage, but it’s best to blanch it first to preserve its quality.

Leave a Comment