

Grow Swiss Chard Rooftop gardens are becoming increasingly popular, and for good reason! Imagine stepping onto your roof and harvesting vibrant, nutritious Swiss chard, ready to be transformed into a delicious meal. It’s not just a dream; it’s an achievable reality with a little know-how and some DIY spirit.
Rooftop gardening, while seemingly modern, has roots stretching back centuries. From the Hanging Gardens of Babylon to the more recent victory gardens of World War II, people have always found innovative ways to cultivate food in limited spaces. Today, with urban populations booming and access to fresh produce sometimes limited, rooftop gardens offer a sustainable and rewarding solution.
But why Swiss chard specifically? Well, this leafy green is a nutritional powerhouse, packed with vitamins, minerals, and antioxidants. Plus, it’s incredibly resilient and relatively easy to grow, making it perfect for beginner rooftop gardeners. I know what you’re thinking: “Rooftop gardening sounds complicated!” That’s where this article comes in. I’m going to share some simple, effective DIY tricks and hacks to help you successfully grow Swiss Chard Rooftop, even if you’ve never gardened before. We’ll cover everything from choosing the right containers and soil to protecting your plants from the elements. Get ready to transform your rooftop into a thriving edible oasis!
Growing Swiss Chard on the Roof: Your DIY Guide for a Bountiful Harvest
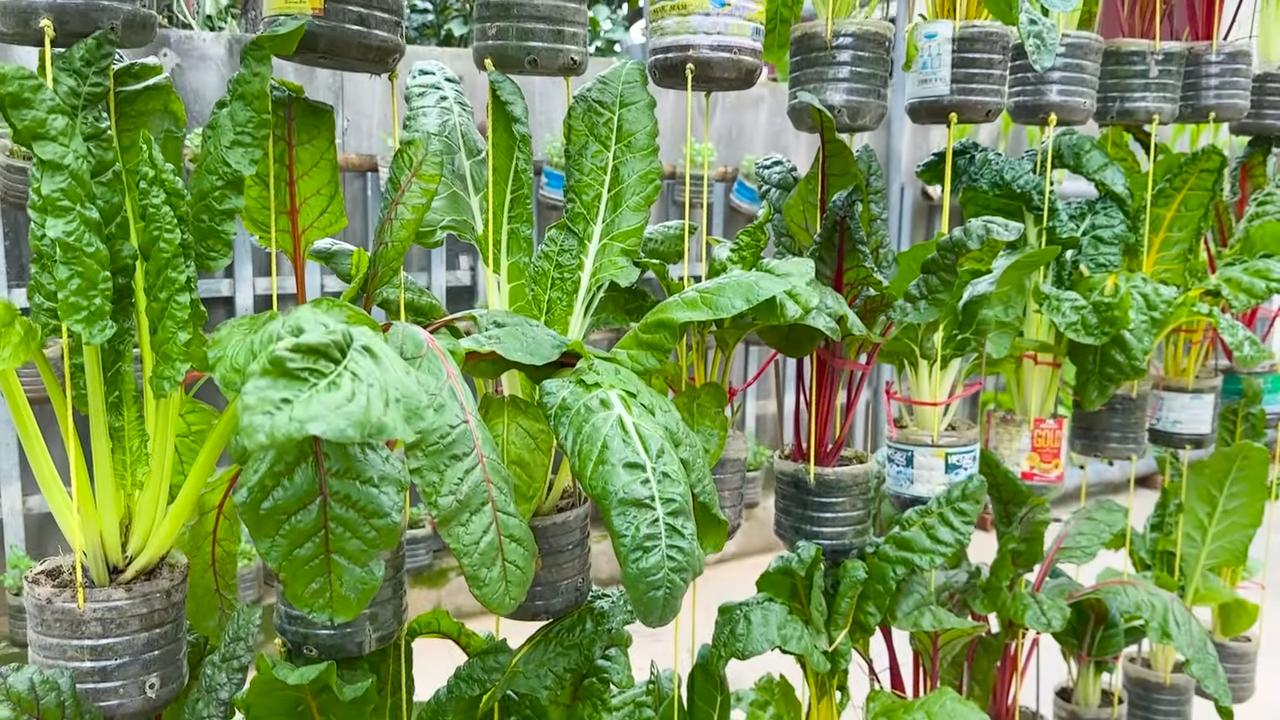
I love harvesting fresh vegetables directly from my rooftop! Swiss chard is perfect for this: it’s robust, easy to care for, and provides delicious leaves over a long period. This guide will show you how to create your own little chard garden on the roof.
What you need:
- Suitable containers: Large pots, planter boxes, or even recycled containers with drainage holes. They should be at least 30 cm deep and wide.
- High-quality potting soil: A mixture of garden soil, compost, and coconut coir is ideal.
- Swiss chard seeds or seedlings: Seeds are cheaper, while seedlings yield results faster.
- Fertilizer: Organic fertilizer like compost tea or horn shavings.
- Watering can or hose: for regular watering.
- Mulch material: Straw, wood chips, or grass clippings to retain moisture in the soil and suppress weeds.
- Shovel or trowel: For filling containers and planting.
- Gloves: To keep your hands clean.
- (Optional) Snail protection: If you live in an area with many snails.
- (Optional) Support/Trellis: For varieties with particularly large leaves to protect them from wind.
Preparation is Everything: The Right Location and Containers
Before we start, it’s important to find the right location for your chard. Swiss chard loves the sun but also needs some protection from the midday heat, especially in summer. A location with at least 6 hours of sun per day is ideal. Also, make sure your roof can support the additional weight of the containers and soil.
The choice of containers is also crucial. I recommend large pots or planter boxes with a capacity of at least 20 liters per plant. This gives the roots enough space to grow. Be absolutely sure that the containers have drainage holes so that excess water can run off and waterlogging is avoided. Waterlogging is the enemy of chard!
Sowing or Planting: Starting Your Chard Garden
You have two options: either you grow your chard from seed, or you buy young plants. Both methods have their pros and cons.
Sowing Swiss Chard Seeds:
- Prepare the soil: Fill your containers with the prepared potting soil. Make sure the soil is loose and well-draining.
- Sowing: Sow the seeds about 1-2 cm deep into the soil. I usually sow 2-3 seeds per spot to ensure that at least one germinates.
- Watering: Water the soil gently so that it is moist but not wet.
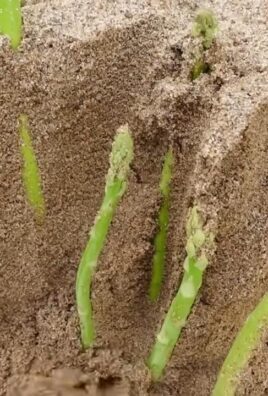
- Germination: The seeds usually germinate within 7-14 days. Keep the soil moist during this time.
- Thinning: Once the seedlings have a few leaves, thin them out, leaving only the strongest plant per spot.
Planting Swiss Chard Seedlings:
- Prepare the soil: Fill your containers with the prepared potting soil.
- Planting holes: Dig holes in the soil large enough to accommodate the root balls of the seedlings.
- Planting: Carefully place the seedlings in the holes and fill the holes with soil. Make sure the top of the root ball is level with the soil surface.
- Watering: Water the plants thoroughly.
Caring for Your Chard: Watering, Fertilizing, and Protecting
Caring for chard is relatively simple, but there are a few things you should pay attention to.
Watering:
Chard needs regular watering, especially during dry periods. The soil should always be slightly moist, but not wet. It’s best to water early in the morning or late in the evening to avoid evaporation. I always check with my finger to see if the soil is still moist enough.
Fertilizing:
Chard is a heavy feeder and needs regular fertilization to grow well. I fertilize my plants every 2-3 weeks with organic fertilizer like compost tea or horn shavings. You can also use a liquid fertilizer specifically designed for vegetables.
Pest Protection:
Chard is relatively resistant to pests, but snails can be a problem. I use snail bait or snail fences to protect my plants. You can also sprinkle coffee grounds around the plants, which keeps snails away.
Mulching:
A layer of mulch made of straw, wood chips, or grass clippings helps to retain moisture in the soil, suppress weeds, and fertilize the soil. I mulch my chard plants right after planting.
Harvest Time: Enjoying the Fruits of Your Labor
You can start harvesting as soon as the leaves are large enough. Cut the outer leaves so that the inner leaves can continue to grow. This allows you to harvest over a long period. I usually harvest my chard leaves when they are about 20-30 cm long.
Harvesting Tips:
- Cut the leaves with a sharp knife or scissors.
- It’s best to harvest the leaves early in the morning when they are still fresh and crisp.
- Regularly remove wilted or damaged leaves to promote the health of the plant.
Variety: Which Chard is Right for You?
There are many different varieties of chard that differ in color, size, and taste. Here are a few popular varieties:
- ‘Bright Lights’: A colorful mix of chard with red, yellow, orange, and white stems.
- ‘Lucullus’: A robust variety with light green leaves and white stems.
- ‘Rhubarb Chard’: A variety with red stems and dark green leaves.
- ‘Fordhook Giant’: A variety with large, dark green leaves and white stems.
I personally like ‘Bright Lights’ a lot because it’s so colorful and spruces up my rooftop garden. But it’s best to try different varieties to find out which one you like best.
Overwintering: Enjoying Chard Next Year Too
Chard is biennial, meaning it flowers and produces seeds in its second year. In mild winters, chard can survive outdoors, but in cold winters, you should protect it.
How to overwinter your chard:
- Cut back the leaves: In the fall, cut the leaves back to a few centimeters above the ground.
- Protect the roots: Cover the roots with a thick layer of mulch to protect them from frost.
- Water sparingly: Water the chard only sparingly during the winter to avoid waterlogging.
In the spring, the chard will sprout again, and you can harvest once more.
Common Problems and Solutions:
- Yellow leaves: Can indicate a nutrient deficiency. Fertilize with a balanced fertilizer.
- Snail infestation: Use snail bait or snail fences.
- Aphids: Spray the plants with a soap and water solution.
- Fungal diseases: Ensure good ventilation and avoid waterlogging.
Conclusion
So, there you have it! Growing Swiss chard on your rooftop isn’t just a whimsical idea; it’s a practical, rewarding, and surprisingly simple way to bring fresh, nutritious greens right to your doorstep. We’ve explored the ins and outs of creating your own rooftop Swiss chard garden, from selecting the right containers and soil to nurturing your plants and harvesting your bounty.
Why is this DIY trick a must-try? Because it offers a multitude of benefits that extend far beyond just having fresh vegetables. Imagine stepping out onto your rooftop and snipping vibrant, colorful leaves for your salad, knowing exactly where they came from and what went into growing them. Think about the satisfaction of reducing your carbon footprint by sourcing your food locally, right on your own roof! Consider the sheer joy of watching your little seedlings transform into thriving plants, a testament to your green thumb and a beautiful addition to your urban landscape.
But the advantages don’t stop there. Growing Swiss chard on your rooftop can also be a fantastic way to improve your mental well-being. Gardening is known to be a therapeutic activity, providing a sense of calm and connection to nature. Plus, the physical activity involved in tending to your plants can be a great way to get some exercise and fresh air.
And let’s not forget the deliciousness factor! Freshly harvested Swiss chard has a flavor that’s simply unmatched by store-bought varieties. Its slightly earthy, slightly sweet taste is a perfect complement to a wide range of dishes, from salads and stir-fries to soups and quiches.
Now, for a few suggestions and variations to inspire your rooftop Swiss chard adventure:
* Experiment with different varieties: Swiss chard comes in a rainbow of colors, from bright red and orange to vibrant yellow and white. Try growing a mix of varieties to add visual appeal to your garden and a range of flavors to your meals.
* Companion planting: Consider planting companion plants alongside your Swiss chard to deter pests and attract beneficial insects. Marigolds, nasturtiums, and garlic are all excellent choices.
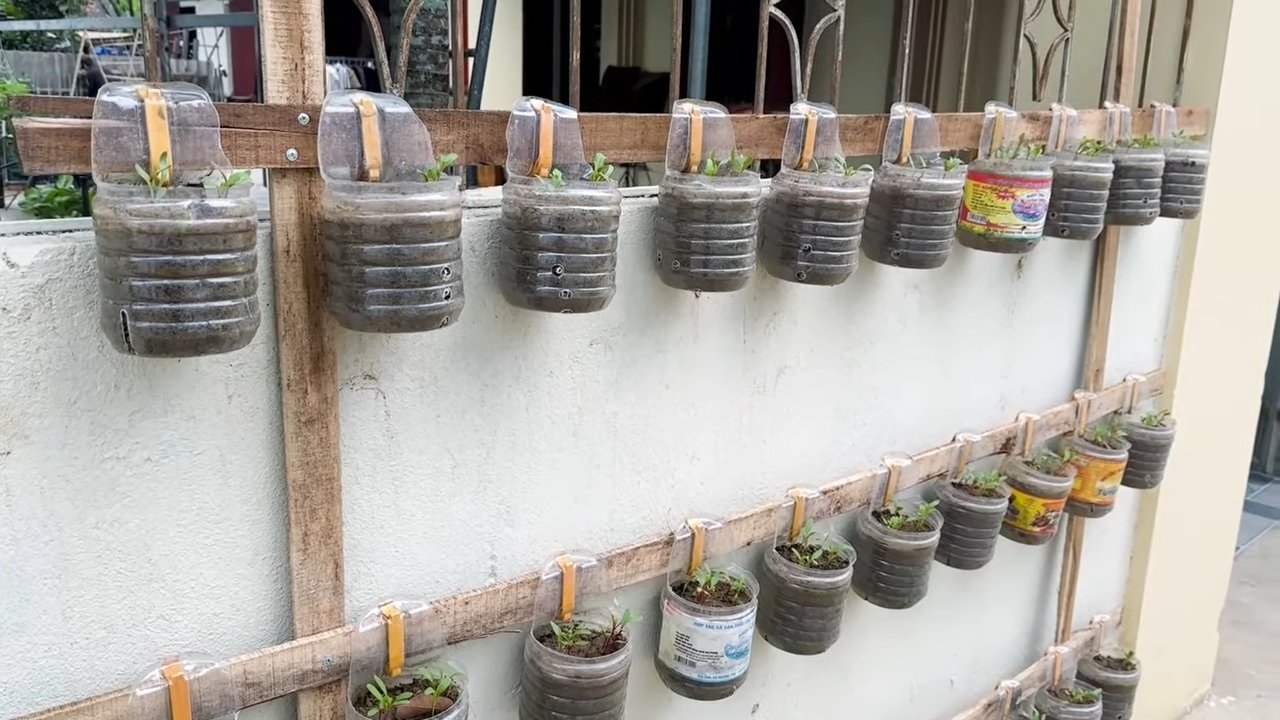
* Vertical gardening: If you’re short on space, explore vertical gardening options. Trellises, hanging baskets, and stacked planters can all be used to grow Swiss chard vertically, maximizing your rooftop’s potential.
* Extend the growing season: Use row covers or a small greenhouse to protect your Swiss chard from frost and extend the growing season into the fall and winter.
* Seed saving: Once your Swiss chard plants bolt (produce flowers and seeds), you can collect the seeds and save them for planting next year. This is a great way to save money and ensure a continuous supply of your favorite varieties.
Ultimately, the best way to discover the joys of growing Swiss chard on your rooftop is to simply give it a try. Don’t be afraid to experiment, learn from your mistakes, and adapt your approach to suit your specific conditions.
We’re confident that you’ll find this DIY trick to be a rewarding and enriching experience. So, grab your seeds, gather your supplies, and get ready to transform your rooftop into a thriving oasis of fresh, homegrown goodness.
We’d love to hear about your experiences! Share your photos, tips, and stories in the comments below. Let’s create a community of rooftop Swiss chard growers and inspire others to embrace the joys of urban gardening. Happy growing!
Frequently Asked Questions (FAQ)
What kind of containers are best for growing Swiss chard on a rooftop?
The ideal containers for growing Swiss chard on a rooftop are those that are durable, lightweight, and provide adequate drainage. Consider using plastic pots, fabric grow bags, or even repurposed containers like old buckets or tubs. The size of the container should be at least 12 inches deep and 12 inches wide to accommodate the plant’s root system. Ensure that the containers have drainage holes to prevent waterlogging, which can lead to root rot. Also, consider the weight of the containers, especially when filled with soil and water, to ensure that your rooftop can support the added load. Dark-colored containers can absorb more heat, which can be beneficial in cooler climates but may require more frequent watering in hotter climates.
What type of soil is recommended for rooftop Swiss chard?
Swiss chard thrives in well-draining, nutrient-rich soil. A good option is to use a potting mix specifically formulated for vegetables. These mixes typically contain a blend of peat moss, perlite, and vermiculite, which provide good drainage and aeration. You can also amend your own soil by mixing equal parts of garden soil, compost, and sand or perlite. Compost is essential for providing nutrients and improving soil structure. Avoid using heavy clay soil, as it can become waterlogged and inhibit root growth. Before planting, consider testing your soil’s pH level. Swiss chard prefers a slightly acidic to neutral pH of 6.0 to 7.0. If your soil is too acidic, you can add lime to raise the pH.
How often should I water my rooftop Swiss chard?
Watering frequency depends on several factors, including the weather, the type of container you’re using, and the stage of growth of your plants. Generally, you should water your Swiss chard whenever the top inch of soil feels dry to the touch. During hot, dry weather, you may need to water daily, while during cooler, wetter weather, you may only need to water every few days. When watering, water deeply and thoroughly, ensuring that the entire root zone is moistened. Avoid overhead watering, as this can lead to fungal diseases. Instead, water at the base of the plants. Mulching around the plants can help to retain moisture and reduce the need for frequent watering.
What are some common pests and diseases that affect Swiss chard, and how can I prevent them?
Swiss chard is generally a hardy plant, but it can be susceptible to certain pests and diseases. Common pests include aphids, flea beetles, and leaf miners. Aphids can be controlled with insecticidal soap or by introducing beneficial insects like ladybugs. Flea beetles can be deterred by using row covers or by spraying with neem oil. Leaf miners can be controlled by removing and destroying infested leaves. Common diseases include fungal diseases like powdery mildew and leaf spot. These diseases can be prevented by providing good air circulation, avoiding overhead watering, and using a fungicide if necessary. Crop rotation can also help to prevent the buildup of soilborne diseases. Regularly inspect your plants for signs of pests or diseases and take action promptly to prevent them from spreading.
How do I harvest Swiss chard, and when is the best time to do so?
You can begin harvesting Swiss chard leaves when they are about 6 inches long. The best time to harvest is in the morning, when the leaves are crisp and hydrated. To harvest, simply cut the outer leaves near the base of the plant, leaving the inner leaves to continue growing. This cut-and-come-again method allows you to harvest Swiss chard continuously throughout the growing season. Avoid harvesting more than one-third of the plant at a time, as this can stress the plant and reduce its yield. You can also harvest the entire plant by cutting it off at the base. Freshly harvested Swiss chard can be stored in the refrigerator for up to a week.
Can I grow Swiss chard in partial shade on my rooftop?
While Swiss chard prefers full sun (6-8 hours of direct sunlight per day), it can tolerate partial shade, especially in hotter climates. If your rooftop receives only partial shade, try to position your Swiss chard plants in the area that receives the most sunlight. Plants grown in partial shade may not grow as quickly or produce as many leaves as those grown in full sun, but they can still thrive and provide a decent harvest. In fact, growing Swiss chard in partial shade can actually be beneficial in hot climates, as it can help to prevent the leaves from scorching.
How do I fertilize my rooftop Swiss chard?
Swiss chard benefits from regular fertilization to ensure healthy growth and abundant yields. You can use a balanced fertilizer (e.g., 10-10-10) or a fertilizer specifically formulated for vegetables. Apply the fertilizer according to the package instructions, typically every 4-6 weeks. You can also amend the soil with compost or other organic matter to provide a slow-release source of nutrients. Avoid over-fertilizing, as this can lead to excessive leaf growth and reduced flavor. Liquid fertilizers can be applied directly to the soil or as a foliar spray. Foliar feeding can be particularly beneficial for providing micronutrients.
Is it safe to grow Swiss chard on a rooftop if I have concerns about pollution?
Growing vegetables on a rooftop in an urban environment can raise concerns about pollution. However, there are steps you can take to minimize the risk of contamination. First, choose a location on your rooftop that is away from sources of pollution, such as busy roads or industrial areas. Second, use a high-quality potting mix that is free of contaminants. Third, wash your Swiss chard leaves thoroughly before eating them. You can also consider using a soil test kit to check for the presence of heavy metals or other pollutants. If you are concerned about air pollution, you can use row covers to protect your plants. Overall, the benefits of growing your own food on a rooftop often outweigh the risks, especially when you take precautions to minimize exposure to pollutants.


Leave a Comment