

Grow Spinach at Home? Absolutely! Imagine stepping into your backyard and harvesting fresh, vibrant spinach leaves for your salad, smoothie, or favorite dish. No more trips to the grocery store, no more worrying about pesticides – just pure, homegrown goodness.
For centuries, spinach has been a staple in diets around the world, revered not only for its nutritional value but also for its versatility in the kitchen. From ancient Persia, where it’s believed to have originated, to the tables of modern-day families, spinach has consistently proven its worth. But what if I told you that cultivating this leafy green could be easier than you think, even if you don’t have a sprawling garden?
That’s where our DIY tricks and hacks come in! In this article, I’m going to share some simple, yet effective methods to grow spinach at home, regardless of your gardening experience or space constraints. Whether you have a sunny balcony, a small patio, or a traditional garden bed, I’ll guide you through the process step-by-step. You’ll learn everything from choosing the right spinach variety to troubleshooting common problems, ensuring a bountiful harvest of this nutritious superfood.
Why is this so important? Because in today’s world, knowing where your food comes from and having control over its quality is more crucial than ever. Plus, there’s nothing quite as satisfying as nurturing a plant from seed to table. So, let’s get our hands dirty and unlock the secrets to growing delicious, healthy spinach right in your own backyard!
Grow Your Own Delicious Spinach: A Beginner’s Guide
Hey there, fellow gardening enthusiasts! I’m so excited to share my secrets to growing vibrant, healthy spinach right in your own backyard (or even on your balcony!). Spinach is a nutritional powerhouse, packed with vitamins and minerals, and nothing beats the taste of freshly harvested, homegrown greens. Trust me, once you taste the difference, you’ll never go back to store-bought!
This guide will walk you through every step, from choosing the right seeds to harvesting your bountiful crop. Let’s get started!
Choosing the Right Spinach Variety
First things first, let’s talk about spinach varieties. There are a few different types, and the best one for you will depend on your climate and preferences. Here’s a quick rundown:
* Savoy Spinach: This type has crinkled, curly leaves and a slightly stronger flavor. It’s known for being cold-hardy, making it a great choice for fall and winter growing.
* Smooth-Leaf Spinach: As the name suggests, this spinach has smooth, flat leaves. It’s easier to clean than savoy spinach and has a milder flavor.
* Semi-Savoy Spinach: This is a hybrid between savoy and smooth-leaf spinach, offering a balance of texture and flavor. It’s also quite versatile and can tolerate a range of conditions.
I personally love growing a mix of savoy and smooth-leaf spinach to have a variety of textures and flavors in my salads.
Preparing Your Spinach Bed
Spinach thrives in well-drained soil that’s rich in organic matter. Here’s how to get your garden bed ready:
* Sunlight: Spinach needs at least 3-6 hours of sunlight per day. Choose a spot in your garden that gets plenty of sun, especially in the cooler months.
* Soil: Spinach prefers a slightly acidic to neutral soil pH (around 6.5 to 7.0). You can test your soil pH with a simple soil testing kit from your local garden center.
* Amendments: Amend your soil with plenty of compost or well-rotted manure. This will improve drainage, add nutrients, and help retain moisture. I usually add a generous layer of compost about 2-3 inches thick.
* Tilling/Digging: Loosen the soil to a depth of at least 6-8 inches. This will allow the spinach roots to grow easily. Remove any rocks, weeds, or other debris.
* Leveling: Rake the soil smooth to create a level planting surface.
Planting Your Spinach Seeds
Now for the fun part – planting! Spinach is a cool-season crop, so the best time to plant it is in early spring or early fall.
1. Timing is Key: For a spring crop, sow seeds 4-6 weeks before the last expected frost. For a fall crop, sow seeds 6-8 weeks before the first expected frost. You can also plant spinach in the winter in milder climates.
2. Direct Sowing: Spinach is best direct-sown, meaning you plant the seeds directly into the garden bed. It doesn’t transplant well.
3. Spacing: Sow seeds about ½ inch deep and 1 inch apart in rows that are 12-18 inches apart.
4. Watering: Gently water the soil after planting. Keep the soil consistently moist until the seeds germinate.
5. Thinning: Once the seedlings emerge (usually in 5-10 days), thin them to about 3-6 inches apart. This will give them enough room to grow and prevent overcrowding. Don’t throw away the thinnings! You can eat them as microgreens.
Caring for Your Spinach Plants
Spinach is relatively easy to care for, but here are a few tips to keep your plants healthy and productive:
* Watering: Water regularly, especially during dry periods. Spinach needs consistent moisture to thrive. Aim for about 1 inch of water per week.
* Weeding: Keep the garden bed free of weeds. Weeds compete with spinach for nutrients and water. Hand-pull weeds carefully to avoid disturbing the spinach roots.
* Fertilizing: Spinach is a heavy feeder, so it benefits from regular fertilization. You can use a balanced organic fertilizer or side-dress with compost tea every few weeks. I like to use fish emulsion, which is a great source of nitrogen.
* Pest Control: Spinach is susceptible to a few pests, such as aphids, leaf miners, and flea beetles. Inspect your plants regularly and take action if you see any signs of infestation. You can use insecticidal soap or neem oil to control these pests.
* Bolting: Bolting is when spinach plants send up a flower stalk and the leaves become bitter. This usually happens when the weather gets too hot. To prevent bolting, plant spinach in a shady spot during the summer months or choose bolt-resistant varieties.
Harvesting Your Spinach
The moment you’ve been waiting for! You can start harvesting spinach leaves when they are about 4-6 inches long.
1. Timing: Harvest spinach in the morning, when the leaves are crisp and cool.
2. Method: You can harvest individual leaves or cut the entire plant at the base. If you harvest individual leaves, the plant will continue to produce more leaves.
3. Storage: Wash the spinach leaves thoroughly and store them in a plastic bag in the refrigerator. They will keep for about a week.
Troubleshooting Common Spinach Problems
Even with the best care, you might encounter a few problems while growing spinach. Here are some common issues and how to address them:
* Yellowing Leaves: This could be a sign of nutrient deficiency, overwatering, or disease. Check your soil pH and nutrient levels, and adjust your watering schedule accordingly.
* Stunted Growth: This could be caused by poor soil, lack of sunlight, or pest infestation. Amend your soil with compost, ensure your plants are getting enough sunlight, and control any pests.
* Leaf Spots: This could be a sign of fungal disease. Remove any affected leaves and apply a fungicide if necessary. Ensure good air circulation around your plants to prevent fungal diseases.
* Bolting: As mentioned earlier, bolting is when spinach plants send up a flower stalk and the leaves become bitter. To prevent bolting, plant spinach in a shady spot during the summer months or choose bolt-resistant varieties.
Extending Your Spinach Harvest
Want to enjoy fresh spinach for as long as possible? Here are a few tips to extend your harvest:
* Succession Planting: Sow seeds every 2-3 weeks to ensure a continuous supply of spinach.
* Cold Frames: Use cold frames or row covers to protect your spinach plants from frost and extend the growing season.
* Overwintering: In mild climates, you can overwinter spinach plants by covering them with a thick layer of mulch.
* Freezing: If you have a surplus of spinach, you can freeze it for later use. Blanch the leaves for a few minutes before freezing to preserve their color and flavor.
Spinach Recipes to Enjoy Your Harvest
Now that you have a bountiful harvest of fresh spinach, it’s time to get cooking! Here are a few of my favorite spinach recipes:
* Spinach Salad: A classic! Toss fresh spinach leaves with your favorite toppings, such as berries, nuts, cheese, and a vinaigrette dressing.
* Spinach and Artichoke Dip: A crowd-pleaser! Combine spinach, artichoke hearts, cream cheese, and Parmesan cheese for a delicious dip.
* Spinach Smoothie: A healthy and refreshing way to start your day! Blend spinach with fruits, yogurt, and juice for a nutritious smoothie.
* Spinach Quiche: A savory and satisfying dish! Combine spinach with eggs, cheese, and vegetables for a delicious quiche.
* Sautéed Spinach: A simple and flavorful side dish! Sauté spinach with garlic, olive oil, and a pinch of salt and pepper.
Additional Tips and Tricks
Here are a few extra tips and tricks to help you grow the best spinach ever:
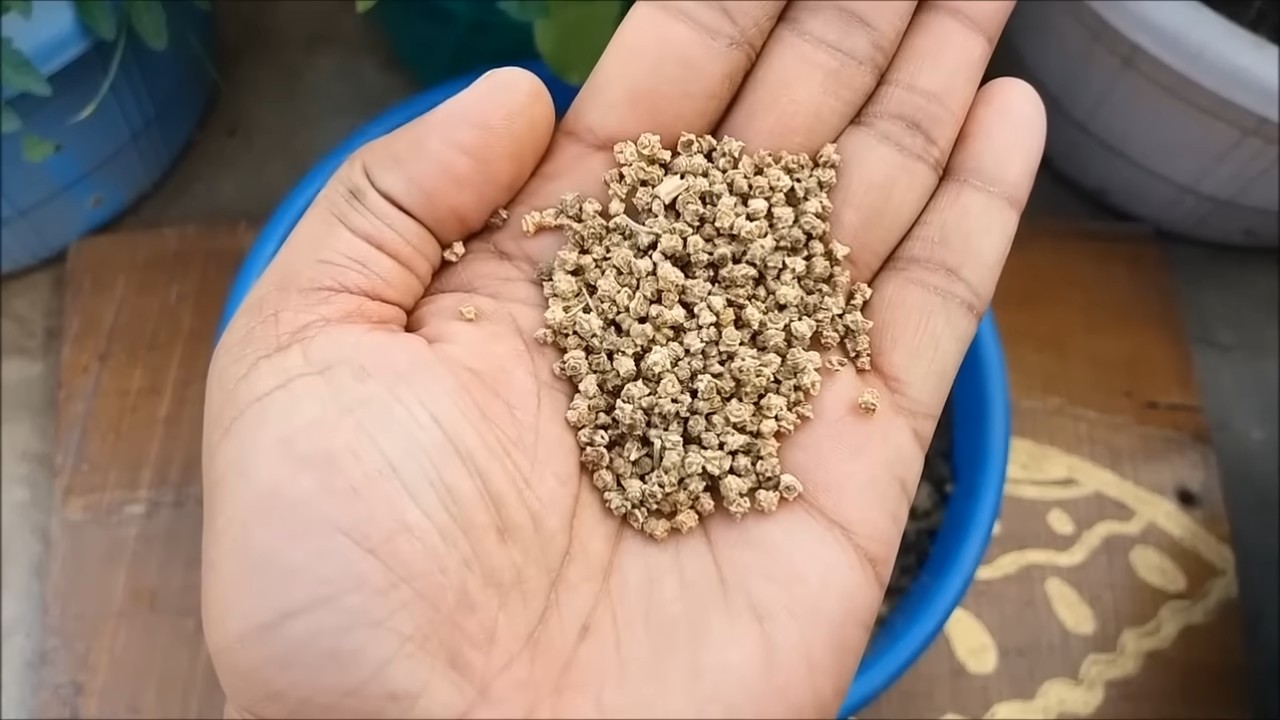
* Soak Seeds: Soaking spinach seeds in water for 24 hours before planting can improve germination rates.
* Companion Planting: Plant spinach with companion plants such as radishes, lettuce, and strawberries. These plants can help deter pests and improve soil health.
* Crop Rotation: Rotate your spinach crops each year to prevent soilborne diseases.
* Observe Your Plants: Pay attention to your spinach plants and learn to recognize the signs of stress or disease. The sooner you identify a problem, the easier it will be to fix it.
Conclusion
Growing your own spinach is a rewarding experience that provides you with fresh, healthy greens all season long. With a little bit of planning and care, you can enjoy a bountiful harvest of delicious spinach right from your own backyard. So, get out there and start planting!
Conclusion
So, there you have it! Growing spinach at home is not only achievable, but it’s also incredibly rewarding. From the vibrant green leaves gracing your garden to the fresh, nutrient-packed addition to your meals, the benefits are undeniable. We’ve walked you through the simple steps, debunked common myths, and armed you with the knowledge to cultivate your own thriving spinach patch, even if you’re a complete beginner.
Why is this DIY trick a must-try? Because store-bought spinach simply can’t compare to the flavor and freshness of homegrown. You control the growing conditions, ensuring your spinach is free from harmful pesticides and bursting with natural goodness. Plus, think of the satisfaction of harvesting your own food! It’s a connection to nature that’s both grounding and empowering.
But the fun doesn’t stop there! Feel free to experiment with different varieties of spinach. Try baby spinach for tender salads, or explore savoy spinach for its crinkled leaves and robust flavor. You can also adjust the growing conditions to suit your local climate. If you live in a warmer region, provide extra shade during the hottest part of the day. If you’re in a cooler area, consider using a cold frame or greenhouse to extend the growing season.
Consider companion planting to maximize your garden’s potential. Spinach thrives alongside plants like radishes, lettuce, and strawberries. These companions can help deter pests, improve soil health, and even enhance the flavor of your spinach.
Don’t be afraid to get creative with your spinach harvest! Beyond salads, spinach is incredibly versatile. Add it to smoothies for a nutritional boost, sauté it with garlic and olive oil for a simple side dish, or incorporate it into soups, stews, and pasta dishes. The possibilities are endless.
We wholeheartedly encourage you to give this DIY trick a try. Growing spinach at home is an investment in your health, your well-being, and your connection to the natural world. It’s a simple yet profound way to bring fresh, delicious, and nutritious food to your table.
And most importantly, we want to hear about your experience! Share your successes, your challenges, and your tips with us in the comments below. Let’s create a community of home gardeners who are passionate about growing their own food. We are confident that with a little effort, you will be enjoying fresh, homegrown spinach in no time. So, grab your seeds, get your hands dirty, and embark on this rewarding journey of growing spinach at home. You won’t regret it! Let us know how your **grow spinach at home** journey goes!
Frequently Asked Questions (FAQ)
1. What is the best time of year to plant spinach?
Spinach is a cool-season crop, meaning it thrives in cooler temperatures. The best time to plant spinach is either in early spring or early fall. For a spring crop, sow seeds as soon as the ground can be worked, typically 4-6 weeks before the last expected frost. For a fall crop, plant seeds 6-8 weeks before the first expected frost. This allows the spinach to mature before the weather gets too cold. In warmer climates, you can often grow spinach throughout the winter.
2. What kind of soil is best for growing spinach?
Spinach prefers well-drained soil that is rich in organic matter. The ideal soil pH is between 6.5 and 7.0. Before planting, amend the soil with compost or well-rotted manure to improve its fertility and drainage. If your soil is heavy clay, consider adding sand or other amendments to improve drainage. A soil test can help you determine the pH and nutrient levels of your soil, allowing you to make necessary adjustments.
3. How much sunlight does spinach need?
Spinach needs at least 3-6 hours of sunlight per day. While it can tolerate some shade, especially in warmer climates, more sunlight will result in healthier and more productive plants. If you’re growing spinach indoors, provide supplemental lighting to ensure it gets enough light.
4. How often should I water spinach?
Spinach needs consistent moisture to thrive. Water deeply and regularly, especially during dry periods. Aim to keep the soil consistently moist but not waterlogged. Overwatering can lead to root rot, so be sure the soil is well-draining. Mulching around the plants can help retain moisture and suppress weeds.
5. What are some common pests and diseases that affect spinach?
Some common pests that affect spinach include aphids, leaf miners, and flea beetles. Diseases that can affect spinach include downy mildew and fusarium wilt. To prevent pest and disease problems, practice good garden hygiene, such as removing weeds and debris. You can also use organic pest control methods, such as insecticidal soap or neem oil, to control pests. Choose disease-resistant varieties of spinach to minimize the risk of disease.
6. How do I harvest spinach?
You can harvest spinach leaves as soon as they are large enough to eat. Simply cut the outer leaves with a sharp knife or scissors, leaving the inner leaves to continue growing. This allows you to harvest spinach multiple times from the same plant. Alternatively, you can harvest the entire plant at once by cutting it off at the base.
7. How do I store spinach after harvesting?
After harvesting, wash the spinach leaves thoroughly and dry them with a salad spinner or paper towels. Store the spinach in a plastic bag or container in the refrigerator. It will typically last for 5-7 days. For longer storage, you can blanch and freeze spinach.
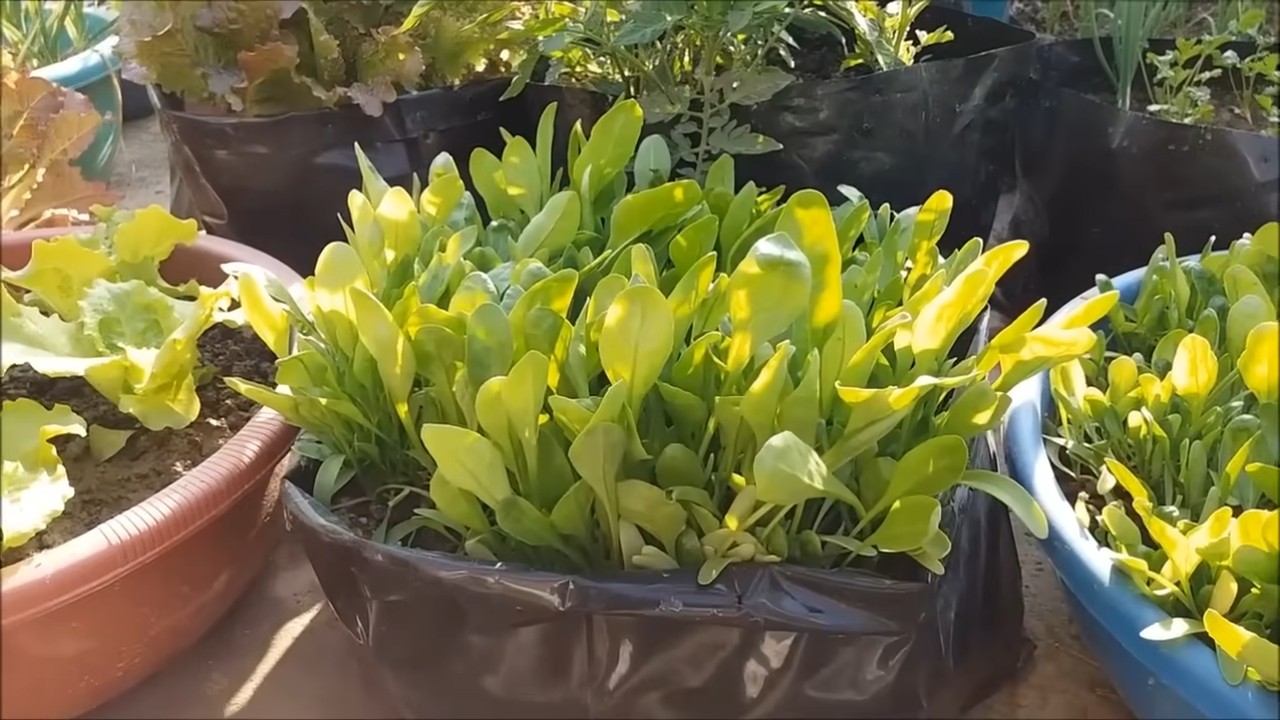
8. Can I grow spinach in containers?
Yes, spinach can be grown successfully in containers. Choose a container that is at least 6 inches deep and has drainage holes. Use a high-quality potting mix and water regularly. Container-grown spinach may need more frequent watering than spinach grown in the ground.
9. What are some good companion plants for spinach?
Good companion plants for spinach include radishes, lettuce, strawberries, and garlic. Radishes help to deter pests, while lettuce provides shade and helps to keep the soil cool. Strawberries attract beneficial insects, and garlic repels pests.
10. How can I prevent spinach from bolting (going to seed)?
Bolting is when the plant prematurely flowers and produces seeds, which makes the leaves bitter. To prevent bolting, plant spinach in early spring or fall, provide adequate shade during hot weather, and water regularly. Choose bolt-resistant varieties of spinach. Harvest the leaves regularly to encourage continued leaf production.


Leave a Comment