

Grow radishes backyard, and unlock a world of fresh, peppery goodness right outside your door! Forget those bland, store-bought radishes – imagine crisp, vibrant radishes bursting with flavor, ready to add a zing to your salads, sandwiches, or even enjoyed as a simple, healthy snack. But how do you achieve this garden-to-table dream, especially if you’re short on space or time? That’s where our DIY tricks and hacks come in!
Radishes have been cultivated for centuries, with roots tracing back to ancient civilizations. They were a staple in the diets of the Egyptians and Greeks, valued for their nutritional benefits and ease of cultivation. Today, we’re bringing that tradition to your backyard, making it easier than ever to enjoy these delightful root vegetables.
Let’s face it, not everyone has acres of land to dedicate to gardening. Many of us are working with small patios, balconies, or even just a sunny windowsill. That’s why these DIY tricks are essential. I’m going to show you how to grow radishes backyard, even in the most limited spaces. We’ll cover everything from choosing the right varieties and preparing your soil to mastering the art of succession planting for a continuous harvest. Get ready to ditch the grocery store radishes and embrace the satisfaction of growing your own!
Growing Radishes in Your Own Garden: A Simple DIY Guide
Hello garden friends! Do you fancy some crisp, homegrown radishes? Then you’ve come to the right place! Radishes are super easy to grow, they grow quickly, and are perfect for beginner gardeners. I’ll show you how to get a bountiful radish harvest in your own garden (or even in a balcony box!). Let’s get started!
What you need for growing radishes
Before we begin, here is a list of everything you’ll need:
- Radish seeds: It’s best to choose varieties that are suitable for your region. There are different colors and shapes – let your creativity run wild!
- Garden tools: A small trowel or garden spade, a rake, and possibly a dibber.
- Good soil: Radishes like loose, humus-rich soil. You can mix garden soil with compost or sand to prepare it optimally.
- Watering can or garden hose: Radishes need regular watering.
- (Optional) Row marker: Helps to draw straight rows.
- (Optional) Slug protection: Especially important if you live in an area with many slugs.
Preparing the Soil
Good soil is the be-all and end-all for a successful harvest. Here’s how to prepare it:
- Loosen the soil: Take your spade or garden trowel and loosen the soil thoroughly. Remove stones, roots, and other obstacles. The soil should be nice and crumbly.
- Incorporate compost: Mix compost or well-rotted manure into the soil. This improves the soil structure and provides the radishes with important nutrients.
- Level the soil: Rake the surface smooth so that the seeds can be sown evenly.
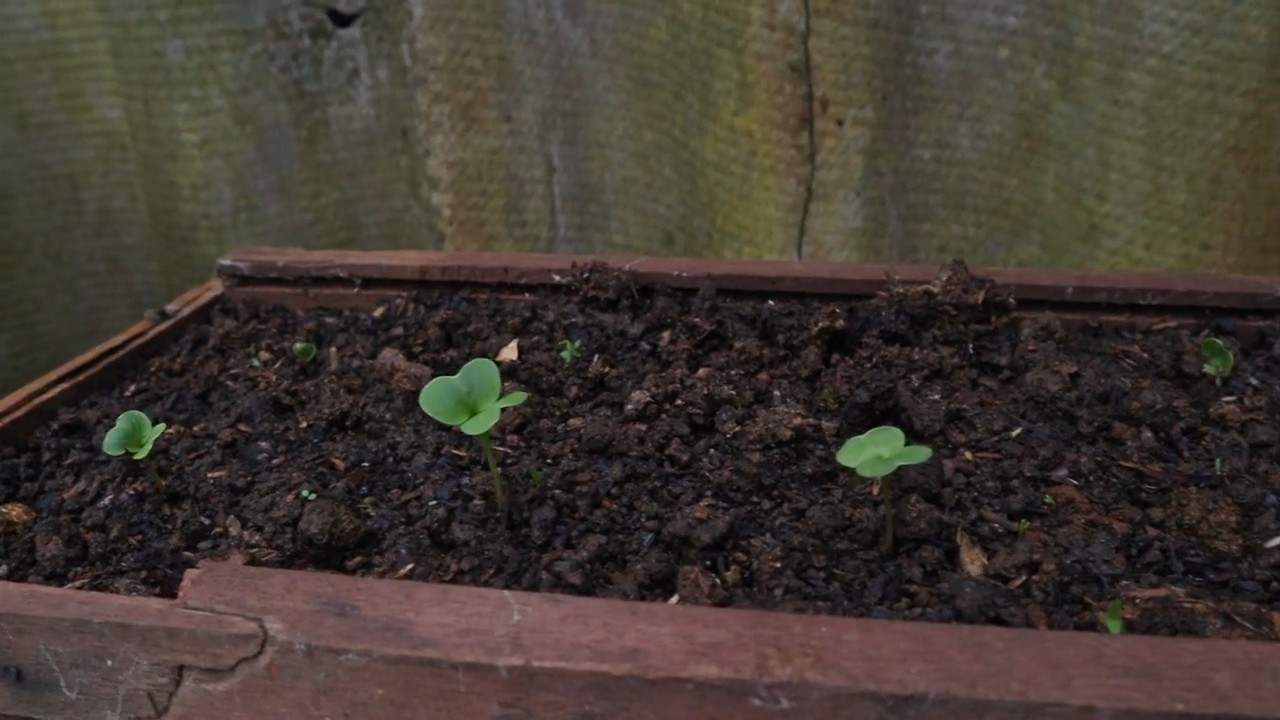
Sowing the Radish Seeds
Now comes the exciting part: sowing the seeds!
- Make rows: Use a rake or a row marker to create shallow rows in the soil. The rows should be about 10-15 cm apart.
- Sow the seeds: Distribute the radish seeds evenly in the rows. Make sure the seeds are not too close together, otherwise the radishes won’t have enough space to grow. A distance of 2-3 cm between the seeds is ideal.
- Cover the seeds: Cover the seeds with a thin layer of soil (about 1 cm).
- Water: Water the rows gently so the soil is moist but not too wet.
Caring for the Radishes
Radishes are low-maintenance, but there are a few things you should keep in mind:
- Water regularly: Radishes need regular watering, especially during germination and growth. Make sure the soil is always slightly moist. However, avoid waterlogging, as this can lead to rot.
- Weed: Remove weeds regularly so that the radishes don’t have to compete for nutrients and light.
- Thin out (pricking out): If the radishes are growing too close together, you should thin them out. This means you carefully pull some of the small seedlings out of the soil to give the remaining plants more space. The ideal distance between radishes is about 5 cm.
- Protect from pests: Watch out for pests like flea beetles or slugs. If necessary, you can use natural pesticides or protect the radishes with a net.
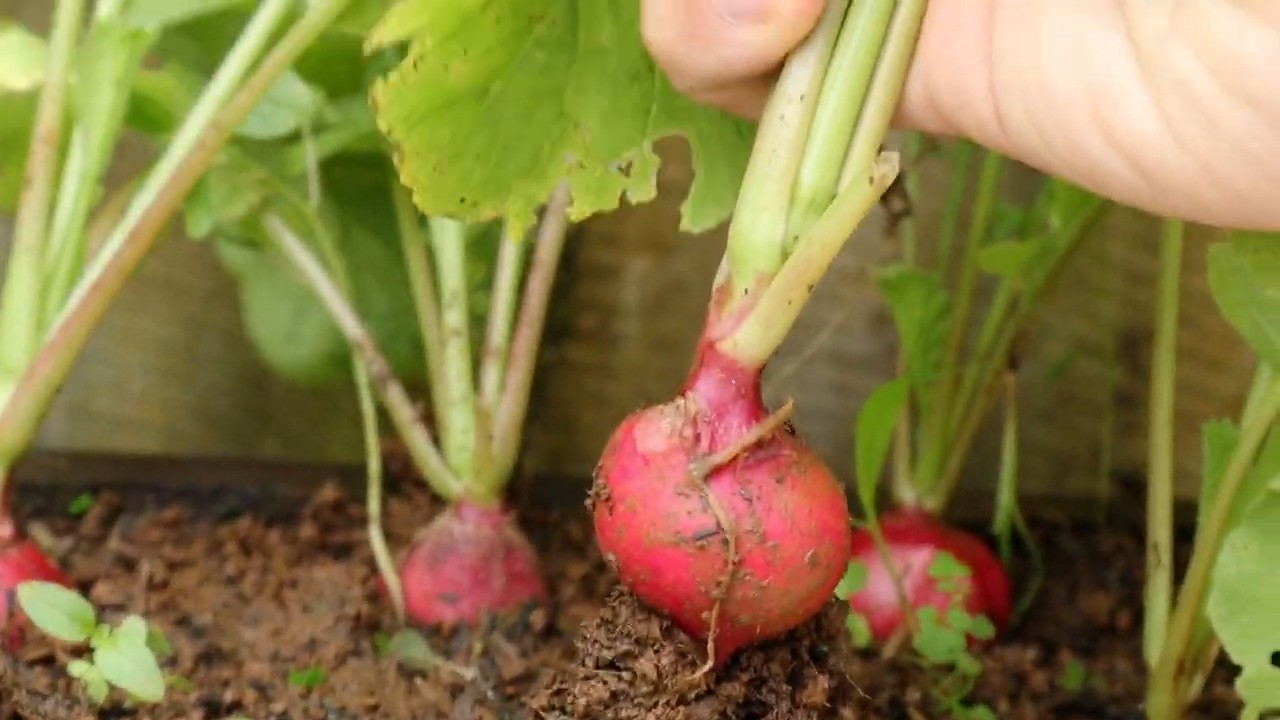
The Harvest
The wait is over! Radishes are fast-growing and can often be harvested after just 3-4 weeks.
- Recognize harvest time: The radishes are ready for harvest when they have reached the desired size (depending on the variety). They should be firm and plump.
- Harvest radishes: Gently pull the radishes out of the soil. If they are difficult to pull, you can loosen the soil around them a bit.
- Remove leaves: Remove the leaves from the radishes, but leave a small part of the stem attached.
- Wash radishes: Wash the radishes thoroughly under running water to remove soil and dirt.
Tips and Tricks for a Bountiful Harvest
- Seasonal sowing: Radishes can be sown several times a year, preferably in spring and autumn. Avoid the hot summer months, as the radishes can quickly bolt and become woody.
- Companion planting: Radishes are good neighbors for many other vegetables, such as carrots, lettuce, or spinach. They help to keep pests away and improve the soil.
- Succession planting: To ensure a continuous harvest, you can sow a new row of radishes every few weeks.
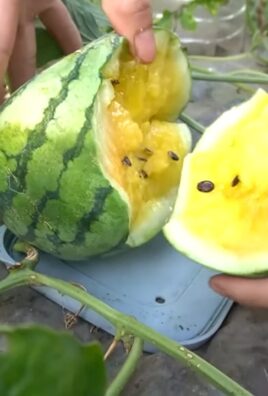
- Variety selection: Try out different radish varieties to find your favorite. There are red, white, yellow, and even purple radishes.
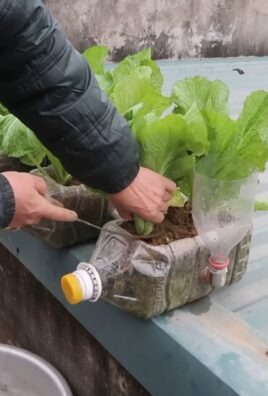
- Balcony box cultivation: You can also grow radishes on the balcony. Choose a sufficiently large balcony box and use good potting soil.
Common Problems and Solutions
- Radishes become woody: This can happen if the radishes stay in the ground for too long or if they get too little water. Harvest the radishes on time and ensure they are watered sufficiently.
- Radishes crack: This often happens after heavy rainfall when the radishes absorb too much water. Ensure even watering and loosen the soil regularly.
- Pests: Flea beetles can eat the leaves of the radishes. You can protect the radishes with a net or use natural pesticides. Slugs can also be a problem. Collect them by hand or use slug pellets.
Radishes in the Kitchen
Radishes are not only delicious but also healthy! They contain many vitamins and minerals. Here are a few ideas on how you can use radishes in the kitchen:
- Raw as a snack: Simply plain with a little salt or dip.
- In salads: Radishes add a fresh, spicy note to any salad.
- On bread: With butter and salt or cream cheese.
- Grilled or fried: An unusual but delicious way to prepare them.
- Radish leaves: The leaves are also edible and can be used in salads, soups, or as pesto.
I hope this guide has helped you and that you’ll soon be able to harvest your own crisp radishes! Happy gardening
Conclusion
So, there you have it! Growing radishes in your backyard is not only incredibly simple, but it’s also a rewarding experience that brings fresh, peppery goodness right to your table. Forget those bland, store-bought radishes that lack flavor and vibrancy. With just a few simple steps, you can cultivate a thriving radish patch that will provide you with a continuous supply of crisp, delicious roots.
This DIY trick is a must-try for several reasons. First and foremost, it’s incredibly fast. Radishes are known for their rapid growth, often maturing in as little as three to four weeks. This means you can enjoy your first harvest in no time, making it a perfect project for impatient gardeners or those looking for quick gratification. Second, it’s a budget-friendly way to add fresh produce to your diet. A packet of radish seeds is inexpensive, and you don’t need a lot of space or fancy equipment to get started. Third, it’s a fantastic way to connect with nature and learn about the growing process. There’s something truly satisfying about nurturing a plant from seed to harvest, and radishes are an excellent choice for beginners.
But the benefits don’t stop there. Growing your own radishes allows you to control the quality of your food. You can choose organic seeds, avoid harmful pesticides, and harvest your radishes at their peak flavor. Plus, freshly harvested radishes taste significantly better than those that have been sitting on a grocery store shelf for days.
Don’t be afraid to experiment with different varieties of radishes. From the classic red globe to the elongated French Breakfast and the spicy Daikon, there’s a radish out there for every palate. You can also try succession planting, sowing a new batch of seeds every few weeks to ensure a continuous harvest throughout the growing season. Consider companion planting as well. Radishes are known to deter certain pests and can be planted alongside other vegetables like carrots, lettuce, and cucumbers.
Another variation to consider is growing radishes in containers. This is a great option if you have limited space or live in an apartment. Simply choose a container that is at least six inches deep and fill it with well-draining potting mix. You can even grow radishes indoors under grow lights, allowing you to enjoy fresh radishes year-round.
We wholeheartedly encourage you to give this DIY trick a try. It’s a simple, rewarding, and delicious way to enhance your gardening skills and enjoy fresh, homegrown produce. Once you’ve experienced the satisfaction of harvesting your own radishes, you’ll never go back to store-bought again.
So, grab a packet of seeds, find a sunny spot in your backyard, and get ready to grow some radishes! We’re confident that you’ll be amazed at how easy and rewarding it is. And most importantly, we want to hear about your experience! Share your photos, tips, and stories with us in the comments below. Let’s create a community of radish-growing enthusiasts and inspire others to discover the joys of homegrown produce. Happy gardening!
Frequently Asked Questions (FAQ)
What is the best time of year to plant radishes?
Radishes are cool-season crops, meaning they thrive in cooler temperatures. The best time to plant radishes is in early spring or late summer/early fall. In spring, plant as soon as the soil can be worked, typically a few weeks before the last expected frost. For a fall harvest, plant about four to six weeks before the first expected frost. Avoid planting radishes during the hottest months of summer, as they tend to bolt (go to seed) in high temperatures.
How much sunlight do radishes need?
Radishes need at least six hours of sunlight per day to grow properly. Choose a location in your backyard that receives full sun for the majority of the day. If you’re growing radishes in containers, you can move them around to ensure they get enough sunlight. If you don’t have a spot with full sun, radishes can still grow in partial shade, but they may take longer to mature and the roots may be smaller.
What kind of soil is best for growing radishes?
Radishes prefer loose, well-draining soil that is rich in organic matter. Before planting, amend your soil with compost or well-rotted manure to improve its fertility and drainage. Avoid heavy clay soils, as they can become compacted and prevent the radishes from developing properly. If you have clay soil, consider growing radishes in raised beds or containers filled with a suitable potting mix. The ideal soil pH for radishes is between 6.0 and 7.0.
How often should I water my radishes?
Radishes need consistent moisture to grow quickly and develop crisp, flavorful roots. Water your radishes regularly, especially during dry periods. Aim to keep the soil consistently moist but not waterlogged. Overwatering can lead to root rot, while underwatering can cause the radishes to become tough and bitter. A good rule of thumb is to water deeply whenever the top inch of soil feels dry to the touch.
How far apart should I plant radish seeds?
Radish seeds should be planted about ½ inch deep and ½ to 1 inch apart in rows that are 6 to 12 inches apart. Thin the seedlings to about 1 to 2 inches apart once they emerge. This will give the radishes enough space to develop properly. If you’re growing radishes in containers, you can plant them closer together, but make sure they still have enough room to grow.
How long does it take for radishes to mature?
Radishes are one of the fastest-growing vegetables, typically maturing in just three to four weeks. However, the exact time to maturity can vary depending on the variety of radish, the growing conditions, and the time of year. Check the seed packet for specific information on the maturity time for the variety you are growing.
How do I know when my radishes are ready to harvest?
Radishes are ready to harvest when the roots are about 1 inch in diameter. Gently loosen the soil around the radish and pull it out of the ground. If the roots are too small, they may not be fully developed. If the roots are too large, they may become tough and bitter. Harvest radishes as soon as they are ready to prevent them from becoming overgrown.
Why are my radishes cracking?
Radish roots can crack if they experience inconsistent watering. This is often caused by periods of drought followed by heavy watering. To prevent cracking, water your radishes regularly and consistently, especially during dry periods. Mulching around the plants can also help to retain moisture in the soil.
Why are my radishes bitter?
Radishes can become bitter if they are grown in hot weather, allowed to dry out, or left in the ground for too long. To prevent bitterness, plant radishes in the cool season, water them regularly, and harvest them as soon as they are ready. Choosing the right variety can also help. Some varieties are less prone to bitterness than others.
What pests and diseases affect radishes?
Radishes are generally pest-resistant, but they can be affected by flea beetles, root maggots, and aphids. Flea beetles can damage the leaves, while root maggots can tunnel into the roots. Aphids can suck the sap from the plants. To control these pests, you can use insecticidal soap, diatomaceous earth, or row covers. Radishes can also be affected by fungal diseases such as damping-off and white rust. To prevent these diseases, avoid overwatering, provide good air circulation, and use disease-resistant varieties.
Can I eat the radish greens?
Yes, radish greens are edible and nutritious! They have a peppery flavor similar to the roots. You can eat them raw in salads, sauté them with other vegetables, or add them to soups and stews. Make sure to wash the greens thoroughly before eating them.
How do I store radishes?
To store radishes, remove the greens and store the roots in a plastic bag in the refrigerator. They will keep for about one to two weeks. You can also store radishes in a container of water in the refrigerator, which will help to keep them crisp.
Leave a Comment