

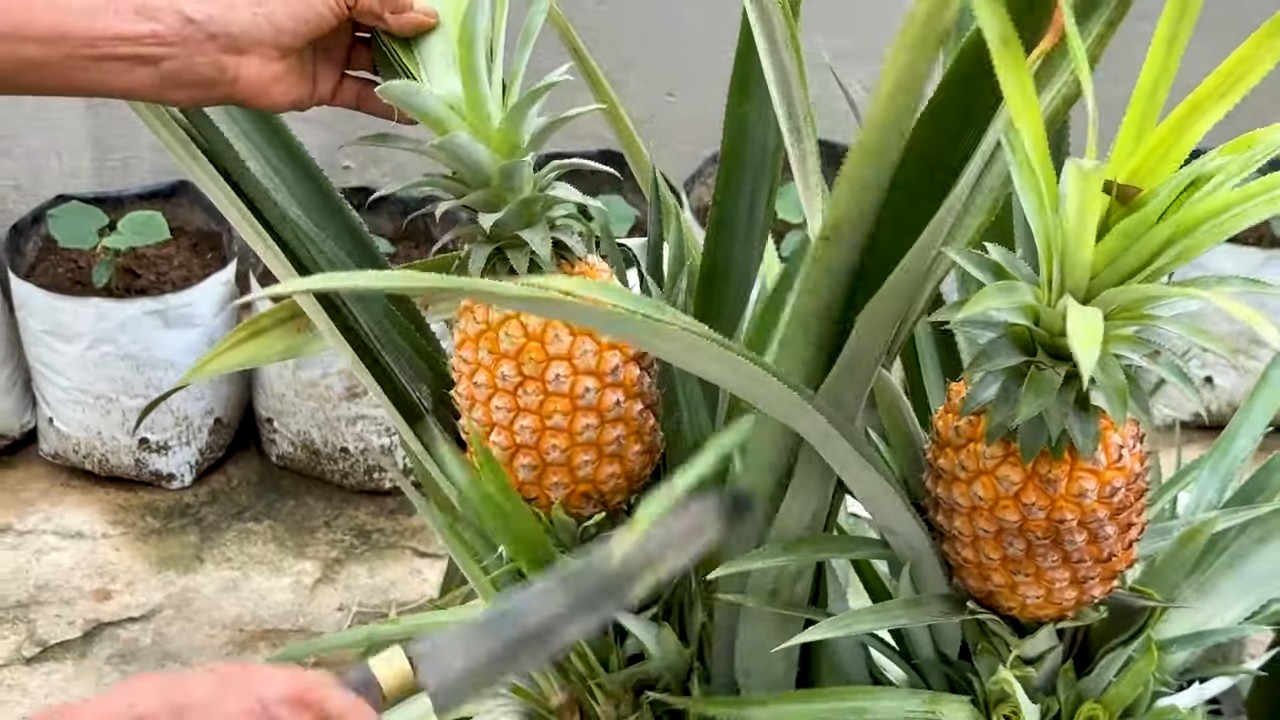
Grow Pineapple at Home: Imagine plucking a juicy, sun-ripened pineapple straight from your own backyard! Sounds like a tropical dream, right? Well, it’s more achievable than you think! Forget expensive grocery store pineapples – this DIY guide will show you how to cultivate your very own sweet treat, bringing a touch of the tropics to your home.
The pineapple, a symbol of hospitality and welcome, has a rich history. Originating in South America, it was prized by indigenous cultures long before European explorers discovered its deliciousness. Pineapples were so rare and exotic in Europe that they became status symbols, often rented out for display at lavish parties! Now, you can have your own piece of that history, without the royal price tag.
Why should you learn to grow pineapple at home? Because it’s incredibly rewarding! Not only will you enjoy the freshest, most flavorful pineapple imaginable, but you’ll also experience the satisfaction of nurturing a plant from start to finish. Plus, it’s a fantastic way to reduce your carbon footprint and connect with nature. This DIY project is perfect for anyone, regardless of gardening experience. I’m excited to share my simple, step-by-step guide to help you transform your space into a mini-tropical paradise. Let’s get started!
Grow Your Own Pineapple: It’s Guaranteed to Work!
Hey everyone! Are you also tired of always buying expensive pineapples at the supermarket? Today I’m going to show you how you can easily grow your own pineapple at home. It’s easier than you think and a lot of fun! Let’s get started!
What you need:
- A ripe pineapple (preferably an organic pineapple, as these have often not been treated with growth inhibitors)
- A sharp knife
- A pot (approx. 15-20 cm in diameter)
- Seed starting mix or potting soil
- Water
- Optional: Rooting powder
- Optional: Plastic bag or glass cloche
Choosing the right pineapple:
Before we start, it’s important to choose the right pineapple. Pay attention to the following points:
- Ripeness: The pineapple should be ripe, but not overripe. It should have a pleasant, sweet smell and give slightly when you press it.
- Leaves: The leaves should look green and healthy. Avoid pineapples with brown or withered leaves.
- Crown: The crown (the tuft of leaves) should be firmly attached and not fall off easily.
Instructions: Step-by-step to your own pineapple
Here are the detailed instructions so that nothing goes wrong for you:
1. Preparing the crown:
- Take your sharp knife and carefully cut off the crown of the pineapple. Be sure to leave about 2-3 cm of fruit flesh on the crown.
- Now remove the remaining fruit flesh from the crown. This is important because the fruit flesh can otherwise rot and hinder root formation. You can either carefully cut off the fruit flesh or twist it off.
- Remove the lowest leaves of the crown (approx. 1-2 cm). This exposes the small root nodes.
- Optional: Dip the exposed root nodes in rooting powder. This promotes root formation.
2. Rooting the crown:
- There are two ways to root the crown: in water or directly in soil. I personally prefer the water method, as you can observe the root formation better.
- Method 1: Rooting in water:
- Place the crown in a glass of water. Make sure that only the root nodes are in the water and the leaves remain dry.
- Place the glass in a bright, warm place, but not in direct sun.
- Change the water every 2-3 days.
- After about 2-4 weeks, the first roots should form.
- Method 2: Direct rooting in soil:
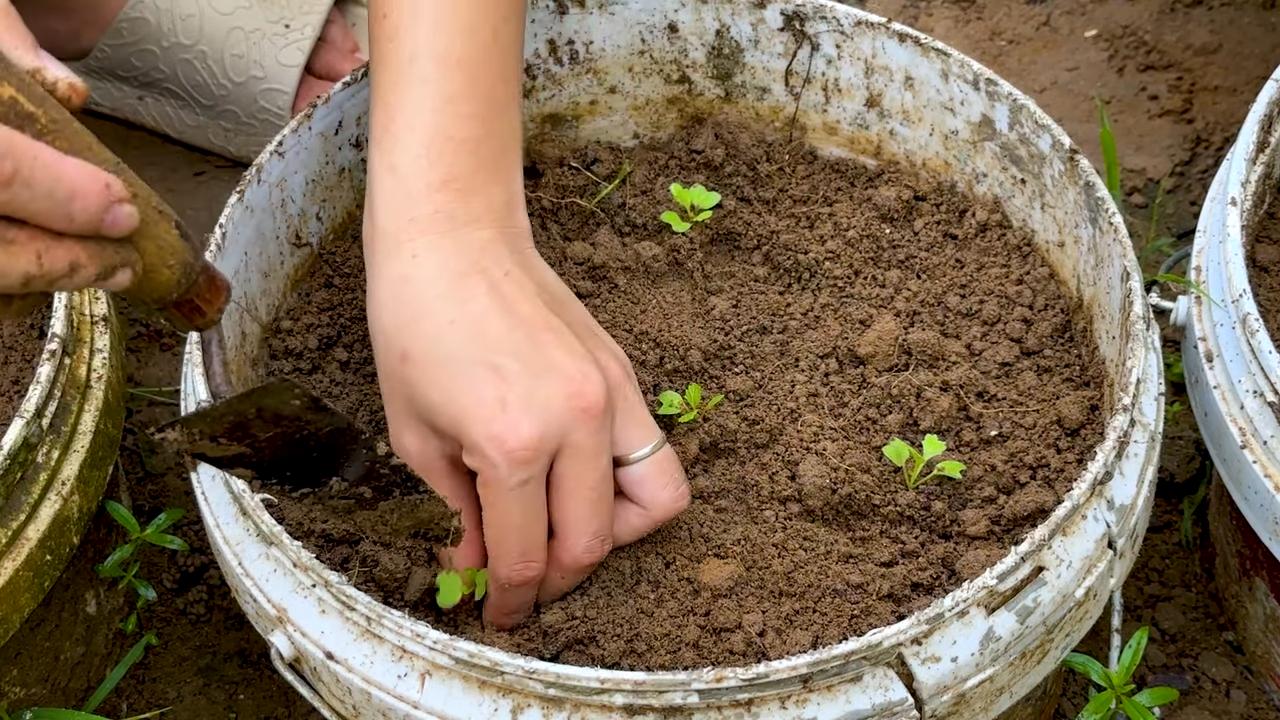
- Fill your pot with seed starting mix or potting soil.
- Make a small hole in the soil and place the crown in it.
- Press the soil down lightly.
- Water the soil carefully.
3. Planting the pineapple:
- Once the roots are about 2-3 cm long (with the water rooting method), you can plant the crown in a pot with seed starting mix or potting soil.
- Make a hole in the soil that is large enough for the roots.
- Carefully place the crown in the hole and cover the roots with soil.
- Press the soil down lightly.
- Water the soil carefully.
4. Caring for the pineapple:
- Place the pot in a bright, warm place, but not in direct sun.
- Water the pineapple regularly, but avoid waterlogging. The soil should always be slightly moist.
- Optional: Place a plastic bag or glass cloche over the pineapple to increase humidity. This promotes growth. However, ventilate the pineapple regularly to prevent mold.
- Fertilize the pineapple every 2-3 weeks with a liquid fertilizer for houseplants.
Patience is required:
Now it’s time to be patient! It can take up to 2-3 years for your pineapple to bear fruit. But don’t worry, even without fruit, the pineapple plant is a great eye-catcher!
Common problems and solutions:
- Leaves turn brown: This can have various causes. Either the pineapple is too dry, too wet, or gets too much sun. Check your care routine and adjust it if necessary.
- No root formation: This may be because the pineapple was not ripe enough or the fruit flesh was not completely removed. Try with another pineapple.
- Mold formation: This can happen if the humidity is too high or the pineapple is too wet. Ventilate the pineapple regularly and avoid waterlogging.
Additional tips for successful cultivation:
- Warmth: Pineapples love warmth. Place the pineapple in a spot where it is at least 20 degrees Celsius.
- Humidity: Pineapples prefer high humidity. You can increase humidity by regularly spraying the pineapple with water or placing a bowl of water nearby.
- Light: Pineapples need a lot of light, but not direct sun. Place the pineapple in a bright spot, but protect it from the midday sun.
- Fertilizer: Fertilize the pineapple regularly with a liquid fertilizer for houseplants.
- Patience: Be patient! It can take a long time for your pineapple to bear fruit.
A few final words:
I hope this guide helps you to grow your own pineapple. It’s a great feeling to grow and harvest something yourself. And who knows, maybe you’ll soon have your own little pineapple plantation at home! Good luck
Conclusion
So, there you have it! Growing your own pineapple at home isn’t just a fun project; it’s a rewarding experience that brings a touch of the tropics right to your windowsill or garden. Forget those expensive, sometimes bland, store-bought pineapples. Imagine the satisfaction of slicing into a juicy, sweet pineapple that you nurtured from start to finish. The flavor difference alone is reason enough to embark on this adventure.
But beyond the delicious fruit, this DIY project offers so much more. It’s a fantastic way to connect with nature, learn about plant life cycles, and even reduce your carbon footprint by avoiding the transportation of commercially grown pineapples. Plus, it’s a conversation starter! Imagine the looks of amazement when you tell your friends and family that you grew your own pineapple.
And don’t think you’re limited to just one type of pineapple. Once you’ve mastered the basic technique, you can experiment with different varieties. Look for the crowns of different pineapple types at your local grocery store or farmers market. Each variety offers a unique flavor profile, from the tangy sweetness of a Smooth Cayenne to the delicate aroma of a Sugarloaf pineapple. You can even try growing ornamental pineapples for their beautiful foliage and unique fruit.
Consider these variations to personalize your pineapple-growing journey:
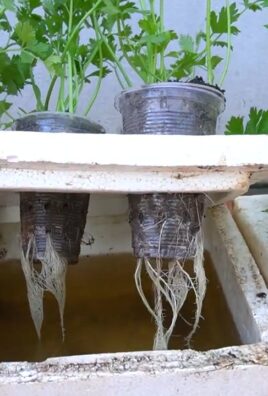
* Hydroponics: For a modern twist, try growing your pineapple hydroponically. This method involves growing the plant in water enriched with nutrients, eliminating the need for soil.
* Container Gardening: If you live in a colder climate, container gardening is the perfect solution. You can easily move your pineapple plant indoors during the winter months to protect it from frost.
* Gifting: Once your pineapple plant starts producing pups (small offshoots), you can propagate them and gift them to friends and family. Spread the joy of homegrown pineapples!
Growing a pineapple from the crown of a store-bought fruit is a testament to the power of nature and the resilience of plants. It’s a project that requires patience, but the rewards are well worth the effort. The sweet, tangy taste of a homegrown pineapple is unlike anything you’ve ever experienced.
We urge you to give this DIY trick a try. It’s easier than you might think, and the results are truly amazing. Don’t be intimidated by the process. With a little care and attention, you’ll be enjoying your own homegrown pineapples in no time.
And most importantly, we want to hear about your experience! Share your photos, tips, and stories with us in the comments below. Let’s create a community of pineapple growers and inspire others to embark on this exciting journey. Did you encounter any challenges? What variety of pineapple did you grow? What did you learn along the way? Your feedback will help others succeed and make this DIY trick even more accessible to everyone. So, grab a pineapple, get your hands dirty, and start growing your own tropical paradise today! Let’s all enjoy the fruits (literally!) of our labor.
Frequently Asked Questions (FAQ)
How long does it take to grow a pineapple from a crown?
Patience is key when growing pineapples! It typically takes anywhere from 2 to 3 years for a pineapple plant to mature and produce fruit. The exact timeframe depends on various factors, including the variety of pineapple, the climate, and the growing conditions. Don’t get discouraged if you don’t see fruit right away. Just keep providing your plant with the care it needs, and eventually, you’ll be rewarded with a delicious pineapple.
What kind of soil is best for growing pineapples?
Pineapples thrive in well-draining, slightly acidic soil. A mixture of potting soil, perlite, and peat moss is a good option. The perlite helps improve drainage, while the peat moss adds acidity to the soil. Avoid using heavy clay soil, as it can retain too much moisture and lead to root rot. You can also amend your soil with compost or other organic matter to improve its fertility.
How much sunlight does a pineapple plant need?
Pineapples are sun-loving plants and require at least 6 hours of direct sunlight per day. If you’re growing your pineapple indoors, place it near a sunny window. If you don’t have enough natural light, you can supplement with grow lights. Insufficient sunlight can result in slow growth and reduced fruit production.
How often should I water my pineapple plant?
Water your pineapple plant regularly, but avoid overwatering. Allow the soil to dry out slightly between waterings. During the warmer months, you may need to water more frequently than during the cooler months. Be sure to water the soil thoroughly, but avoid getting water in the crown of the plant, as this can lead to rot.
What are some common problems when growing pineapples?
Some common problems when growing pineapples include root rot, mealybugs, and scale insects. Root rot is caused by overwatering and poor drainage. Mealybugs and scale insects are sap-sucking pests that can weaken the plant. To prevent root rot, ensure that your pineapple plant is planted in well-draining soil and avoid overwatering. To control mealybugs and scale insects, you can use insecticidal soap or neem oil.
How do I know when my pineapple is ripe?
Determining when a pineapple is ripe can be tricky, but there are a few telltale signs. A ripe pineapple will have a fragrant aroma, a slightly golden color, and a firm but yielding texture. You can also try gently pulling on one of the leaves. If it comes out easily, the pineapple is likely ripe. Avoid picking pineapples that are still green or hard, as they will not ripen properly off the plant.
Can I grow a pineapple indoors?
Yes, you can absolutely grow a pineapple indoors, especially if you live in a climate with cold winters. Choose a large pot with good drainage and place it in a sunny location. You may need to supplement with grow lights if you don’t have enough natural light. Be sure to water your pineapple plant regularly and fertilize it every few months.
What kind of fertilizer should I use for my pineapple plant?
Use a balanced fertilizer with a ratio of 10-10-10 or 14-14-14. Fertilize your pineapple plant every few months during the growing season (spring and summer). Follow the instructions on the fertilizer label carefully to avoid over-fertilizing.
How do I propagate a pineapple plant?
Pineapple plants can be propagated from the crown of the fruit, as well as from pups (small offshoots) that grow around the base of the plant. To propagate from the crown, follow the steps outlined in this article. To propagate from pups, carefully remove them from the mother plant and plant them in individual pots.
Is growing a pineapple at home worth the effort?
Absolutely! While it requires patience, growing your own pineapple is a rewarding experience that offers numerous benefits. You’ll enjoy the delicious taste of a homegrown pineapple, connect with nature, and learn about plant life cycles. Plus, you’ll have a unique conversation starter and a beautiful addition to your home or garden. The satisfaction of harvesting a pineapple that you nurtured from start to finish is truly priceless. So, go ahead and give it a try – you won’t be disappointed!

Leave a Comment