

Grow Peanuts at Home: A Fun and Rewarding DIY Project
Have you ever dreamed of harvesting your own peanuts, fresh from your backyard? Growing peanuts at home might sound daunting, but it’s surprisingly simple and incredibly rewarding! This DIY guide will walk you through the entire process, from planting to harvest, revealing the secrets to a bountiful peanut crop right in your own garden. I’ve always loved the idea of growing my own food, and peanuts, with their unique underground growth habit, presented a particularly intriguing challenge. It’s a project that connects you to the earth in a very tangible way.
The history of peanuts is fascinating! Originally cultivated in South America, these legumes have become a global staple, playing a significant role in various cultures worldwide. From peanut butter to peanut oil, their versatility is undeniable. But there’s something truly special about enjoying peanuts you’ve grown yourself – a taste of homegrown goodness that’s hard to beat.
Why Grow Your Own Peanuts?
Beyond the satisfaction of nurturing a plant from seed to harvest, growing your own peanuts offers several advantages. You’ll know exactly where your food comes from, ensuring it’s free from pesticides and other harmful chemicals. Plus, homegrown peanuts often boast a richer, more intense flavor than store-bought varieties. And let’s be honest, the sheer joy of digging up your own peanut harvest is an experience unlike any other! This guide will equip you with all the knowledge and techniques you need to successfully grow peanuts at home, transforming your garden into a mini-peanut farm.
So, grab your gardening gloves and let’s get started on this exciting journey of growing peanuts at home! I promise, it’s easier than you think.
Growing Peanuts at Home: A Comprehensive Guide
Growing peanuts at home might seem daunting, but with a little patience and the right approach, you can enjoy a delicious harvest right from your backyard. Here’s my step-by-step guide to help you succeed.
Phase 1: Planning and Preparation
- Choose the right peanut variety: Research varieties suitable for your climate. Some are better suited to shorter growing seasons than others. Consider factors like disease resistance and yield.
- Select a sunny location: Peanuts need at least six to eight hours of direct sunlight daily. Choose a spot in your garden that receives ample sun.
- Prepare the soil: Peanuts thrive in well-drained, sandy loam soil. Amend heavy clay soils with compost or other organic matter to improve drainage. The soil should be loose and easy to work with.
- Test your soil pH: Peanuts prefer a slightly acidic to neutral pH (6.0-7.0). Use a soil testing kit to determine your soil’s pH and amend accordingly with lime or sulfur if necessary.
- Gather your supplies: You’ll need peanut seeds (not roasted peanuts!), a garden trowel or hand cultivator, a watering can, and possibly some fertilizer (more on this later).
Phase 2: Planting Your Peanuts
- Soak the seeds: Soaking the peanut seeds in water for 12-24 hours before planting can help improve germination rates. This isn’t strictly necessary, but it can give your seeds a head start.
- Prepare the planting area: Loosen the soil to a depth of about 6-8 inches. Remove any rocks or debris that might hinder root growth.
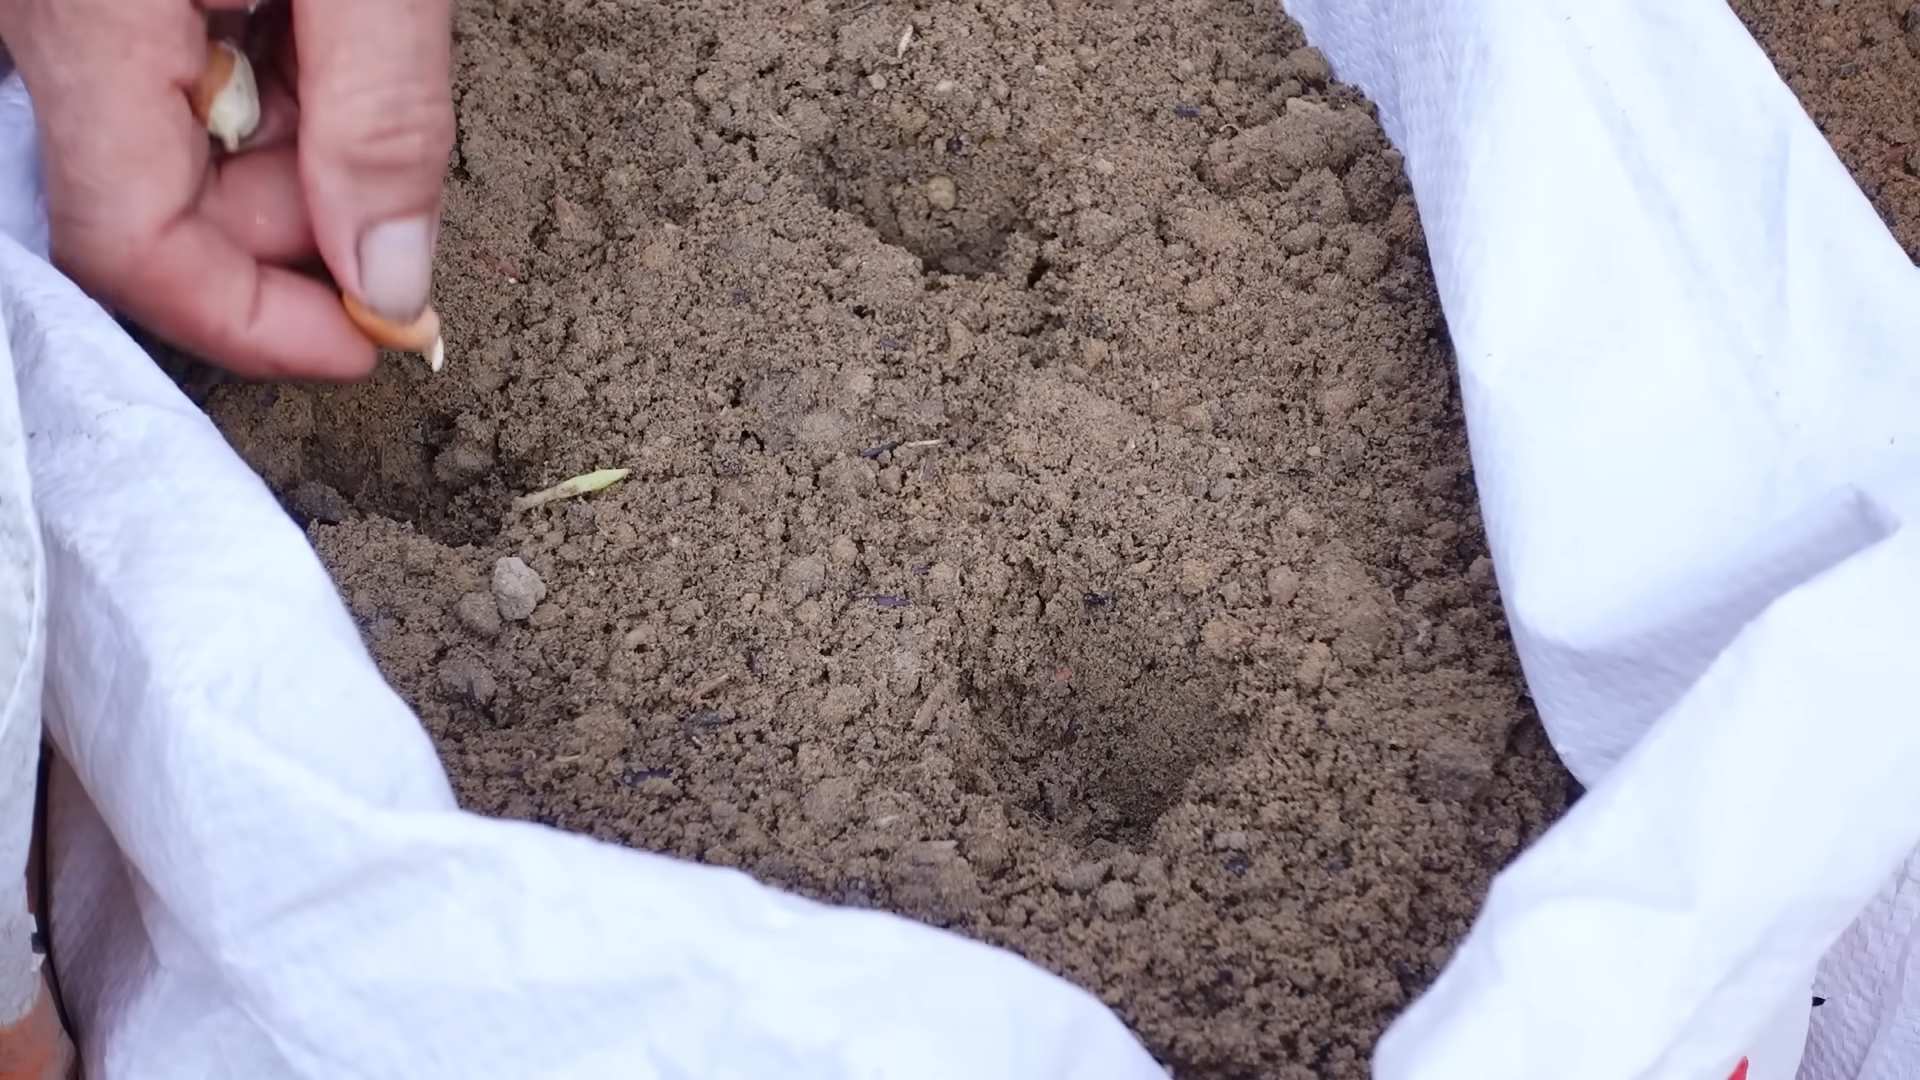
- Plant the seeds: Plant the seeds about 2-3 inches deep and 6-12 inches apart, depending on the variety. Space rows about 2 feet apart to allow for adequate growth.
- Water gently: After planting, water the area thoroughly but gently to avoid disturbing the seeds. Avoid overwatering, as this can lead to root rot.
Phase 3: Nurturing Your Peanut Plants
- Regular watering: Keep the soil consistently moist, but not waterlogged, throughout the growing season. Water deeply and less frequently rather than shallowly and often. The frequency will depend on your climate and rainfall.
- Weed control: Regularly remove weeds to prevent competition for nutrients and water. Mulching can help suppress weed growth.
- Fertilizing: While peanuts are relatively low-maintenance, you can give them a boost with a balanced fertilizer. Follow the instructions on the fertilizer package carefully. Too much fertilizer can be harmful.
- Pest and disease monitoring: Regularly inspect your plants for signs of pests or diseases. Address any issues promptly using appropriate organic or chemical controls. Common pests include aphids and spider mites. Common diseases include leaf spot and fungal blights.
- Peanuts need support: As the plants grow, they may need some support, especially in windy areas. You can use stakes or other supports to help keep the plants upright.
Phase 4: Harvesting Your Peanuts
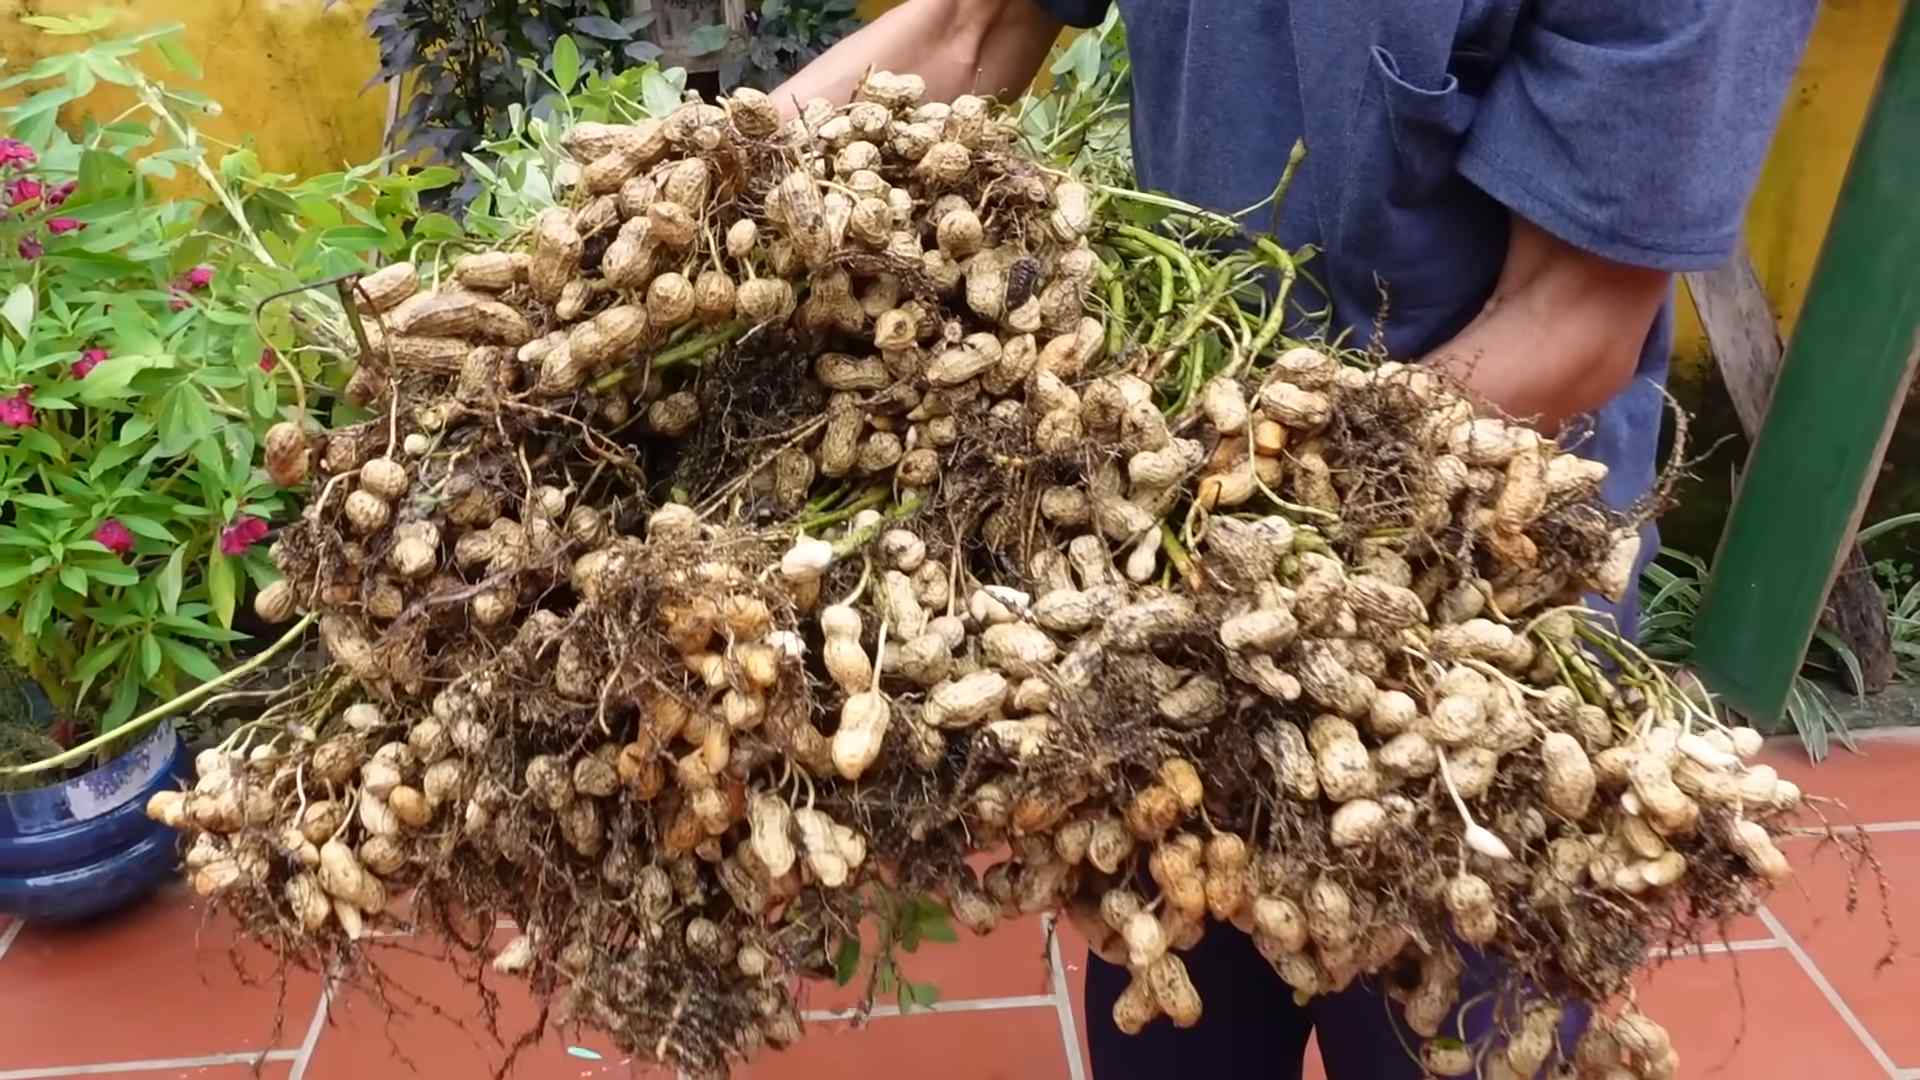
- Know when to harvest: Peanuts are typically ready for harvest 100-150 days after planting, depending on the variety. The leaves will usually turn yellow and die back. This is a good indication that the peanuts are mature.
- Dig up the plants: Carefully dig up the entire peanut plant, being careful not to damage the pods. Use a garden fork or shovel to loosen the soil around the plants.
- Cure the peanuts: After digging, allow the plants to dry in a well-ventilated area for a few days. This helps to dry the pods and prevent mold.
- Remove the peanuts from the pods: Once the plants are dry, you can remove the peanuts from the pods. You can do this by hand or by using a machine if you have a large harvest.
- Clean and store: Clean the peanuts by removing any dirt or debris. Store them in a cool, dry, and well-ventilated area. Properly stored peanuts can last for several months.
Troubleshooting Common Issues
Poor Germination:
If your seeds don’t germinate well, it could be due to several factors: improper planting depth, poor soil drainage, or using old or damaged seeds. Make sure to follow the planting instructions carefully and use fresh, high-quality seeds.
Yellowing Leaves:
Yellowing leaves can indicate nutrient deficiencies, overwatering, or pest infestations. Check your soil’s nutrient levels and adjust your watering schedule accordingly. Inspect the plants for pests and treat them if necessary.
Disease Problems:
Fungal diseases are common in peanuts. Ensure good air circulation around the plants by spacing them properly. Consider using disease-resistant varieties and practicing crop rotation.
Pest Infestations:
Aphids and other insects can damage peanut plants. Monitor your plants regularly and use appropriate pest control methods, such as insecticidal soap or neem oil, if necessary. Always follow the instructions on the product label.
Remember:
Patience is key when growing peanuts. It takes time and effort, but the reward of harvesting your own homegrown peanuts is well worth it. Enjoy the process and the delicious results!
Conclusion
Growing your own peanuts at home is a surprisingly rewarding experience, offering a unique connection to your food and a delightful sense of accomplishment. This DIY trick isn’t just about harvesting your own peanuts; it’s about understanding the entire lifecycle of a plant, from tiny seed to delicious legume. The ease of the process, coupled with the delicious, fresh-from-the-garden flavor of homegrown peanuts, makes this a must-try for any gardening enthusiast, regardless of experience level. You’ll be amazed at how simple it is to cultivate these versatile plants, and the satisfaction of enjoying the fruits (or rather, nuts!) of your labor is unparalleled. Beyond the simple joy of growing your own food, you’ll also be contributing to a more sustainable lifestyle by reducing your reliance on commercially produced peanuts.
This method of growing peanuts at home opens up a world of possibilities. Experiment with different peanut varieties to discover your favorites. Some varieties are better suited to specific climates, so research is key to success. Consider companion planting – incorporating other plants that benefit peanut growth, such as marigolds or beans, can enhance the overall yield and health of your peanut plants. You can also explore different planting methods, such as using raised beds or containers, to adapt the process to your available space and resources. For those with limited space, container gardening is a fantastic option, allowing you to grow peanuts even on a balcony or patio. Don’t be afraid to get creative! The beauty of this DIY project lies in its adaptability.
Ultimately, the success of your peanut-growing adventure hinges on patience and observation. Pay close attention to your plants’ needs, providing adequate sunlight, water, and nutrients. Regular weeding is also crucial to ensure healthy growth. Remember, even experienced gardeners encounter setbacks. Don’t be discouraged by minor challenges; learn from them and adjust your approach accordingly. The journey of growing your own peanuts is as rewarding as the final harvest.
We strongly encourage you to embark on this fulfilling journey of growing peanuts at home. Share your experiences, successes, and even your challenges with us and other gardening enthusiasts. Post pictures of your thriving peanut plants and your bountiful harvest on social media using #GrowPeanutsAtHome. Let’s build a community of homegrown peanut lovers, sharing tips, tricks, and the joy of this simple yet rewarding DIY project. Your success story could inspire others to embark on their own peanut-growing adventures! Let’s cultivate a world where everyone can experience the satisfaction of growing their own food.
Frequently Asked Questions
What type of soil is best for growing peanuts?
Peanuts thrive in well-drained, sandy loam soil with a slightly acidic pH (around 6.0-6.8). Heavy clay soils can lead to poor drainage and root rot, so amending heavy clay with organic matter like compost can improve its suitability. Good drainage is crucial to prevent waterlogging, which can damage the developing peanuts.
How much sunlight do peanut plants need?
Peanut plants are sun-worshippers! They require at least six to eight hours of direct sunlight per day to flourish. Insufficient sunlight can lead to stunted growth and reduced yields. Choose a sunny location in your garden or ensure your containers receive ample sunlight.
When is the best time to plant peanuts?
The ideal time to plant peanuts depends on your climate. Generally, peanuts are planted after the last frost and when the soil temperature has warmed to at least 60-70°F (15-21°C). This usually falls between late spring and early summer. Check your local frost dates for the most accurate planting time in your area.
How long does it take for peanuts to mature?
The time it takes for peanuts to mature varies depending on the variety and growing conditions, but it typically ranges from 120 to 150 days from planting to harvest. Be patient and allow the plants ample time to develop fully before harvesting.
How do I know when my peanuts are ready to harvest?
Peanuts are ready for harvest when the foliage of the plant begins to yellow and die back. This usually occurs about 3-4 months after planting. Gently dig up a few plants to check the maturity of the peanuts. The pods should be fully developed and firm to the touch.
What are some common problems when growing peanuts?
Some common problems include pests like aphids, leafhoppers, and nematodes. Regular inspection and appropriate pest control measures are essential. Diseases such as leaf spot and fungal diseases can also affect peanut plants. Ensuring good air circulation and avoiding overhead watering can help prevent fungal problems. Proper soil drainage is also crucial to prevent root rot.
Can I grow peanuts in containers?
Absolutely! Container gardening is a great option for growing peanuts, especially if you have limited space. Choose a large container (at least 12 inches deep) with drainage holes to ensure proper aeration and drainage. Use a well-draining potting mix and follow the same planting and care instructions as for in-ground planting.
What should I do with my harvested peanuts?
After harvesting, carefully remove the peanuts from the pods. Allow them to dry thoroughly in a well-ventilated area for several weeks before storing them in a cool, dry place. Proper drying is essential to prevent spoilage and maintain the quality of your homegrown peanuts. Enjoy them fresh, roasted, or incorporated into your favorite recipes! The possibilities are endless.
Leave a Comment