

Grow peanuts at home? Absolutely! Imagine the satisfaction of harvesting your own homegrown peanuts, ready to be roasted, turned into creamy peanut butter, or simply enjoyed as a healthy snack. It’s easier than you might think, and this DIY guide will walk you through every step of the process, transforming your garden into a peanut paradise.
Peanuts, also known as groundnuts, have a rich history, dating back thousands of years in South America. They weren’t always a staple in Western diets, but their popularity exploded in the late 19th and early 20th centuries, thanks in part to agricultural innovators like George Washington Carver, who discovered hundreds of uses for the humble peanut. Today, they’re a beloved ingredient worldwide, and now, you can cultivate them yourself!
Why should you try this DIY project? Well, for starters, growing your own food is incredibly rewarding. Plus, store-bought peanuts can sometimes be treated with chemicals or come from questionable sources. By learning how to grow peanuts at home, you control the entire process, ensuring you’re eating fresh, healthy, and delicious peanuts. I’m excited to share these simple tricks and hacks that will help you succeed, even if you’re a beginner gardener. Let’s get started and unlock the secrets to a bountiful peanut harvest!
Growing Peanuts at Home: Your DIY Guide for a Successful Harvest
Hey everyone! Have you ever wondered how peanuts actually grow? I found the idea of growing my own peanuts in the garden or even in a pot totally fascinating. And you know what? It’s not as hard as you might think! In this article, I’ll show you step-by-step how you can grow your own peanuts at home. Let’s get started!
What you need: The right preparation is everything
Before we get started, we naturally need the right equipment and materials. Here is a list of things you should have ready:
- Peanuts: Choose raw, unsalted peanuts. Peanuts sold specifically for planting are best, but you can also use unroasted peanuts from the supermarket. Make sure they are not damaged.
- Pots or a garden bed: Peanuts need space to spread out. Choose large pots (at least 30 cm in diameter and depth) or a sunny bed in the garden.
- Soil: Use well-draining, sandy loam soil. Peanuts do not like waterlogging. You can also buy a special peanut or vegetable soil.
- Water: Regular watering is important, especially during germination and fruit formation.
- Sunlight: Peanuts love the sun! Choose a location that gets at least 6-8 hours of sunlight per day.
- Fertilizer (optional): A low-nitrogen fertilizer can promote growth.
- Patience: Peanuts need time to grow. Be patient and don’t give up!
Step-by-step guide: How to plant your peanuts
Now let’s get down to it! Here is a detailed guide on how to plant your peanuts:
- Prepare the peanuts:
- Soak the peanuts in lukewarm water for 24 hours before planting. This helps to speed up germination.
- You can also carefully shell the peanuts, but this is not absolutely necessary. If you do shell them, be careful not to damage the thin skin around the kernels.
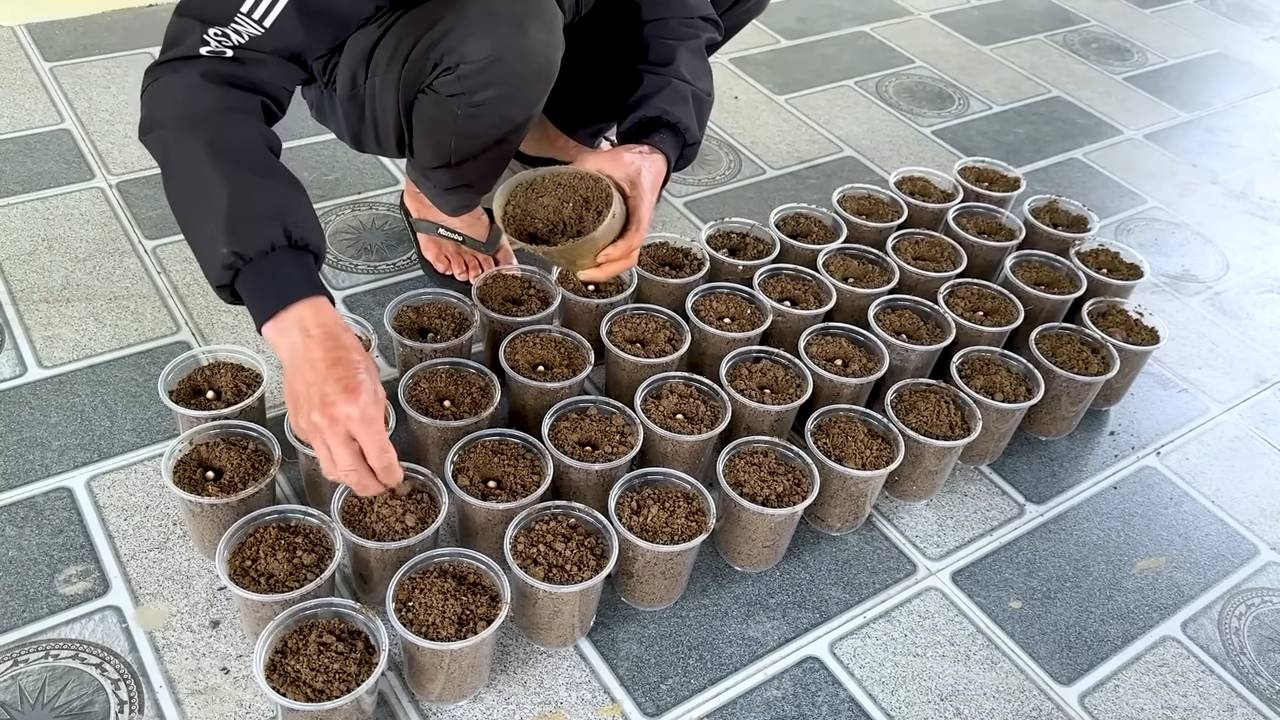
- Sowing:
- Fill your pots or bed with the prepared soil.
- Make small holes (about 2-3 cm deep) at a distance of about 15-20 cm.
- Place 2-3 peanuts in each hole. This increases the likelihood that at least one will germinate.
- Cover the holes with soil and press it down lightly.
- Watering:
- Water the soil gently but thoroughly. The soil should be moist, but not wet.
- Location:
- Place the pots in a sunny and warm place. If you have planted the peanuts in a garden bed, make sure the soil is well-drained.
- Germination:
- Germination usually takes 7-10 days, but can also take longer, depending on the temperature and conditions. Keep the soil moist during this time.
Caring for your peanut plants: Keeping them healthy and strong
Once your peanut plants have germinated, it is important to care for them properly. Here are a few tips:
- Watering: Water the plants regularly, especially during dry periods. Make sure the soil does not dry out, but avoid waterlogging.
- Fertilizing (optional): Fertilize the plants every few weeks with a low-nitrogen fertilizer. Too much nitrogen can lead to lush leaf growth but impair peanut production.
- Weeding: Keep the bed or pots free of weeds. Weeds compete with the peanut plants for nutrients and water.
- Hilling: When the plants are about 15-20 cm high, mound soil around the base of the plants. This promotes the formation of side shoots on which the peanuts develop.
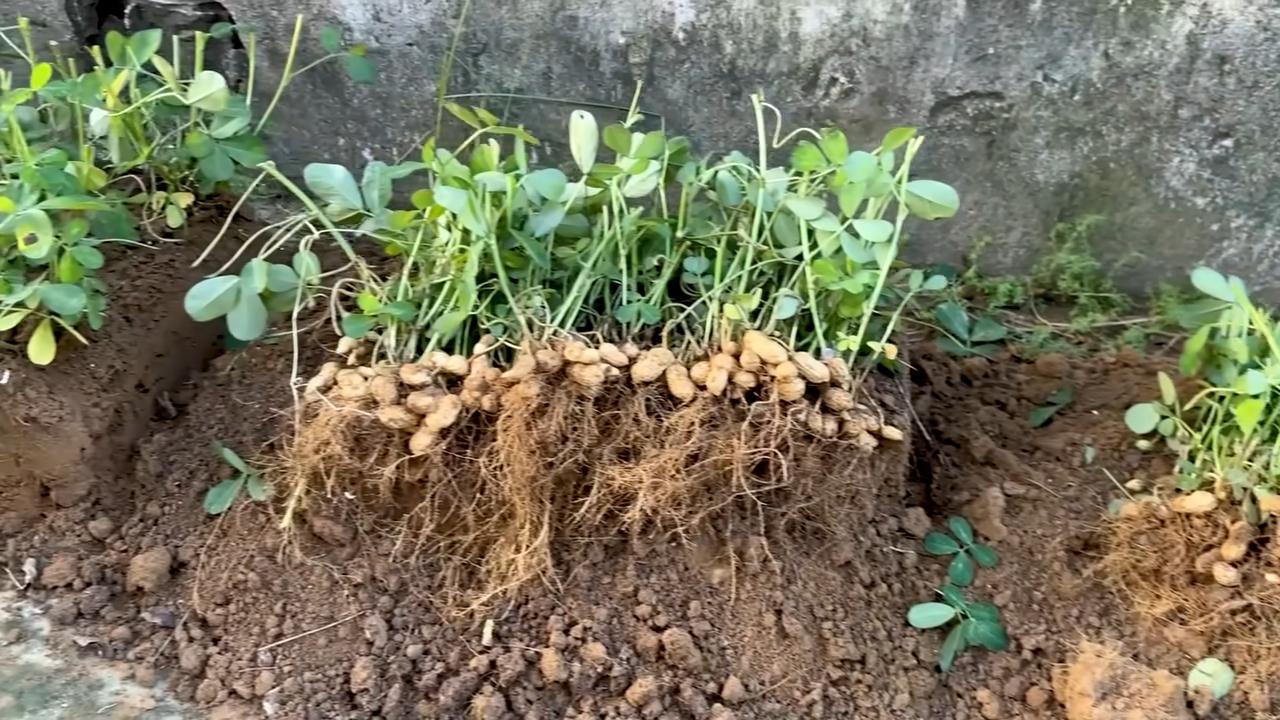
The peculiarity of the peanut flower: A fascinating process
Peanuts are special because their flowers self-pollinate and then form a so-called “peg.” This peg is a stem that burrows down into the earth. The peanuts then develop at the tip of this peg.
- Observe the flowers: The peanut plants produce small, yellow flowers. These flowers are self-pollinating, which means they do not need insects for pollination.
- The peg: After pollination, the flowers wither and the pegs form. These pegs are very sensitive, so avoid damaging them.
- Hilling (repeat): When you see the pegs forming, mound soil around the base of the plants again. This helps the pegs to penetrate the soil more easily.
Harvest time: When are the peanuts ripe?
Harvest time is the most exciting part! But when do you know that your peanuts are ripe?
- Timing: Peanuts usually need 120-150 days to ripen. This means you can harvest them about 4-5 months after sowing.
- Signs: The leaves of the plants begin to turn yellow and wilt. This is a sign that the peanuts are ripe.
- Test: Carefully dig up one plant and check the peanuts. The shells should be hard and well-filled. The kernels should have a reddish-brown color.
Harvesting peanuts: How to get your reward from the earth
Now the time has finally come! Here’s how you harvest your peanuts:
- Digging up: Carefully dig up the plants with a digging fork. Be careful not to damage the peanuts.
- Cleaning: Shake the soil off the plants.
- Drying: Hang the plants upside down in a dry, airy place. You can also spread them out on a wire rack. Let them dry for 2-3 weeks.
- Removing peanuts: Once the plants are dry, you can remove the peanuts from the roots.
- Curing (optional): You can let the peanuts cure in the sun for a few more days. This improves the taste.
Storing peanuts: Keeping them fresh for a long time
After harvesting and drying, it is important to store the peanuts properly so they stay fresh for a long time.
- Storage: Store the peanuts in an airtight container in a cool, dry, and dark place.
- Shelf life: Properly stored peanuts are good for several months.
- Freezing: You can also freeze the peanuts. They will then be good for up to a year.
Common problems and solutions: What to do when something goes wrong?
Problems can also occur when growing peanuts. Here are a few common problems and how you can solve them:
- Poor germination: If the peanuts do not germinate, it could be due to poor quality peanuts, too cold temperatures, or too moist soil. Use fresh peanuts, ensure sufficient warmth, and ensure good drainage.
- Pests: Peanut plants can be infested by pests such as aphids or caterpillars. Use natural pesticides or insecticides.
- Diseases: Peanut plants can be susceptible to various diseases. Ensure good air circulation and avoid overwatering.
Conclusion
So, there you have it! Growing peanuts at home is not only achievable, but it’s also a deeply rewarding experience. Forget the store-bought varieties that often lack the freshness and vibrant flavor of homegrown produce. This DIY trick unlocks a world of peanut possibilities, allowing you to cultivate your own supply of these delicious and nutritious legumes right in your backyard or even on your balcony.
Why is this a must-try? Because it puts you in control. You choose the variety, you control the growing conditions, and you reap the benefits of knowing exactly where your food comes from. Imagine the satisfaction of harvesting your own peanuts, roasting them to perfection, and enjoying the unparalleled taste of freshly grown goodness. It’s a project that connects you to nature, teaches you about the growing process, and provides a sustainable source of a beloved snack.
Beyond the basic method, there’s ample room for experimentation. Try different peanut varieties to discover your favorite flavor profile. Valencia peanuts are known for their sweetness, while Virginia peanuts are prized for their large size. Explore organic growing methods to ensure your peanuts are free from harmful chemicals. Consider companion planting to enhance growth and deter pests. Marigolds, for example, are known to repel nematodes, a common peanut pest.
Don’t be afraid to get creative with your harvest! Roasted peanuts are just the beginning. You can use your homegrown peanuts to make homemade peanut butter, add them to trail mixes, incorporate them into Asian-inspired dishes, or even bake them into cookies and cakes. The possibilities are endless!
We understand that venturing into the world of home gardening can sometimes feel daunting, but growing peanuts is surprisingly straightforward. With a little patience, the right conditions, and this simple DIY trick, you’ll be well on your way to enjoying a bountiful harvest.
We wholeheartedly encourage you to give this DIY trick a try. Start small, learn as you go, and don’t be discouraged by initial setbacks. Gardening is a journey, and every experience, whether successful or not, is a valuable learning opportunity.
Most importantly, we want to hear about your experiences! Share your peanut-growing adventures with us in the comments below. Tell us about your successes, your challenges, and any tips or tricks you’ve discovered along the way. Let’s create a community of peanut enthusiasts and learn from each other. Did you try a unique growing method? Did you discover a particularly delicious way to use your homegrown peanuts? We’re eager to hear all about it! Your insights could inspire others to embark on their own peanut-growing journey. So, grab your seeds, prepare your soil, and get ready to experience the joy of growing your own peanuts at home. Happy gardening!
Frequently Asked Questions (FAQ)
1. What is the best time to plant peanuts?
Peanuts thrive in warm weather, so the best time to plant them is in the spring, after the last frost. The soil temperature should be consistently above 65°F (18°C). In most regions, this typically falls between April and June. Check your local weather forecast and planting guides for specific recommendations based on your climate. Planting too early can result in poor germination and stunted growth.
2. What kind of soil is best for growing peanuts?
Peanuts prefer well-drained, sandy loam soil. This type of soil allows for good aeration and drainage, which is crucial for healthy root development and pod formation. Avoid heavy clay soils, as they can become waterlogged and impede peanut growth. If you have clay soil, amend it with organic matter, such as compost or well-rotted manure, to improve drainage and aeration. The ideal soil pH for peanuts is between 6.0 and 6.5.
3. How much sunlight do peanuts need?
Peanuts require at least 6-8 hours of direct sunlight per day. Choose a planting location that receives ample sunlight throughout the growing season. Insufficient sunlight can lead to weak plants, reduced yields, and smaller peanuts. If you’re growing peanuts indoors, supplement with grow lights to ensure they receive adequate light.
4. How often should I water my peanut plants?
Peanuts need consistent moisture, especially during flowering and pod development. Water deeply and regularly, aiming to keep the soil consistently moist but not waterlogged. Avoid overhead watering, as it can promote fungal diseases. Drip irrigation or soaker hoses are ideal for delivering water directly to the roots. Reduce watering frequency as the peanuts approach maturity.
5. How long does it take for peanuts to mature?
Peanuts typically take 120-150 days to mature, depending on the variety and growing conditions. You’ll know they’re ready to harvest when the foliage begins to yellow and the pods feel plump and full. To check for maturity, dig up a few plants and examine the pods. The inside of the pods should be dark and the kernels should be fully developed.
6. What are some common peanut pests and diseases?
Common peanut pests include aphids, spider mites, nematodes, and peanut root-knot nematodes. Diseases include leaf spot, white mold, and peanut rust. Implement preventative measures, such as crop rotation, companion planting, and proper watering techniques, to minimize pest and disease problems. Use organic pest control methods, such as insecticidal soap or neem oil, to control infestations.
7. Can I grow peanuts in containers?
Yes, you can grow peanuts in containers, but you’ll need to choose a large container (at least 18 inches in diameter) with good drainage. Use a well-draining potting mix and provide adequate sunlight and water. Container-grown peanuts may require more frequent fertilization than those grown in the ground.
8. How do I harvest peanuts?
To harvest peanuts, carefully dig up the entire plant, being careful not to damage the pods. Shake off any excess soil and allow the plants to dry in the sun for a few days. Once the plants are dry, you can remove the peanuts from the vines.
9. How do I cure peanuts?
Curing peanuts is essential for developing their flavor and preventing spoilage. After harvesting, spread the peanuts in a single layer on a screen or tray and allow them to air dry in a well-ventilated area for 2-3 weeks. The peanuts are properly cured when the kernels are brittle and the skins are easily removed.
10. How do I store peanuts?
Store cured peanuts in an airtight container in a cool, dry place. Properly stored peanuts can last for several months. You can also freeze peanuts for longer storage.

Leave a Comment