

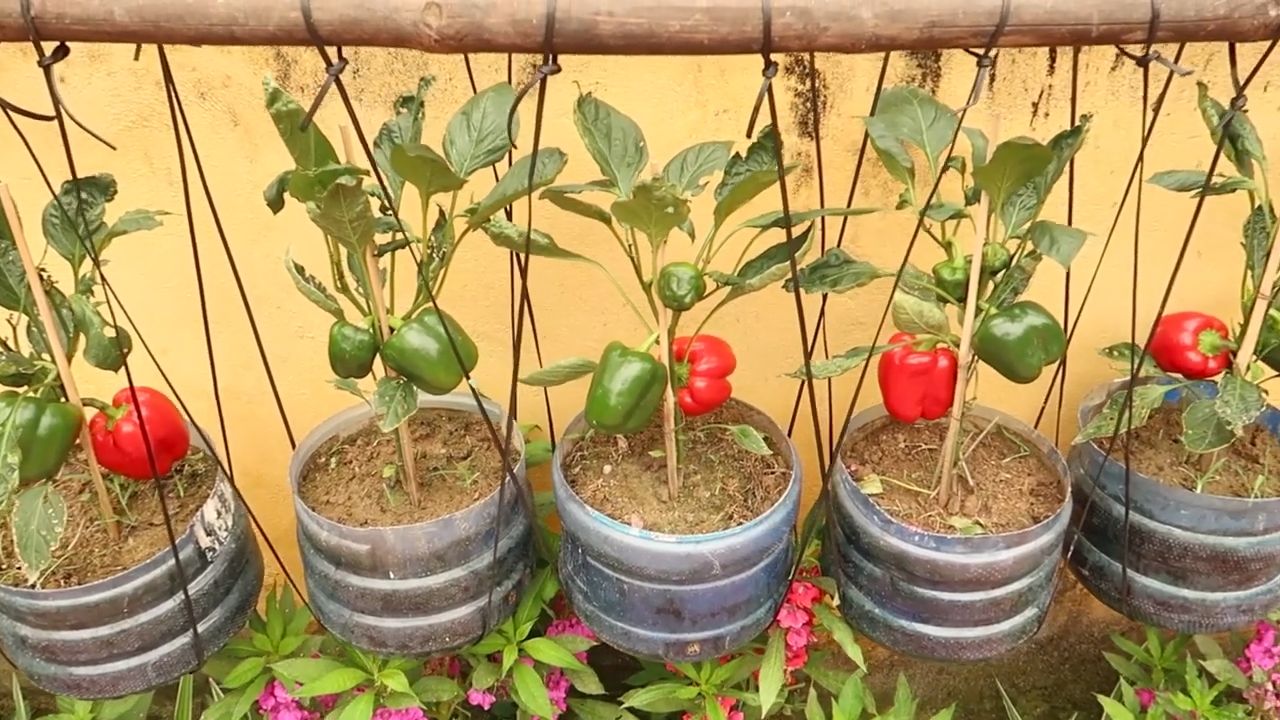
Grow More Chili Peppers: Who doesn’t love the fiery kick of a homegrown chili pepper? Imagine plucking vibrant, colorful peppers straight from your garden, ready to spice up your favorite dishes. But what if your chili pepper plants aren’t producing as much as you’d hoped? Don’t worry, you’re not alone! Many home gardeners face this challenge, and that’s exactly why I’ve put together this guide filled with simple, effective DIY tricks to help you maximize your chili pepper harvest.
Chili peppers have a rich history, dating back thousands of years in the Americas. They were prized by ancient civilizations not only for their flavor but also for their medicinal properties. Today, they’re a staple in cuisines around the world, adding heat and complexity to countless dishes. But beyond their culinary appeal, growing your own chili peppers is incredibly rewarding. It connects you to nature, provides fresh, healthy produce, and lets you experiment with different varieties.
Let’s face it, store-bought chili peppers can be expensive and sometimes lack the intense flavor of homegrown ones. Plus, knowing exactly where your food comes from and how it was grown is a huge peace of mind. That’s where these DIY tricks come in. I’m going to share some of my favorite, tried-and-true methods to help you grow more chili peppers than ever before. From simple soil amendments to clever watering techniques, these hacks are designed to boost your plant’s health and productivity, ensuring a bountiful harvest that will keep your spice rack stocked all season long. So, grab your gardening gloves, and let’s get started!
Chili Plant Power: How to Make Your Chilies Explode!
Hey chili lovers! Are you ready to take your chili harvest to the next level? Today I’ll show you how to really get your chili plants growing with a few simple tips and tricks and bring in a harvest that will blow you away. Don’t worry, it’s easier than you think!
The Basics: What Chilies Really Want
Before we get started, let’s quickly clarify the basics. Chilies are little divas when it comes to their needs. They need:
- Sun, sun, sun: At least 6-8 hours of direct sunlight per day are a must. The more, the better!
- Warmth: Chilies love it warm. Temperatures between 20°C and 30°C are ideal. Frost is their absolute enemy.
- Well-drained soil: Waterlogging is poison for chili roots. Make sure there is good drainage.
- Regular watering: The soil should always be slightly moist, but not wet.
- The right fertilization: Chilies are heavy feeders and need sufficient nutrients, especially during fruit formation.
Chili Boost: The Best DIY Tricks for a Mega Harvest
Now we come to the exciting DIY hacks that will really get your chili plants going.
1. The Eggshell Trick: Calcium for Strong Fruits
Eggshells are a real insider tip for chili gardeners. They are rich in calcium, which is essential for the development of strong and healthy fruits. Calcium deficiency can lead to blossom end rot, a disease where the fruits rot at the tip. Of course, we want to avoid that!
Here’s how:
- Collect eggshells and rinse them thoroughly.
- Let the shells dry well.
- Crush the dry shells into a fine powder. You can use a mortar and pestle, a coffee grinder, or a blender for this.
- Put the eggshell powder directly into the soil around your chili plants. Work it in lightly.
- Alternatively, you can also mix the powder into your watering water.
How often?
I recommend using a small amount of eggshell powder every 2-3 weeks.
2. Coffee Grounds as Fertilizer: Nitrogen Kick for Your Chilies
Coffee grounds are not only a pick-me-up for us, but also for our chili plants! It contains nitrogen, which is important for the growth of leaves and stems. In addition, coffee grounds loosen the soil and improve drainage.
Here’s how:
- Collect your coffee grounds.
- Let the coffee grounds dry well to prevent mold.
- Spread the dried coffee grounds around your chili plants. Work it lightly into the soil.
- You can also add the coffee grounds to your compost.
Important:
Use only coffee grounds without sugar or milk. And don’t overdo it! Too much coffee grounds can make the soil too acidic.
How often?
I use coffee grounds about once a month.
3. Epsom Salt Booster: Magnesium for Green Leaves
Epsom salt (magnesium sulfate) is a miracle cure for chili plants suffering from magnesium deficiency. Magnesium is important for photosynthesis and ensures healthy, green leaves. A magnesium deficiency often manifests as yellow leaves with green veins.
Here’s how:
- Dissolve one teaspoon of Epsom salt in one liter of water.
- Spray your chili plants with the solution. Make sure to wet all the leaves, including the undersides.
- Alternatively, you can also use the solution for watering.
Important:
Use Epsom salt only if your plants actually show signs of magnesium deficiency. An overdose can be harmful.
How often?
I only use Epsom salt when needed, about every 2-3 weeks, until the symptoms disappear.
4. Nettle Manure: The Natural All-Rounder
Nettle manure is a real all-rounder in the garden. It is rich in nitrogen, potassium, iron, and other important nutrients. It also strengthens the plants and makes them more resistant to pests and diseases.
Here’s how:
- Collect fresh nettles. Wear gloves to protect yourself from the stinging hairs.
- Chop the nettles coarsely.
- Fill a bucket or a barrel with the nettles.
- Pour water over them until the nettles are completely covered.
- Cover the bucket or barrel, but not airtight.
- Let the manure ferment for 1-2 weeks. Stir it regularly.
- The manure is ready when it no longer foams and smells unpleasant.
- Dilute the manure with water in a ratio of 1:10 before use.
- Water your chili plants with the diluted manure.
Important:
Nettle manure stinks! It’s best to place it in a remote location.
How often?
I water my chili plants with nettle manure about every 2-3 weeks.
5. Mulching: Retain Moisture and Suppress Weeds
Mulching is a simple but effective method to keep the soil moist, suppress weeds, and promote soil life.
Here’s how:
- Spread a layer of mulch material around your chili plants.
- Suitable mulch materials include straw, wood chips, grass clippings, or leaves.
Important:
Make sure that the mulch is not directly against the stem of the plant to avoid rot.
How often?
I renew the mulch layer when it becomes thinner or decomposes.
6. Pruning: More Power for the Fruits
“Pruning” is the removal of side shoots that grow between the main stem and the leaves. These shoots unnecessarily take energy from the plant, which it can better use for the development of the fruits.
Here’s how:
- Look for side shoots that grow between the main stem and the leaves.
- Carefully break off the side shoots with your fingers.
Important:
Prune your chili plants regularly, especially during the growth phase.
How often?
I prune my chili plants about once a week.
7. Pollination Help: When the Bees are Lazy
Sometimes chili plants need a little help with pollination, especially when they are in a greenhouse or indoors.
Here’s how:
- Take a small brush or a cotton swab.
- Gently brush over the stamens (the small sticks in the flower) of one flower.
- Then brush over the stigma (the sticky part in the middle of the flower) of another flower.
- Repeat this process for all flowers.
- Alternatively, you can also shake the plant lightly to distribute the pollen.
How often?
I pollinate my chili plants about every 2-3 days when they are in bloom.
Additional Tips for Chili Pros
Chilies love company: Plant basil or marigolds near your chili plants.
Conclusion
So, there you have it! Mastering the art of growing more chili peppers doesn’t require a green thumb blessed by the gardening gods. It’s about understanding the plant’s needs and employing a few clever, cost-effective strategies. This DIY approach, focusing on optimized soil, strategic watering, and the power of companion planting, is a game-changer for anyone looking to boost their chili pepper harvest.
Why is this a must-try? Because it’s simple, effective, and incredibly rewarding. Imagine the satisfaction of harvesting baskets overflowing with vibrant, fiery peppers, all thanks to your own ingenuity and a little bit of elbow grease. Forget relying solely on expensive fertilizers or complicated gardening techniques. This method empowers you to take control of your chili pepper production, ensuring a bountiful supply for all your culinary adventures.
But the beauty of this DIY trick lies in its adaptability. Feel free to experiment with different companion plants. Basil, for example, is a classic choice, but marigolds and nasturtiums can also work wonders in deterring pests. Consider varying the type of organic matter you add to your soil mix. Compost, aged manure, and even coffee grounds can contribute to a nutrient-rich environment that your chili peppers will thrive in.
Don’t be afraid to adjust the watering schedule based on your local climate and the specific needs of your chili pepper variety. Some peppers prefer slightly drier conditions, while others require more consistent moisture. The key is to observe your plants closely and respond accordingly.
And remember, growing more chili peppers is not just about the quantity; it’s about the quality too. By providing your plants with the optimal conditions, you’ll not only increase your yield but also enhance the flavor and heat of your peppers. Imagine the depth of flavor you can achieve in your salsas, sauces, and chili recipes with peppers grown with such care and attention.
We wholeheartedly encourage you to give this DIY trick a try. It’s a fun, engaging, and ultimately delicious way to connect with nature and elevate your culinary creations. And most importantly, we want to hear about your experience! Share your successes, your challenges, and any variations you’ve discovered in the comments below. Let’s build a community of chili pepper enthusiasts, sharing our knowledge and inspiring each other to grow the best peppers possible. Your insights could be invaluable to other gardeners embarking on their own chili pepper growing journey. So, get out there, get your hands dirty, and get ready to harvest a bumper crop of delicious, fiery chili peppers!
Frequently Asked Questions (FAQ)
What type of soil is best for growing more chili peppers?
Chili peppers thrive in well-draining, fertile soil with a slightly acidic to neutral pH (around 6.0 to 7.0). A good mix would include equal parts of garden soil, compost, and perlite or sand. The compost provides essential nutrients, while the perlite or sand ensures proper drainage, preventing waterlogging which can lead to root rot. Avoid heavy clay soils, as they tend to retain too much water. You can amend clay soil with organic matter like compost and aged manure to improve its drainage and fertility. Consider getting a soil testing kit to determine your soil’s pH and nutrient levels, allowing you to make necessary adjustments before planting.
How often should I water my chili pepper plants?
Watering frequency depends on several factors, including the climate, soil type, and the size of your plants. Generally, chili peppers need consistent moisture, but they don’t like to be waterlogged. Water deeply when the top inch of soil feels dry to the touch. In hot, dry weather, you may need to water daily, while in cooler, wetter weather, you can reduce the frequency. Use a soaker hose or drip irrigation to deliver water directly to the roots, minimizing water loss through evaporation and reducing the risk of fungal diseases. Avoid overhead watering, as it can wet the foliage and create a favorable environment for diseases.
What are the best companion plants for chili peppers?
Companion planting can significantly benefit chili peppers by attracting beneficial insects, repelling pests, and improving soil health. Basil is a classic companion plant for chili peppers, as it repels aphids, whiteflies, and other common pests. Marigolds are another excellent choice, as they deter nematodes and other soil-borne pests. Other beneficial companion plants include carrots, onions, garlic, and nasturtiums. Avoid planting chili peppers near fennel or brassicas (such as cabbage and broccoli), as they can inhibit their growth.
How can I protect my chili pepper plants from pests and diseases?
Prevention is key when it comes to pest and disease control. Start by choosing disease-resistant varieties of chili peppers. Ensure proper spacing between plants to allow for good air circulation, which helps prevent fungal diseases. Regularly inspect your plants for signs of pests or diseases, such as aphids, spider mites, or leaf spots. If you spot any problems, address them promptly using organic pest control methods, such as insecticidal soap or neem oil. Avoid using broad-spectrum pesticides, as they can harm beneficial insects. You can also use row covers to protect your plants from pests early in the season.
How much sunlight do chili pepper plants need?
Chili peppers need at least 6-8 hours of direct sunlight per day to thrive. Choose a sunny location in your garden where your plants will receive ample sunlight. If you’re growing chili peppers indoors, use grow lights to supplement natural sunlight. Insufficient sunlight can lead to leggy growth, reduced flowering, and smaller peppers.
When is the best time to harvest chili peppers?
The best time to harvest chili peppers depends on the variety and your desired level of heat. Generally, peppers are ready to harvest when they reach their mature color and size. For green chili peppers, you can harvest them when they are firm and have reached their desired size. For red, yellow, or orange chili peppers, wait until they have fully ripened on the plant. Use pruning shears or scissors to cut the peppers from the plant, leaving a small stem attached.
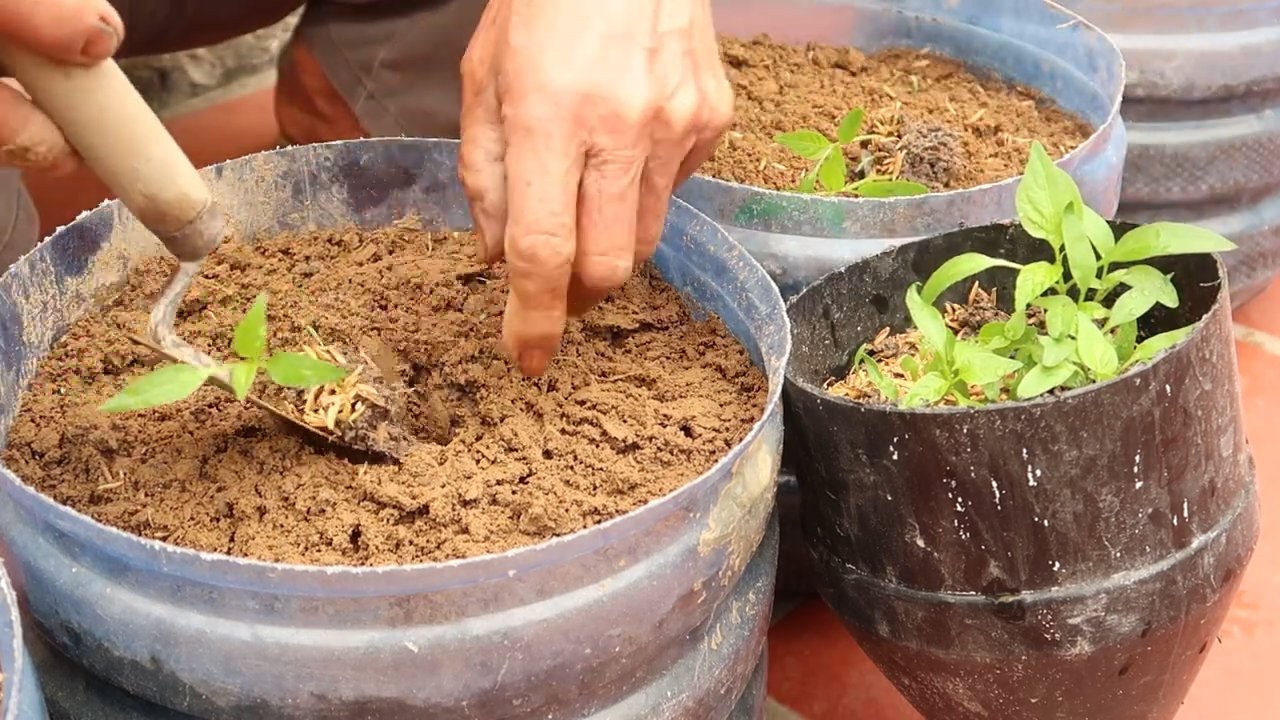
Can I grow chili peppers in containers?
Yes, chili peppers can be successfully grown in containers. Choose a container that is at least 12 inches in diameter and has drainage holes. Use a well-draining potting mix and provide your plants with adequate sunlight and water. Container-grown chili peppers may need to be fertilized more frequently than those grown in the ground, as nutrients can leach out of the soil more quickly.
How can I increase the heat of my chili peppers?
Several factors can influence the heat of chili peppers, including genetics, growing conditions, and stress levels. To increase the heat of your peppers, ensure they receive plenty of sunlight and water. Avoid over-fertilizing, as this can reduce the heat. Some gardeners believe that stressing the plants slightly by withholding water for a short period before harvest can increase the heat. However, be careful not to stress the plants too much, as this can negatively impact their overall health.
What should I do with my chili peppers after harvesting them?
After harvesting your chili peppers, you can use them fresh, dry them, pickle them, or freeze them. Fresh chili peppers can be stored in the refrigerator for up to a week. To dry chili peppers, you can string them together and hang them in a well-ventilated area, or you can use a dehydrator. Pickled chili peppers can be stored in the refrigerator for several months. To freeze chili peppers, wash and dry them thoroughly, then place them in freezer bags or containers.
How do I save seeds from my chili peppers?
Saving seeds from your chili peppers is a great way to ensure you have a supply of seeds for future growing seasons. Choose healthy, fully ripe peppers from your best-performing plants. Cut the peppers open and remove the seeds. Spread the seeds out on a paper towel and allow them to dry completely. Once the seeds are dry, store them in an airtight container in a cool, dark place. Be aware that if you are growing hybrid varieties of chili peppers, the seeds may not produce plants that are true to type.
Leave a Comment