

Grow Kale in Grow Bags: Unlock a world of fresh, homegrown goodness, even if you’re short on space! Have you ever dreamed of harvesting your own vibrant, nutrient-packed kale but thought you didn’t have the room? Well, dream no more! This DIY guide is your passport to a thriving kale patch, no sprawling garden required.
For centuries, kale has been a staple in diets around the globe, prized for its resilience and incredible health benefits. From its humble beginnings as a wild cabbage relative to its current status as a superfood superstar, kale has nourished communities and cultures. Now, you can easily bring this historical powerhouse into your own life.
But why grow kale in grow bags, you ask? In today’s world, many of us are living in apartments, condos, or homes with limited outdoor space. Traditional gardening can feel daunting and inaccessible. Grow bags offer a fantastic solution! They’re lightweight, portable, and perfect for balconies, patios, or even sunny windowsills. Plus, they provide excellent drainage and aeration, creating the ideal environment for your kale to flourish. I’m excited to show you how simple and rewarding it can be to cultivate your own delicious kale, right at your fingertips. Let’s get started!
Grow Kale Like a Pro: A DIY Guide to Kale-tastic Grow Bags!
Hey there, fellow garden enthusiasts! I’m so excited to share my tried-and-true method for growing lush, vibrant kale right in grow bags. Forget those sprawling garden beds – grow bags are the perfect solution for small spaces, balconies, or even just adding a pop of green to your patio. Plus, they’re incredibly easy to manage. Trust me, even if you’re a beginner, you can totally nail this!
Why Grow Kale in Grow Bags?
Before we dive into the nitty-gritty, let’s talk about why grow bags are such a game-changer for kale:
* Excellent Drainage: Grow bags are typically made from breathable fabric, which allows excess water to drain away easily. Kale hates soggy roots, so this is a huge plus!
* Improved Aeration: The fabric also allows air to circulate around the roots, promoting healthy growth and preventing root rot.
* Temperature Control: Grow bags help regulate soil temperature, keeping the roots cooler in the summer and warmer in the winter.
* Portability: Need to move your kale to a sunnier spot? No problem! Grow bags are lightweight and easy to relocate.
* Space-Saving: Perfect for small gardens, balconies, or patios.
* Easy to Manage: Less weeding and easier access for harvesting.
What You’ll Need
Okay, let’s gather our supplies. Here’s what you’ll need to get started:
* Grow Bags: I recommend using 10-gallon grow bags for kale. This gives the plants enough room to grow without being too bulky.
* Kale Seeds or Seedlings: You can start from seed or buy seedlings from your local nursery. I personally love starting from seed, but seedlings will give you a head start.
* Potting Mix: Use a high-quality potting mix that’s well-draining and rich in organic matter. Avoid using garden soil, as it can compact in grow bags.
* Compost: Compost is your kale’s best friend! It provides essential nutrients and improves soil structure.
* Slow-Release Fertilizer: A slow-release fertilizer will provide a steady supply of nutrients throughout the growing season. Look for one that’s specifically formulated for vegetables.
* Watering Can or Hose: For watering your kale plants.
* Trowel or Small Shovel: For filling the grow bags and transplanting seedlings.
* Gardening Gloves: To keep your hands clean and protected.
* Optional:
* Seed Starting Tray and Dome: If you’re starting from seed.
* Heat Mat: To speed up germination.
* Plant Labels: To keep track of your kale varieties.
Starting from Seed vs. Seedlings
This is a personal preference, but here’s a quick breakdown to help you decide:
* Starting from Seed:
* Pros: More economical, wider variety of kale types to choose from, more control over the growing process.
* Cons: Requires more time and effort, higher risk of failure, takes longer to harvest.
* Starting from Seedlings:
* Pros: Faster harvest, easier to get started, less risk of failure.
* Cons: More expensive, limited variety of kale types, less control over the growing process.
Starting Kale from Seed (My Preferred Method!)
If you’re like me and love the satisfaction of starting from seed, here’s how to do it:
Phase 1: Sowing the Seeds
1. Prepare Your Seed Starting Tray: Fill your seed starting tray with a seed starting mix. Moisten the mix thoroughly.
2. Sow the Seeds: Sow 2-3 kale seeds per cell, about 1/4 inch deep.
3. Cover and Water: Gently cover the seeds with more seed starting mix and water lightly.
4. Provide Warmth and Light: Place the seed starting tray on a heat mat (optional) and cover it with a humidity dome. Place the tray in a warm, sunny location or under grow lights.
5. Keep the Soil Moist: Check the soil daily and water as needed to keep it moist but not soggy.
Phase 2: Germination and Early Growth
1. Wait for Germination: Kale seeds typically germinate in 5-10 days.
2. Remove the Dome: Once the seedlings emerge, remove the humidity dome to prevent fungal diseases.
3. Thin the Seedlings: Once the seedlings have their first true leaves (the second set of leaves), thin them to one seedling per cell. Choose the strongest seedling and snip off the others at the soil line.
4. Provide Adequate Light: Ensure the seedlings receive at least 6 hours of direct sunlight per day or 12-14 hours of light from grow lights.
5. Water Regularly: Water the seedlings regularly, allowing the soil to dry out slightly between waterings.
Phase 3: Hardening Off
1. Acclimate to Outdoor Conditions: Before transplanting your kale seedlings into grow bags, you need to “harden them off.” This process gradually acclimates the seedlings to outdoor conditions, preventing transplant shock.
2. Start Slowly: Begin by placing the seedlings outdoors in a sheltered location for 1-2 hours per day.
3. Increase Exposure Gradually: Gradually increase the amount of time the seedlings spend outdoors each day, over the course of a week or two.
4. Protect from Extreme Weather: Protect the seedlings from strong winds, direct sunlight, and frost.
Transplanting Kale Seedlings (Whether You Started Them or Bought Them!)
Okay, now for the fun part – getting those kale babies into their grow bag homes!
1. Prepare the Grow Bag: Fill the grow bag with a mixture of potting mix and compost. I like to use a 2:1 ratio (2 parts potting mix to 1 part compost). Leave about 2-3 inches of space at the top of the bag.
2. Add Slow-Release Fertilizer: Mix in a slow-release fertilizer according to the package instructions.
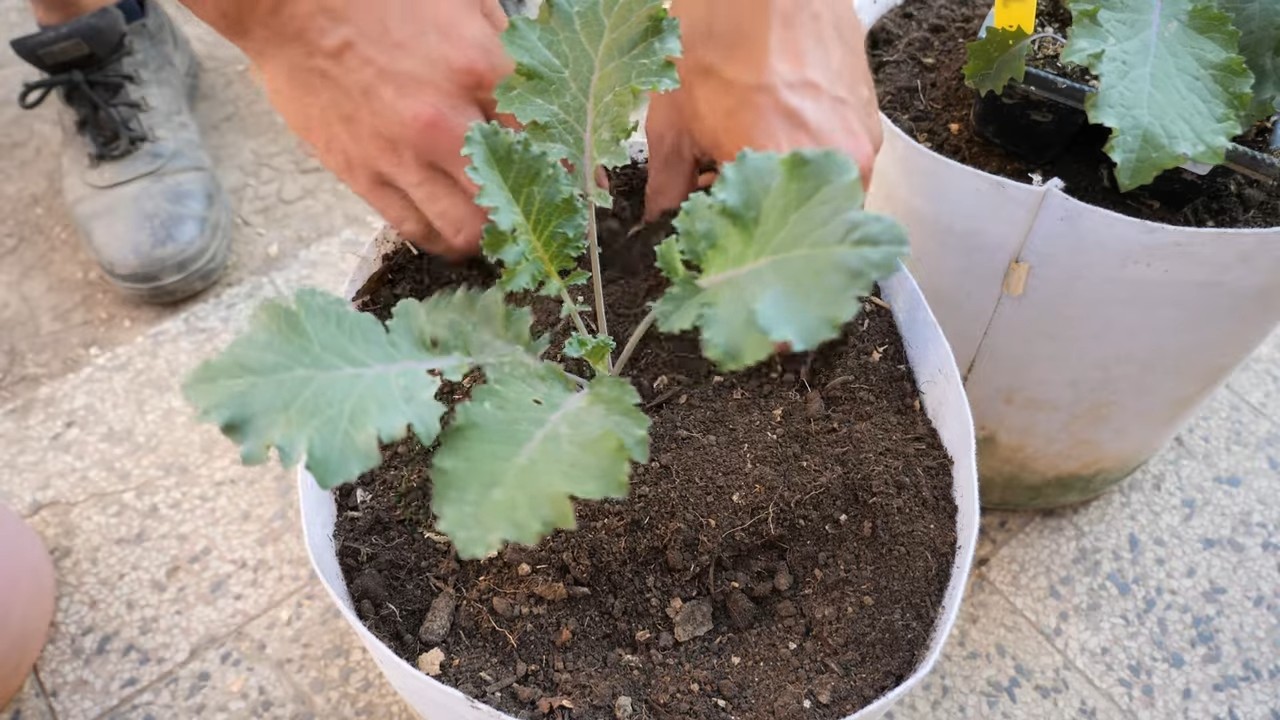
3. Create a Planting Hole: Dig a hole in the center of the grow bag that’s large enough to accommodate the root ball of the kale seedling.
4. Gently Remove the Seedling: Carefully remove the kale seedling from its container. If you started from seed, gently squeeze the bottom of the cell to loosen the seedling. If you bought seedlings, gently loosen the root ball with your fingers.
5. Plant the Seedling: Place the seedling in the planting hole and gently backfill with potting mix. Make sure the top of the root ball is level with the soil surface.
6. Water Thoroughly: Water the seedling thoroughly after planting.
7. Mulch (Optional): Add a layer of mulch around the base of the plant to help retain moisture and suppress weeds.
Caring for Your Kale in Grow Bags
Now that your kale is planted, here’s how to keep it happy and healthy:
1. Watering: Water your kale regularly, especially during hot, dry weather. The soil should be consistently moist but not soggy. Check the soil moisture by sticking your finger into the soil – if it feels dry an inch or two below the surface, it’s time to water. Grow bags tend to dry out faster than traditional garden beds, so you may need to water more frequently.
2. Fertilizing: Kale is a heavy feeder, so it needs regular fertilization. In addition to the slow-release fertilizer you added at planting time, you can also supplement with a liquid fertilizer every 2-3 weeks. Look for a balanced fertilizer or one that’s specifically formulated for leafy greens.
3. Sunlight: Kale needs at least 6 hours of direct sunlight per day. If you’re growing your kale in a shady location, you may need to supplement with grow lights.
4. Pest Control: Keep an eye out for common kale pests, such as aphids, cabbage worms, and flea beetles. You can control these pests with organic methods, such as hand-picking, insecticidal soap, or neem oil.
5. Weeding: Keep the grow bag free of weeds. Weeds compete with kale for nutrients and water.
6. Support (Optional): As your kale plants grow taller, they may need some support. You can use stakes or tomato cages to keep them from falling over.
Harvesting Your Kale
The best part! You can start harvesting kale leaves once the plants are about 6-8 inches tall.
1. Harvest Outer Leaves: Harvest the outer leaves first, leaving the inner leaves to continue growing.
2. Cut or Snap Off Leaves: You can either
Conclusion
So, there you have it! Growing kale in grow bags isn’t just a gardening trend; it’s a game-changer for anyone, regardless of space or experience. We’ve walked you through the simple steps, highlighting the benefits and addressing potential challenges. But why is this DIY trick a must-try?
Firstly, the convenience is unparalleled. Grow bags offer unmatched portability. Want to move your kale to a sunnier spot? No problem! Unexpected frost? Simply relocate your bags indoors. This flexibility is a lifesaver for unpredictable climates and urban gardeners with limited sunlight.
Secondly, grow bags promote healthier root systems. The breathable fabric allows for excellent aeration and drainage, preventing root rot and encouraging vigorous growth. This translates to bigger, more flavorful kale leaves for your salads, smoothies, and stir-fries.
Thirdly, it’s incredibly cost-effective. Starting with a few grow bags is significantly cheaper than building raised beds or investing in expensive gardening equipment. Plus, you can reuse the bags for multiple seasons, making it an environmentally friendly choice.
But the real magic lies in the control you have over your growing environment. You can tailor the soil mix to perfectly suit kale’s needs, ensuring it receives the optimal nutrients for robust growth. Experiment with different compost blends, adding amendments like bone meal or kelp meal to boost nutrient levels.
Ready to take your kale growing to the next level? Consider these variations:
* **Succession Planting:** Plant new kale seeds every few weeks to ensure a continuous harvest throughout the growing season.
* **Companion Planting:** Plant marigolds or nasturtiums around your kale to deter pests naturally.
* **Vertical Gardening:** Utilize trellises or supports to train your kale plants upwards, maximizing space and creating a stunning visual display.
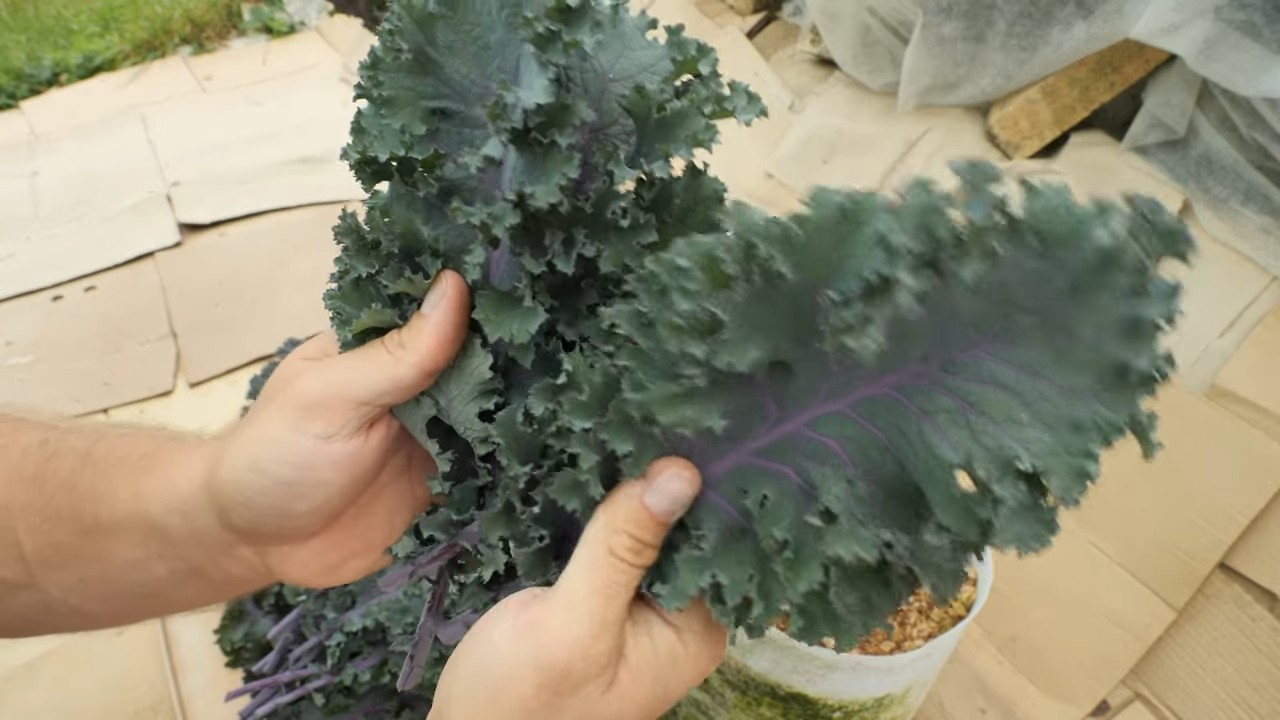
* Different Kale Varieties: Experiment with different types of kale in your grow bags. Try curly kale, lacinato kale (dinosaur kale), or red Russian kale for a variety of flavors and textures.
Don’t be afraid to experiment and find what works best for you. Gardening is a journey of learning and discovery, and grow bags provide the perfect platform for exploring the world of kale cultivation.
We’re confident that once you experience the ease and rewards of growing kale in grow bags, you’ll be hooked. It’s a simple, effective, and enjoyable way to bring fresh, healthy greens to your table.
So, grab some grow bags, seeds, and soil, and get started today! We can’t wait to hear about your experiences. Share your photos, tips, and questions in the comments below. Let’s build a community of thriving kale growers! Let us know what you think about this **DIY trick**!
Frequently Asked Questions (FAQ)
What size grow bag is best for kale?
The ideal size grow bag for kale is typically between 10 and 20 gallons. A 10-gallon bag is sufficient for a single kale plant, while a 20-gallon bag can accommodate two or even three plants, depending on the variety. Consider the mature size of the kale variety you’re growing when choosing your bag size. Larger bags provide more room for root development, leading to healthier and more productive plants.
What type of soil should I use in my grow bags for kale?
Kale thrives in well-draining, nutrient-rich soil. A good mix consists of equal parts compost, potting soil, and perlite or vermiculite. Compost provides essential nutrients, potting soil offers good structure, and perlite or vermiculite improves drainage and aeration. You can also add amendments like bone meal or kelp meal to boost nutrient levels. Avoid using garden soil directly in grow bags, as it can become compacted and hinder drainage.
How often should I water kale in grow bags?
Watering frequency depends on the weather, the size of your grow bag, and the stage of growth of your kale plants. Generally, you should water deeply whenever the top inch of soil feels dry to the touch. In hot, sunny weather, you may need to water daily, while in cooler, cloudier weather, you can water less frequently. Be careful not to overwater, as this can lead to root rot. Grow bags allow for better drainage than traditional pots, but it’s still important to monitor soil moisture levels.
How much sunlight does kale need when grown in grow bags?
Kale requires at least 6 hours of direct sunlight per day to thrive. Choose a location for your grow bags that receives ample sunlight throughout the day. If you live in a particularly hot climate, some afternoon shade can be beneficial to prevent the leaves from scorching. If you don’t have enough natural sunlight, you can supplement with grow lights.
How do I fertilize kale grown in grow bags?
Kale is a heavy feeder and benefits from regular fertilization. You can use a balanced organic fertilizer, such as a 10-10-10 or 5-5-5, every 2-3 weeks. Alternatively, you can use liquid seaweed or fish emulsion as a foliar feed. Be sure to follow the instructions on the fertilizer packaging. Avoid over-fertilizing, as this can lead to excessive foliage growth at the expense of root development.
How do I protect my kale from pests and diseases in grow bags?
Grow bags can actually help reduce pest and disease problems by improving drainage and aeration. However, it’s still important to monitor your plants regularly for signs of trouble. Common kale pests include aphids, cabbage worms, and flea beetles. You can control these pests with insecticidal soap, neem oil, or by handpicking them off the plants. Diseases like powdery mildew and black rot can be prevented by ensuring good air circulation and avoiding overhead watering.
Can I grow kale in grow bags during the winter?
Yes, you can grow kale in grow bags during the winter, especially in mild climates. Kale is a cold-hardy vegetable and can tolerate temperatures down to 20°F (-6°C). In colder climates, you can protect your kale plants by moving the grow bags indoors or covering them with a frost blanket. Choose a winter-hardy kale variety, such as ‘Winterbor’ or ‘Red Russian’, for best results.
How long does it take for kale to grow in grow bags?
Kale typically takes 55-75 days to mature from seed. However, you can start harvesting outer leaves as soon as they are large enough to eat, usually around 30-40 days after planting. The more you harvest, the more the plant will produce.
Can I reuse grow bags for multiple seasons?
Yes, grow bags are reusable. After harvesting your kale, simply empty the soil, wash the bag, and store it in a dry place until the next growing season. Over time, the fabric may degrade, but with proper care, you can reuse grow bags for several seasons.
What are the benefits of using grow bags compared to traditional pots for growing kale?
Grow bags offer several advantages over traditional pots for growing kale:
* **Improved Drainage and Aeration:** The breathable fabric allows for better drainage and aeration, preventing root rot and promoting healthier root systems.
* **Portability:** Grow bags are lightweight and easy to move, allowing you to relocate your plants to optimal sunlight or protection from frost.
* **Temperature Regulation:** Grow bags help regulate soil temperature, keeping roots cooler in hot weather and warmer in cold weather.
* **Air Pruning:** As roots reach the edge of the bag, they are air pruned, which encourages branching and a denser root system.
* **Cost-Effective:** Grow bags are generally less expensive than traditional pots.
Can I grow other vegetables in grow bags besides kale?
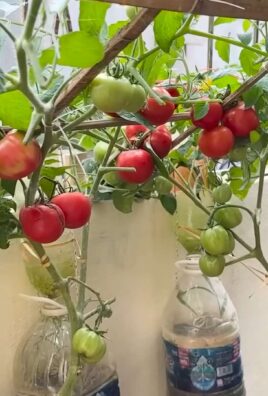
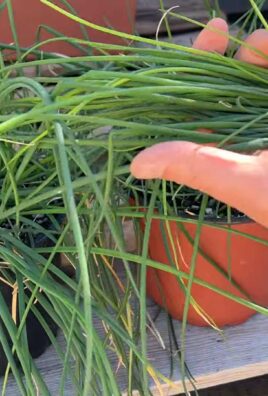
Absolutely! Grow bags are versatile and can be used to grow a wide variety of vegetables, including tomatoes, peppers, lettuce, spinach, herbs, and even potatoes. The key is to choose the appropriate size grow bag for the specific vegetable you’re growing.
Leave a Comment