

Grow Juicy Strawberries Backyard – the very thought conjures images of sun-kissed berries bursting with flavor, doesn’t it? Imagine stepping outside your back door and plucking the sweetest, most delicious strawberries you’ve ever tasted, all thanks to your own green thumb! This isn’t just a dream; it’s an achievable reality with a few simple tricks and DIY hacks.
For centuries, strawberries have been cherished not only for their delectable taste but also for their vibrant color and nutritional benefits. From ancient Roman gardens to medieval monastery plots, these little red gems have held a special place in our hearts and diets. But you don’t need to be a seasoned gardener to enjoy the fruits (pun intended!) of your labor.
In today’s busy world, finding moments of peace and connection with nature can be a challenge. That’s where the magic of home gardening comes in. Learning how to grow juicy strawberries backyard offers a fantastic opportunity to de-stress, learn a new skill, and enjoy the satisfaction of nurturing something from seed to table. Plus, let’s be honest, store-bought strawberries just can’t compare to the taste of homegrown goodness. This article will equip you with easy-to-follow DIY techniques and clever hacks that will transform your backyard into a strawberry paradise, even if you’re a complete beginner. Get ready to roll up your sleeves and embark on a rewarding gardening adventure!
Growing Strawberries in Your Own Garden: Here’s How to Succeed!
Hey garden friends! Do you also crave juicy, sweet strawberries straight from your own garden? I’ll show you how to do it easily. Growing strawberries isn’t as hard as you might think, and the taste of homegrown strawberries is simply unbeatable. Let’s get started!
What you need for growing strawberries:
-
Strawberry plants: Young plants from a nursery or runners from existing plants are best. Look for healthy leaves and strong roots.
-
Suitable location: Strawberries love the sun! Choose a sunny spot in your garden that gets at least 6 hours of sun a day.
-
Good soil: Strawberries prefer loose, humus-rich, and slightly acidic soil.
-
Compost or organic fertilizer: to enrich the soil with nutrients.
-
Mulch material: Straw, wood chips, or special strawberry plastic to keep the fruit clean and suppress weeds.
-
Watering can or garden hose: For regular watering.
-
Scissors or knife: To remove runners and old leaves.
-
(Optional) Snail fence or other protective measures: To protect the strawberries from snails and birds.
-
(Optional) Planters: If you don’t have a garden, you can also grow strawberries in pots or window boxes.
Step-by-Step Guide to Growing Strawberries:
1. Preparing the Soil
-
Location selection: As mentioned, strawberries need sun! Choose a sunny location in your garden.
-
Soil cultivation: Loosen the soil thoroughly. Remove stones, roots, and weeds.
-
Soil improvement: Mix in compost or organic fertilizer to enrich the soil with nutrients and improve drainage. I like to use well-rotted horse manure; my strawberries love it!
-
Check pH level: Strawberries prefer a slightly acidic pH (between 5.5 and 6.5). You can check the pH level with a soil test kit from the garden center and adjust it with lime or sulfur if necessary.
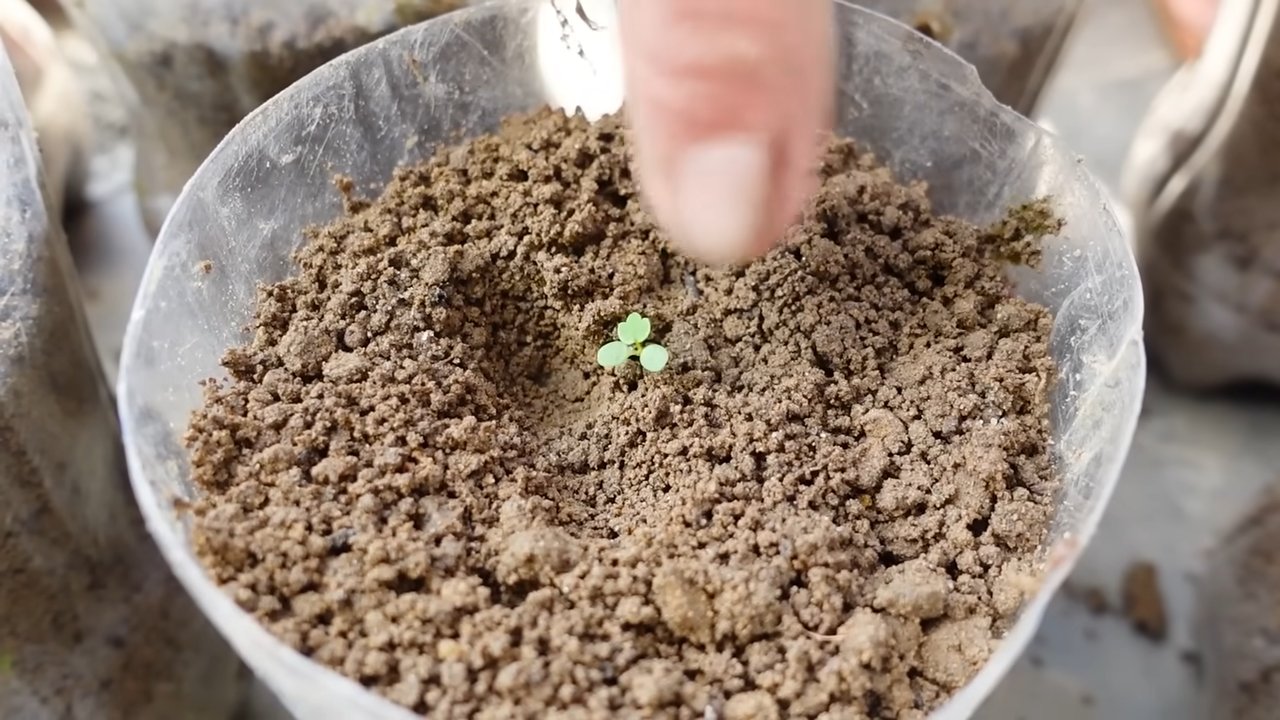
2. Planting Strawberry Plants
-
Planting time: The best time to plant strawberries is in the spring (April/May) or late summer (August/September).
-
Planting distance: Keep a distance of about 25-30 cm between plants and 50-60 cm between rows. This gives the plants enough space to grow and the fruits get enough sun.
-
Dig planting holes: Dig holes large enough to accommodate the root balls of the strawberry plants.
-
Placing the plants: Place the strawberry plants so that the crowns (the transition between roots and leaves) are just above the soil surface. Make sure the roots are not squeezed.
-
Fill the holes: Fill the holes with soil and press it down lightly.
-
Watering in: Water the strawberry plants thoroughly after planting.
3. Caring for the Strawberry Plants
-
Watering: Strawberries need regular water, especially during flowering and fruit development. It is best to water in the morning so that the leaves can dry during the day and fungal diseases are avoided. Avoid waterlogging!
-
Fertilizing: Fertilize the strawberry plants regularly during the growing season with an organic fertilizer or a special strawberry fertilizer. I fertilize my strawberries every 2-3 weeks with diluted nettle tea; it’s a great natural fertilizer.
-
Mulching: Apply a layer of mulch material (straw, wood chips, or strawberry plastic) around the strawberry plants. This keeps the fruits clean, suppresses weeds, and protects the soil from drying out.
-
Weed control: Regularly remove weeds that compete with the strawberry plants.
-
Remove runners: Strawberries form runners on which new plants grow. If you do not want to grow new plants, you should remove the runners regularly so that the mother plant can put its energy into fruit production.
-
Protection from pests and diseases: Watch for signs of pests (e.g., snails, aphids) or diseases (e.g., gray mold). If necessary, you can use natural pesticides or fungicides. A snail fence can work wonders!
4. Harvesting the Strawberries
-
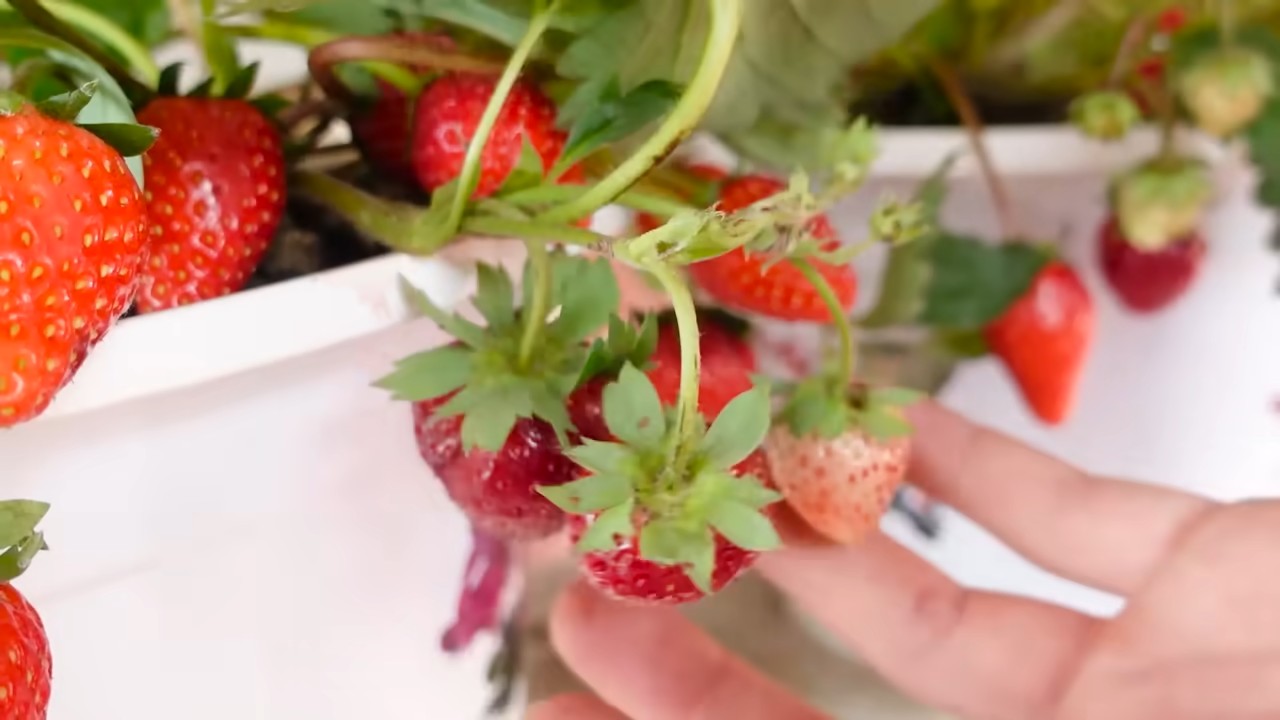
Harvesting time: Strawberries are ripe when they have a deep red color and are easy to pick from the stem.
-
Harvesting technique: Pick the strawberries carefully so they are not damaged. Leave the small green stem on the strawberry.
-
Regular harvesting: Harvest the strawberries regularly so that the plants can form new fruits.
-
Storage: Strawberries do not last long. They taste best freshly picked. They will keep for a few days in the refrigerator.
5. Growing Strawberries in a Pot
No garden? No problem! Strawberries can also be grown wonderfully in pots or window boxes.
-
Suitable containers: Choose pots or window boxes with sufficient volume (at least 10 liters per plant) and good drainage.
-
Soil: Use a high-quality potting soil or a special strawberry soil.
-
Location: Place the pots in a sunny location.
-
Care: Water and fertilize the strawberries regularly. Make sure the soil does not dry out.
-
Overwintering: In winter, you should move the pots to a sheltered place or cover them with fleece to protect the plants from frost.
Variety Recommendations:
There are countless strawberry varieties that differ in taste, size, and harvest time. Here are a few of my favorites:
-
‘Elsanta’: A very popular variety with large, firm fruits and a good taste.
-
‘Korona’: An early variety with sweet, aromatic fruits.
-
‘Senga Sengana’: A classic variety with an intense strawberry aroma.
-
‘Hummi Praline’: An everbearing variety that produces fruit all summer long.
-
‘Mieze Schindler’: An old variety with a unique, slightly sour taste.
Additional Tips and Tricks:
-
Bird protection: Birds love strawberries! Protect your strawberries with a net or a scarecrow.
-
Snail control: Snails can devour strawberries in a short time. Set up snail traps or sprinkle snail bait around the plants.
-
Strawberry plastic: Strawberry plastic is a special film that is laid out around the strawberry plants. It keeps the fruits clean, suppresses weeds, and warms the soil.
-
Strawberry tower: If you have little space, you can build a strawberry tower. This is a vertical arrangement of pots in which strawberries are planted.
-
Propagating strawberries: Strawberries can be easily propagated via runners.
Conclusion
So, there you have it! Transforming your backyard into a strawberry paradise is not only achievable but also incredibly rewarding. This DIY trick for growing juicy strawberries is a game-changer, offering a simple yet effective method to maximize your yield and enjoy the sweetest, most flavorful berries imaginable. Forget those bland, store-bought strawberries – with a little effort and this easy-to-follow guide, you’ll be harvesting baskets full of vibrant, delicious fruit right from your own garden.
The beauty of this method lies in its adaptability. Whether you have a sprawling garden or a small balcony, you can tailor this technique to fit your space. Consider using vertical planters for a space-saving solution, or experiment with different soil amendments to optimize your growing conditions. You can even try companion planting, adding herbs like basil or thyme to deter pests and enhance the flavor of your strawberries.
Don’t be afraid to get creative! Try different varieties of strawberries to discover your favorites. Some varieties are known for their sweetness, while others are prized for their size or disease resistance. Experimenting with different types will not only add variety to your harvest but also help you find the perfect strawberry for your local climate and growing conditions.
This DIY approach isn’t just about saving money; it’s about connecting with nature, understanding the growing process, and enjoying the unparalleled satisfaction of harvesting your own food. There’s something truly special about biting into a strawberry you’ve nurtured from a tiny plant to a bountiful producer.
We’re confident that this DIY trick will revolutionize your strawberry growing experience. It’s a simple, effective, and enjoyable way to grow juicy strawberries and enjoy the fruits (literally!) of your labor.
Now, it’s your turn! We encourage you to give this method a try and experience the joy of growing your own delicious strawberries. Don’t be intimidated – even if you’re a beginner gardener, this technique is easy to master.
Once you’ve tried it, we’d love to hear about your experience. Share your photos, tips, and stories in the comments below. Let’s create a community of strawberry enthusiasts and learn from each other’s successes and challenges. Together, we can all enjoy the sweet taste of homegrown strawberries! So, get your hands dirty, embrace the process, and prepare to be amazed by the abundance of juicy strawberries you can grow right in your own backyard. Happy gardening!
Frequently Asked Questions (FAQ)
What is the best time of year to plant strawberries?
The ideal time to plant strawberries depends on your climate and the type of strawberry you’re growing. Generally, early spring or late fall are the best times. In warmer climates, fall planting allows the plants to establish roots over the winter for a strong start in the spring. In colder climates, spring planting after the last frost is recommended to avoid winter damage. Everbearing strawberries can be planted in either spring or fall. Be sure to check your local planting guidelines for the best timing in your specific region.
What type of soil is best for growing strawberries?
Strawberries thrive in well-drained, slightly acidic soil with a pH between 5.5 and 6.5. The soil should be rich in organic matter to provide essential nutrients and retain moisture. Before planting, amend your soil with compost, well-rotted manure, or other organic amendments to improve its fertility and drainage. Avoid heavy clay soils, as they can become waterlogged and lead to root rot. If you have clay soil, consider growing your strawberries in raised beds or containers with a suitable potting mix.
How often should I water my strawberry plants?
Strawberries need consistent moisture, especially during fruit development. Water deeply and regularly, aiming to keep the soil consistently moist but not waterlogged. The frequency of watering will depend on your climate, soil type, and the stage of growth. During hot, dry weather, you may need to water daily. Check the soil moisture regularly by sticking your finger into the soil – if it feels dry an inch or two below the surface, it’s time to water. Avoid overhead watering, as it can promote fungal diseases. Instead, use a soaker hose or drip irrigation to water at the base of the plants.
How much sunlight do strawberries need?
Strawberries need at least 6-8 hours of direct sunlight per day to produce abundant, flavorful fruit. Choose a planting location that receives full sun for the majority of the day. If you live in a hot climate, some afternoon shade may be beneficial to prevent the plants from overheating. Insufficient sunlight can result in smaller, less flavorful berries and reduced yields.
What are some common pests and diseases that affect strawberries, and how can I prevent them?
Strawberries are susceptible to several pests and diseases, including slugs, snails, aphids, spider mites, gray mold, and root rot. To prevent these problems, practice good garden hygiene. Remove dead leaves and debris regularly to improve air circulation and reduce humidity. Use organic pest control methods, such as handpicking pests, using insecticidal soap, or introducing beneficial insects like ladybugs. To prevent fungal diseases, avoid overhead watering and ensure good air circulation. Consider using a fungicide if necessary, but always follow the instructions carefully.
How do I fertilize my strawberry plants?
Strawberries benefit from regular fertilization to support healthy growth and abundant fruit production. Apply a balanced fertilizer in the spring before the plants begin to bloom. Look for a fertilizer with a ratio of 10-10-10 or 12-12-12. Avoid over-fertilizing, as this can lead to excessive foliage growth at the expense of fruit production. You can also supplement with organic fertilizers like compost tea or fish emulsion. After the harvest, apply another dose of fertilizer to help the plants recover and prepare for the next growing season.
How do I protect my strawberries from birds?
Birds love strawberries just as much as we do! To protect your crop, use netting to cover your plants. Secure the netting tightly to the ground to prevent birds from getting underneath. You can also use bird scare devices, such as reflective tape or plastic owls, to deter birds from the area. Another option is to plant decoy berries, such as wild strawberries, nearby to distract the birds from your cultivated plants.
How often should I replace my strawberry plants?
Strawberry plants typically produce well for 3-5 years. After that, their yields may decline. To maintain a consistent harvest, it’s a good idea to replace your plants every few years. You can propagate new plants from runners (the stems that grow out from the main plant) or purchase new plants from a nursery. Replacing your plants regularly will ensure that you always have a healthy and productive strawberry patch.
Can I grow strawberries in containers?
Yes, strawberries grow very well in containers! This is a great option if you have limited space or want to grow strawberries on a balcony or patio. Choose a container that is at least 12 inches deep and wide to provide enough room for the roots to grow. Use a high-quality potting mix and ensure that the container has good drainage. Water regularly and fertilize as needed. Container-grown strawberries may need more frequent watering than those grown in the ground, especially during hot weather.
What are everbearing strawberries, and how are they different from June-bearing strawberries?
Everbearing strawberries produce fruit throughout the growing season, typically with two or three main harvests. June-bearing strawberries, on the other hand, produce one large crop of fruit in the spring, usually in June. Everbearing strawberries are a good choice if you want a continuous supply of strawberries throughout the summer and fall. June-bearing strawberries are ideal if you want a large harvest all at once for making jam or freezing. The best type for you depends on your personal preferences and growing goals.
Leave a Comment