

Grow Honeydew Melons Easily, even if you think you don’t have a green thumb! Have you ever dreamed of biting into a perfectly ripe, juicy honeydew melon, bursting with sweetness, that you actually grew yourself? It sounds idyllic, right? But the thought of cultivating these beauties can seem daunting. Fear not, fellow gardening enthusiasts! This DIY guide is packed with simple, effective tricks and hacks that will transform your backyard (or even your balcony!) into a honeydew haven.
The honeydew melon, with its smooth, pale skin and refreshing flesh, has a rich history, tracing back to ancient Egypt and the Middle East. For centuries, it’s been prized for its delicate flavor and hydrating properties. But you don’t need to be a pharaoh to enjoy the fruits (or rather, melons!) of your labor.
Many gardeners shy away from growing honeydew melons because they believe it’s too difficult, requiring vast amounts of space and specialized knowledge. That’s where these DIY tricks come in! I’m going to share my secrets for successfully grow honeydew melons easily, regardless of your experience level or garden size. From choosing the right variety to optimizing your soil and providing the perfect support, this guide will equip you with everything you need to harvest your own delicious honeydew melons. Get ready to impress your friends and family with your homegrown bounty!
It’s This Easy to Grow Your Own Honeydew Melons!
I love honeydew melons! Their sweet, juicy taste is simply unbeatable, especially on hot summer days. And what’s even better: you can easily grow them yourself! I’ll show you how to harvest your own honeydew melons with a few simple tips and tricks. Don’t worry, it’s easier than you think!
Preparation is Everything: The Right Location and Sowing
Before we get started, it’s important to find the right location for your honeydew melons and to prepare for sowing. Honeydew melons are sun-lovers and need a lot of warmth to thrive.
- The perfect location: Choose a sunny spot in your garden that gets at least 6-8 hours of direct sunlight per day. The soil should be well-draining and rich in nutrients. Avoid locations where water collects, as this can lead to root rot.
- The right soil: Honeydew melons prefer a slightly acidic to neutral soil with a pH between 6.0 and 7.0. You can enrich the soil with compost or well-rotted manure to improve its nutrient supply.
- Sowing: You have two options: either you start the honeydew melons indoors or you sow them directly outdoors. I recommend starting them indoors, as the plants will have a head start and the harvest will begin earlier.
Sowing Indoors (Starting Ahead):
- The right time: Start about 4-6 weeks before the last expected frost. In Germany, this is usually in April.
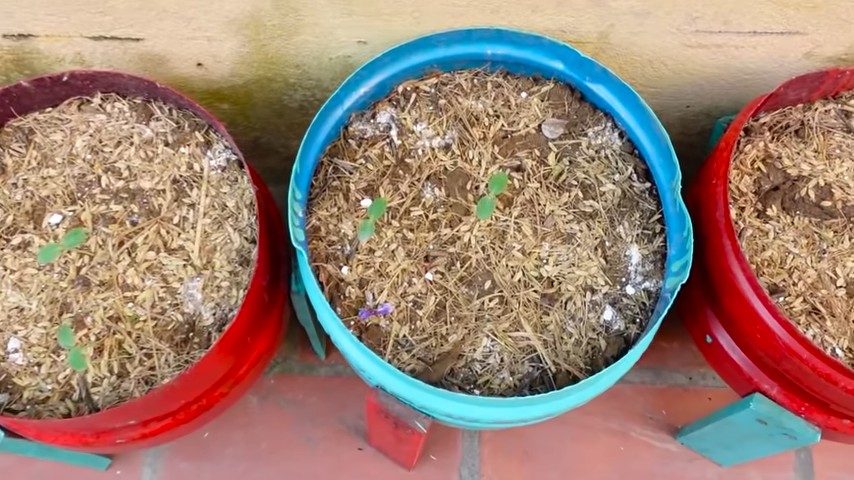
- The right container: Use small starter pots or multi-pot trays. Fill them with seed starting mix.
- Sowing: Place 2-3 seeds per pot about 1-2 cm deep into the soil.
- The right temperature: Place the pots in a warm place with a temperature between 20 and 25 degrees Celsius.
- The right moisture: Keep the soil moist, but not wet. Spray it regularly with a spray bottle.
- Pricking out: As soon as the seedlings have 2-3 true leaves, you can transplant them into larger pots. Choose a pot with a diameter of about 10 cm.
Direct Sowing Outdoors:
- The right time: Sow the seeds outdoors only when there is no more danger of frost and the soil has warmed up sufficiently. This is usually in mid-May or early June.
- Soil preparation: Loosen the soil thoroughly and remove weeds. Enrich the soil with compost or well-rotted manure.
- Sowing: Sow the seeds in rows at a distance of about 60-90 cm. Place 2-3 seeds per planting spot about 2-3 cm deep into the soil.
- Watering: Water the seeds thoroughly after sowing.
Care: Watering, Fertilizing, and Pruning
Once your honeydew melon plants are in the garden, proper care is crucial for a bountiful harvest.
- Watering: Honeydew melons need regular water, especially during fruit development. It’s best to water the plants in the morning so the leaves can dry during the day. Avoid watering the leaves directly, as this can promote fungal diseases.
- Fertilizing: Honeydew melons are heavy feeders and need sufficient nutrients. Fertilize the plants regularly with an organic fertilizer or a special melon fertilizer. Start fertilizing about 2-3 weeks after planting out and repeat every 2-3 weeks.
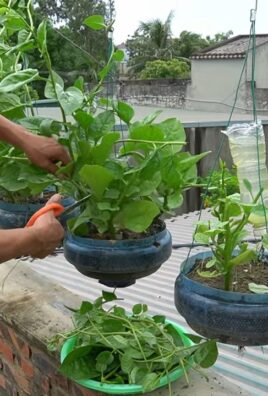
- Pruning: Pruning is optional, but it can promote fruit production. Remove side shoots that grow from the leaf axils. Leave only the main shoot and a few side shoots. This allows the plant to concentrate its energy on developing the fruits.
- Mulching: A layer of mulch made of straw or grass clippings helps to keep the soil moist, suppress weeds, and regulate soil temperature.
Protection from Pests and Diseases
Like all plants, honeydew melons can be affected by pests and diseases. Here are some common problems and how you can combat them:
- Powdery Mildew: Powdery mildew is a fungal disease that appears as a white, flour-like coating on the leaves. Remove affected leaves and treat the plants with a fungicide. Ensure good air circulation around the plants to prevent the spread of mildew.
- Downy Mildew: Downy mildew is another fungal disease that appears as yellowish spots on the top of the leaves and a gray coating on the underside. Remove affected leaves and treat the plants with a fungicide.
- Aphids: Aphids suck plant sap and can weaken the plants. Spray the plants with a jet of water or use an insecticide based on neem oil.
- Snails/Slugs: Snails and slugs can eat the leaves and fruits. Collect the snails by hand or use slug pellets.
The Harvest: When is the Honeydew Melon Ripe?
The harvest is the most exciting part! But when is the honeydew melon ripe? It’s not always easy to tell, but here are some signs:
- The scent: A ripe honeydew melon smells sweet and aromatic.
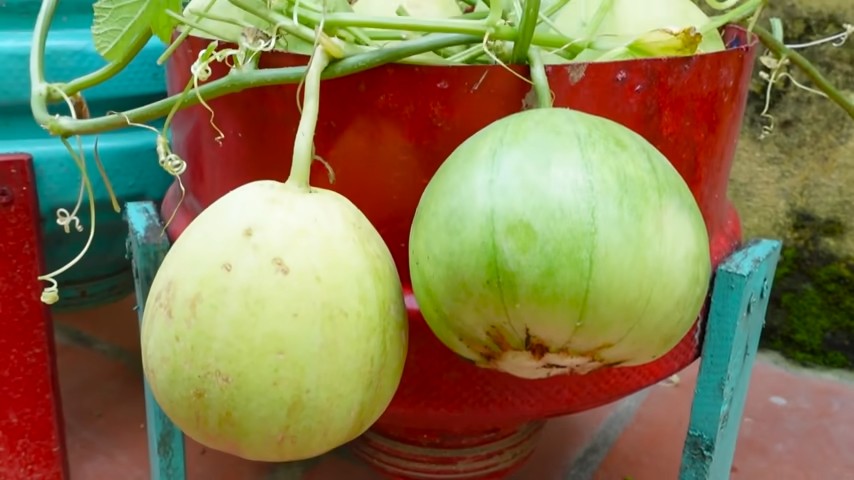
- The color: The rind of the honeydew melon changes its color from greenish to yellowish or cream-colored.
- The sound: Tap the melon lightly. A ripe melon sounds hollow.
- The stem: The stem end of the melon should be slightly cracked.
If you notice these signs, you can carefully cut the honeydew melon from the stem.
Additional Tips for a Successful Honeydew Melon Harvest
- Variety selection: Choose a honeydew melon variety that is suitable for your climate. There are many different varieties that differ in size, taste, and time to maturity.
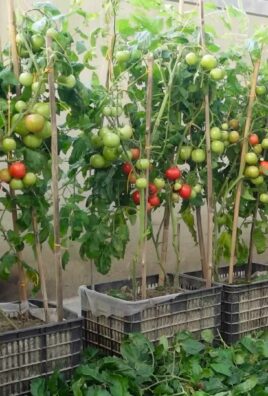
- Trellis/Support: Honeydew melons can get very large and need a trellis or support to keep them off the ground. You can use a trellis or a fence.
- Fruit support: Place straw or wooden boards under the fruits to protect them from moisture and dirt.
- Pollination: Honeydew melons depend on pollination by bees and other insects. Create a bee-friendly environment in your garden by growing flowering plants.
Avoiding Common Mistakes
- Sowing too early: Honeydew melons are sensitive to cold. Do not sow them too early, as they may freeze.
- Too little sun: Honeydew melons need a lot of sun to thrive. Choose a sunny location.
- Too little water: Honeydew melons need regular water, especially during fruit development.
- Too little fertilizer: Honeydew melons are heavy feeders and need sufficient nutrients.
- Ignoring pest and disease infestation: Check your plants regularly for pests and diseases and combat them early.
I hope this guide helps you to successfully grow your own honeydew melons. With a little patience and care, you will soon be rewarded with a bountiful harvest! Happy gardening!
Conclusion
So, there you have it! Growing honeydew melons doesn’t have to be a daunting task reserved for seasoned gardeners. By implementing these simple yet effective DIY tricks, you can significantly increase your chances of harvesting sweet, juicy honeydew melons right in your own backyard. We’ve covered everything from optimizing soil conditions and providing adequate support to mastering the art of pollination and pest control. These aren’t just theoretical concepts; they’re practical, hands-on techniques that empower you to take control of your honeydew melon cultivation.
Why is this a must-try? Because store-bought honeydew simply can’t compare to the flavor and satisfaction of a melon you’ve nurtured from seed to fruit. The difference in taste is remarkable – a sweetness that’s more intense, a texture that’s more succulent, and a freshness that’s simply unmatched. Plus, you’ll know exactly what went into growing your melon, avoiding any unwanted pesticides or chemicals. Beyond the superior taste, growing your own honeydew melons is a rewarding experience that connects you with nature and provides a sense of accomplishment.
Looking for variations? Consider experimenting with different honeydew varieties to find your favorite. ‘Honey Gold’ offers a richer, more intense flavor, while ‘Temptation’ is known for its early maturity. You can also try growing your honeydew melons in raised beds or containers if you have limited space. For those in cooler climates, starting seeds indoors and using row covers can extend the growing season and protect your plants from frost. Another interesting variation is to try grafting your honeydew melon onto a more vigorous rootstock, such as a squash, to improve disease resistance and overall plant health. This is a more advanced technique, but it can yield impressive results.
Don’t be afraid to get your hands dirty and embrace the learning process. Gardening is all about experimentation and adapting to your specific environment. Remember to observe your plants closely, pay attention to their needs, and adjust your approach as necessary. The key to successfully **grow honeydew melons easily** lies in consistent care and attention.
We’re confident that with these DIY tricks, you’ll be well on your way to enjoying a bountiful harvest of delicious honeydew melons. So, grab your gardening gloves, gather your supplies, and get started today! We can’t wait to hear about your experiences. Share your photos, tips, and challenges in the comments below. Let’s build a community of honeydew enthusiasts and learn from each other’s successes and failures. Happy gardening!
Frequently Asked Questions (FAQ)
1. How long does it take to grow honeydew melons from seed?
Growing honeydew melons from seed typically takes between 75 and 100 days from planting to harvest. This timeframe can vary depending on the specific variety, climate conditions, and the overall health of your plants. Starting seeds indoors 4-6 weeks before the last expected frost can give you a head start and shorten the overall growing season. Remember to harden off your seedlings before transplanting them outdoors to acclimate them to the sun and wind.
2. What are the best soil conditions for growing honeydew melons?
Honeydew melons thrive in well-drained, fertile soil with a pH between 6.0 and 6.8. Before planting, amend your soil with plenty of organic matter, such as compost or well-rotted manure, to improve drainage, fertility, and water retention. Avoid heavy clay soils, as they can become waterlogged and lead to root rot. If you have clay soil, consider growing your honeydew melons in raised beds or containers filled with a suitable potting mix.
3. How much sunlight do honeydew melons need?
Honeydew melons require at least 6-8 hours of direct sunlight per day to produce sweet, flavorful fruit. Choose a planting location that receives full sun throughout the growing season. If you live in a particularly hot climate, providing some afternoon shade can help prevent sunburn on the developing melons.
4. How often should I water my honeydew melon plants?
Water your honeydew melon plants deeply and regularly, especially during hot, dry weather. Aim to keep the soil consistently moist but not waterlogged. Water at the base of the plants to avoid wetting the foliage, which can increase the risk of fungal diseases. As the melons begin to ripen, reduce watering slightly to concentrate the sugars and improve the flavor.
5. How do I know when my honeydew melon is ripe?
Determining when a honeydew melon is ripe can be tricky, but there are a few key indicators to look for. The skin should turn from a pale green to a creamy yellow color. The blossom end (the opposite end from the stem) should be slightly soft and give to gentle pressure. The tendril closest to the melon should be dry and brown. Finally, a ripe honeydew melon will have a sweet, fragrant aroma.
6. What are some common pests and diseases that affect honeydew melons?
Common pests that can affect honeydew melons include aphids, squash bugs, cucumber beetles, and vine borers. Diseases include powdery mildew, fusarium wilt, and anthracnose. Regularly inspect your plants for signs of pests or diseases and take appropriate action, such as using insecticidal soap, neem oil, or copper fungicide. Practicing good sanitation, such as removing diseased leaves and vines, can also help prevent the spread of diseases. Crop rotation can also help prevent soil borne diseases.
7. How can I improve pollination of my honeydew melon plants?
Honeydew melons require pollination to set fruit. If you’re not seeing many bees or other pollinators in your garden, you may need to hand-pollinate your plants. To do this, use a small paintbrush to transfer pollen from the male flowers (which have a long, thin stem) to the female flowers (which have a small, immature melon at the base). The best time to hand-pollinate is in the morning, when the flowers are open and the pollen is fresh.
8. Can I grow honeydew melons in containers?
Yes, you can grow honeydew melons in containers, but you’ll need to choose a large container (at least 20 gallons) and provide adequate support for the vines. Use a high-quality potting mix and fertilize regularly with a balanced fertilizer. Container-grown honeydew melons may require more frequent watering than those grown in the ground. Choose a bush variety for container growing.
9. What kind of fertilizer should I use for honeydew melons?
Use a balanced fertilizer (such as 10-10-10) at planting time, and then side-dress with a nitrogen-rich fertilizer when the vines begin to run. Once the melons start to develop, switch to a fertilizer that is higher in phosphorus and potassium to promote fruit development and sweetness. Avoid over-fertilizing, as this can lead to excessive vine growth and reduced fruit production.
10. How do I store honeydew melons after harvest?
Store ripe honeydew melons in the refrigerator for up to a week. Cut melons should be wrapped tightly in plastic wrap to prevent them from drying out. You can also freeze honeydew melon chunks for later use in smoothies or desserts.

Leave a Comment