

Grow Heirloom Tomatoes Indoors? Absolutely! Imagine biting into a juicy, sun-ripened heirloom tomato in the dead of winter, bursting with flavor that store-bought varieties can only dream of. Sounds impossible, right? Well, get ready to roll up your sleeves because this guide is packed with DIY secrets to make that dream a reality. For centuries, gardeners have cherished heirloom tomatoes for their unique tastes, vibrant colors, and fascinating histories 鈥?often passed down through generations.
But what if you don’t have a sprawling garden or live in a climate that supports these beauties year-round? That’s where our indoor gardening adventure begins! I know, I know, growing tomatoes indoors can seem daunting, but trust me, with a few clever tricks and a little elbow grease, you can enjoy the unparalleled taste of homegrown heirloom tomatoes no matter the season.
In this article, I’m going to share my favorite DIY hacks and proven techniques to help you grow heirloom tomatoes indoors successfully. We’ll cover everything from selecting the right varieties and providing optimal lighting to mastering pollination and tackling common pests. So, ditch those bland, supermarket tomatoes and get ready to experience the joy of harvesting your own delicious, homegrown heirlooms 鈥?all from the comfort of your home!
Growing Heirloom Tomatoes Indoors: A Comprehensive DIY Guide
Hey there, fellow gardening enthusiasts! Ever dreamt of biting into a juicy, sun-ripened heirloom tomato in the dead of winter? Well, dream no more! I’m going to walk you through the process of growing these flavorful beauties indoors, so you can enjoy that garden-fresh taste year-round. It might seem daunting, but trust me, with a little patience and the right setup, you’ll be harvesting your own heirloom tomatoes in no time.
Choosing the Right Heirloom Variety
First things first, not all heirloom tomatoes are created equal when it comes to indoor growing. Some varieties are simply too large and sprawling to thrive in a confined space. Here’s what I look for:
* Compact or Determinate Varieties: These varieties have a bushier growth habit and don’t require as much staking or pruning. Think Roma, Celebrity, or Patio tomatoes. While technically hybrids, they often exhibit heirloom qualities and are well-suited for containers.
* Early Maturing Varieties: Since indoor growing conditions might not be as ideal as outdoors, choosing varieties that mature quickly will give you a head start and increase your chances of a successful harvest. Look for varieties that mature in 60-70 days.
* Disease Resistance: Indoor plants can be susceptible to diseases due to poor air circulation. Opt for varieties that are known to be resistant to common tomato diseases like Fusarium wilt and Verticillium wilt.
* My Personal Favorites: I’ve had great success with ‘Black Krim’ (fantastic flavor, but needs good support), ‘Amish Paste’ (great for sauces), and ‘Stupice’ (early and productive). Do some research and find varieties that appeal to your taste buds!
Setting Up Your Indoor Tomato Garden
Okay, now that we’ve chosen our varieties, let’s get our indoor garden ready. This is where the magic happens!
* Location, Location, Location: Tomatoes need a LOT of light 鈥?at least 6-8 hours of direct sunlight per day. A south-facing window is ideal. If you don’t have enough natural light, you’ll need to invest in grow lights (more on that later).
* Containers: Choose containers that are at least 10-12 inches in diameter. I prefer using fabric pots because they allow for better drainage and aeration. Make sure your containers have drainage holes!
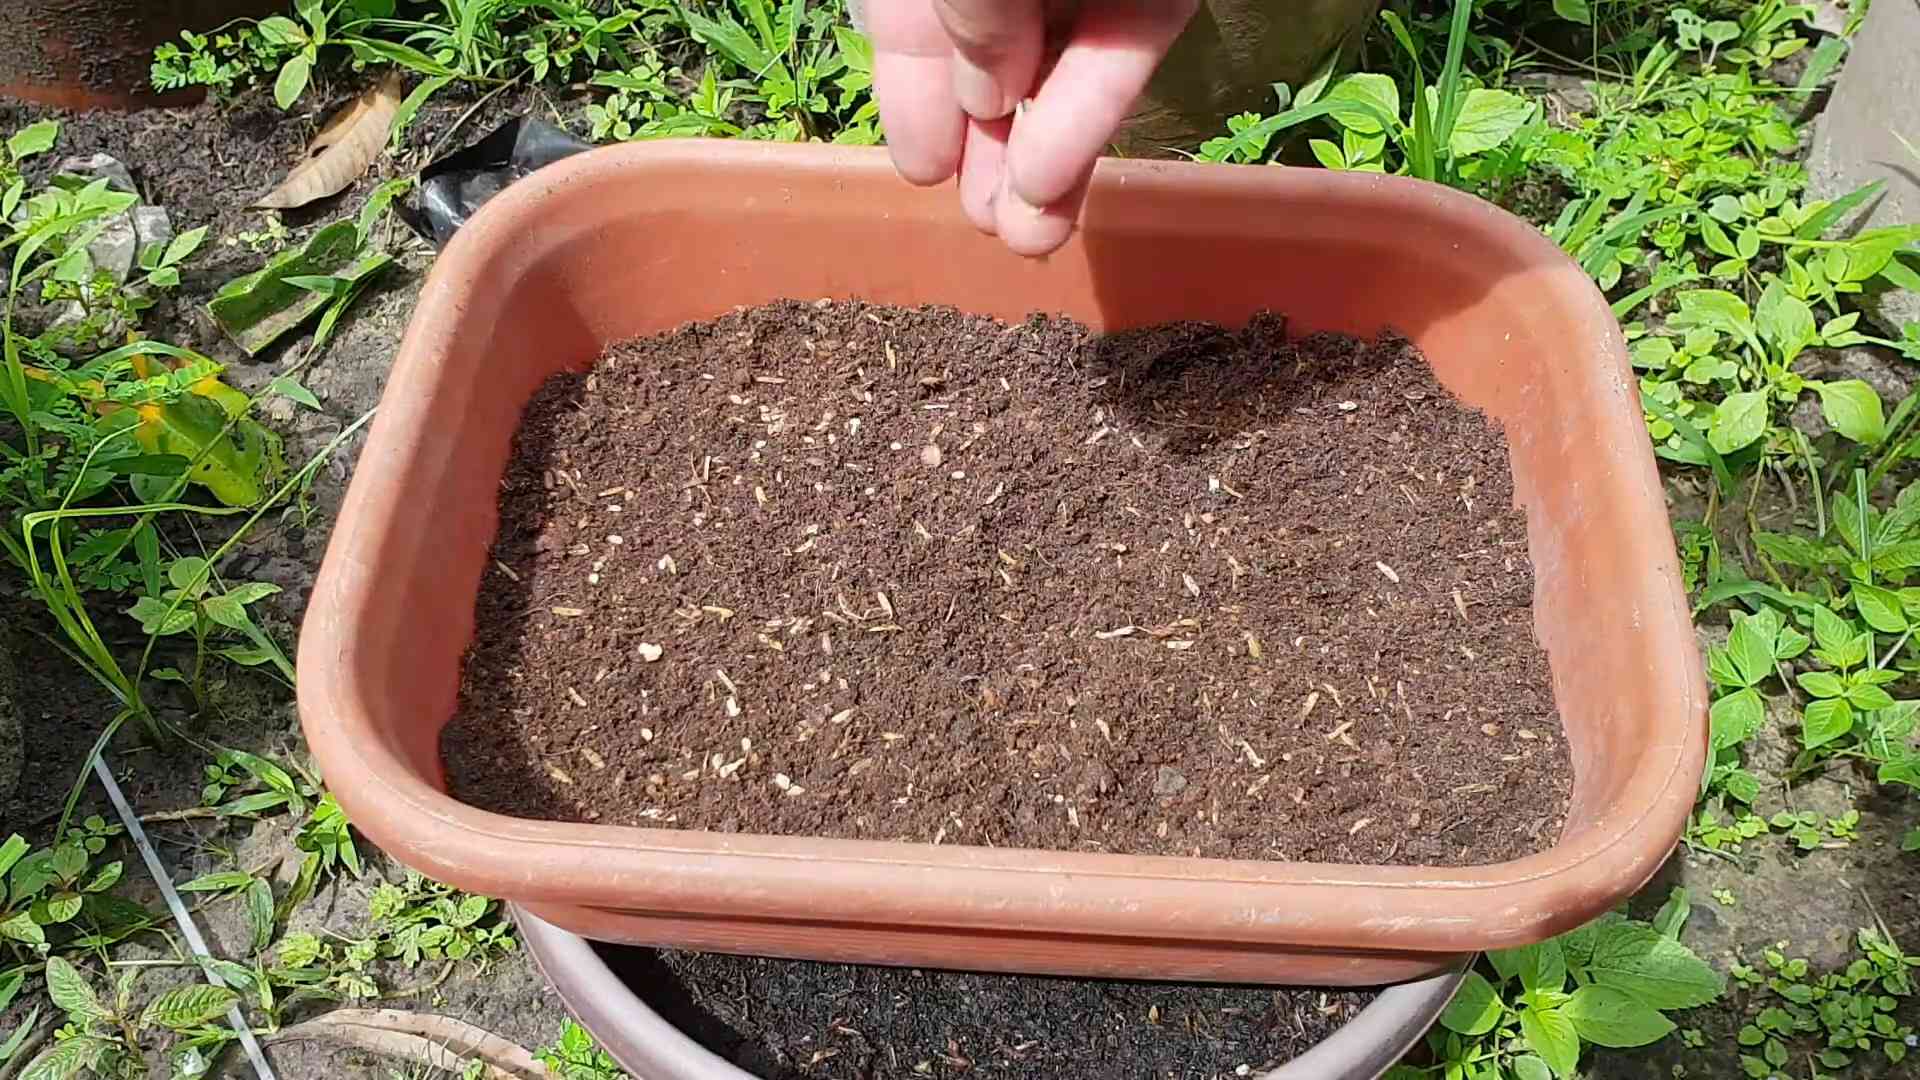
* Potting Mix: Don’t use garden soil! It’s too heavy and doesn’t drain well. Use a high-quality potting mix specifically formulated for containers. I like to add some perlite or vermiculite to improve drainage.
* Grow Lights (If Needed): If you don’t have enough natural light, you’ll need to supplement with grow lights. LED grow lights are energy-efficient and provide the full spectrum of light that tomatoes need. Place the lights a few inches above the plants and adjust them as the plants grow.
* Air Circulation: Good air circulation is crucial to prevent diseases. A small fan can help circulate the air around your plants.
* Temperature: Tomatoes thrive in temperatures between 65-85掳F (18-29掳C). Avoid placing your plants near drafts or heating vents.
Step-by-Step Planting Guide
Alright, let’s get our hands dirty! Here’s how I plant my heirloom tomato seeds indoors:
1. Starting Seeds (6-8 weeks before last frost): I usually start my seeds indoors about 6-8 weeks before the last expected frost date. This gives them a good head start.
* Seed Starting Mix: Use a seed starting mix, which is finer and less nutrient-rich than potting mix.
* Seed Trays or Small Pots: Fill seed trays or small pots with the seed starting mix.
* Sowing Seeds: Sow the seeds about 录 inch deep.
* Watering: Gently water the seeds and keep the soil moist but not soggy.
* Warmth: Place the seed trays or pots in a warm location (70-75掳F/21-24掳C). A heat mat can help speed up germination.
* Light: Once the seeds germinate (usually in 5-10 days), move them to a location with bright light or under grow lights.
2. Transplanting Seedlings: Once the seedlings have developed their first set of true leaves (the leaves that look like tomato leaves, not the initial seed leaves), it’s time to transplant them into larger pots.
* Prepare the Pots: Fill the larger pots (at least 4 inches in diameter) with potting mix.
* Gently Remove Seedlings: Carefully remove the seedlings from the seed trays or small pots, being careful not to damage the roots.
* Planting Depth: Plant the seedlings slightly deeper than they were previously planted. This will encourage more root growth.
* Watering: Water the seedlings thoroughly after transplanting.
3. Final Transplant to Larger Containers: When the seedlings are about 6-8 inches tall and have a well-developed root system, it’s time to transplant them into their final containers (at least 10-12 inches in diameter).
* Prepare the Containers: Fill the containers with potting mix.
* Gently Remove Seedlings: Carefully remove the seedlings from their pots.
* Planting Depth: Again, plant the seedlings slightly deeper than they were previously planted.
* Watering: Water the seedlings thoroughly after transplanting.
* Support: Install a stake or tomato cage to support the plants as they grow.
Caring for Your Indoor Tomato Plants
Now that your tomato plants are happily settled in their containers, it’s time to provide them with the care they need to thrive.
* Watering: Water deeply and regularly, allowing the soil to dry out slightly between waterings. Avoid overwatering, which can lead to root rot. I usually water when the top inch of soil feels dry to the touch.
* Fertilizing: Tomatoes are heavy feeders, so you’ll need to fertilize them regularly. Use a balanced fertilizer (e.g., 10-10-10) or a fertilizer specifically formulated for tomatoes. Follow the instructions on the fertilizer label. I usually fertilize every 2-3 weeks.
* Pruning: Prune your tomato plants regularly to remove suckers (the small shoots that grow between the main stem and the branches). This will help improve air circulation and encourage fruit production.
* Pollination: Indoor tomatoes often need help with pollination since there are no bees or wind to do the job. You can hand-pollinate your plants by gently shaking the flowers or using a small brush to transfer pollen from one flower to another. I use an electric toothbrush (without the brush head!) and gently touch it to the back of each flower to vibrate the pollen loose.
* Pest Control: Keep an eye out for pests like aphids, whiteflies, and spider mites. If you spot any pests, treat them with insecticidal soap or neem oil.
* Disease Prevention: Good air circulation and proper watering are key to preventing diseases. If you notice any signs of disease, such as yellowing leaves or spots, treat the plants with a fungicide.
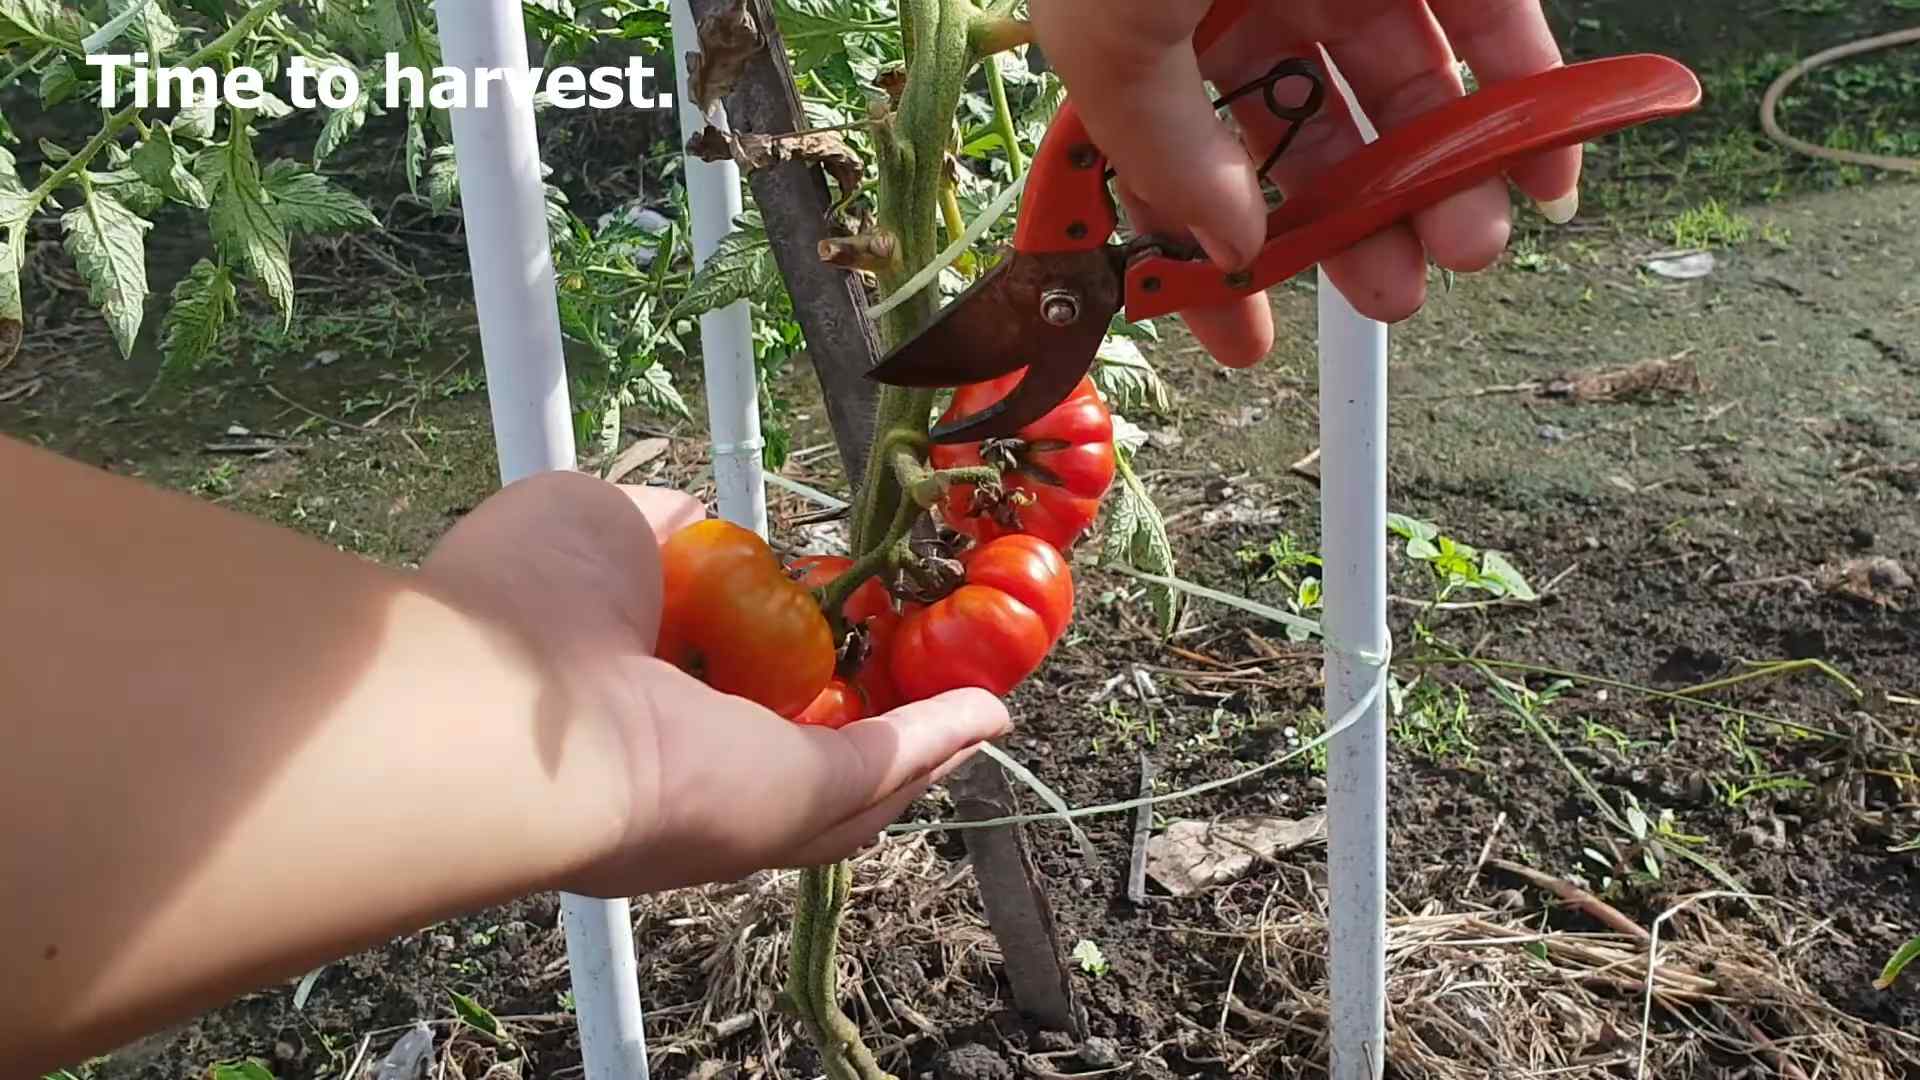
Harvesting Your Heirloom Tomatoes
The moment you’ve been waiting for! Harvesting your own homegrown heirloom tomatoes is incredibly rewarding.
* Ripeness: Tomatoes are ripe when they are fully colored and slightly soft to the touch.
* Harvesting: Gently twist the tomato off the vine.
* Enjoy! Savor the delicious flavor of your homegrown heirloom tomatoes!
Troubleshooting Common Problems
Even with the best care, you might encounter some problems along the way. Here are a few common issues and how to address them:
* Yellowing Leaves: This could be a sign of overwatering, underwatering, nutrient deficiency, or disease. Check the soil moisture and adjust your watering accordingly. Fertilize the plants if necessary. If you suspect a disease, treat the plants with a fungicide.
* Blossom End Rot: This is caused by a calcium deficiency. Make sure your soil has enough calcium and water the plants consistently. You can also add calcium to the soil by using bone meal or eggshells.
* Lack of Fruit: This could be due to poor pollination, insufficient light, or extreme temperatures. Hand-pollinate your plants, provide them with adequate light, and maintain a consistent temperature.
Hey there, fellow gardening enthusiasts! Ever dreamt of biting into a juicy, sun-ripened heirloom tomato in the dead of winter? Well, dream no more! I’m going to walk you through the process of growing these flavorful beauties indoors, so you can enjoy that garden-fresh taste year-round. It might seem daunting, but trust me, with a little patience and the right setup, you’ll be harvesting your own heirloom tomatoes in no time.
Choosing the Right Heirloom Variety
First things first, not all heirloom tomatoes are created equal when it comes to indoor growing. Some varieties are simply too large and sprawling to thrive in a confined space. Here’s what I look for:
* Compact or Determinate Varieties: These varieties have a bushier growth habit and don’t require as much staking or pruning. Think Roma, Celebrity, or Patio tomatoes. While technically hybrids, they often exhibit heirloom qualities and are well-suited for containers.
* Early Maturing Varieties: Since indoor growing conditions might not be as ideal as outdoors, choosing varieties that mature quickly will give you a head start and increase your chances of a successful harvest. Look for varieties that mature in 60-70 days.
* Disease Resistance: Indoor plants can be susceptible to diseases due to poor air circulation. Opt for varieties that are known to be resistant to common tomato diseases like Fusarium wilt and Verticillium wilt.
* My Personal Favorites: I’ve had great success with ‘Black Krim’ (fantastic flavor, but needs good support), ‘Amish Paste’ (great for sauces), and ‘Stupice’ (early and productive). Do some research and find varieties that appeal to your taste buds!
Setting Up Your Indoor Tomato Garden
Okay, now that we’ve chosen our varieties, let’s get our indoor garden ready. This is where the magic happens!
* Location, Location, Location: Tomatoes need a LOT of light 鈥?at least 6-8 hours of direct sunlight per day. A south-facing window is ideal. If you don’t have enough natural light, you’ll need to invest in grow lights (more on that later).
* Containers: Choose containers that are at least 10-12 inches in diameter. I prefer using fabric pots because they allow for better drainage and aeration. Make sure your containers have drainage holes!
* Potting Mix: Don’t use garden soil! It’s too heavy and doesn’t drain well. Use a high-quality potting mix specifically formulated for containers. I like to add some perlite or vermiculite to improve drainage.
* Grow Lights (If Needed): If you don’t have enough natural light, you’ll need to supplement with grow lights. LED grow lights are energy-efficient and provide the full spectrum of light that tomatoes need. Place the lights a few inches above the plants and adjust them as the plants grow.
* Air Circulation: Good air circulation is crucial to prevent diseases. A small fan can help circulate the air around your plants.
* Temperature: Tomatoes thrive in temperatures between 65-85掳F (18-29掳C). Avoid placing your plants near drafts or heating vents.
Step-by-Step Planting Guide
Alright, let’s get our hands dirty! Here’s how I plant my heirloom tomato seeds indoors:
1. Starting Seeds (6-8 weeks before last frost): I usually start my seeds indoors about 6-8 weeks before the last expected frost date. This gives them a good head start.
* Seed Starting Mix: Use a seed starting mix, which is finer and less nutrient-rich than potting mix.
* Seed Trays or Small Pots: Fill seed trays or small pots with the seed starting mix.
* Sowing Seeds: Sow the seeds about 录 inch deep.
* Watering: Gently water the seeds and keep the soil moist but not soggy.
* Warmth: Place the seed trays or pots in a warm location (70-75掳F/21-24掳C). A heat mat can help speed up germination.
* Light: Once the seeds germinate (usually in 5-10 days), move them to a location with bright light or under grow lights.
2. Transplanting Seedlings: Once the seedlings have developed their first set of true leaves (the leaves that look like tomato leaves, not the initial seed leaves), it’s time to transplant them into larger pots.
* Prepare the Pots: Fill the larger pots (at least 4 inches in diameter) with potting mix.
* Gently Remove Seedlings: Carefully remove the seedlings from the seed trays or small pots, being careful not to damage the roots.
* Planting Depth: Plant the seedlings slightly deeper than they were previously planted. This will encourage more root growth.
* Watering: Water the seedlings thoroughly after transplanting.
3. Final Transplant to Larger Containers: When the seedlings are about 6-8 inches tall and have a well-developed root system, it’s time to transplant them into their final containers (at least 10-12 inches in diameter).
* Prepare the Containers: Fill the containers with potting mix.
* Gently Remove Seedlings: Carefully remove the seedlings from their pots.
* Planting Depth: Again, plant the seedlings slightly deeper than they were previously planted.
* Watering: Water the seedlings thoroughly after transplanting.
* Support: Install a stake or tomato cage to support the plants as they grow.
Caring for Your Indoor Tomato Plants
Now that your tomato plants are happily settled in their containers, it’s time to provide them with the care they need to thrive.
* Watering: Water deeply and regularly, allowing the soil to dry out slightly between waterings. Avoid overwatering, which can lead to root rot. I usually water when the top inch of soil feels dry to the touch.
* Fertilizing: Tomatoes are heavy feeders, so you’ll need to fertilize them regularly. Use a balanced fertilizer (e.g., 10-10-10) or a fertilizer specifically formulated for tomatoes. Follow the instructions on the fertilizer label. I usually fertilize every 2-3 weeks.
* Pruning: Prune your tomato plants regularly to remove suckers (the small shoots that grow between the main stem and the branches). This will help improve air circulation and encourage fruit production.
* Pollination: Indoor tomatoes often need help with pollination since there are no bees or wind to do the job. You can hand-pollinate your plants by gently shaking the flowers or using a small brush to transfer pollen from one flower to another. I use an electric toothbrush (without the brush head!) and gently touch it to the back of each flower to vibrate the pollen loose.
* Pest Control: Keep an eye out for pests like aphids, whiteflies, and spider mites. If you spot any pests, treat them with insecticidal soap or neem oil.
* Disease Prevention: Good air circulation and proper watering are key to preventing diseases. If you notice any signs of disease, such as yellowing leaves or spots, treat the plants with a fungicide.
Harvesting Your Heirloom Tomatoes
The moment you’ve been waiting for! Harvesting your own homegrown heirloom tomatoes is incredibly rewarding.
* Ripeness: Tomatoes are ripe when they are fully colored and slightly soft to the touch.
* Harvesting: Gently twist the tomato off the vine.
* Enjoy! Savor the delicious flavor of your homegrown heirloom tomatoes!
Troubleshooting Common Problems
Even with the best care, you might encounter some problems along the way. Here are a few common issues and how to address them:
* Yellowing Leaves: This could be a sign of overwatering, underwatering, nutrient deficiency, or disease. Check the soil moisture and adjust your watering accordingly. Fertilize the plants if necessary. If you suspect a disease, treat the plants with a fungicide.
* Blossom End Rot: This is caused by a calcium deficiency. Make sure your soil has enough calcium and water the plants consistently. You can also add calcium to the soil by using bone meal or eggshells.
* Lack of Fruit: This could be due to poor pollination, insufficient light, or extreme temperatures. Hand-pollinate your plants, provide them with adequate light, and maintain a consistent temperature.
* Pests: As mentioned earlier, keep an eye out for pests and treat them with insecticidal soap or neem oil.
Extra Tips for Success
Here are a few extra tips that I’ve learned over the years:
* Rotate Your Crops: If you grow tomatoes in the same containers year after year, the soil can become depleted of nutrients. Rotate your crops by growing different types of plants in the containers each year
Conclusion
So, there you have it! Growing heirloom tomatoes indoors might seem like a challenge, but with a little patience, the right setup, and this simple DIY trick, you can enjoy the unparalleled flavor of these garden gems even when the weather outside is frightful. We’ve shown you how to nurture these beauties from seed to (hopefully) a bountiful harvest, all within the cozy confines of your home.
Why is this DIY approach a must-try? Because it empowers you to control the growing environment, mitigating many of the risks associated with outdoor gardening, such as pests, diseases, and unpredictable weather. Plus, let’s be honest, there’s something incredibly satisfying about nurturing a plant from seed and watching it thrive under your care. The taste of a sun-ripened (or, in this case, grow-light-ripened!) heirloom tomato that you’ve grown yourself is simply unmatched. It’s a flavor explosion that store-bought tomatoes just can’t replicate.
But don’t stop there! Experiment with different heirloom varieties. Perhaps you’d like to try a Brandywine for its classic tomato flavor, a Cherokee Purple for its smoky sweetness, or a Green Zebra for its unique appearance and tangy bite. You can also adjust the DIY setup to suit your specific space and needs. If you have a larger area, consider using multiple grow lights or a small hydroponic system. For smaller spaces, vertical gardening techniques can maximize your yield. Think about adding companion plants like basil or marigolds to your indoor garden to deter pests and enhance the flavor of your tomatoes. Consider using a self-watering system to make watering easier.
Remember, growing heirloom tomatoes indoors is a journey, not a destination. There will be challenges along the way, but the rewards are well worth the effort. The satisfaction of biting into a juicy, flavorful heirloom tomato that you’ve nurtured from seed to fruit is an experience that every gardener should have.
We are confident that this DIY guide will set you on the path to success. Now it’s your turn! Grab your seeds, gather your supplies, and get ready to embark on your indoor heirloom tomato adventure. We can’t wait to hear about your experiences. Share your photos, tips, and triumphs in the comments below. Let’s build a community of indoor heirloom tomato growers and inspire others to discover the joy of homegrown goodness. Don’t forget to document your progress and share your results. Happy growing!
Frequently Asked Questions (FAQ)
What are the best heirloom tomato varieties to grow indoors?
Choosing the right variety is crucial for indoor success. While many heirlooms can be grown indoors, some are better suited than others. Determinate varieties, which grow to a specific size and produce all their fruit at once, are often a good choice for smaller spaces. Indeterminate varieties, which continue to grow and produce fruit throughout the season, can also be grown indoors, but they require more space and support. Some popular and reliable indoor heirloom choices include:
* Roma: A classic paste tomato, great for sauces and canning. It is a determinate variety, making it suitable for smaller spaces.
* San Marzano: Another excellent paste tomato with a rich flavor. It is an indeterminate variety, so it will need staking or caging.
* Black Krim: Known for its complex, slightly salty flavor and dark reddish-purple color. It is an indeterminate variety.
* Brandywine: A classic heirloom with a rich, sweet flavor. It is an indeterminate variety and requires significant support.
* Cherokee Purple: A popular heirloom with a smoky-sweet flavor and a unique dusky pink color. It is an indeterminate variety.
* Dwarf Varieties: Look for dwarf heirloom varieties specifically bred for container growing. These are naturally smaller and more compact, making them ideal for indoor spaces.
Consider the size of your growing space, your desired use for the tomatoes, and your personal taste preferences when selecting your varieties.
How much light do heirloom tomatoes need indoors?
Light is the most critical factor for successful indoor tomato growing. Heirloom tomatoes require at least 6-8 hours of direct sunlight per day, but since that’s often impossible indoors, you’ll need to supplement with grow lights.
* Type of Grow Lights: LED grow lights are the most energy-efficient and produce the least amount of heat. Fluorescent grow lights (T5 or T8) are also a good option, but they need to be closer to the plants. High-Pressure Sodium (HPS) lights are very powerful but generate a lot of heat and are not recommended for small indoor spaces.
* Light Intensity: Aim for a light intensity of around 200-400 PPFD (Photosynthetic Photon Flux Density) at the top of the plants. You can use a light meter to measure the PPFD, or you can simply observe your plants. If they are leggy and stretching towards the light, they need more light.
* Light Placement: Position the grow lights 6-12 inches above the plants and adjust the height as the plants grow.
* Light Schedule: Use a timer to ensure your plants receive a consistent 14-16 hours of light per day.
What kind of soil should I use for growing heirloom tomatoes indoors?
The right soil is essential for healthy tomato growth. Avoid using garden soil, as it can be too heavy and may contain pests or diseases. Instead, use a high-quality potting mix that is well-draining and rich in organic matter.
* Potting Mix Composition: Look for a potting mix that contains a blend of peat moss, perlite, and vermiculite. Peat moss helps retain moisture, perlite improves drainage, and vermiculite helps retain nutrients.
* pH Level: Heirloom tomatoes prefer a slightly acidic soil pH of around 6.0-6.8. You can test the pH of your soil using a soil testing kit.
* Adding Nutrients: Supplement the potting mix with compost or other organic matter to provide essential nutrients. You can also use a slow-release fertilizer specifically formulated for tomatoes.
How often should I water my indoor heirloom tomatoes?
Watering frequency depends on several factors, including the size of the pot, the type of potting mix, the temperature, and the humidity. As a general rule, water your tomatoes when the top inch of soil feels dry to the touch.
* Watering Technique: Water deeply and thoroughly, until water drains out of the bottom of the pot. Avoid watering the foliage, as this can promote fungal diseases.
* Drainage: Ensure that your pots have drainage holes to prevent waterlogging.
* Overwatering vs. Underwatering: Overwatering can lead to root rot, while underwatering can cause the plants to wilt and stunt their growth. Monitor your plants closely and adjust your watering schedule accordingly.
* Self-Watering Containers: Consider using self-watering containers to help maintain consistent moisture levels.
How do I pollinate my heirloom tomatoes indoors?
Tomatoes are self-pollinating, but they often need a little help indoors, where there are no bees or wind to assist with pollination.
* Hand Pollination: Gently shake the tomato plants a few times a week to release pollen. You can also use a small paintbrush or cotton swab to transfer pollen from one flower to another.
* Electric Toothbrush: Some gardeners use an electric toothbrush to vibrate the flower stems and release pollen.
* Air Circulation: A small fan can help circulate air and facilitate pollination.
How do I deal with pests and diseases on my indoor heirloom tomatoes?
Even indoors, your tomatoes can be susceptible to pests and diseases.
* Prevention: The best defense is a good offense. Start with healthy plants, use clean potting mix, and provide adequate light and ventilation.
* Common Pests: Aphids, whiteflies, spider mites, and fungus gnats are common indoor tomato pests. Inspect your plants regularly for signs of infestation.
* Organic Pest Control: Use organic pest control methods, such as insecticidal soap, neem oil, or horticultural oil, to control pests.
* Common Diseases: Fungal diseases, such as early blight, late blight, and powdery mildew, can also affect indoor tomatoes.
* Disease Control: Provide good air circulation, avoid overwatering, and remove any infected leaves or plants. You can also use organic fungicides to control fungal diseases.
When can I harvest my heirloom tomatoes?
Harvest time depends on the variety of tomato and the growing conditions. Generally, heirloom tomatoes are ready to harvest when they are fully colored, slightly soft to the touch, and easily detach from the vine.
* Color: The color of the tomato will vary depending on the variety. Refer to the seed packet or plant tag for the expected color.
* Texture: The tomato should be slightly soft to the touch, but not mushy.
* Detachment: The tomato should easily detach from the vine with a gentle twist.
* Taste Test: The best way to determine if a tomato is ripe is to taste it. It should have a rich, sweet flavor.

Leave a Comment