

Grow Gourds at Home – ever dreamt of transforming your backyard into a whimsical wonderland, overflowing with uniquely shaped and vibrantly colored gourds? I know I have! For centuries, gourds have been more than just decorative items; they’ve been essential tools, musical instruments, and even sacred objects in various cultures around the world. From the intricately carved gourds of South America to the functional dippers and bowls used in Africa, these versatile fruits have a rich and fascinating history.
But you don’t need to be a seasoned gardener or a history buff to appreciate the magic of gourds. The truth is, growing gourds at home is surprisingly easy and incredibly rewarding. Imagine crafting your own birdhouses, painting personalized decorations, or even creating unique musical instruments – all from gourds you nurtured yourself! In this article, I’m going to share my favorite DIY tricks and hacks to help you successfully grow gourds at home, even if you’re a complete beginner. We’ll cover everything from seed selection and soil preparation to harvesting and curing, ensuring you have a bountiful gourd harvest to enjoy for years to come. So, grab your gardening gloves, and let’s get started!
Growing Gourds: A Beginner’s Guide to a Bountiful Harvest
Hey there, fellow gardening enthusiasts! I’m so excited to share my experience with growing gourds. It’s a rewarding and surprisingly easy project that adds a unique touch to your garden and provides you with materials for crafting and decorating. Get ready to transform your backyard into a gourd-growing paradise!
Choosing Your Gourd Varieties
Before we dive into the nitty-gritty, let’s talk about the fun part: picking your gourds! There’s a whole world of gourds out there, each with its own shape, size, and purpose. Here are a few popular options to get you started:
* Birdhouse Gourds: These are probably the most recognizable. They have a large, round body and a smaller neck, perfect for creating cozy homes for our feathered friends.
* Dipper Gourds: As the name suggests, these gourds have a long handle, making them ideal for scooping water or other liquids. They’re also great for crafting ladles or decorative pieces.
* Ornamental Gourds: This category includes a wide variety of small, colorful gourds with unique shapes and patterns. They’re perfect for fall decorations and craft projects. Think warty gourds, apple gourds, and pear gourds!
* Luffa Gourds: Yes, the same luffa you use in the shower! These gourds have a fibrous interior that, when dried, becomes a natural exfoliating sponge.
Things to consider when choosing:
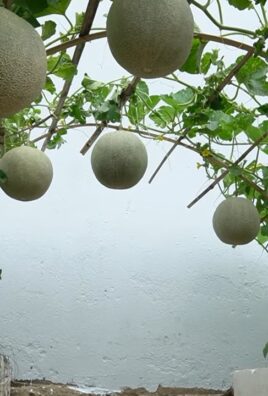
* Space: Gourds are vigorous vines that need plenty of room to spread. Make sure you have enough space in your garden or a sturdy trellis system.
* Climate: Most gourds need a long growing season with warm temperatures. Check your local climate and choose varieties that are well-suited to your area.
* Purpose: What do you want to do with your gourds? Are you planning to make birdhouses, crafts, or simply enjoy their beauty in your garden?
Preparing Your Gourd-Growing Paradise
Gourds are hungry plants, so preparing the soil is crucial for a successful harvest. Here’s what I recommend:
* Sunlight: Gourds need at least 6-8 hours of direct sunlight per day. Choose a location in your garden that gets plenty of sunshine.
* Soil: Gourds thrive in well-drained, fertile soil. Amend your soil with compost or well-rotted manure to improve its fertility and drainage.
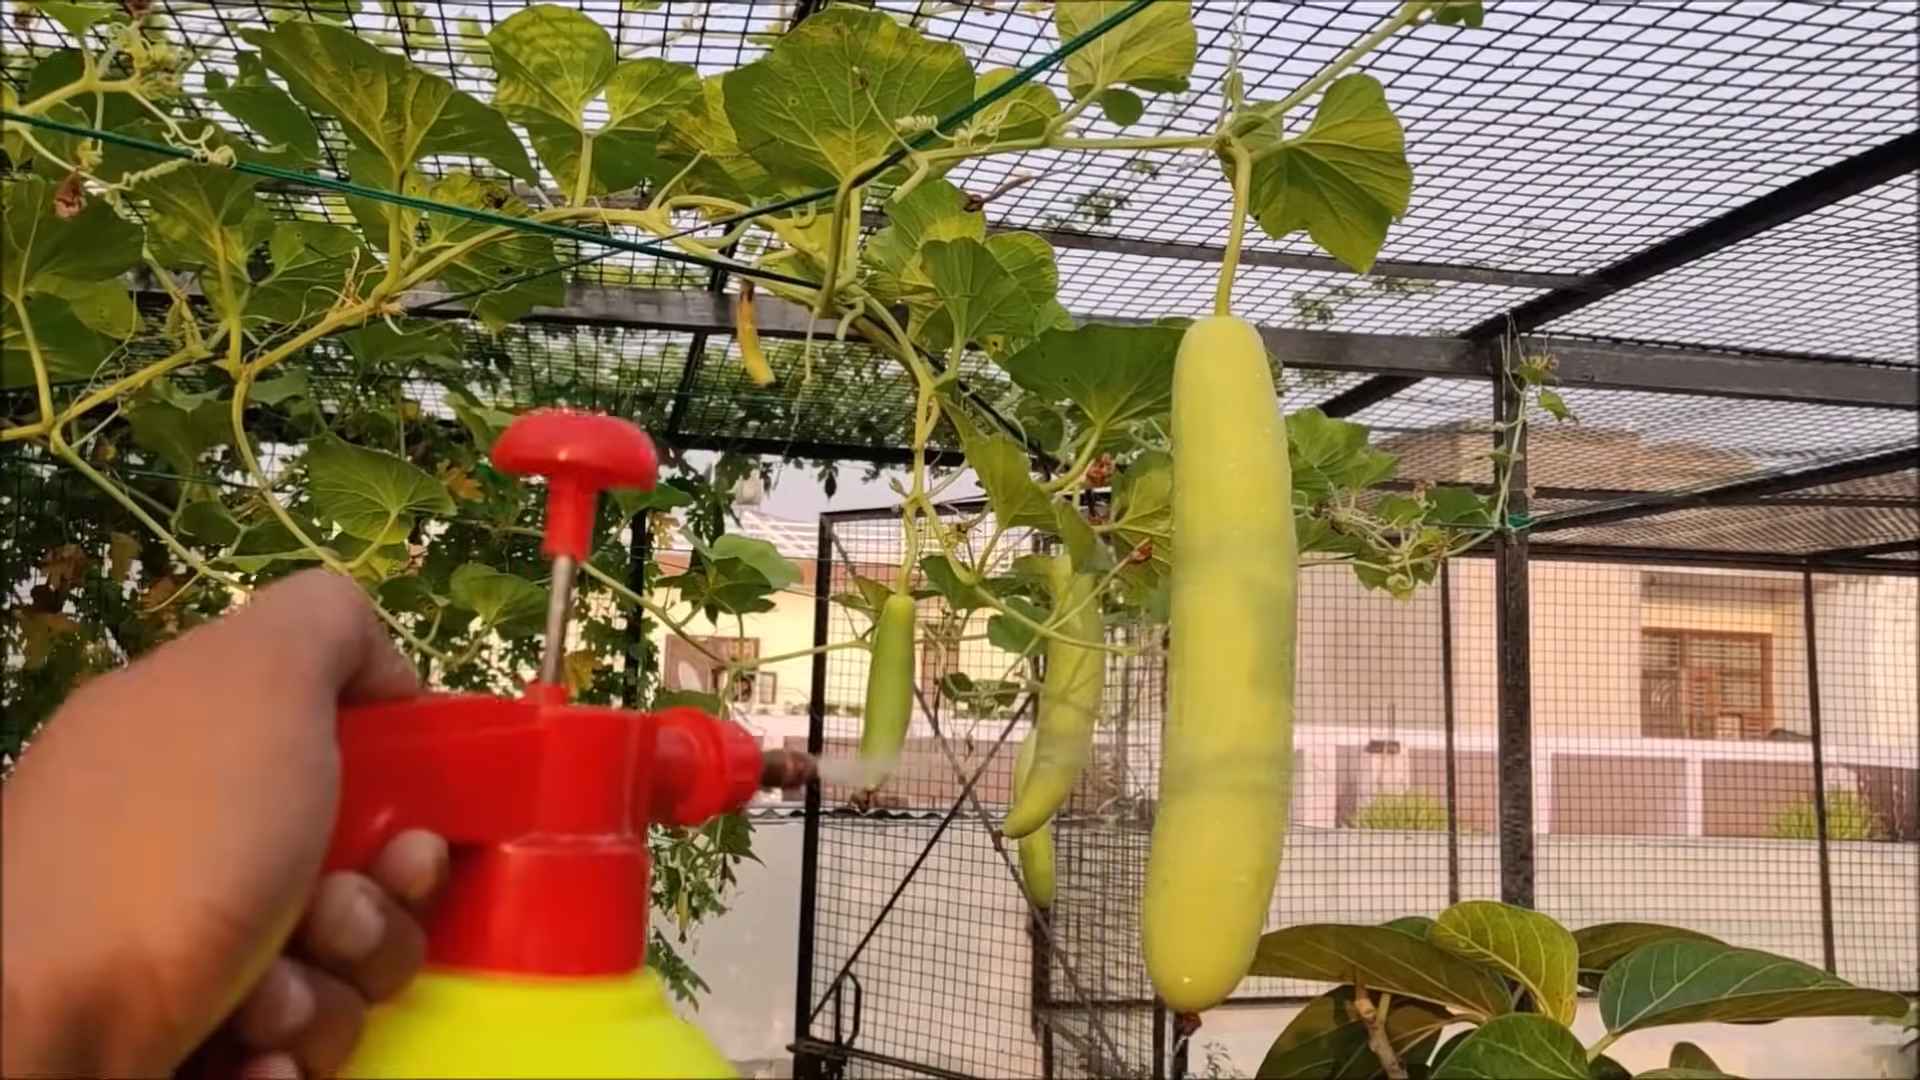
* Support: Gourds are climbing vines that need a strong support system. You can use a trellis, fence, or even a sturdy pergola. Make sure your support is strong enough to handle the weight of the mature vines and gourds.
* Spacing: Give your gourd plants plenty of room to spread. Space them at least 3-4 feet apart.
Planting Your Gourd Seeds
Now for the exciting part: planting your gourd seeds! You can either start your seeds indoors or direct sow them in your garden.
Starting Seeds Indoors (Recommended):
1. Timing: Start your seeds indoors about 4-6 weeks before the last expected frost.
2. Containers: Use peat pots or other biodegradable containers to avoid disturbing the roots when transplanting.
3. Soil: Fill the containers with a seed-starting mix.
4. Planting: Plant 2-3 seeds per container, about 1 inch deep.
5. Watering: Water gently to moisten the soil.
6. Warmth: Keep the containers in a warm location (around 70-75°F) until the seeds germinate. A heat mat can be helpful.
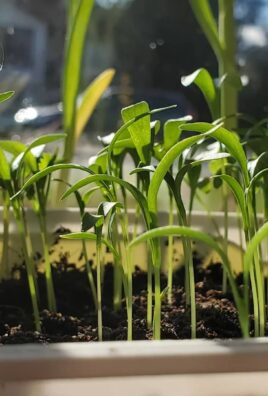
7. Light: Once the seedlings emerge, provide them with plenty of light. A grow light is ideal, but a sunny windowsill can also work.
8. Hardening Off: Before transplanting your seedlings outdoors, you’ll need to harden them off. This means gradually exposing them to outdoor conditions over a period of 1-2 weeks. Start by placing them in a sheltered location for a few hours each day, gradually increasing the amount of time they spend outdoors.
Direct Sowing:
1. Timing: Direct sow your seeds after the last expected frost, when the soil has warmed up to at least 65°F.
2. Soil Preparation: Prepare the soil as described above.
3. Planting: Plant 2-3 seeds per hill, about 1 inch deep. Space the hills 3-4 feet apart.
4. Watering: Water gently to moisten the soil.
Caring for Your Gourd Plants
Once your gourd plants are established, it’s important to provide them with the care they need to thrive.
* Watering: Water your gourd plants regularly, especially during dry periods. Aim to keep the soil consistently moist, but not waterlogged.
* Fertilizing: Feed your gourd plants with a balanced fertilizer every 2-3 weeks. You can also side-dress them with compost or well-rotted manure.
* Pruning: Pruning can help to improve air circulation and encourage fruit production. Remove any dead or diseased leaves and stems. You can also pinch off the tips of the vines to encourage branching.
* Pest and Disease Control: Keep an eye out for common gourd pests and diseases, such as squash bugs, squash vine borers, and powdery mildew. Take action promptly to control any problems. I’ve found that neem oil is a great organic solution for many pests.
* Pollination: Gourds are pollinated by insects, so it’s important to attract pollinators to your garden. Plant flowers that attract bees and other beneficial insects. If you’re not seeing enough pollination, you can hand-pollinate the flowers yourself. To do this, use a small paintbrush to transfer pollen from the male flowers to the female flowers. Female flowers have a small gourd-like structure behind the flower, while male flowers do not.
Harvesting Your Gourds
The moment you’ve been waiting for! Harvesting your gourds is a rewarding experience.
* Timing: Harvest your gourds when they are fully mature and the stems have dried and turned brown. This usually happens in the fall, before the first frost.
* Cutting: Use a sharp knife or pruning shears to cut the gourds from the vine, leaving a few inches of stem attached.
* Handling: Handle the gourds carefully to avoid bruising or damaging them.
Curing Your Gourds
Curing is essential for preserving your gourds and preventing them from rotting.
1. Cleaning: Gently wash the gourds with soapy water to remove any dirt or debris.
2. Drying: Place the gourds in a well-ventilated, dry location, such as a garage or shed. Avoid direct sunlight, which can cause the gourds to crack.
3. Spacing: Space the gourds apart so that air can circulate around them.
4. Turning: Turn the gourds regularly to ensure that they dry evenly.
5. Time: The curing process can take several weeks or even months, depending on the size and type of gourd. You’ll know the gourds are fully cured when they are lightweight and the seeds rattle inside.
Crafting with Your Gourds
Now for the fun part: crafting with your gourds! The possibilities are endless. Here are a few ideas to get you started:
* Birdhouses: Drill a hole in a birdhouse gourd and add a perch.
* Dipper Gourds: Sand and seal a dipper gourd to create a functional dipper.
* Ornamental Gourds: Paint, decorate, and display ornamental gourds for fall decorations.
* Luffa Sponges: Soak luffa gourds in water to remove the outer skin and reveal the natural sponge.
Tips for Crafting:
* Safety: Wear a dust mask when sanding or cutting gourds.
* Tools: Use sharp tools to avoid splintering the gourds.
* Sealing: Seal your finished gourds with a clear coat of varnish or polyurethane to protect them from moisture.
Troubleshooting Common Gourd Problems
Even with the best care, you may encounter some problems while growing gourds. Here are a few common issues and how to address them:
* Poor Germination: Make sure your seeds are fresh and that the soil is warm enough.
* Squash Bugs: Handpick squash bugs or use an insecticide soap.
* Squash Vine Borers: Wrap the stems of your plants with aluminum foil to prevent squash vine borers from laying their eggs.
* Powdery Mildew: Improve air circulation and apply a fungicide if necessary.
Final Thoughts
Growing gourds is a fun and rewarding experience that anyone can enjoy. With a little planning and care, you

Conclusion
So, there you have it! Growing gourds at home is not only achievable but also incredibly rewarding. From selecting the perfect variety to nurturing your seedlings and harvesting your mature gourds, this guide has equipped you with the knowledge to transform your garden into a gourd-growing haven.
Why is this DIY trick a must-try? Because it connects you to the natural world in a tangible way. It’s about more than just producing decorative items; it’s about understanding the life cycle of a plant, appreciating the beauty of organic forms, and experiencing the satisfaction of creating something unique with your own hands. Plus, think of the endless possibilities! Imagine crafting birdhouses, bowls, dippers, or even musical instruments from your homegrown gourds. The possibilities are truly limited only by your imagination.
But the benefits extend beyond the creative realm. Growing gourds can also be a fantastic educational experience for children, teaching them about botany, patience, and the importance of sustainable practices. It’s a project that the whole family can enjoy together, fostering a sense of accomplishment and shared creativity.
Variations and Suggestions:
Don’t be afraid to experiment! Try different gourd varieties to see which ones thrive best in your climate and which shapes and sizes you prefer. Consider companion planting to deter pests and attract beneficial insects. Marigolds, for example, are known to repel nematodes, while dill attracts pollinators. You can also explore different training methods to shape your gourds as they grow. Trellising, for instance, can encourage long, straight gourds, while allowing them to sprawl on the ground can result in more rounded shapes.
For a truly unique touch, try carving or painting your gourds after they’ve dried. This is a wonderful way to personalize your creations and add a touch of artistic flair. You can also use natural dyes to color your gourds, creating a beautiful and eco-friendly finish.
Remember to properly cure your gourds after harvesting to ensure they last for years to come. This involves drying them thoroughly in a well-ventilated area until they are lightweight and the seeds rattle inside.
We are confident that with a little patience and effort, you’ll be amazed at the bounty you can produce. Growing gourds at home is a journey of discovery, a celebration of nature’s artistry, and a testament to the power of DIY.
So, what are you waiting for? Grab your seeds, prepare your soil, and embark on this exciting adventure. We encourage you to try this DIY trick and share your experiences with us! Post photos of your gourd gardens, share your crafting projects, and let us know what you’ve learned along the way. We can’t wait to see what you create! Let’s cultivate a community of gourd enthusiasts and inspire others to embrace the joy of growing their own. Happy growing!
Frequently Asked Questions (FAQ)
What is the best time to plant gourd seeds?
The ideal time to plant gourd seeds is after the last frost, when the soil has warmed up to at least 65 degrees Fahrenheit. Gourds are warm-season crops and require plenty of sunshine and warmth to thrive. In most regions, this typically falls between late spring and early summer. You can start seeds indoors 4-6 weeks before the last frost to get a head start, but be sure to harden them off gradually before transplanting them outdoors.
How much space do gourds need to grow?
Gourds require a significant amount of space to grow, as their vines can spread quite extensively. As a general rule, allow at least 6-8 feet between plants if you’re growing them in rows. If you’re using a trellis, you can space them closer together, but make sure the trellis is sturdy enough to support the weight of the mature gourds. Consider the specific variety you’re growing, as some are more compact than others. Providing ample space will ensure that your gourds have enough room to develop properly and receive adequate sunlight and air circulation.
What kind of soil is best for growing gourds?
Gourds thrive in well-drained, fertile soil that is rich in organic matter. Before planting, amend your soil with compost, aged manure, or other organic materials to improve its structure and nutrient content. A slightly acidic to neutral pH (around 6.0 to 7.0) is ideal. Avoid heavy clay soils, as they can become waterlogged and hinder root development. If you have clay soil, consider adding sand or perlite to improve drainage. Regular soil testing can help you determine if your soil needs any additional amendments.
How often should I water my gourd plants?
Gourds need consistent moisture, especially during hot, dry weather. Water deeply and regularly, aiming to keep the soil consistently moist but not waterlogged. A good rule of thumb is to water when the top inch of soil feels dry to the touch. Avoid overhead watering, as this can increase the risk of fungal diseases. Instead, water at the base of the plants, using a soaker hose or drip irrigation system if possible. Mulching around the plants can also help to retain moisture and suppress weeds.
What are some common pests and diseases that affect gourds?
Gourds can be susceptible to various pests and diseases, including squash bugs, squash vine borers, aphids, powdery mildew, and downy mildew. Regularly inspect your plants for signs of infestation or disease. Handpick pests whenever possible, and use insecticidal soap or neem oil to control larger infestations. To prevent fungal diseases, ensure good air circulation around your plants, avoid overhead watering, and apply a fungicide if necessary. Crop rotation can also help to reduce the risk of soilborne diseases.
How do I know when my gourds are ready to harvest?
Gourds are typically ready to harvest in the fall, after the vines have died back and the gourds have turned a hard, mature color. The exact timing will depend on the variety and your local climate. A good way to test for ripeness is to tap the gourd; it should sound hollow. The stem should also be dry and brown. Use a sharp knife or pruning shears to cut the gourd from the vine, leaving a few inches of stem attached. Avoid bruising or damaging the gourds during harvest, as this can increase the risk of rot.
How do I cure gourds after harvesting?
Curing is essential for preserving gourds and preventing them from rotting. After harvesting, wash the gourds with a mild soap and water solution to remove any dirt or debris. Then, place them in a well-ventilated area, such as a shed or garage, where they will be protected from rain and direct sunlight. Arrange the gourds so that they are not touching each other, and turn them regularly to ensure even drying. The curing process can take several weeks or even months, depending on the size and thickness of the gourds. They are fully cured when they are lightweight, the seeds rattle inside, and the outer shell is hard and dry.
Can I eat gourds?
While some gourds are edible when young, most ornamental gourds are not suitable for consumption. They can contain bitter compounds called cucurbitacins, which can cause stomach upset or even be toxic. It’s best to stick to varieties specifically grown for eating, such as zucchini, squash, and pumpkins. If you’re unsure whether a gourd is edible, it’s best to err on the side of caution and avoid eating it.
How can I decorate my gourds?
Once your gourds are cured, the decorating possibilities are endless! You can paint them with acrylic paints, carve them with intricate designs, or embellish them with beads, shells, or other decorative elements. Use a sealant to protect your artwork and make it last longer. You can also use natural dyes to color your gourds, creating a beautiful and eco-friendly finish. Let your creativity flow and transform your homegrown gourds into unique works of art.
Where can I find gourd seeds?
Gourd seeds are widely available at garden centers, nurseries, and online retailers. Look for reputable seed suppliers that offer a wide variety of gourd types. You can also save seeds from your own gourds to plant the following year. Just be sure to select seeds from healthy, mature gourds and dry them thoroughly before storing them in a cool, dry place.
Leave a Comment